Page 1 of 2
Electrical Wiring Connectors
Posted: Tue Apr 21, 2020 8:01 am
Author: MikeP
With the help of Philippe I'm rewiring the Z1000ST as the main loom was butchered and then taped back together. It does work but many of the multipin connectors are brittle and broken. The question is, where can I get replacement multipin connectors? I normally use kojoycat, but they're in lockdown and not doing online sales, so does anyone else do the replica connectors?
I could use the standard 2.8mm multi pin connector, that are readily available with the security clip, but wanted to keep it original. Any suggestions?
Re: Electrical Wiring Connectors
Posted: Tue Apr 21, 2020 11:40 am
Author: z1bman
i use this company as they are only a couple of miles from me
https://www.ebay.co.uk/str/AutoStar-Sho ... 7675.l2563
Re: Electrical Wiring Connectors
Posted: Tue Apr 21, 2020 12:03 pm
Author: MikeP
Most have a clip to stop them coming detached but this is what I'm after:
Re: Electrical Wiring Connectors
Posted: Tue Apr 21, 2020 12:47 pm
Author: Kwackman
In USA, so postage will probably cost too much, but are these the ones?
http://www.vintageconnections.com/Products/Detail/67
Re: Electrical Wiring Connectors
Posted: Tue Apr 21, 2020 1:17 pm
Author: MikeP
Yep they're the ones. Surely someone has these in the UK?
Re: Electrical Wiring Connectors
Posted: Tue Apr 21, 2020 1:36 pm
Author: warren3200gt
Re: Electrical Wiring Connectors
Posted: Tue Apr 21, 2020 1:40 pm
Author: Pigford
Vehicle Wiring Products maybe?
Re: Electrical Wiring Connectors
Posted: Tue Apr 21, 2020 3:19 pm
Author: MikeP
Having reviewed what I'm after this site is good value, even taking postage into account, so thanks very much Kwackman for that steer

Re: Electrical Wiring Connectors
Posted: Tue Apr 21, 2020 3:21 pm
Author: Kwackman
Well, could I suggest that you buy some of their 2.8mm spades as spare, as the normal 2.8mm won't fit properly.
http://www.vintageconnections.com/Products/Detail/54
Re: Electrical Wiring Connectors
Posted: Tue Apr 21, 2020 3:28 pm
Author: MikeP
I'm hoping to replace the ABS housing only, as mine are cracked and the spades/blades are pulling out, but if need be (whilst I'm sat in the doorway of the garage in the sunshine) I'll replace the ends too if they're not a match.
Thanks for the heads-up.
Re: Electrical Wiring Connectors
Posted: Tue Apr 21, 2020 3:29 pm
Author: Kwackman
PM coming your way....
Re: Electrical Wiring Connectors
Posted: Tue Apr 21, 2020 3:33 pm
Author: Charlie
How many are you needing ?
Re: Electrical Wiring Connectors
Posted: Tue Apr 21, 2020 4:00 pm
Author: MikeP
Charlie wrote:How many are you needing ?
Thanks for the offer Charlie but I've placed an order on Vintage Connections.
Re: Electrical Wiring Connectors
Posted: Tue Apr 21, 2020 4:21 pm
Author: Philippe
Hi Mike
as promised some pictures of the routing of the ST loom. I put them here so the other guys can see them too and when answering with a personal message I can only attach one picture at the time...I'm not a computer wizzard after all.

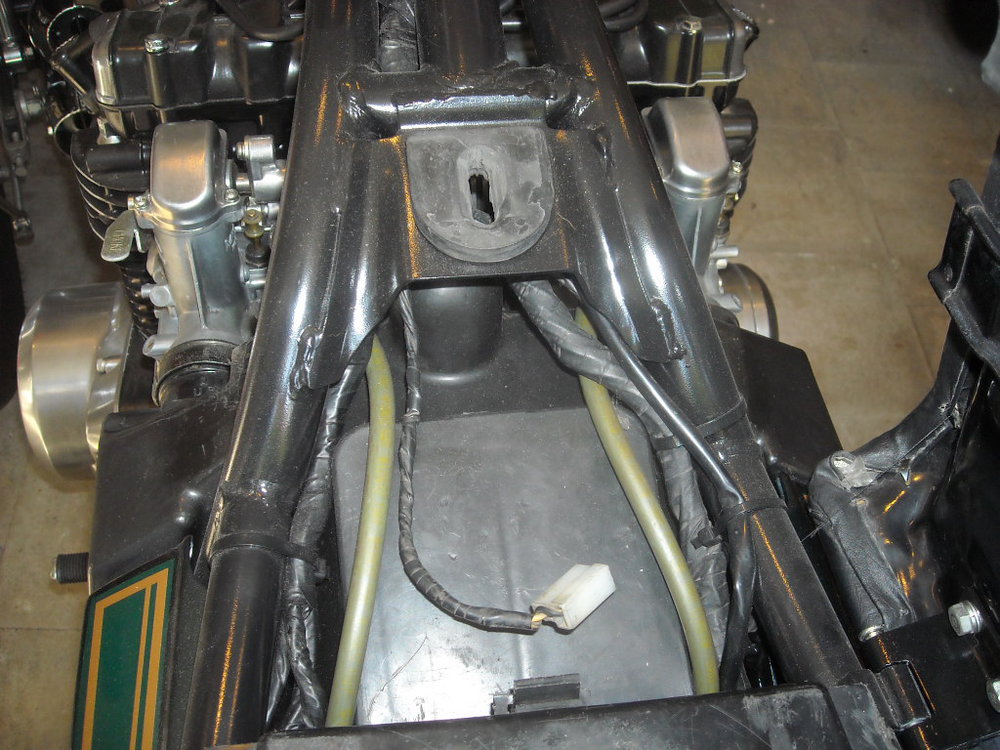
- The "start" of the main loom...
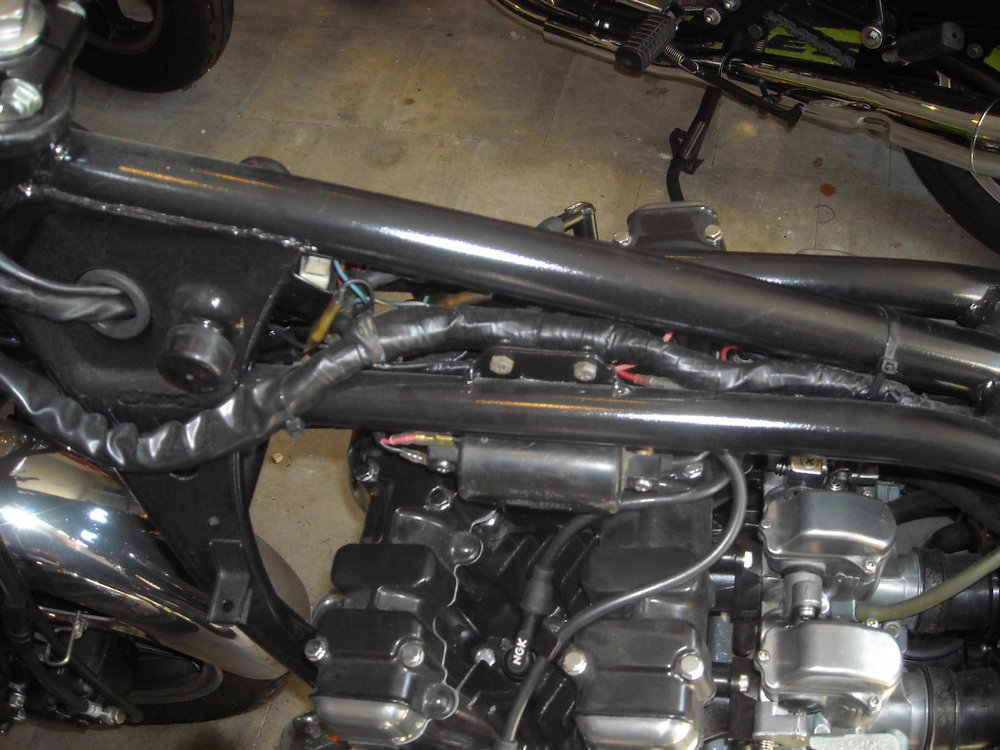
- and where it leaves the upper frametube
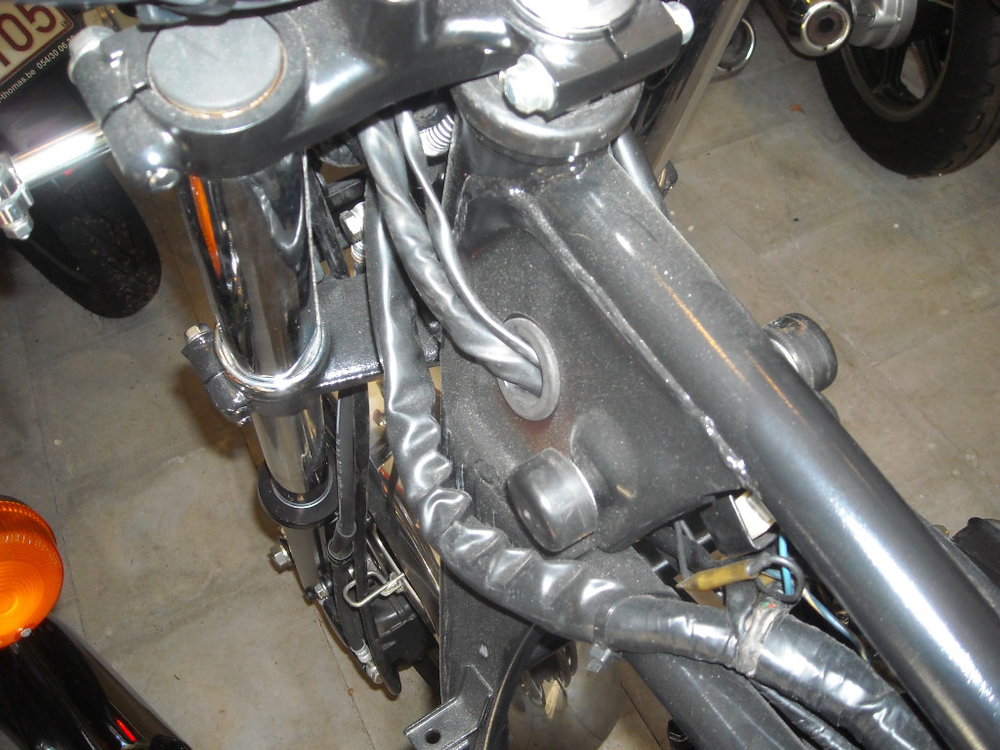
- the left hand side of the headstock
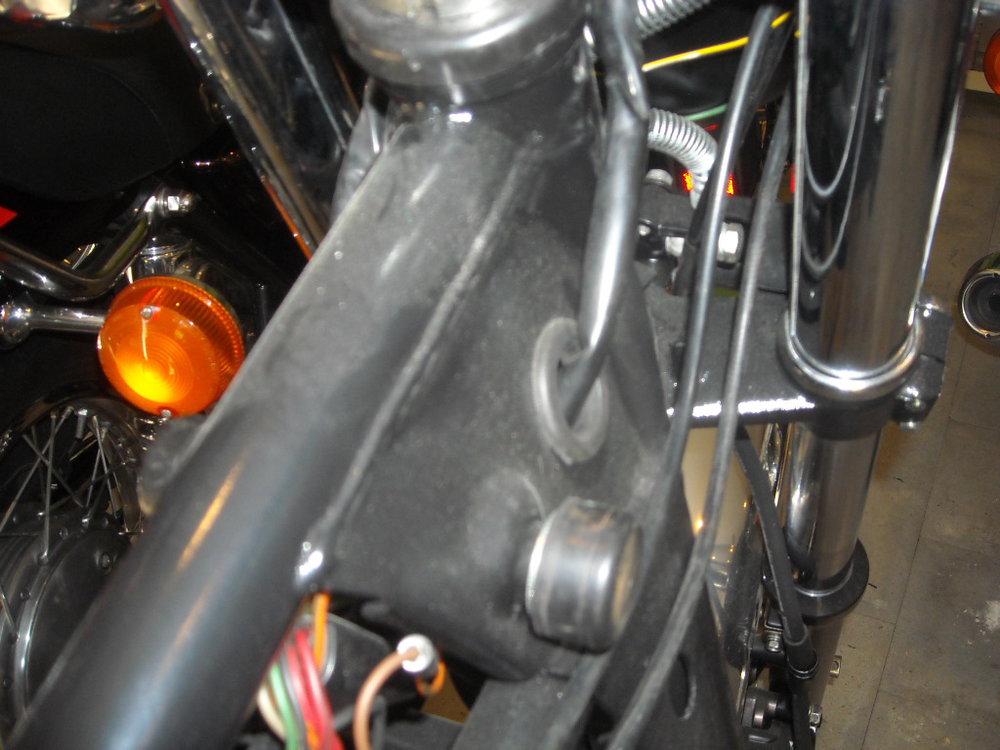
- and the right hand side
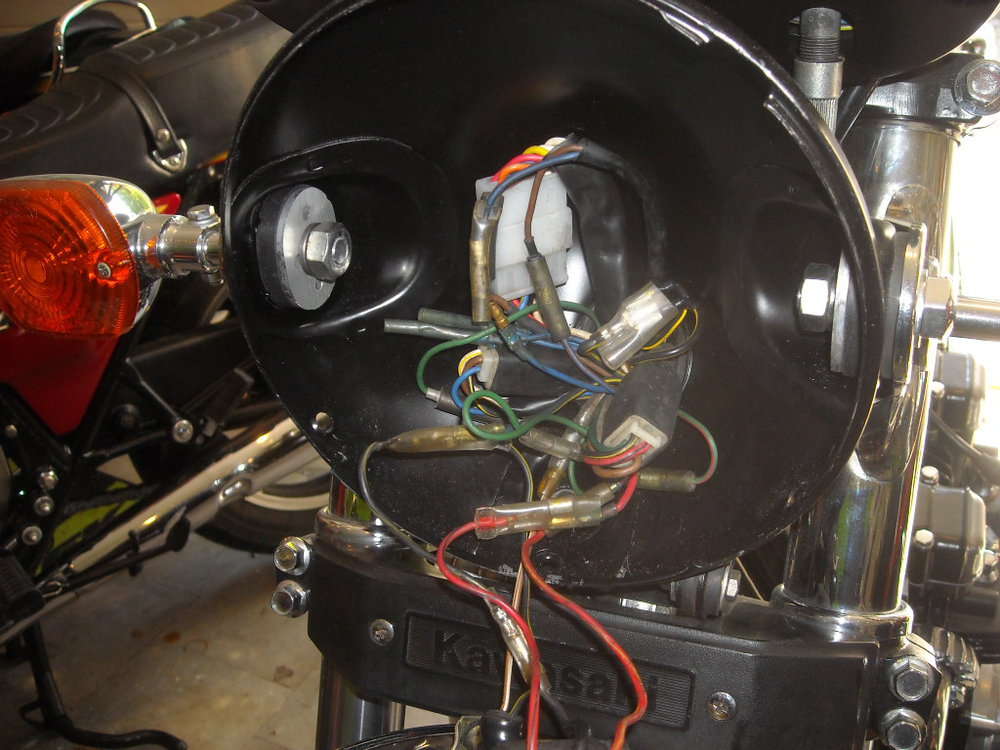
- the inside of the headlamp bowl
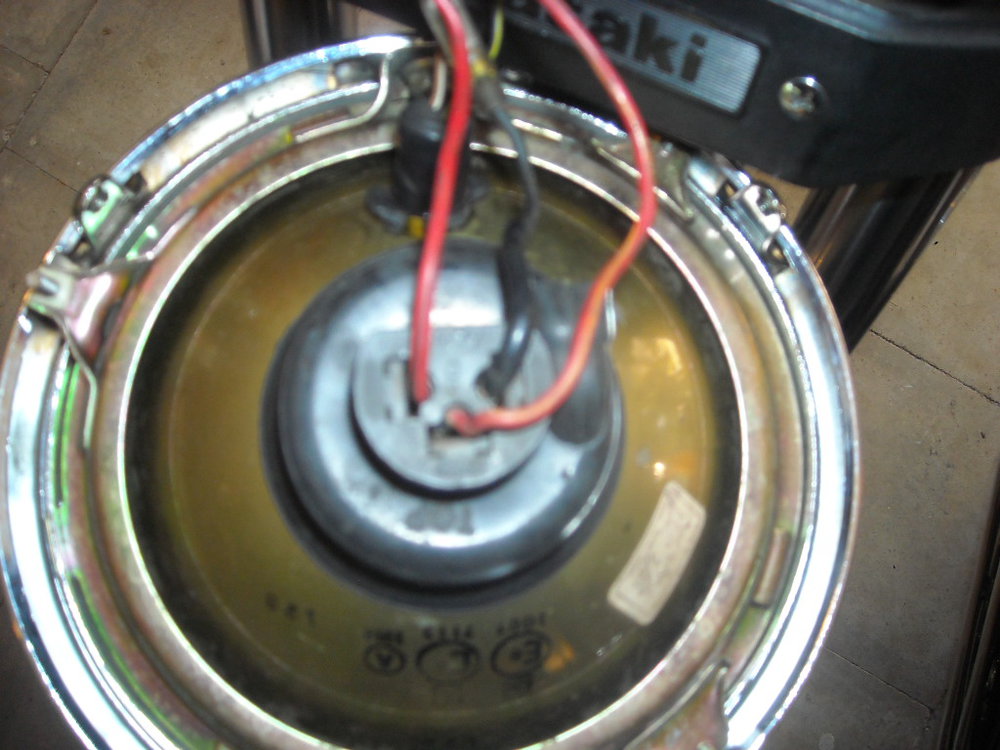
- the connector of the lightbulb
I hope the pictures and the little explanation under them is clear enough.
As you can see the left hand switch loom is routed on the left hand side of the headstock on this bike but it's long enough to go around the headstock and enter the frame from the right hand side, the choice is up to you.
Good luck!
GrtZ
Philippe
Re: Electrical Wiring Connectors
Posted: Sun Apr 26, 2020 3:04 pm
Author: MikeP
Philippe wrote:Hi Mike
as promised some pictures of the routing of the ST loom. I put them here so the other guys can see them too and when answering with a personal message I can only attach one picture at the time...I'm not a computer wizzard after all.

I hope the pictures and the little explanation under them is clear enough.
As you can see the left hand switch loom is routed on the left hand side of the headstock on this bike but it's long enough to go around the headstock and enter the frame from the right hand side, the choice is up to you.
Good luck!
GrtZ
Philippe
Thank you once again Philippe, for those great photos and the explanation too. The looms have been re-sleeved and now routed in readiness for the new original style multi pin blocks - slowly coming from the States.
I see you've also put on some rubber protector/hoops, for where the switchgear cabling goes through the frames holes in front of the tank mount rubbers, and I've adopted them too

. Hopefully reduce any fretting of the sheaving.