Hello Guest User,

Please feel free to have a look around the forum but be aware that as an unregistered guest you can't see all of it and you can't post.

To access these 'Registered Users Only' areas simply register and login.

Gee Pea Zed Unitrak

Work in Progress

Moderators: chrisu, paul doran, Taffus, KeithZ1R

Message
Author
User avatar
chrisNI
Site Admin
Posts: 3708
Joined: 22nd Dec 2001
Location: NI

#46 PostAuthor: chrisNI » Fri Nov 22, 2013 11:40 pm

vduk wrote:
Is tar is really that valuable? If it is, I'm gonna dig up my drive and weigh it in :shock: :lol:


It's worth 1/2d as stated above, so I'd leave it.... :shock:

User avatar
RALPHARAMA
Area Rep.
Area Rep.
Posts: 2752
Joined: 19th May 2007
Location: Pensford, Somerset
Contact:

#47 PostAuthor: RALPHARAMA » Sat Nov 23, 2013 9:59 am

I've started a new alternative to zinc plating - zinc/nickel alloy plating. This is supposed to have a far superior protective coating against corrosion.

I've made up a new 'soup' and this time I made some stainless hangers for the anodes to connect female Lucar spades to the power supply. Apparently with both nickel and zinc anodes in the electrolyte, you have to fetch them out pretty smartish as the zinc anodes get plated with nickel even without power and then are no good for plating.

As everything seems to be black on the GPZ I have invested in some black passivate. The first attempt didn't get a very good or dense black so I called the ever helpful Dan at Gateros plating supplies, and he told me how to strip off the first attempt with pickle and then suggested that I give the freshly plated pieces a quick 4 second swim in the pickle before the passivate tank, obvious with a water wash in between all tanks. This worked very well and I am very pleased with all the results so far.

Image

I'll be doing more plating today so I'll post more pix
Ralph Ferrand
Z1000A1 (1977), Godier Genoud Z1300A5 (1983), Z900A4 Stock (1976), Z900A4 Special (project), GPZ1100 Unitrak (1983), ZRX1200R (2004) DT175MX (1981).

http://www.bikerstoolbox.co.uk

Don't be caught out http://www.dhlparcels.info/

User avatar
RALPHARAMA
Area Rep.
Area Rep.
Posts: 2752
Joined: 19th May 2007
Location: Pensford, Somerset
Contact:

#48 PostAuthor: RALPHARAMA » Sat Nov 23, 2013 6:43 pm

Spent a good few hours today with the nasty poisons in plastic tubs :lol:

I had intended to take pix of the job as I went, but didn't remember 'till I'd finished and packed it all away. :oops:

Here's a few pix of the results - here's the clutch cable adjuster

Image

Here's the tub of yesterday's efforts

Image

Here's today's plating hanging up to dry and allow the passivate to cure.

Image

Had another head delivered by his gingerness (thanks Steve). Sadly this one has a broken cam bearing cap. Rather than give up, given the effort to get it to me, I thought I would have a crack at repairing it. In the past someone has drilled it and hammered in some roll pins :shock: Given their failure to make a serious repair, I have extricated them.

Image

Ground off the edges and bolted and clamped the cap in place on the head.

Image

Before doing this I put said part into the ultrasonic cleaner and then swilled it in acetone (brake cleaner) and blew it clean with the air line. The biggest problem with welding aluminium alloy, in my experience, is contamination and given the fact that this part has been inside a running engine since it's break, it seems unlikely that I would be able to get it really clean, but I gave it my best shot. In case anyone isn't aware, these are line bored in the head and so are matched to the head - you can't just buy another one, which is why it amazes me when people buy heads on e-bay with no cam caps :shock: This cap wasn't sitting straight as can be seen by the marking on the bearing shell, so if I can't weld it then it's a scrapper, so it's well worth a punt.

To help the welding process with aluminium it helps to preheat the part -

Image

I blew some sparks at it with the TIG in AC mode using pure argon gas and had some moderate success. There was some serious shit in the middle section, but I managed to get some reasonable welds either side so hopefully it will be OK

Image

I'll properly strip the head tomorrow and see how we're looking, but unless I could get a reasonable repair on the cam cap it was pointless.
Ralph Ferrand
Z1000A1 (1977), Godier Genoud Z1300A5 (1983), Z900A4 Stock (1976), Z900A4 Special (project), GPZ1100 Unitrak (1983), ZRX1200R (2004) DT175MX (1981).

http://www.bikerstoolbox.co.uk

Don't be caught out http://www.dhlparcels.info/

User avatar
Z1parR
Hardcore
Hardcore
Posts: 3114
Joined: 11th Oct 2009
Location: Chorley Lancs

#49 PostAuthor: Z1parR » Sat Nov 23, 2013 7:00 pm

Ralph you're a feckin mad scientist .
And an absolute pleasure to watch when you're in tenacious project mode :bow
0172 . Geoff Parr

User avatar
Ginger Bear
Hardcore
Hardcore
Posts: 5512
Joined: 16th Dec 2008
Location: In the Dark.
Contact:

#50 PostAuthor: Ginger Bear » Sat Nov 23, 2013 7:55 pm

Ralph,

As far as I'm aware it wouldn't be a problem to cut the joining web out completely & use the cap as two separate parts..........

.......... maybe that could be plan 'B' :fou
Image

# 104

Phil Churchett Award Winner 2011 & 2016 :D
Buzzworkz Best Modified Zed 2016

User avatar
Big Fluff
Hardcore
Hardcore
Posts: 2543
Joined: 1st Mar 2007
Location: Marbury, Shropshire

#51 PostAuthor: Big Fluff » Sun Nov 24, 2013 5:44 pm

Ginger Bear wrote:Ralph,

As far as I'm aware it wouldn't be a problem to cut the joining web out completely & use the cap as two separate parts..........

.......... maybe that could be plan 'B' :fou

+1 - Seen that done before with good results Steve.
Kawasaki GPz750T, Kawasaki ZRX1100R, Kawasaki GPZ1000RX, H**** VF1000RG Rothmans, H**** VF500F2F, H**** CB1100RD, Suzuki GSX1100EFE, H**** XL125K2

oldtimer
100Club
100Club
Posts: 217
Joined: 2nd Mar 2013
Location: stoke on trent

#52 PostAuthor: oldtimer » Sun Nov 24, 2013 8:37 pm

Ralph, do you still need a GPZ pulse cover emblem, one here on e bay if it will fit:

http://www.ebay.co.uk/itm/KAWASAKI-5601 ... 1e82b6a27f

User avatar
RALPHARAMA
Area Rep.
Area Rep.
Posts: 2752
Joined: 19th May 2007
Location: Pensford, Somerset
Contact:

#53 PostAuthor: RALPHARAMA » Tue Dec 03, 2013 8:46 pm

I have finally finished the engine stand.

The biggest issue was that the lock system didn't lock the rotation when the heavy engine was at different angles. I decided to make a positive lock with a pin.

Image

My mate gave me a rusty slice of four inch round bar, which I machined up in the lathe. I then clocked it in on a four jaw chuck on my home brewed rotary table on my cheap Chinese crappy milling machine. I had previously made a pin locking system which I Tigged on the top of the bearing bit. I blued up the round bit with marking blue and loosely fitted it to the engine mounting arm bit and used the pin to scratch it's position to give me a PCD for the holes. I then drilled the holes on the marked PCD at 22.5 degree angles ie 1/8 turn.

Image

Once I'd finished that I needed to glue it to the shaft of the engine mounting arm with some TIG sparks. It gave me the opportunity to use my new engineers level :D

Image

I have very badly brushed on some red hammerite which has improved the look. I have also put in some plastic end caps in the open ends of the box section and fitted some thumb screws. I have even fixed on some rubber feet.

Image

Image

Image

Image
Ralph Ferrand
Z1000A1 (1977), Godier Genoud Z1300A5 (1983), Z900A4 Stock (1976), Z900A4 Special (project), GPZ1100 Unitrak (1983), ZRX1200R (2004) DT175MX (1981).

http://www.bikerstoolbox.co.uk

Don't be caught out http://www.dhlparcels.info/

User avatar
zpower
100Club
100Club
Posts: 325
Joined: 21st Feb 2013
Location: Staffordshire
Contact:

#54 PostAuthor: zpower » Tue Dec 03, 2013 9:10 pm

I'm impressed!!!

I really like that.
** Special rates for the Z1OC forum members **
Website design, hosting / domain names.
Computer and Laptop repairs.

Is Vic There
Hardcore
Hardcore
Posts: 1285
Joined: 8th Nov 2011
Location: Brisbane, Australia.

#55 PostAuthor: Is Vic There » Wed Dec 04, 2013 1:03 am

Your ace :lol:
Norton 850 Command, Harris Mag 2, Harris Mag 5, Triumph Steve McQueen, Suzuki RGV250 Barry Sheene, RG250 Walter Wolf, RD125LC, Lambretta Li150, Vespa 50N.

garyd
Hardcore
Hardcore
Posts: 2267
Joined: 11th Jun 2011
Location: West of London

#56 PostAuthor: garyd » Sun Dec 29, 2013 2:22 pm

Any progress?

User avatar
RALPHARAMA
Area Rep.
Area Rep.
Posts: 2752
Joined: 19th May 2007
Location: Pensford, Somerset
Contact:

#57 PostAuthor: RALPHARAMA » Sun Dec 29, 2013 5:01 pm

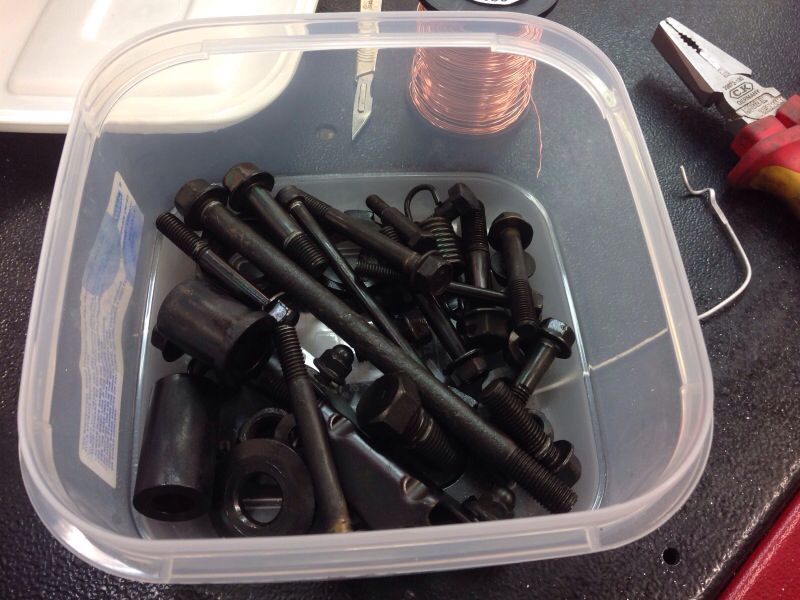
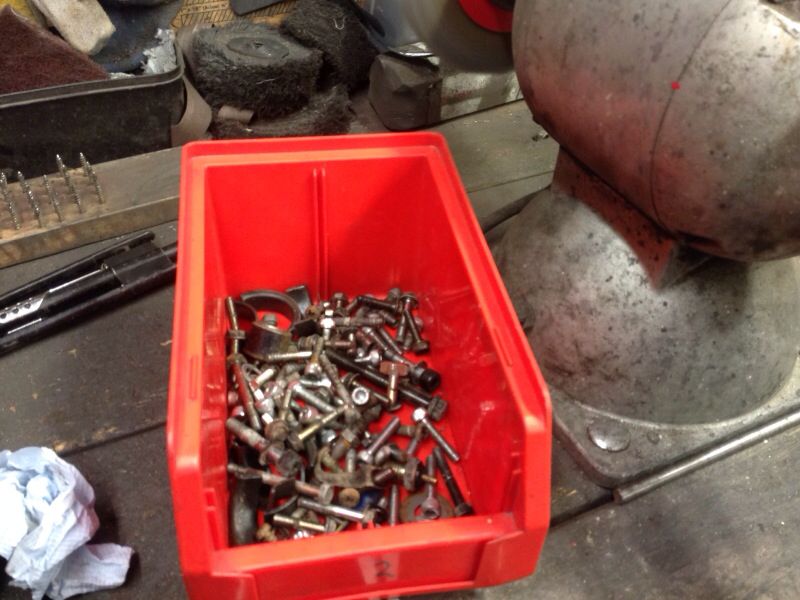
Progress has been slower than I would have liked. There has been a huge amount of time taken wire wheeling and bead blasting.nine parts of the fasteners on this bike are black. Normally I replace a whole heap of fasteners with stainless with I tend to machine and polish, but SS has been kept to a minimum on this bike as there's no straight forward way to make it black.

Image

Image

Image

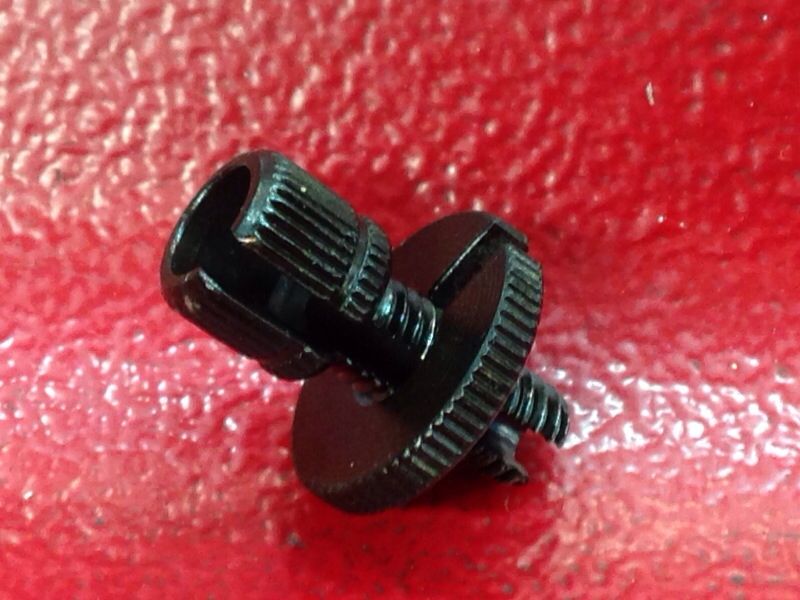
Some may argue that plating the studs isn't necessary, and in truth it's probably a bit OTT, but they were plated originally, though I don't think mr Kawasaki passivated them black :D

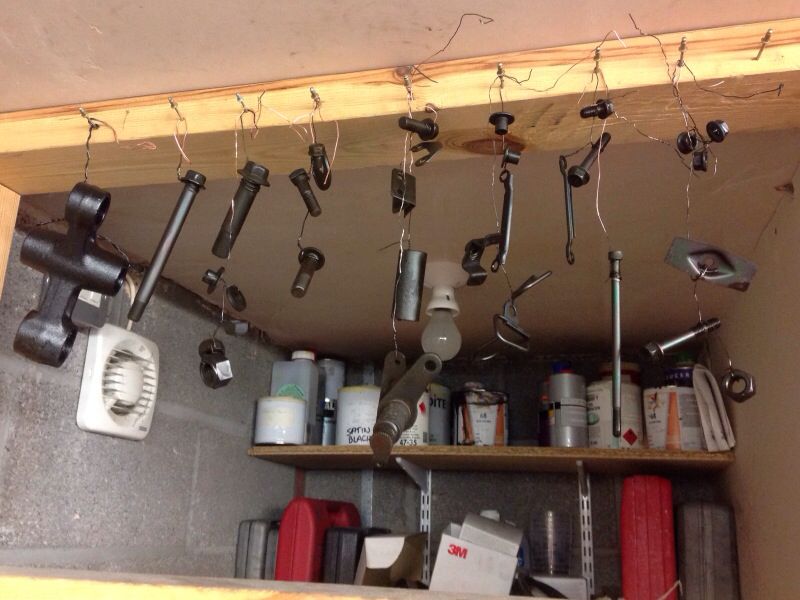
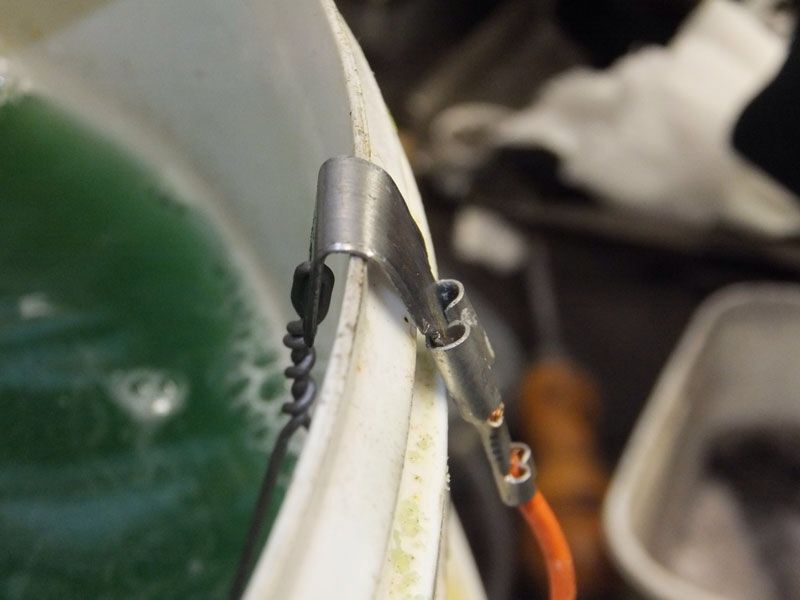
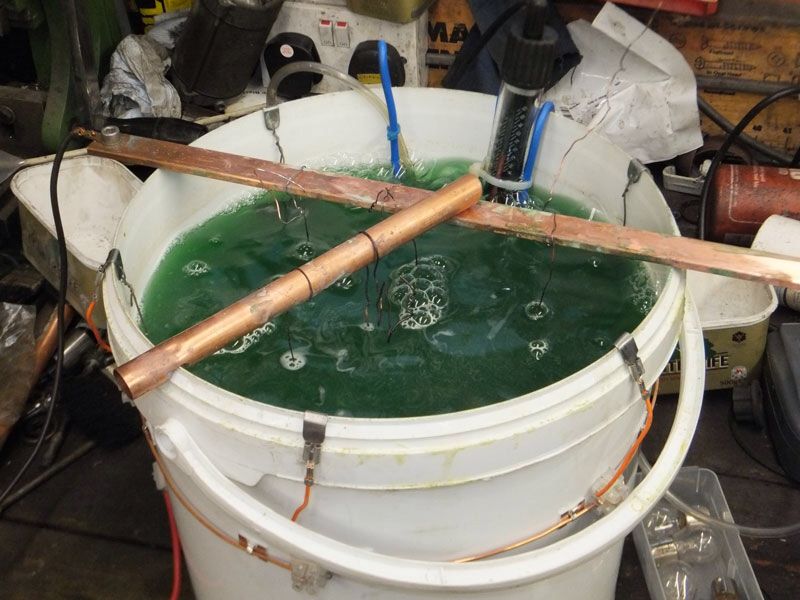
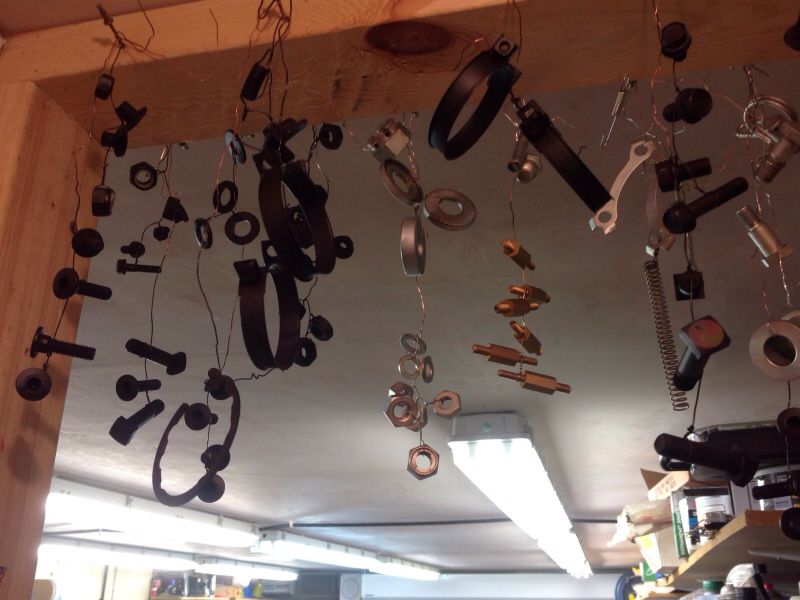
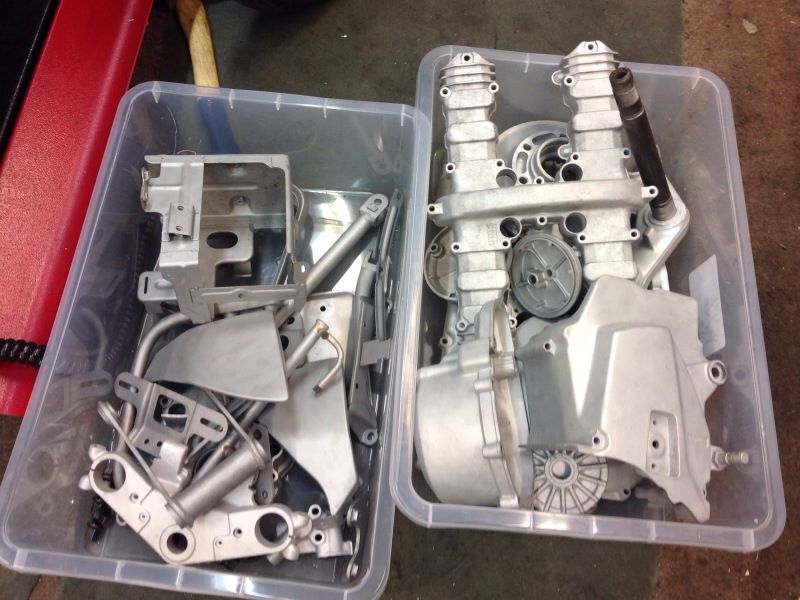
Lots of time spent 'wiring up' parts

Image

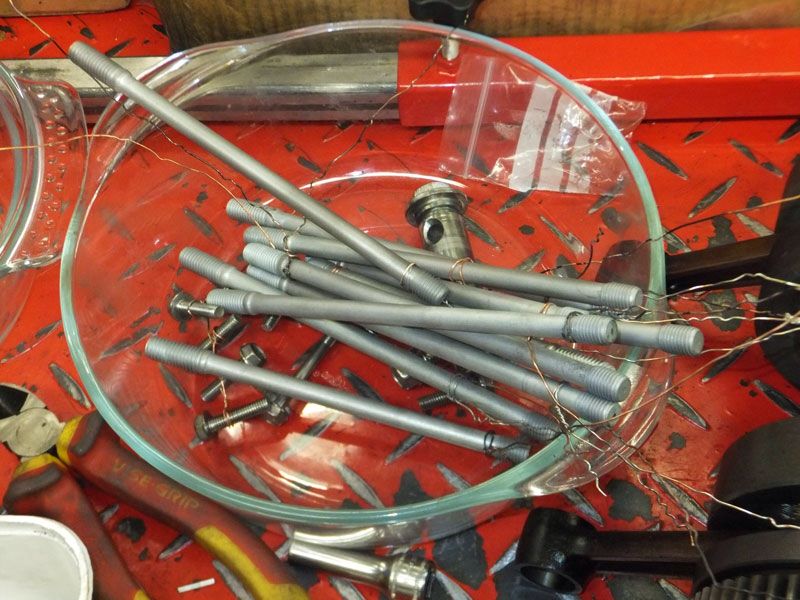
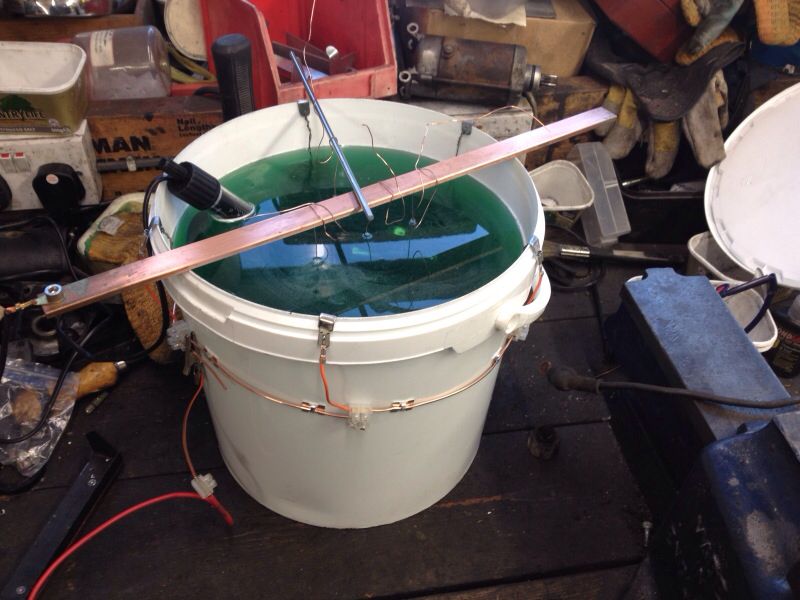
With the new nickel/zinc system I made up stainless hangers for the anodes so they can be easily removed and 'unplugged'. Because of the nature of the soup you have to remove the anodes as soon as the cooking is completed or the nickel anode plates the zincs and then they're no good.

Image

Image

Once passivated, the items have to be hung, like pheasants, to cure for at least 24 hours.

Image

Image

There have been many hours spent blasting in the bead blast cabinet

Image

Image

I've blasted all the casings apart from the head as that is a right royal pain in the the Gary Glitter to safely mask up due to the blind oil ways.

Image

I had a paint session in the back garden where I did much of the mild steel parts that are in gloss black. I only used standard two pack etch, as none will be coming into contact with petrol or heat and it needed using up. I can't find the camera, so I'm not sure if I took any pix of that or not. :??

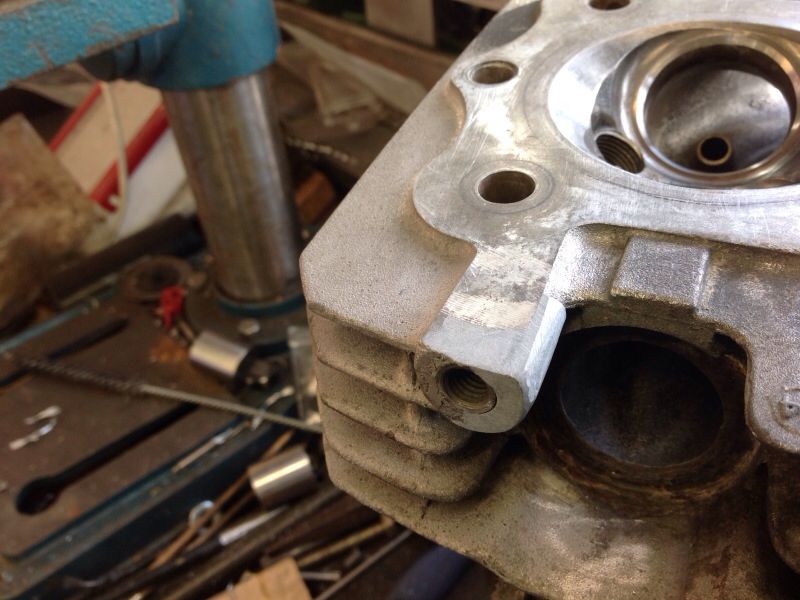
I did a bit more work on the head today ... More hours with the wire wheel on the Dremmel :| 
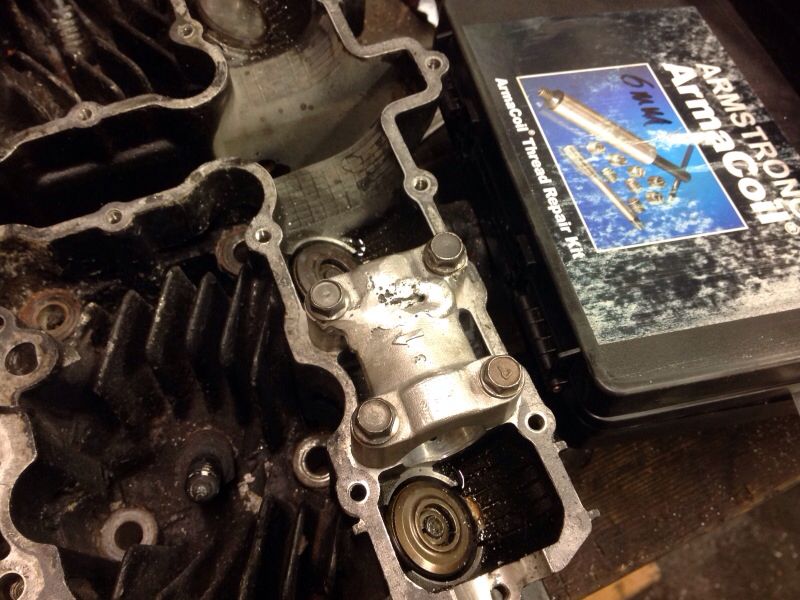
one of the exhaust studs had been bodged with a bit of studding, so I hacked out what was there and fitted a very long timesert, which I bedded in with BondLok epoxy aluminium putty stuff. It's not quite straight, but it's better that it was.

Image

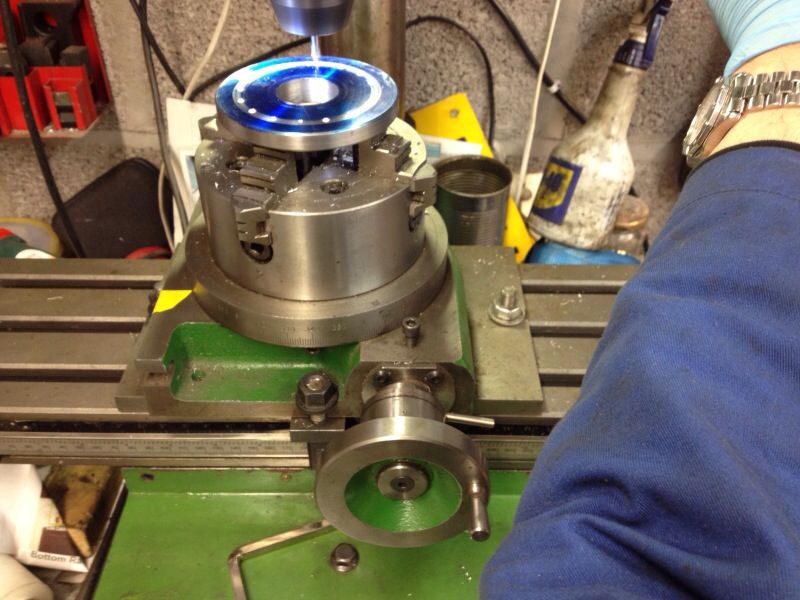
The head will have to be skimmed in the new year. I was going to get the engineers to recut the valve seats, but I managed to borrow a seat cutting kit from a friend to do an XS650 engine I'm working on, and decided to cut the seats on the GPZ motor while I was at it.

Image

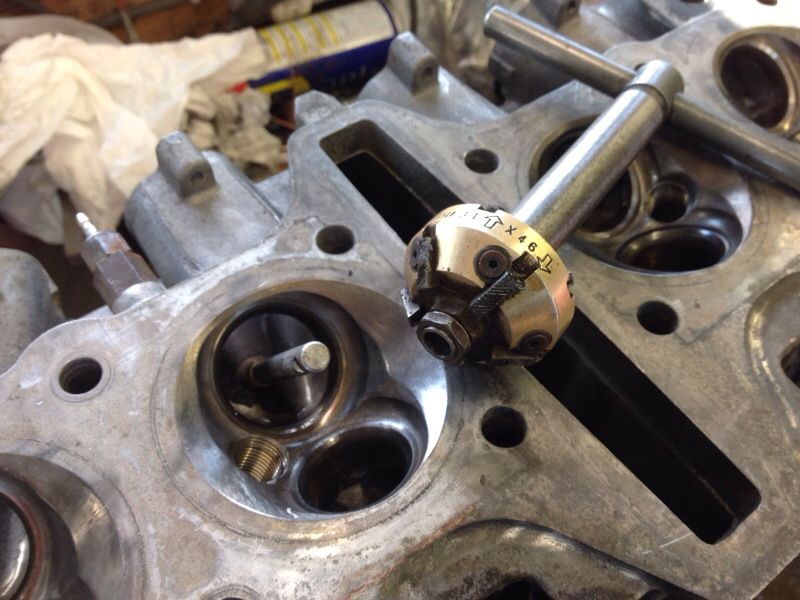
It's not so hard really, you tighten the mandrel in the guide, slide the cutter down the mandrel and basically turn it to cut until it's clean again. The hardest part was machining a precise sleeve as the mandrel small enough for the guide was too small for the cutter head.

Image

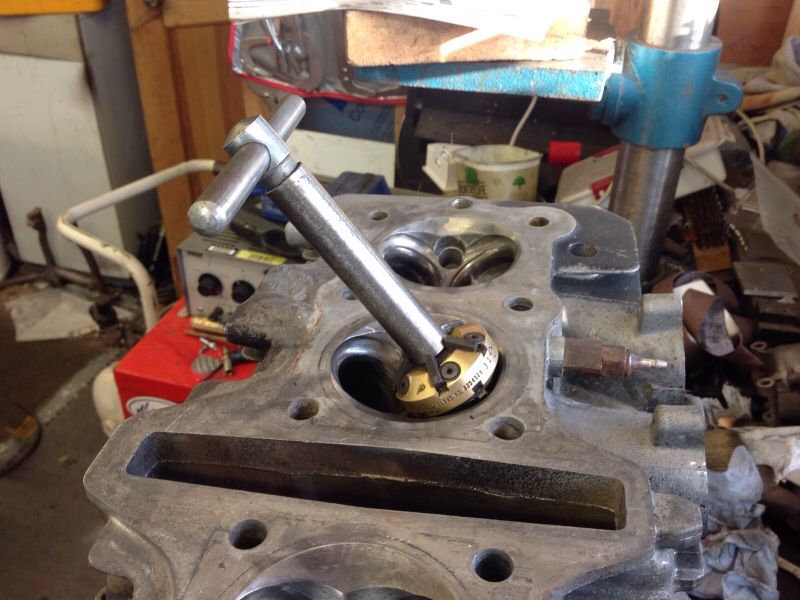
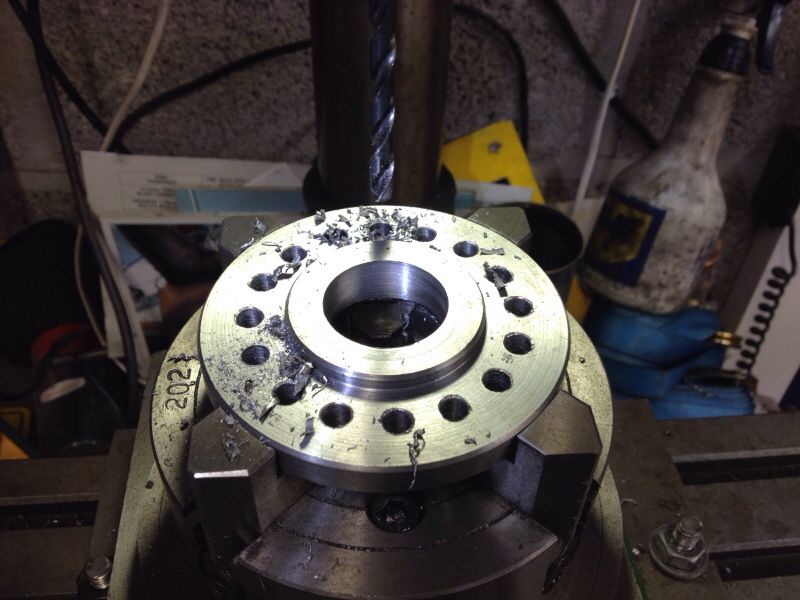
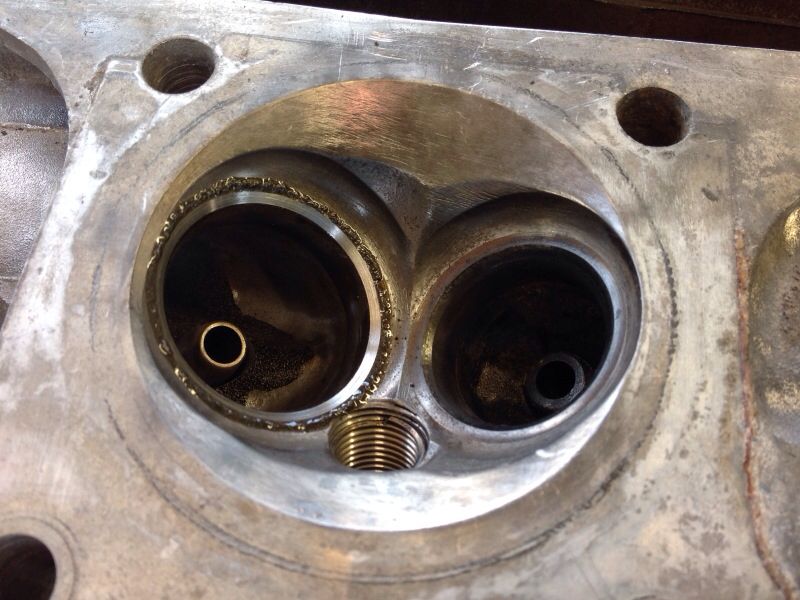
And here's the freshly cut inlet seat

Image

I intend to contact the makers of the valve face cutting tools, with a view to adding them to the list of wonderful shiny things available from Biker's Toolbox :D

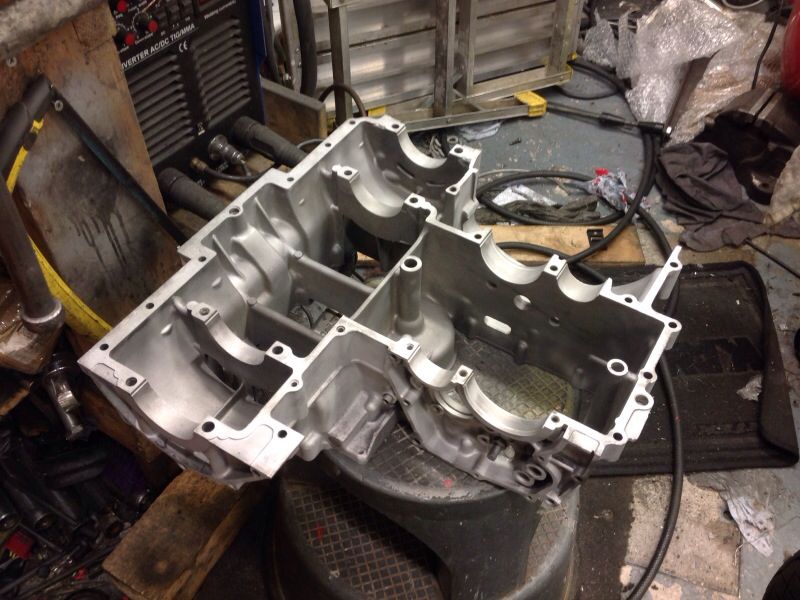
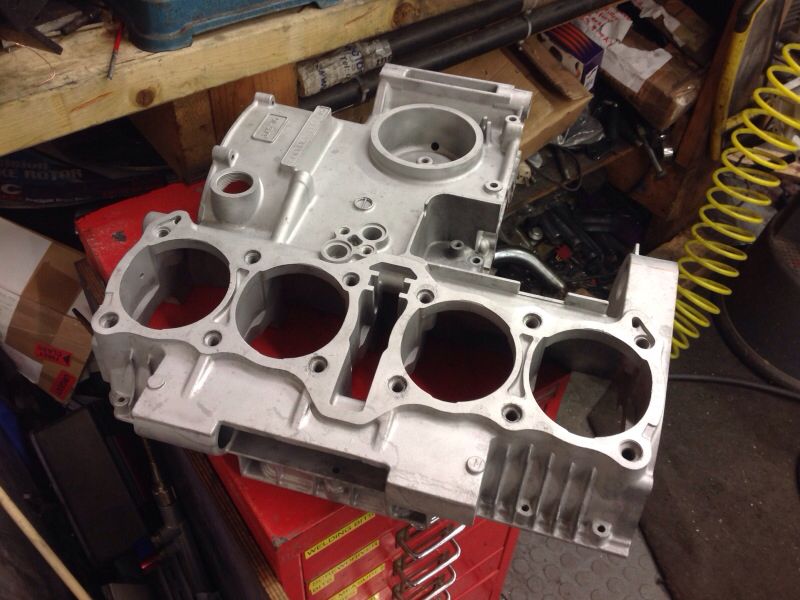
In the not too dim and distant I will be painting the engine bits. I'm pretty sure that the outer cases eg alternator, clutch cover etc are all gloss black. Does anyone know whether the crank cases, barrels, and head are also gloss or are they satin?
Ralph Ferrand
Z1000A1 (1977), Godier Genoud Z1300A5 (1983), Z900A4 Stock (1976), Z900A4 Special (project), GPZ1100 Unitrak (1983), ZRX1200R (2004) DT175MX (1981).

http://www.bikerstoolbox.co.uk

Don't be caught out http://www.dhlparcels.info/

User avatar
big green bus
Custard Cream
Custard Cream
Posts: 794
Joined: 2nd Apr 2006
Location: durham

#58 PostAuthor: big green bus » Sun Dec 29, 2013 6:00 pm

I notice the cutters are 31 & 46 I thought the angles were 30 45 60 could anybody tell me different and would the 1 degree make and difference anyway.

pluto
100Club
100Club
Posts: 204
Joined: 12th Mar 2012
Location: Bath

#59 PostAuthor: pluto » Mon Dec 30, 2013 11:13 am

The barrels head and cases are satin black. Pj1 satin is available again. Fowlers have it in stock. I think they have changed the recipe so not sure if it is still as good. Went on ok though. The covers are gloss but almost a powder coat or a very thick paint.
Dave

User avatar
zed1015
Hardcore
Hardcore
Posts: 3813
Joined: 2nd Nov 2005
Location: Somewhere between Scunny and Goole.

#60 PostAuthor: zed1015 » Mon Dec 30, 2013 11:45 am

vduk wrote:I intend to contact the makers of the valve face cutting tools, with a view to adding them to the list of wonderful shiny things available from Biker's Toolbox :D


I've been getting my Neway cutters and spares from Beam equipment in the US.
Even with postage and customs etc they have been half the price of sourcing them in the uk.
He does have an ebay shop but doesn't list the Neway cutters.
Here's the link for the US site.
http://www.beamequipment.com/Valve_Seat ... oling.html
To cut both seats with the correct 3 angles, 4 Neway cutter heads are required along with the appropriate mandrel and T handle.


Return to “Projects”

Who is online

Users browsing this forum: No registered users and 84 guests