Hello Guest User,

Please feel free to have a look around the forum but be aware that as an unregistered guest you can't see all of it and you can't post.

To access these 'Registered Users Only' areas simply register and login.

Gee Pea Zed Unitrak

Work in Progress

Moderators: chrisu, paul doran, Taffus, KeithZ1R

Message
Author
User avatar
zed1015
Hardcore
Hardcore
Posts: 3810
Joined: 2nd Nov 2005
Location: Somewhere between Scunny and Goole.

#61 PostAuthor: zed1015 » Mon Dec 30, 2013 12:02 pm

big green bus wrote:I notice the cutters are 31 & 46 I thought the angles were 30 45 60 could anybody tell me different and would the 1 degree make and difference anyway.


It's called an interference or race cut.
The 1/2 degree difference on the mating surfaces create a wedge effect for a better seal.

User avatar
RALPHARAMA
Area Rep.
Area Rep.
Posts: 2752
Joined: 19th May 2007
Location: Pensford, Somerset
Contact:

#62 PostAuthor: RALPHARAMA » Sat Feb 08, 2014 4:19 pm

Haven't had much free time to play with the GPZ recently. I did however get down to some rubbing down of the plastics today

Image

It dull and tedious work, but has to be done. The inside of the fairing seems to be coloured with overspray from the various colours the bike has been. I'm guessing it should be satin black?
Ralph Ferrand
Z1000A1 (1977), Godier Genoud Z1300A5 (1983), Z900A4 Stock (1976), Z900A4 Special (project), GPZ1100 Unitrak (1983), ZRX1200R (2004) DT175MX (1981).

http://www.bikerstoolbox.co.uk

Don't be caught out http://www.dhlparcels.info/

User avatar
nick pearce
100Club
100Club
Posts: 271
Joined: 28th Feb 2009
Location: Gloucester

GPZ 1100 A1.

#63 PostAuthor: nick pearce » Sun Feb 16, 2014 5:34 pm

Fair play to you Mate. Loads of work there. Thought I had a lot on when I did my one . This is epic compared to mine.
N Pearce

User avatar
RALPHARAMA
Area Rep.
Area Rep.
Posts: 2752
Joined: 19th May 2007
Location: Pensford, Somerset
Contact:

#64 PostAuthor: RALPHARAMA » Mon Feb 17, 2014 7:11 pm

The shite weather has stopped me doing much. I really need to get on with some painting, but until the weather improves markedly I'm more than somewhat snookered.

I did some more filling and rubbing back on the tank today. It's not even nearly easy :shock: Because the tank has been pretty badly dented in the past and because I have already epoxied the inside I can't dress the high points with a hammer, so I'm having to build up the areas around the high points with filler. I'm sure a professional could sort it fairly quickly, but I'm finding it very challenging. Probably have another crack at it tomorrow :( it's taking shape slowly.

Image

Thanks to a tip on this forum I have now got a brand spanking new petrol cap. I fitted the old lock barrel into it as it didn't come with a lock barrel. I'm astounded at how complicated these caps are :shock:

Image

I drilled the rivets out that secure the fork brace in the mudguard. It was pretty scuzzy, so I stripped the old paint back and bead blasted it. I also filled the dings and flatted back the muddy itself.

Image

I really want to build the motor, but until We get some decent weather to etch prime and two pack the cases I'm screwed :evil:
Ralph Ferrand
Z1000A1 (1977), Godier Genoud Z1300A5 (1983), Z900A4 Stock (1976), Z900A4 Special (project), GPZ1100 Unitrak (1983), ZRX1200R (2004) DT175MX (1981).

http://www.bikerstoolbox.co.uk

Don't be caught out http://www.dhlparcels.info/

garyd
Hardcore
Hardcore
Posts: 2267
Joined: 11th Jun 2011
Location: West of London

#65 PostAuthor: garyd » Mon Feb 17, 2014 10:48 pm

There can't be a single component on that bike that you havn't dissected, inspected and made good!

User avatar
RALPHARAMA
Area Rep.
Area Rep.
Posts: 2752
Joined: 19th May 2007
Location: Pensford, Somerset
Contact:

#66 PostAuthor: RALPHARAMA » Sun Apr 06, 2014 5:07 pm

I've been building a chop for a paying punter, so the GeePeaZed has taken a bit of a back seat recently. A few weeks ago I did get in the spray booth with a mate, as he was getting on my case about painting some bits on his H1E, which he's desperate to get back on the road.

As usual I started with Bradite zinc chromate primer, which pisses off the tree hungers a treat, but gives a great base for the two pack polyurethane to stick to. It doesn't have any builder or filler in it, so there aren't the problems inherent with petrol getting sucked in and pushing the top coats off.

As always I used my shitty Chinese gun for the etch primer, as it doesn't do the gun any good.

Here's some pix of the weekend's efforts, taken on my phone by by semi-able assistant (he's been by ill :( )

Image

Image

Image

Image

Image

Image
Ralph Ferrand
Z1000A1 (1977), Godier Genoud Z1300A5 (1983), Z900A4 Stock (1976), Z900A4 Special (project), GPZ1100 Unitrak (1983), ZRX1200R (2004) DT175MX (1981).

http://www.bikerstoolbox.co.uk

Don't be caught out http://www.dhlparcels.info/

User avatar
RALPHARAMA
Area Rep.
Area Rep.
Posts: 2752
Joined: 19th May 2007
Location: Pensford, Somerset
Contact:

#67 PostAuthor: RALPHARAMA » Wed Jul 08, 2015 5:35 pm

The project has been on again, though I am having to slip it in between paying punter's bikes :(

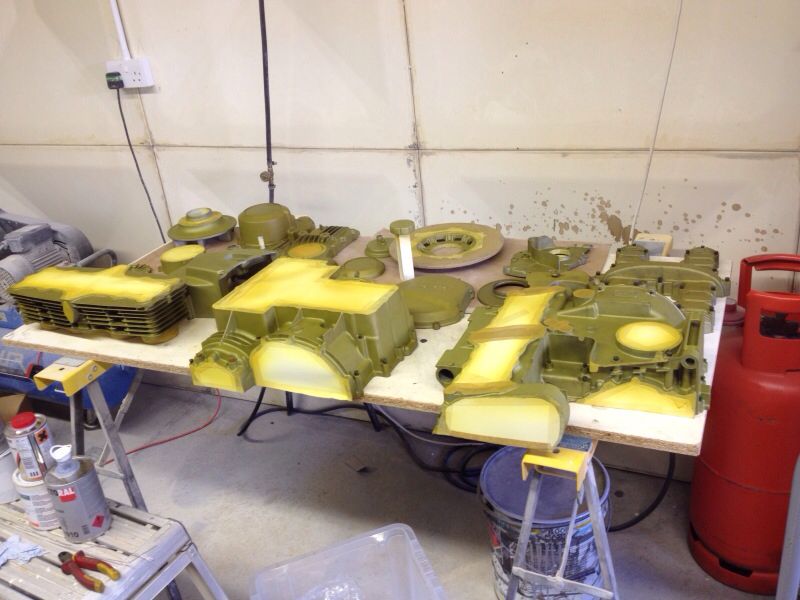
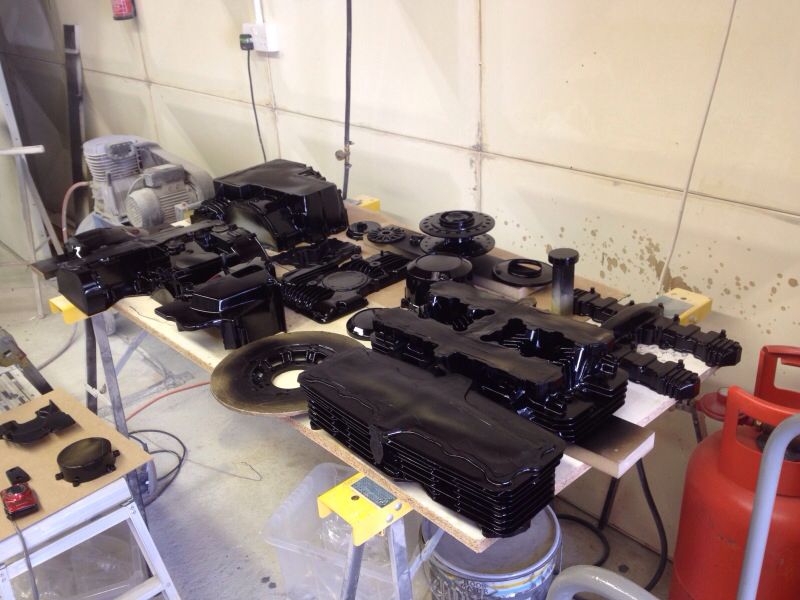
I re-started by building up the motor which was all painted up.

Image

Image

Image

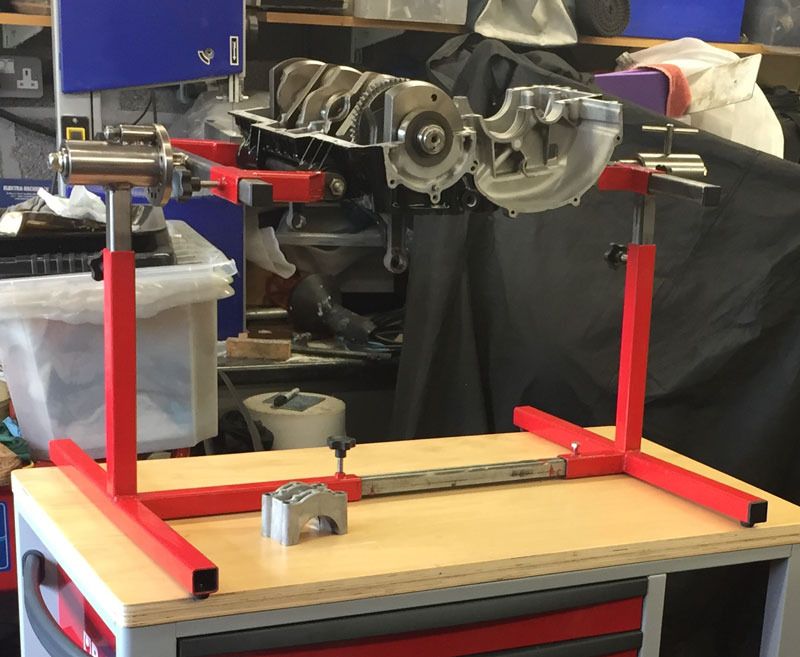
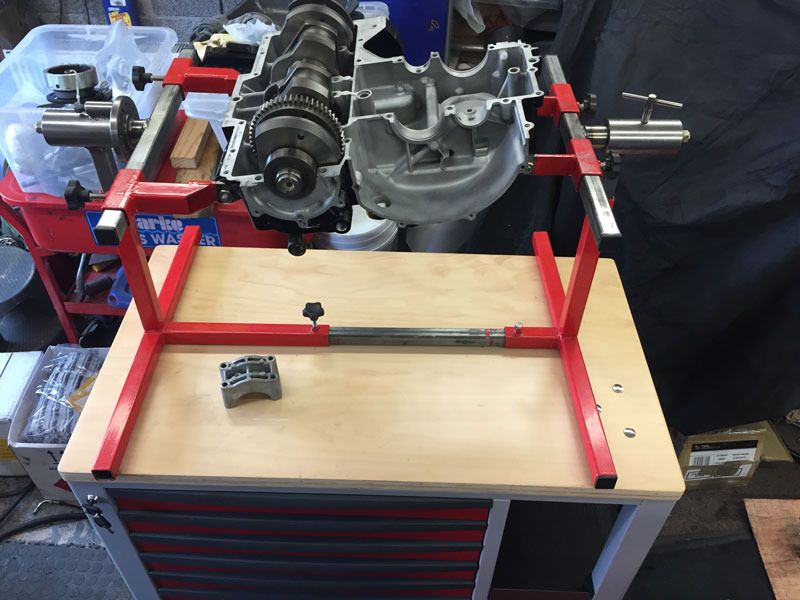
I only got this far as I had lost the pistons :evil: I could find the brand new genuine Kawasaki piston rings!

After a good few months of searching the house, workshop, office, loft etc I gave up and bought an 1170 wiseco kit off a club member.

Obviously after taking the barrels up to the engineers the originals turned up!

Image

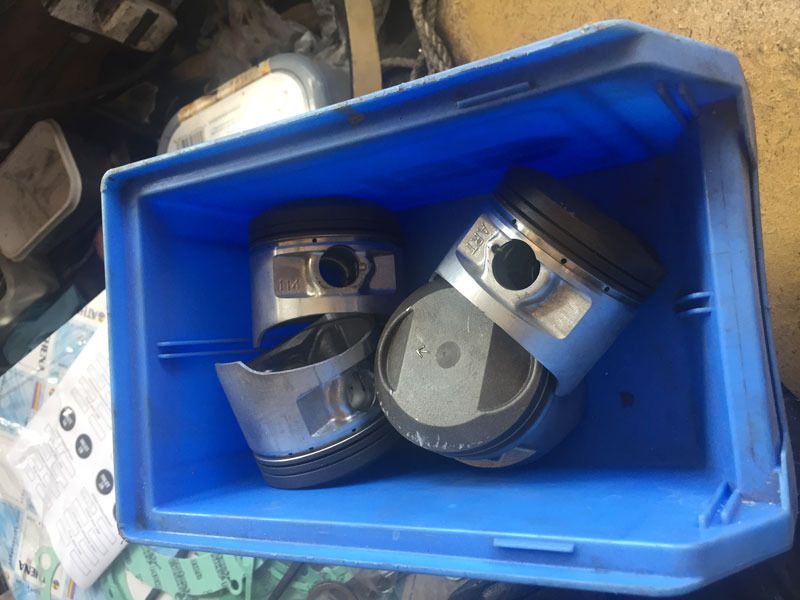
... at least I assume that's what these pistons are!

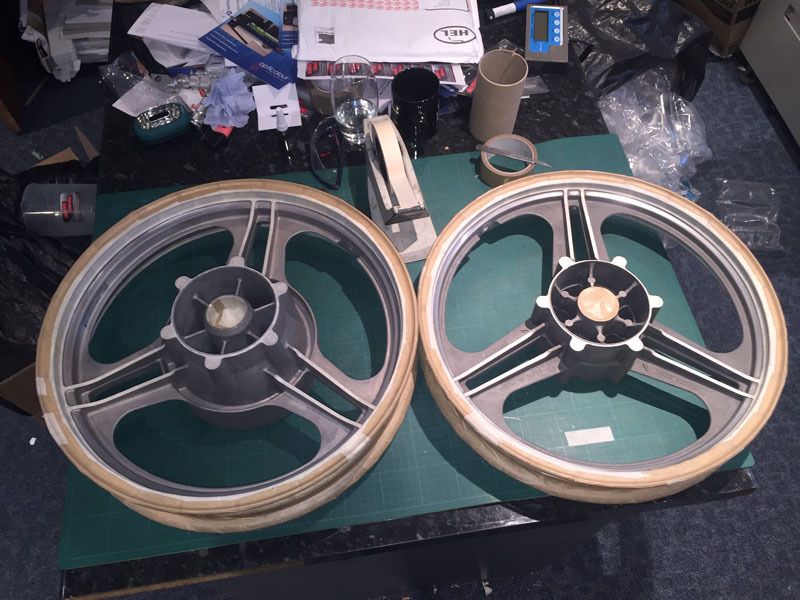
Next job was to mask up the wheels ...

Image

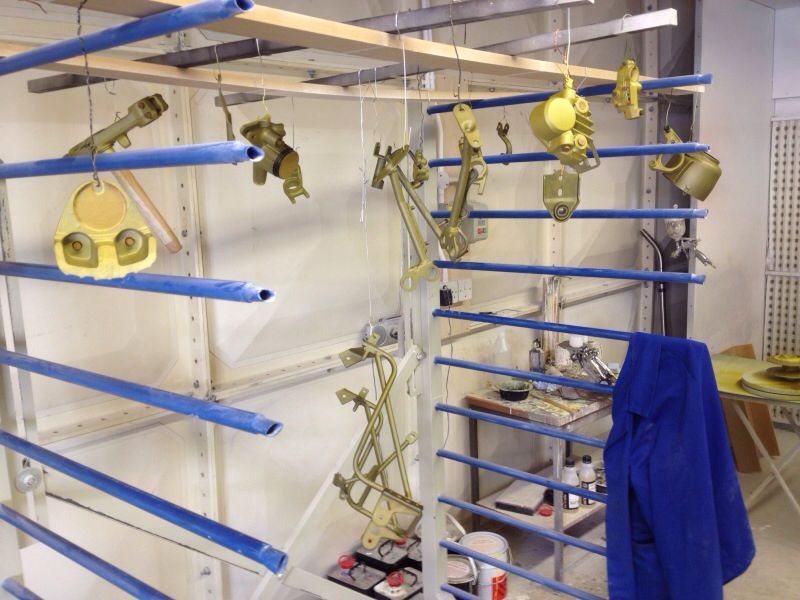
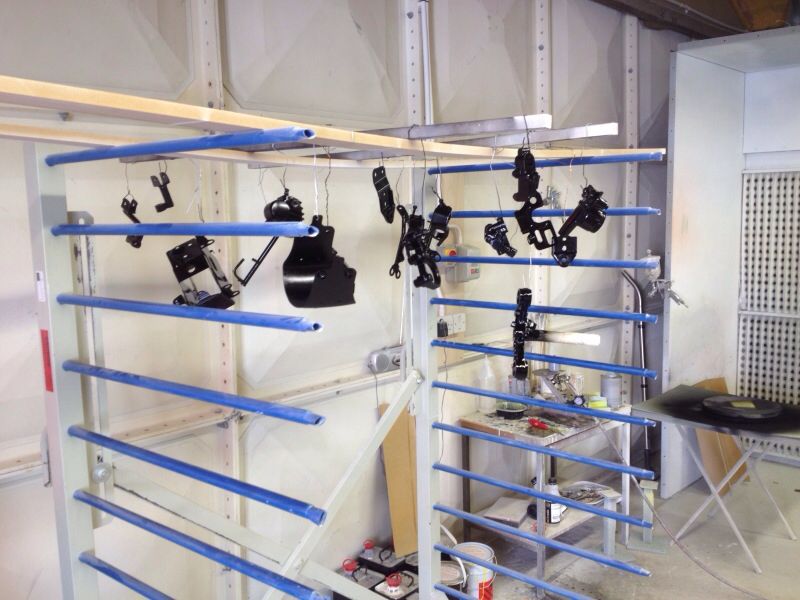
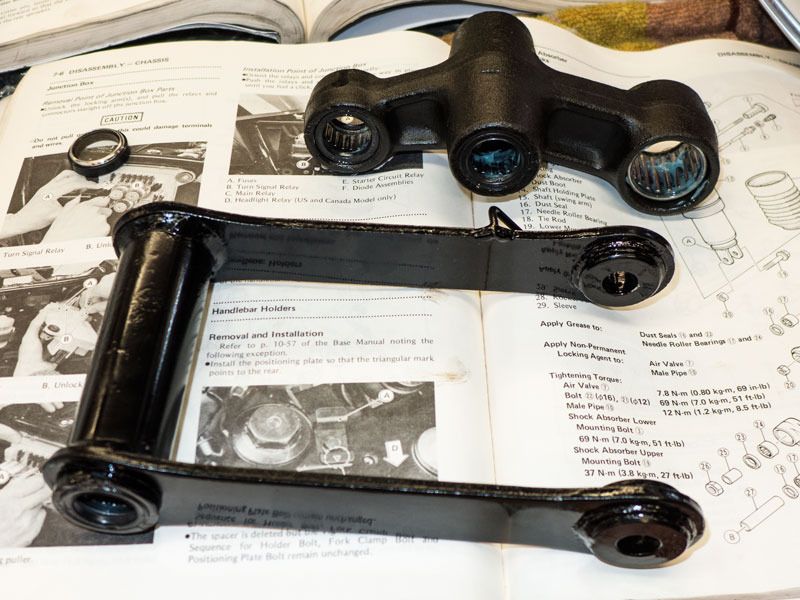
... then etch prime all the metal bits ...

Image

the sprocket carrier was done with a uber poisonous zinc chromate primer with the engine bits and nearly ended up black!

Image

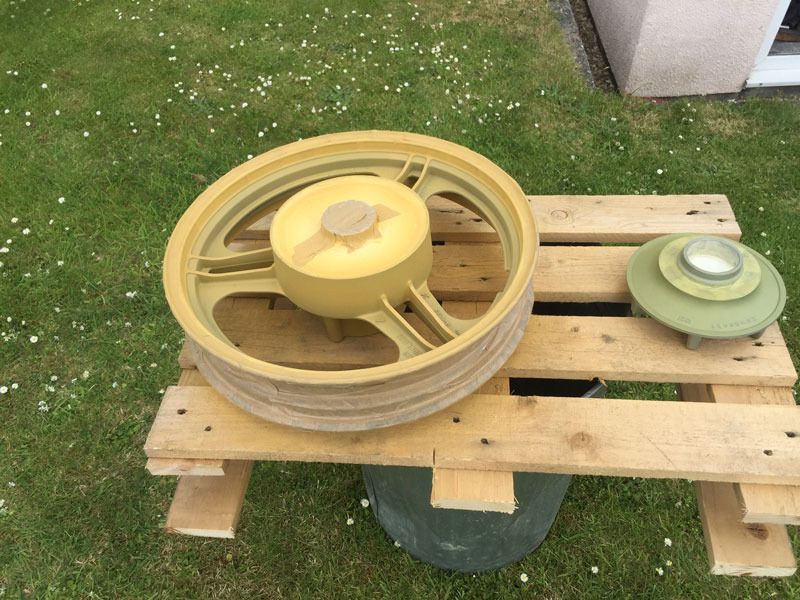
Then I used my old mini primer gun to bang on the high build primer, but this didn't do much of a job, partly because it was cheap crap in the first place (no point in spending good money on a primer gun), partly because after the quantity of etch primer etc I have put through it has taken it's toll and partly because it's not really got a big enough jet for high build primer any way.

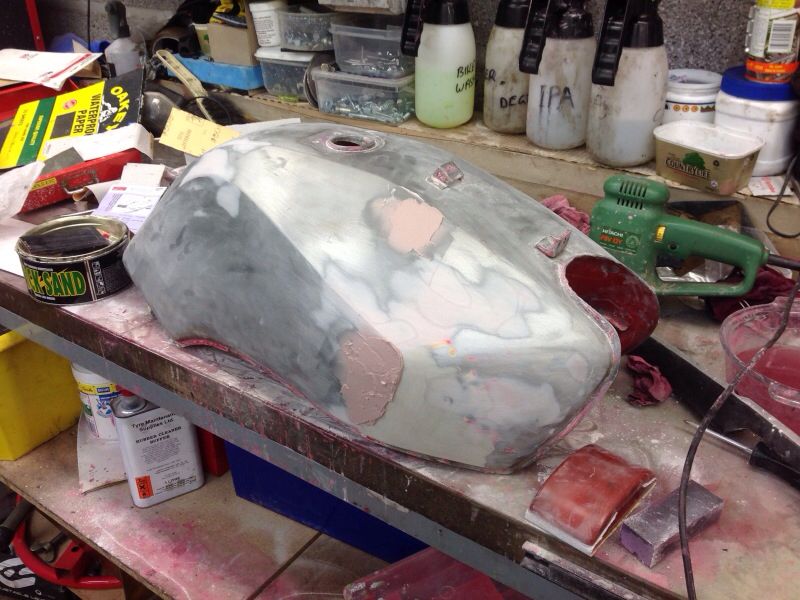
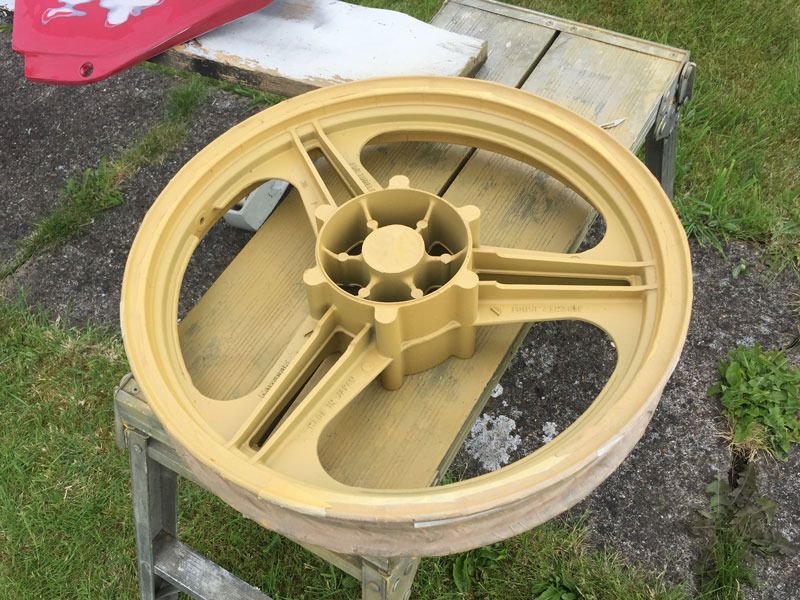
That of course left a shed load of flatting to be done ...

Image

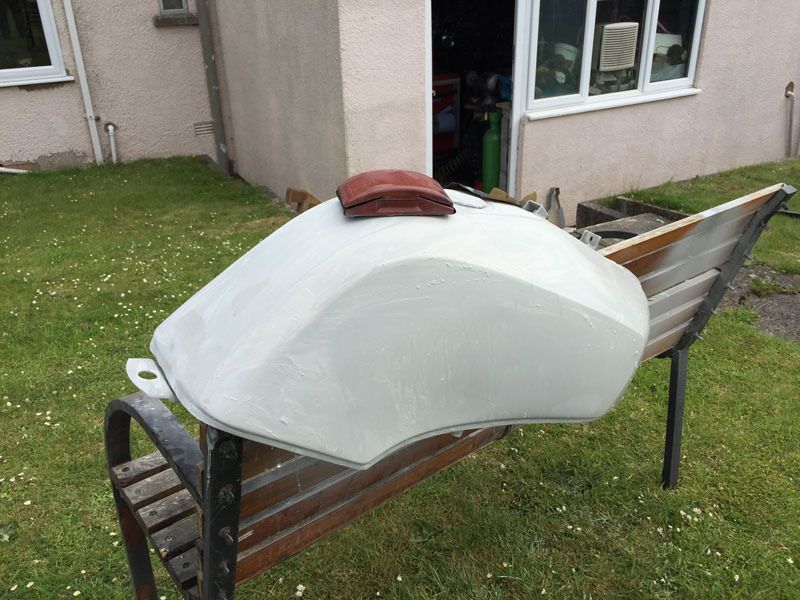
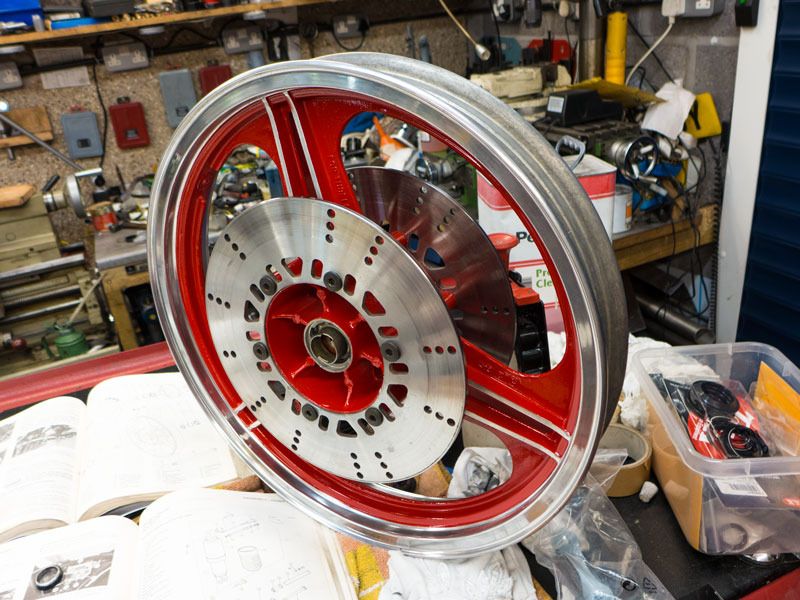
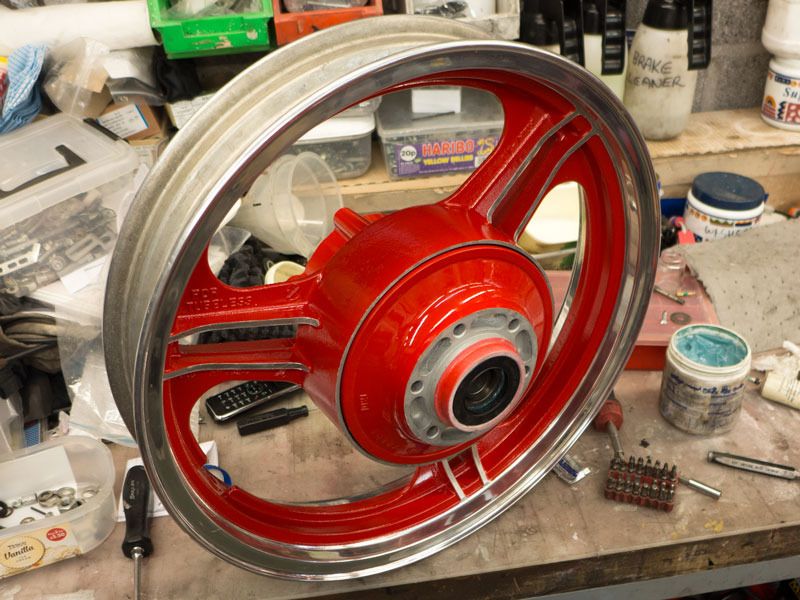
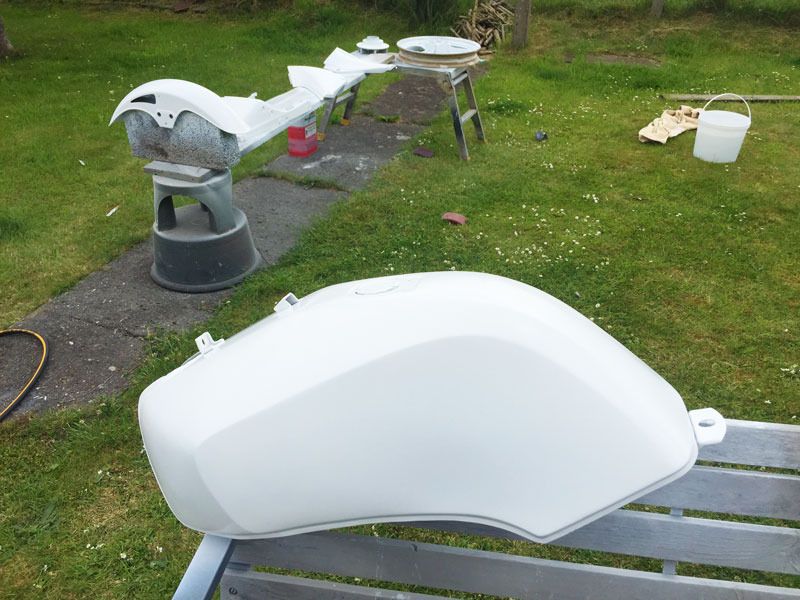
Next to go was the first of the base coats, a white, to give the bright red a lift ...

Image

Then I banged on the red base coat ...

Image

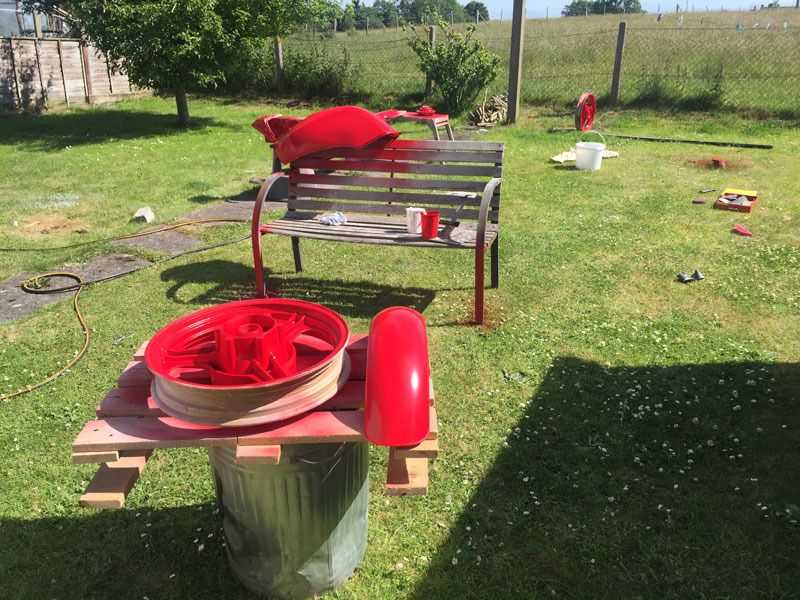
and then clear coated the wheels and front muddy.

SWMBO gave me a hand to remove the masking from the wheels which had been on for ages, so was a right royal pain ....

Image

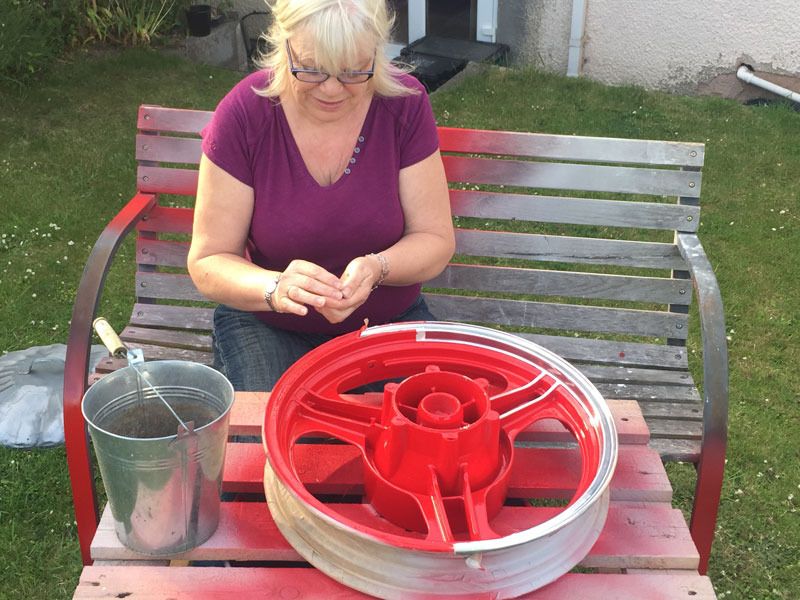
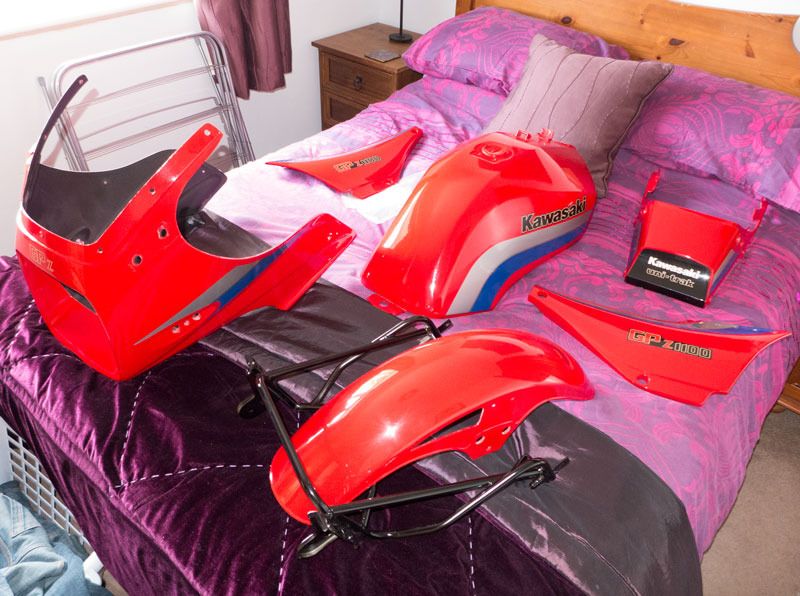
The finished wheels look OK

Image

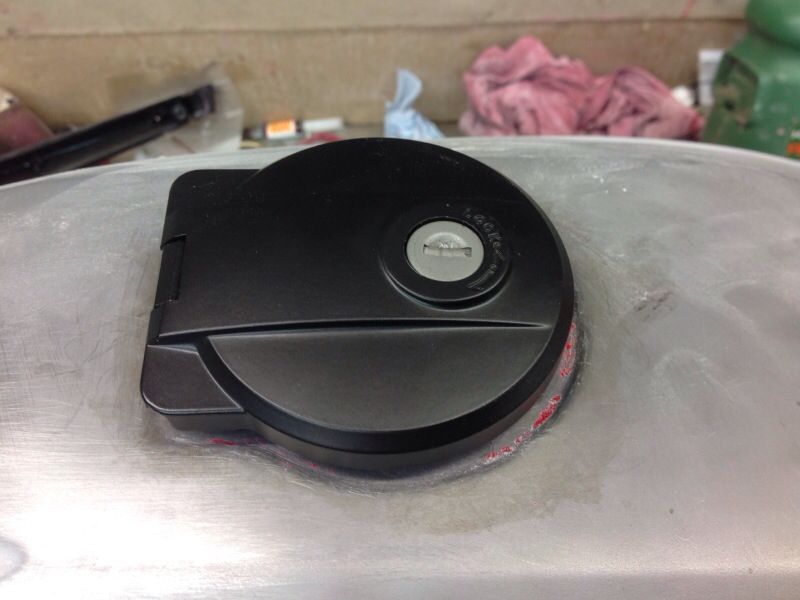
... now at this point the observant amongst you will notice that you haven't seen any pix of the fairing. Sadly I hadn't noticed :shock: that it was still sat in my office :roll:

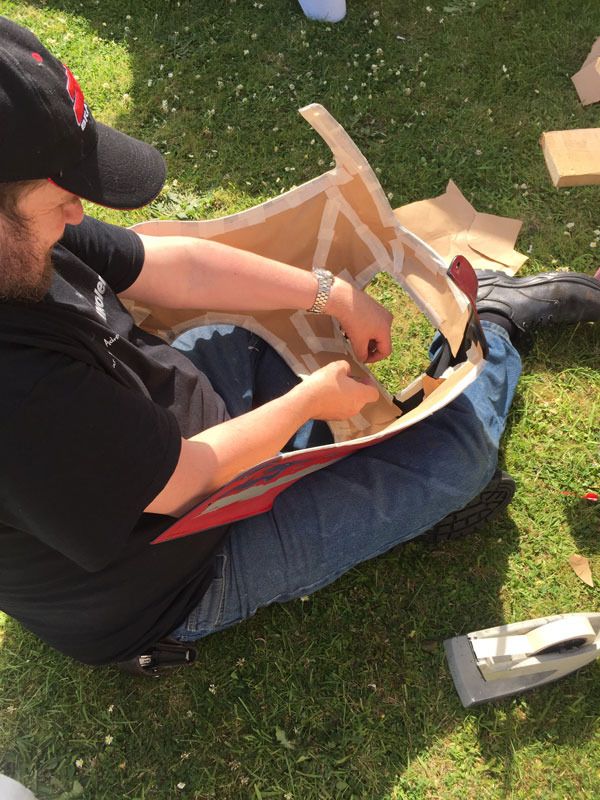
First job was to mask and paint the inside. I used a satin textured plastic paint in a rattle can for that ...

Image

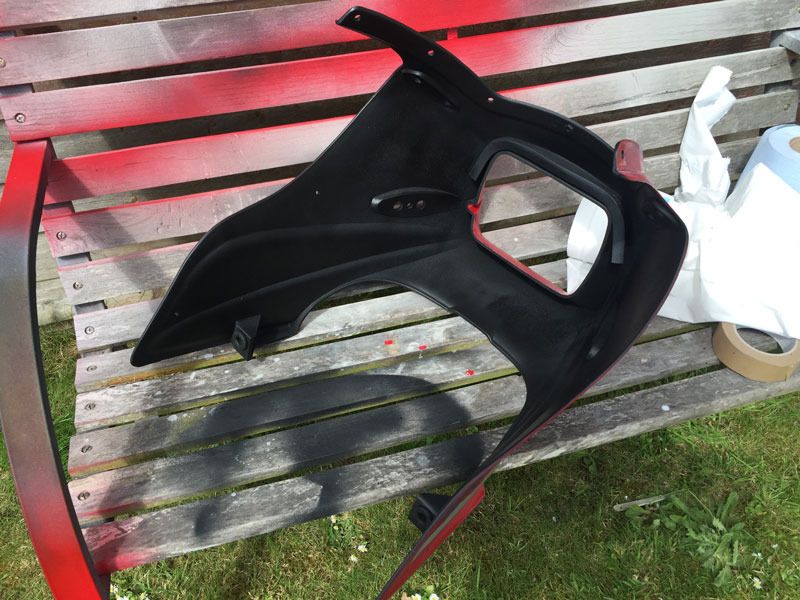
Then it was demask the outside and mask the inside which was bloody fiddly...

Image

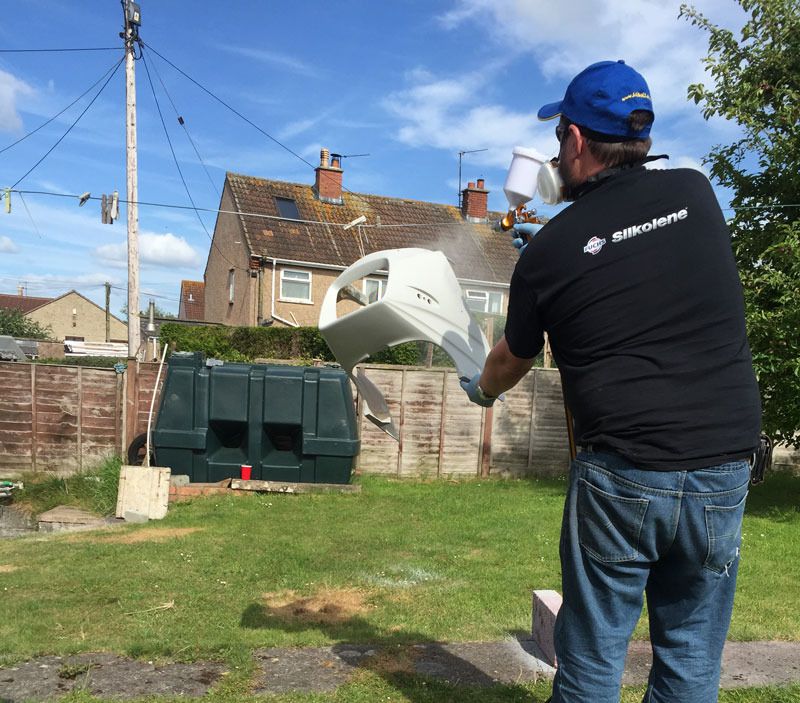
Having had so bad a time with the primer previously, I splashed out £30 cash on a new full size 1.8 jet primer gun. This really larded it on the fairing easy peezy ...

Image

Forgot to take any pix of the next stages

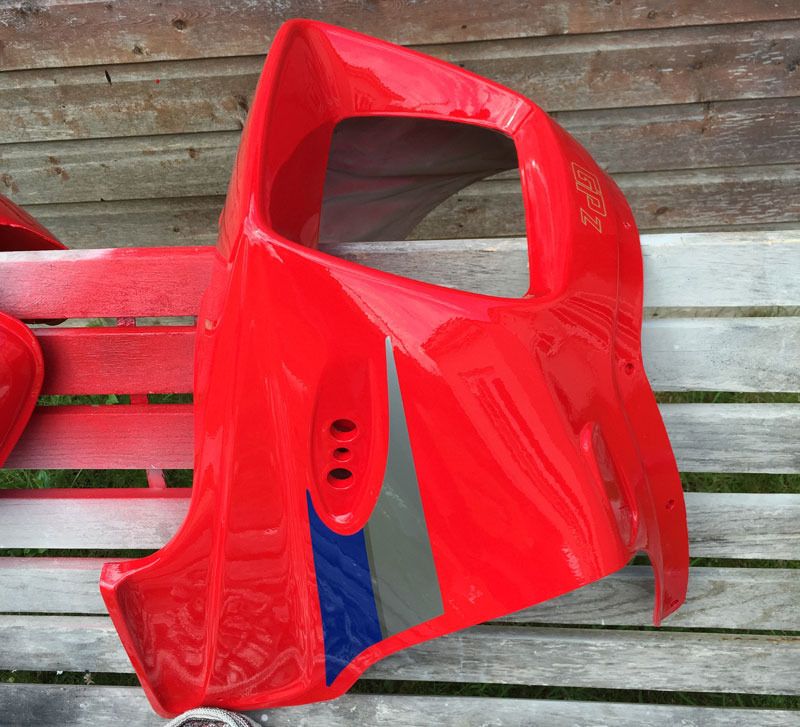
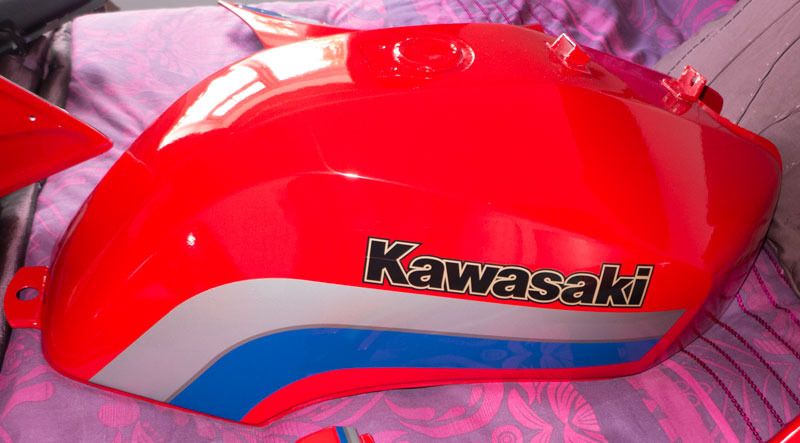
Then I painstakingly applied the gerber edge graphics. I made life a tad easier by soaking them with water with a little squirt of baby shampoo to make repositioning easier and make it possible to squeegee out the air pockets. Sadly I managed to tear the very thin vinyl of the 'K' on the tank on one side whilst removing the application tape, which was harder to remove than it should have been. I bought the graphics at the October Stafford show before the last one :shock:

I used my mate's spray booth as insects have a habit of landing in clear coat and are then stuck there for ever more. I had a minor disaster whilst in there. The booth is used for painting furniture and there was a lot of dust on the floor, which I didn't have time to clear up, and some of it attached itself to the air line and then fell off onto one of the side panels. It did manage to get a couple of curtain runs, which I would normally just flat out with some fine wet 'n' dry and then compound out. I clear coated last Friday afternoon, but it wasn't convenient for my mate to meet me at the spray booth until Sunday morning to collect it all, by which time the lacquer had gone so hard it wouldn't compound, so I'll have to live with the defects. Fortunately I achieved a pretty good gun finish on the whole, so I'm not going to re-lacquer it. I've seen a worse from factories, especially Chinese factories :lol: I'm not a painter by any stretch of the imagination, but I like to do as much of my restorations as I possibly can and I'd rather have a 9/10 job I've done than a perfect job I've only paid for :D

Image

Image

Image

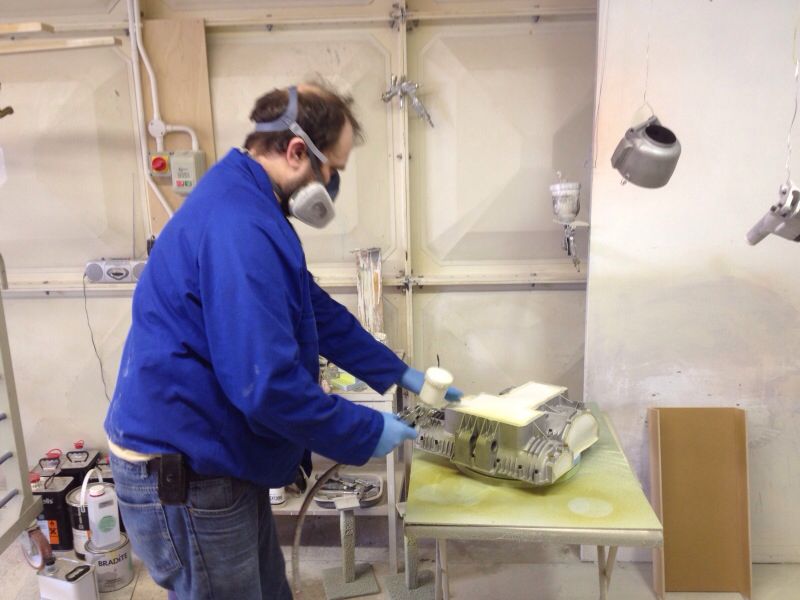
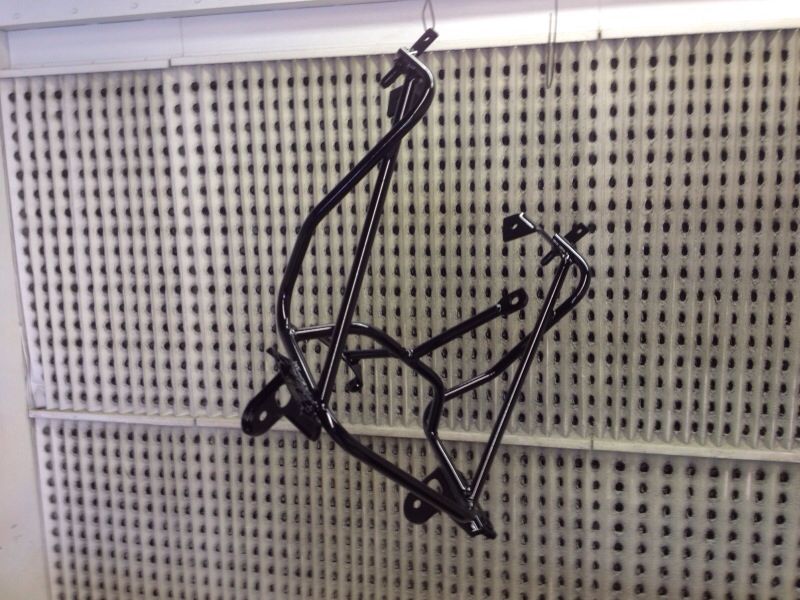
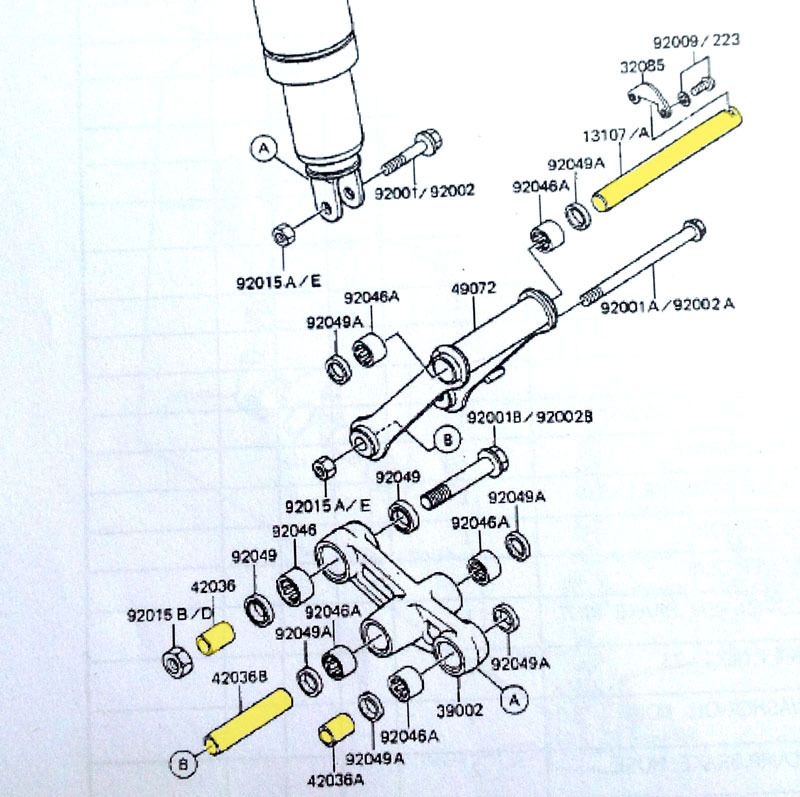
Once the head and barrels come back from the engineers, I'll finish building the motor. I think I'll probably elect to fit the frame over the fully built engine and then build the chassis up around it.

I think from memory I still need to strip and paint etc the front forks, but I think most of the rest is ready to assemble. It's been a long time. :??
Ralph Ferrand
Z1000A1 (1977), Godier Genoud Z1300A5 (1983), Z900A4 Stock (1976), Z900A4 Special (project), GPZ1100 Unitrak (1983), ZRX1200R (2004) DT175MX (1981).

http://www.bikerstoolbox.co.uk

Don't be caught out http://www.dhlparcels.info/

User avatar
Pigford
I'm on prescription!!
Posts: 10566
Joined: 2nd Jan 2006
Location: Hampshire Coast UK

#68 PostAuthor: Pigford » Wed Jul 08, 2015 6:00 pm

Paint looks A1 to me Ralphy :twisted:
And on the 7th day... Zeds were created!

garyd
Hardcore
Hardcore
Posts: 2267
Joined: 11th Jun 2011
Location: West of London

#69 PostAuthor: garyd » Wed Jul 08, 2015 9:12 pm

Truely impressed with your range of skills Ralph.

Not least your photograhy!

User avatar
KWACKERZ1
Hardcore
Hardcore
Posts: 1965
Joined: 1st Sep 2007
Location: Leicestershire

#70 PostAuthor: KWACKERZ1 » Thu Jul 09, 2015 7:54 am

very impressive, graphics are a git to apply, so well done.

And the garden bench has a new splash of gpz red :lol:

User avatar
ollie
Custard Cream
Custard Cream
Posts: 690
Joined: 13th Sep 2002
Location: north yorkshire

#71 PostAuthor: ollie » Thu Jul 09, 2015 1:53 pm

well done Ralph ,keep going lad :wink: :up
zedsrus:"i don't know man ,i just got here myself !!"

Is Vic There
Hardcore
Hardcore
Posts: 1285
Joined: 8th Nov 2011
Location: Brisbane, Australia.

#72 PostAuthor: Is Vic There » Fri Jul 10, 2015 5:18 am

Looks the dogs mate, well done.
Norton 850 Command, Harris Mag 2, Harris Mag 5, Triumph Steve McQueen, Suzuki RGV250 Barry Sheene, RG250 Walter Wolf, RD125LC, Lambretta Li150, Vespa 50N.

User avatar
RALPHARAMA
Area Rep.
Area Rep.
Posts: 2752
Joined: 19th May 2007
Location: Pensford, Somerset
Contact:

#73 PostAuthor: RALPHARAMA » Thu Jul 16, 2015 6:15 pm

The saga continues ... I am spending far longer looking for parts than actually building this bike, because I've been sooo busy working on other people's bikes that all my bits have been getting buried. I fitted the discs to the front wheel today. They were a tad smeggy so I put them in the chuck of the lathe and gave them a rub with some fine scotchbrite. I managed to find the mounting bolts which I had plated with zinc/nickle and a black passivate.

Image

I have re-fitted all the wheel bearings and after half an hour's searching even found the cush drive rubbers :D

Image

I think I skipped the rear disc as it was in shocking condition, but it should be easy enough to score a pattern replacement. If it's the same as the front I may be able to get one off the front wheel I restored for the shafter and then replaced with a different one when I grafted on the Brembos! I am slightly considering a set of Harrison Billet four pots for the front if I can get them them to fit and over come my parsimonious streak :shock: I have a gut feeling though that they may be a bit deep and there won't be enough clearance for the wheel spokes, so I may have to stick with standard.

I have fitted all the needle bearings in the Unitrak linkages. The 'rocker' linkage I plated and the other I painted with two pack gloss. I still need to get a couple of grease seals.

Image

The biggest headache is that I can't find the link shaft and bearing sleeves. Only one is still available. My guess is that I skipped them because they were shagged, though I'm not sure. They have a ground, hardened surface which precludes me spinning some up on the lathe :evil:

I guess I'd better cross my fingers and post a wanted ad :|
Ralph Ferrand
Z1000A1 (1977), Godier Genoud Z1300A5 (1983), Z900A4 Stock (1976), Z900A4 Special (project), GPZ1100 Unitrak (1983), ZRX1200R (2004) DT175MX (1981).

http://www.bikerstoolbox.co.uk

Don't be caught out http://www.dhlparcels.info/

snotie1965
100Club
100Club
Posts: 338
Joined: 28th Mar 2013
Location: Swindon Wiltshire

#74 PostAuthor: snotie1965 » Thu Jul 16, 2015 6:46 pm

I have some spares for a uni-trak linkage , have you a pic of what you need ?

User avatar
RALPHARAMA
Area Rep.
Area Rep.
Posts: 2752
Joined: 19th May 2007
Location: Pensford, Somerset
Contact:

#75 PostAuthor: RALPHARAMA » Thu Jul 16, 2015 7:37 pm

I haven't got the parts but I have highlighted the missing bits on the parts drawing.

Cheers

Image
Ralph Ferrand
Z1000A1 (1977), Godier Genoud Z1300A5 (1983), Z900A4 Stock (1976), Z900A4 Special (project), GPZ1100 Unitrak (1983), ZRX1200R (2004) DT175MX (1981).

http://www.bikerstoolbox.co.uk

Don't be caught out http://www.dhlparcels.info/


Return to “Projects”

Who is online

Users browsing this forum: No registered users and 78 guests