Hello Guest User,
Please feel free to have a look around the forum but be aware that as an unregistered guest you can't see all of it and you can't post.
To access these 'Registered Users Only' areas simply register and login.
Please feel free to have a look around the forum but be aware that as an unregistered guest you can't see all of it and you can't post.
To access these 'Registered Users Only' areas simply register and login.
Q's Z900 A4
Moderators: paul doran, Taffus, KeithZ1R, chrisu


Time for a quick update 
Rear brake master was a bit rough to say the least.


Washer and spring were rusty, so cleaned them up and fitted a new piston and seal.

I tried to find a new cap but they were soooooo expensive I refitted the old one. I can always keep an eye out for one
Rear caliper pistons were FUBAR so I bought some new ones.


Will hopefully be rebuilding the rear caliper and finishing off rear wheel fitment over the weekend.
Richard
Last edited by Richard Q on Fri Feb 06, 2015 11:58 pm, edited 1 time in total.
Somewhere, over a rainbow, weigh a pie.
1976 KZ900
1976 KZ900
I have laid out most of the wiring loom and studying the many photos I took when stripping it down, am slowly managing to refit the electrics. Handlebar furniture is back on - switch gear is in excellent condition so had just been refitted. Painted the weights and put them back, just need to find some levers as these have discoloured somewhat.

Throttle cable had started to break apart so new ones have been ordered. The carb end was held on with a cable tie when I first got the bike.

New rear disc on the wheel and trial fitted to check clearances.


Throttle cable had started to break apart so new ones have been ordered. The carb end was held on with a cable tie when I first got the bike.

New rear disc on the wheel and trial fitted to check clearances.

Somewhere, over a rainbow, weigh a pie.
1976 KZ900
1976 KZ900
Fitted new pistons, seals and dusts caps.

I had to move a shim from one side of the caliper to the other as the disc seemed to have a slightly different offset - seemed weird, but I did get it to fit dead centre after a lot of mucking about, and swearing.

New pads, springs and hey presto, no overhang although I did manage to scratch all of my new paint.

Spent two hours trying to bleed the rear brake I have heard they can be a pig, so I persevered for a while too long. Got fed up and pulled the master cylinder apart to find that the primary seal had got jammed up in the top of the cylinder. So another good clean up, this time tried (but failed) to get the reservoir off, but removed the plug, and the baffle. Got some wire wool right up inside the cylinder, then got in in the solvent bath and emptied the air compressor blowing out every possible orifice 

Note the damage to the cap. It's now back together and bled in 5 minutes using a dosing syringe. Rear brake works, which is excellent as I have now been able to torque up the sprocket nut. Have lost the bloody clutch return spring though, so all come to a halt again.
Painty stuff is back from Hutch
Just a trial fit, awesome, now it's getting exciting.


I had to move a shim from one side of the caliper to the other as the disc seemed to have a slightly different offset - seemed weird, but I did get it to fit dead centre after a lot of mucking about, and swearing.

New pads, springs and hey presto, no overhang
although I did manage to scratch all of my new paint.

Spent two hours trying to bleed the rear brake

Note the damage to the cap. It's now back together and bled in 5 minutes using a dosing syringe. Rear brake works, which is excellent as I have now been able to torque up the sprocket nut. Have lost the bloody clutch return spring though, so all come to a halt again.
Painty stuff is back from Hutch
Just a trial fit, awesome, now it's getting exciting.

Somewhere, over a rainbow, weigh a pie.
1976 KZ900
1976 KZ900
-
Is Vic There
- Hardcore

- Posts: 1285
- Joined: 8th Nov 2011
- Location: Brisbane, Australia.

The foam under the clocks has disintegrated. I found some 3.5mm foam and some 1.6mm double sided stuff - now I have some 5mm or very close. I cut some basic templates out of card

Then transferred it to the foam

I put most of the clock module together on the bike but trying to fit the plastic guard underneath was impossible so transferred it to the bench. All together now

And back on the bike

It seems to be taking an age to put even the smallest thing back together. The powder coaters did a good job of masking bolt holes, but they filled the holes with foil and some of it has bonded into the threads. So every captive thread on the bike has to be tapped prior to building it up. I have had to replace most of the damper rubbers as well, bit of a pain but well worth it

I decided to have a go at plastic polishing to get the inner mudguard to look a little better. I started with this :-
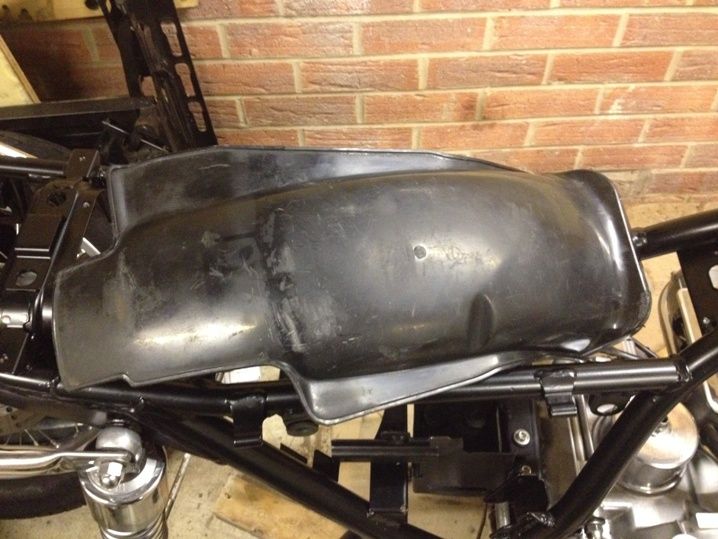
Rubbed it down with some 1200 wet n dry, followed by some 2000, all done wet. I eventually ended up with this, and an arm that ached
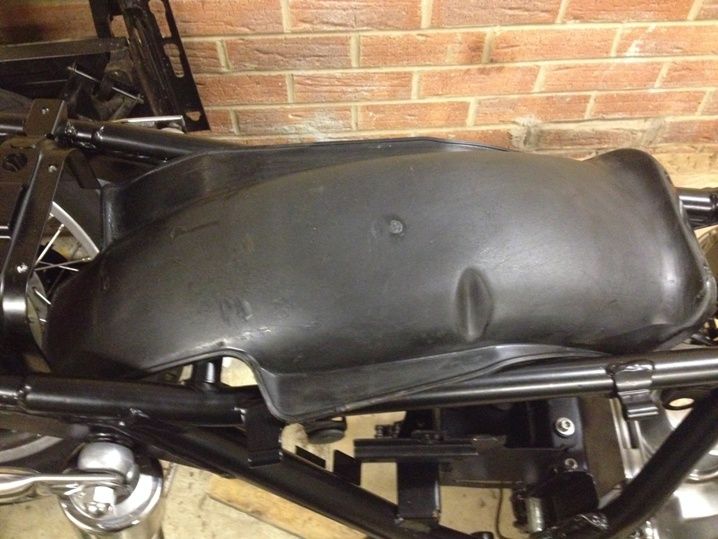
Then, out with the polishing kit, which comprised of two mops and two types of compound. Two things became obvious - 1/. It's not as easy as it looks, and 2/. I don't have enough patience to to do this sort of thing

But I did manage to get to this :-
With a bit (lot) more patience and practice these kits could really posh things up
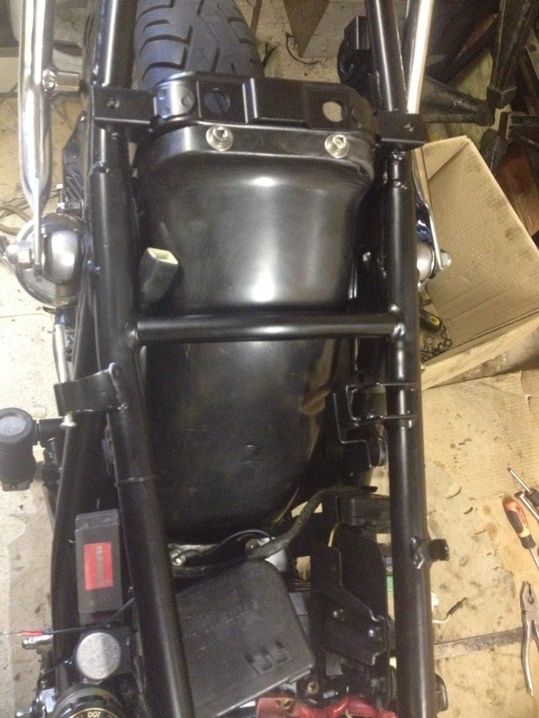
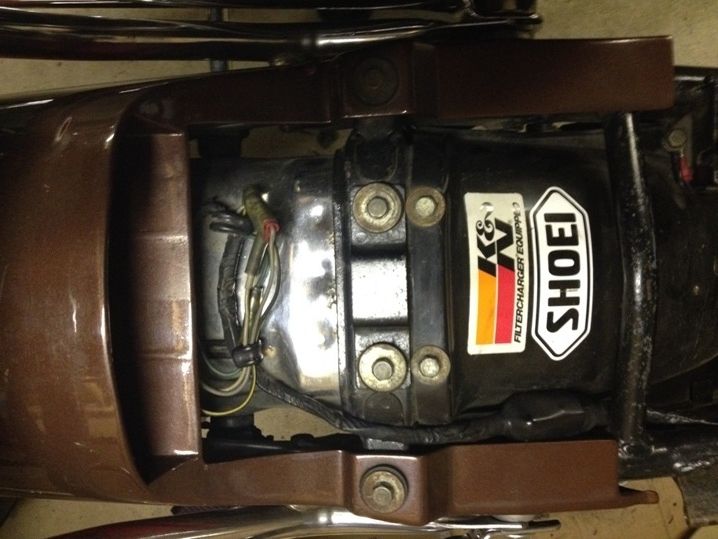
Here's a before and after of under the seat

Apart from all that, I have fitted the new chrome mudguard (cheaper than having the old one rechromed), duck tail, rack/grab rail, rear light, threaded the wiring through the impossible small channels, etc,

Just need to refit the indicators and the chain guard, and the rear of the bike is finished woop

Then transferred it to the foam

I put most of the clock module together on the bike but trying to fit the plastic guard underneath was impossible so transferred it to the bench. All together now

And back on the bike

It seems to be taking an age to put even the smallest thing back together. The powder coaters did a good job of masking bolt holes, but they filled the holes with foil and some of it has bonded into the threads. So every captive thread on the bike has to be tapped prior to building it up. I have had to replace most of the damper rubbers as well, bit of a pain but well worth it

I decided to have a go at plastic polishing to get the inner mudguard to look a little better. I started with this :-

Rubbed it down with some 1200 wet n dry, followed by some 2000, all done wet. I eventually ended up with this, and an arm that ached

Then, out with the polishing kit, which comprised of two mops and two types of compound. Two things became obvious - 1/. It's not as easy as it looks, and 2/. I don't have enough patience to to do this sort of thing
But I did manage to get to this :-

With a bit (lot) more patience and practice these kits could really posh things up
Here's a before and after of under the seat


Apart from all that, I have fitted the new chrome mudguard (cheaper than having the old one rechromed), duck tail, rack/grab rail, rear light, threaded the wiring through the impossible small channels, etc,

Just need to refit the indicators and the chain guard, and the rear of the bike is finished
Somewhere, over a rainbow, weigh a pie.
1976 KZ900
1976 KZ900

Cheers Freddy/Is Vic There, I'm getting there
After a good look at the indicators, I found the screws were rusty, two of the lenses were cracked, one was no longer clear (verging on opaque), two of the threaded fixing bars were too short (the rubbers were missing as well supposedly to make them fit), and the wiring was cracked through to the actual wire in several places.
So after a bit of thought I bought a new set
The fixings on the rear ones were a fair bit too long, as you can see, so I did trim them to length.

Rear ones fitted and wired up,along with the chain guard. Back of the bike now finished (OK I have to hang the exhausts, but you know what I mean).

New handlebars arrived and they don't look that different until you put them together

Quite a bit higher and wider. They certainly make the bike look bigger for some reason. See the old ones on the previous post.

So, rear indicators on and wired up, chain guard cleaned up and fitted, new handlebars on, clutch cable now connected, throttle cables fitted to handlebar end, mirrors on, chrome clock bottoms on (the first lot I got didn't fit and had to be returned ), engine half filled with oil (bowl underneath in case it leaks out ), front brakes plumbed in, and petrol cap on (the was nerve wracking - tapping that pin in so close to the new paintwork )
Soon be running
Richard
Hoping for some decent weather over the weekend so I can give the car a bit of a run, and with that out of the garage I can have a good clean up and find some of the lost bits
After a good look at the indicators, I found the screws were rusty, two of the lenses were cracked, one was no longer clear (verging on opaque), two of the threaded fixing bars were too short (the rubbers were missing as well supposedly to make them fit), and the wiring was cracked through to the actual wire in several places.
So after a bit of thought I bought a new set
The fixings on the rear ones were a fair bit too long, as you can see, so I did trim them to length.

Rear ones fitted and wired up,along with the chain guard. Back of the bike now finished (OK I have to hang the exhausts, but you know what I mean).

New handlebars arrived and they don't look that different until you put them together

Quite a bit higher and wider. They certainly make the bike look bigger for some reason. See the old ones on the previous post.

So, rear indicators on and wired up, chain guard cleaned up and fitted, new handlebars on, clutch cable now connected, throttle cables fitted to handlebar end, mirrors on, chrome clock bottoms on (the first lot I got didn't fit and had to be returned
Soon be running
Richard
Hoping for some decent weather over the weekend so I can give the car a bit of a run, and with that out of the garage I can have a good clean up and find some of the lost bits
Somewhere, over a rainbow, weigh a pie.
1976 KZ900
1976 KZ900
Certain things have gone hidey, like the centre stand spring, new screws for the tank badges and one of the exhaust hanger rubbers. So as the sun was shining on Saturday and the salt had all but gone from the roads, I took the Rover out for a spin that was awesome. And left it outside and spent most of the day cleaning up and sorting out the gara... ermmm man cave.
Found the centre stand spring hanging from the stand , and the tank badge screws in a pile of paperwork still stapled to the invoice. Exhaust rubber has emigrated
Never mind, I spent some of Sunday connecting up the wires where they came from, (During the strip down, I took a load of high res pics and have the laptop next to the bike). Wiring diagram is handy, but pics of where they actually go is very useful.

I now have indicators, all of the idiot lights although the oil pressure light is intermittent (faulty switch), horn, brakes lights, headlamp flash, and the starter spins the engine Lovely to hear it making noises again.

The only thing I don't have is a headlight (OK side light and rear light too). I haven't investigated that yet, but it shouldn't take too long, just a feed problem by the look of it.
Is there an easy way to hook up the centre stand spring? It is just brute force, or is there a clever way of attaching it?
When the spring is on, the exhausts are coming out of the box woop
Richard
Found the centre stand spring hanging from the stand
Never mind, I spent some of Sunday connecting up the wires where they came from, (During the strip down, I took a load of high res pics and have the laptop next to the bike). Wiring diagram is handy, but pics of where they actually go is very useful.

I now have indicators, all of the idiot lights although the oil pressure light is intermittent (faulty switch), horn, brakes lights, headlamp flash, and the starter spins the engine

The only thing I don't have is a headlight (OK side light and rear light too). I haven't investigated that yet, but it shouldn't take too long, just a feed problem by the look of it.
Is there an easy way to hook up the centre stand spring? It is just brute force, or is there a clever way of attaching it?
When the spring is on, the exhausts are coming out of the box
Richard
Somewhere, over a rainbow, weigh a pie.
1976 KZ900
1976 KZ900

Richard Q wrote:
Is there an easy way to hook up the centre stand spring? It is just brute force, or is there a clever way of attaching it
Richard
attach it to the loops before you bolt the stand on then use a taper to align the holes on one side then push the bolt through the other perhaps
Keith


You can never have too many tools in your life, except the two legged variety
I'm never wrong, once I thought I was but I was
mistaken.
Phil Churchett winner 2013
You can never have too many tools in your life, except the two legged variety
I'm never wrong, once I thought I was but I was
mistaken.
Phil Churchett winner 2013
-
wheelysteve

- Custard Cream

- Posts: 961
- Joined: 10th Mar 2014
- Location: Wokingham, Berks
I did it by fastening one end in a vice then opening the spring and pushing washers (or 1 penny pieces if your well off) into the coils. You need to alternate each side of the spring, effectively increasing the length of the spring.
When you've jammed enough in there it's easy to fit the spring on the already fitted centre stand.
Hope this makes sense!!
Steve
When you've jammed enough in there it's easy to fit the spring on the already fitted centre stand.
Hope this makes sense!!
Steve
1975 Z1B Candy Red/Blue
1975 Dogs Z1B
1976 Z900 A4
1977 Z650B1
1978 Z650B2
1978 KZ1000D Z1R
Yam Tracer 900GT
PUM 710
1975 Dogs Z1B
1976 Z900 A4
1977 Z650B1
1978 Z650B2
1978 KZ1000D Z1R
Yam Tracer 900GT
PUM 710
-
Steve Cooke
- ZedHead

- Posts: 1166
- Joined: 18th Mar 2007
- Location: Southampton
Who is online
Users browsing this forum: No registered users and 124 guests