Hello Guest User,

Please feel free to have a look around the forum but be aware that as an unregistered guest you can't see all of it and you can't post.

To access these 'Registered Users Only' areas simply register and login.

My Ultimate Zed

Work in Progress

Moderators: chrisu, paul doran, Taffus, KeithZ1R

Message
Author
User avatar
Zomerset Zed
100Club
100Club
Posts: 239
Joined: 30th May 2014
Location: Somerset

Swingarm shock mounts welded on

#46 PostAuthor: Zomerset Zed » Sun Nov 29, 2015 10:59 am

Image

Image

User avatar
Zomerset Zed
100Club
100Club
Posts: 239
Joined: 30th May 2014
Location: Somerset

Loosely assembled front end

#47 PostAuthor: Zomerset Zed » Sun Nov 29, 2015 11:00 am

Image

Image

Image

Image

ADE
100Club
100Club
Posts: 311
Joined: 22nd Dec 2001
Location: Shropshire

#48 PostAuthor: ADE » Sun Nov 29, 2015 1:01 pm

Looking good
Ade

User avatar
Zomerset Zed
100Club
100Club
Posts: 239
Joined: 30th May 2014
Location: Somerset

#49 PostAuthor: Zomerset Zed » Sun Nov 29, 2015 3:03 pm

Did you buy the shock mounts or have them machined?


I designed the shock mounts to the dimensions i wanted and then got them machined by a mate of mine along with the new top shock mounts.

User avatar
Zomerset Zed
100Club
100Club
Posts: 239
Joined: 30th May 2014
Location: Somerset

#50 PostAuthor: Zomerset Zed » Sun Nov 29, 2015 3:05 pm

what are the wheels off?


Front is 2005 R6 and rear is 2005 R1....

User avatar
Zomerset Zed
100Club
100Club
Posts: 239
Joined: 30th May 2014
Location: Somerset

Rear brake caliper mounted

#51 PostAuthor: Zomerset Zed » Sun Nov 29, 2015 5:24 pm

Playing catch up with progress. Didn't realize it was so long since i did the last lot :oops:

I decided i wanted the matching caliper design for the radial mounted 05 R6 front units. The later R1 rear unit i had was a horrible sliding caliper single piston unit rather than an opposed twin piston. It was a bit of a trial and i am still not happy with it - more on this at a later date :x

Image

Designed a hanger bracket and spacers using a rod end ally torque arm. It will do for now, but may fall victim of my rule with this bike, that if i'm not 100% happy with it, it doesn't get to stay on the bike :roll:

User avatar
Zomerset Zed
100Club
100Club
Posts: 239
Joined: 30th May 2014
Location: Somerset

Its on 2 wheels

#52 PostAuthor: Zomerset Zed » Thu Dec 31, 2015 4:56 pm

Again playing catch up on the thread. This was state of play just before christmas:

Image

Titanium bolts cut to length (not that easy to do neatly)

Image

Titanium nuts and stainless washers...

Image

Fat one! Decided to leave the top shock mount round bar intact rather than cutting out centre once i welded in. Should have much more strength too!
Decided to cut out the original rear brace here as i didn't want to sully the looks with a crappy peice of sheet-metal and i don't want the battery to be visible under the line of the side panels - i want clear space. That then rules out the keeping of the original inner mud guard. I will be making up my own inner splash guard and battery/electrical box. More on this later....

Image

Cheapo Tech shocks were right length and look, but i will be using only for the build process as they are fabricated from cheese. I will replace with some bespoke units later to my spec. Probably go with Hyperpro

Image

Good proportions i think....

Image

R6 front end is going to look great with a painted front wheel and a minimalist 80's type endurance mud guard...

Image

Have done more since, but progress is slow....

snotie1965
100Club
100Club
Posts: 338
Joined: 28th Mar 2013
Location: Swindon Wiltshire

#53 PostAuthor: snotie1965 » Thu Dec 31, 2015 5:32 pm

That looks good already !!! i hope you are going to tune the motor to go with the top of the range running gear ? ACE job ........

User avatar
Zomerset Zed
100Club
100Club
Posts: 239
Joined: 30th May 2014
Location: Somerset

Overdue update

#54 PostAuthor: Zomerset Zed » Sat Sep 03, 2016 8:37 pm

I will try to update with progress over the next week or so:

Bars drilled for running wiring for handle bar switches

Image

Image

Image

Individual wires will be in a sheath on final build

I designed a drill and tap jig to repair threads in the head for the exhaust studs:

Image

and then using my 3D printer i have just built, printed the parts and gave it a go:

Image

Image

Image

Image

Seems to work :D

User avatar
Ginger Bear
Hardcore
Hardcore
Posts: 5512
Joined: 16th Dec 2008
Location: In the Dark.
Contact:

#55 PostAuthor: Ginger Bear » Sat Sep 03, 2016 9:47 pm

Cool stuff :up
Image

# 104

Phil Churchett Award Winner 2011 & 2016 :D
Buzzworkz Best Modified Zed 2016

User avatar
Zomerset Zed
100Club
100Club
Posts: 239
Joined: 30th May 2014
Location: Somerset

Outrigger bearing assembly

#56 PostAuthor: Zomerset Zed » Sun Sep 04, 2016 9:04 am

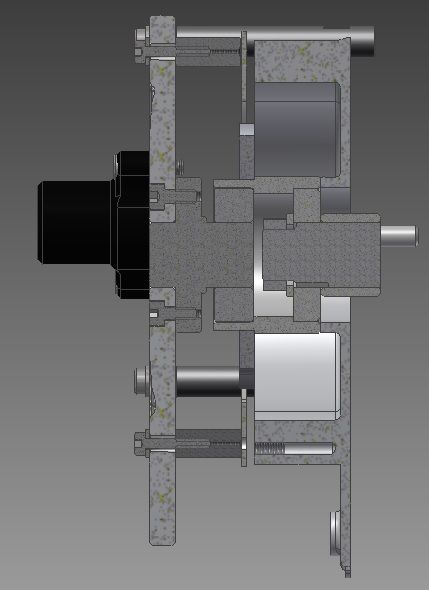
My original plan was to use an extended output shaft and a secondary support bearing inboard of the sprocket. The intention was to use standard sprockets (not offset) and retain the original and beautiful kawasaki cast ally sprocket cover. I had arrived at a design which would hide everything under the cover and look standard-ish, using a Faulk Stumm clutch cylinder.

I had a quote from the countries leading motorcycle gearbox manufacturer but when i came to placing the order they changed their minds and said that they couldn't do it :x

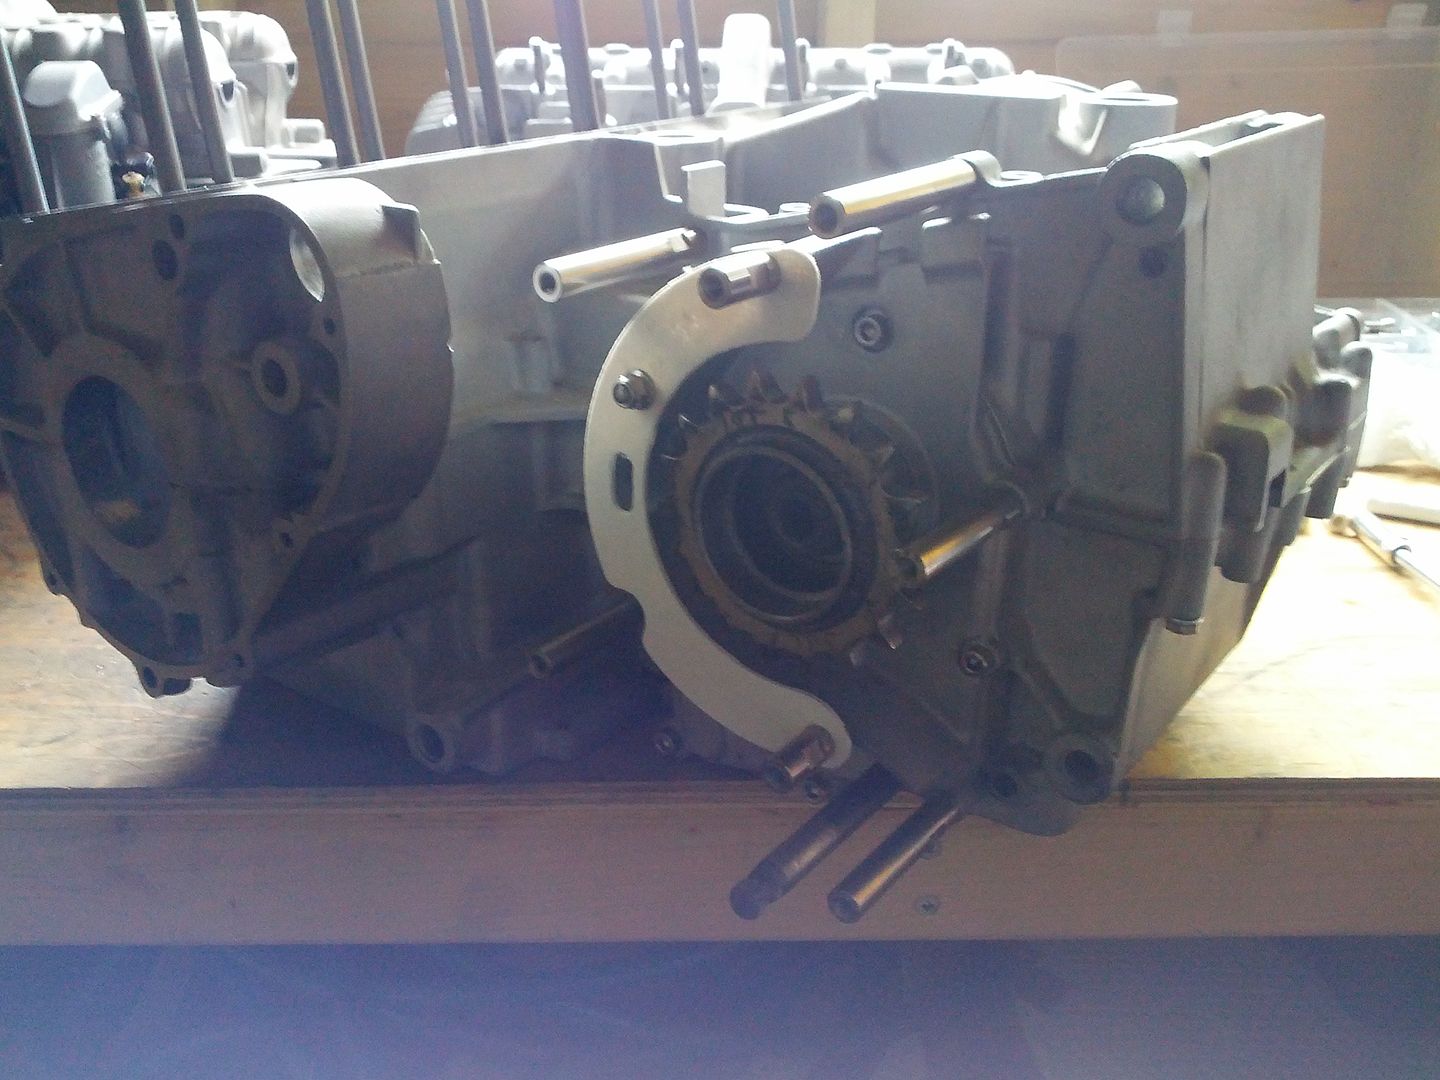
So, back to plan B, the more conventional offset sprocket and an outrigger plate:
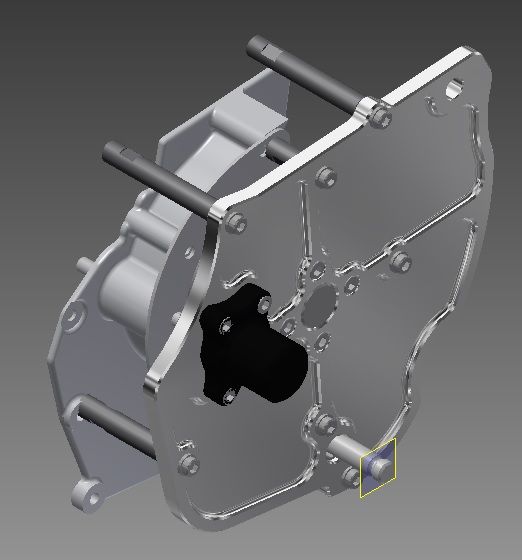
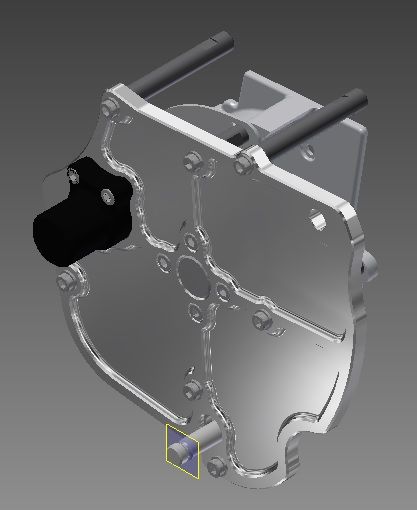
Image

Image

Image

Some details:

Using an externally mounted Oberon clutch cylinder from a Panigale
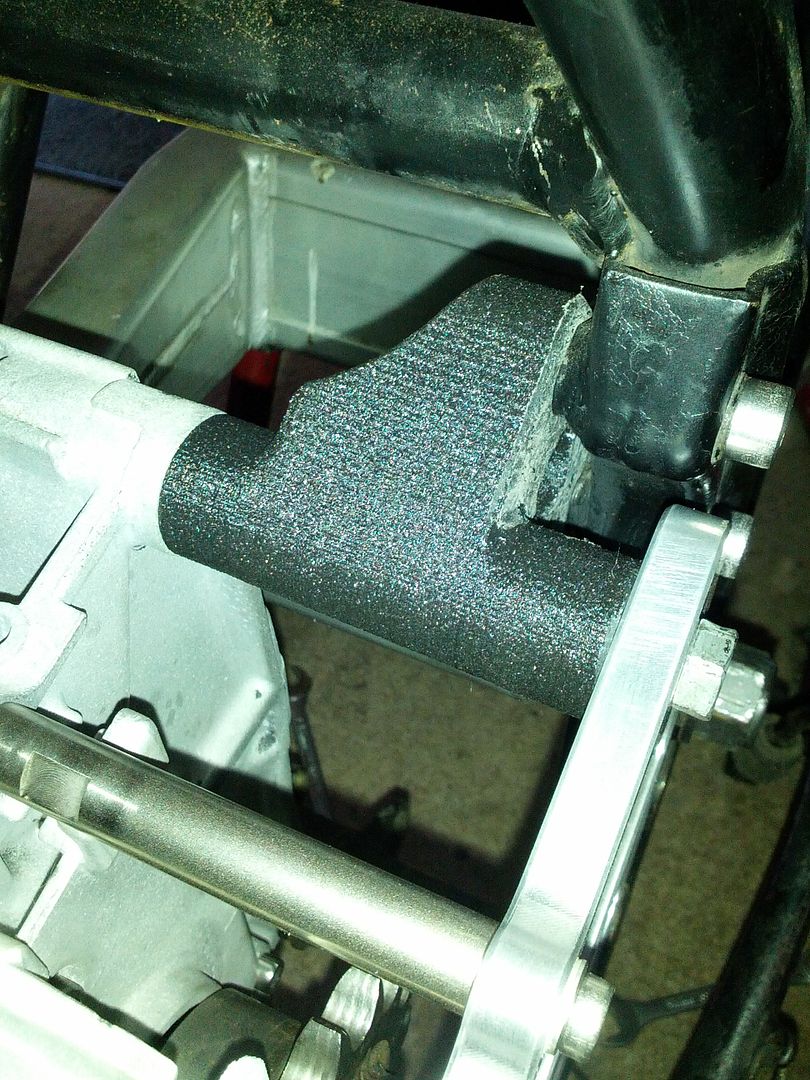
Has a mount hole to fix to the rear upper engine mount
Has a steel plate case saver in case the chain ever comes off
Gear change shaft is mounted in a sealed roller bearing

Note model above isn't complete yet and will also have a top cover wither in ally plate or carbon fibre.

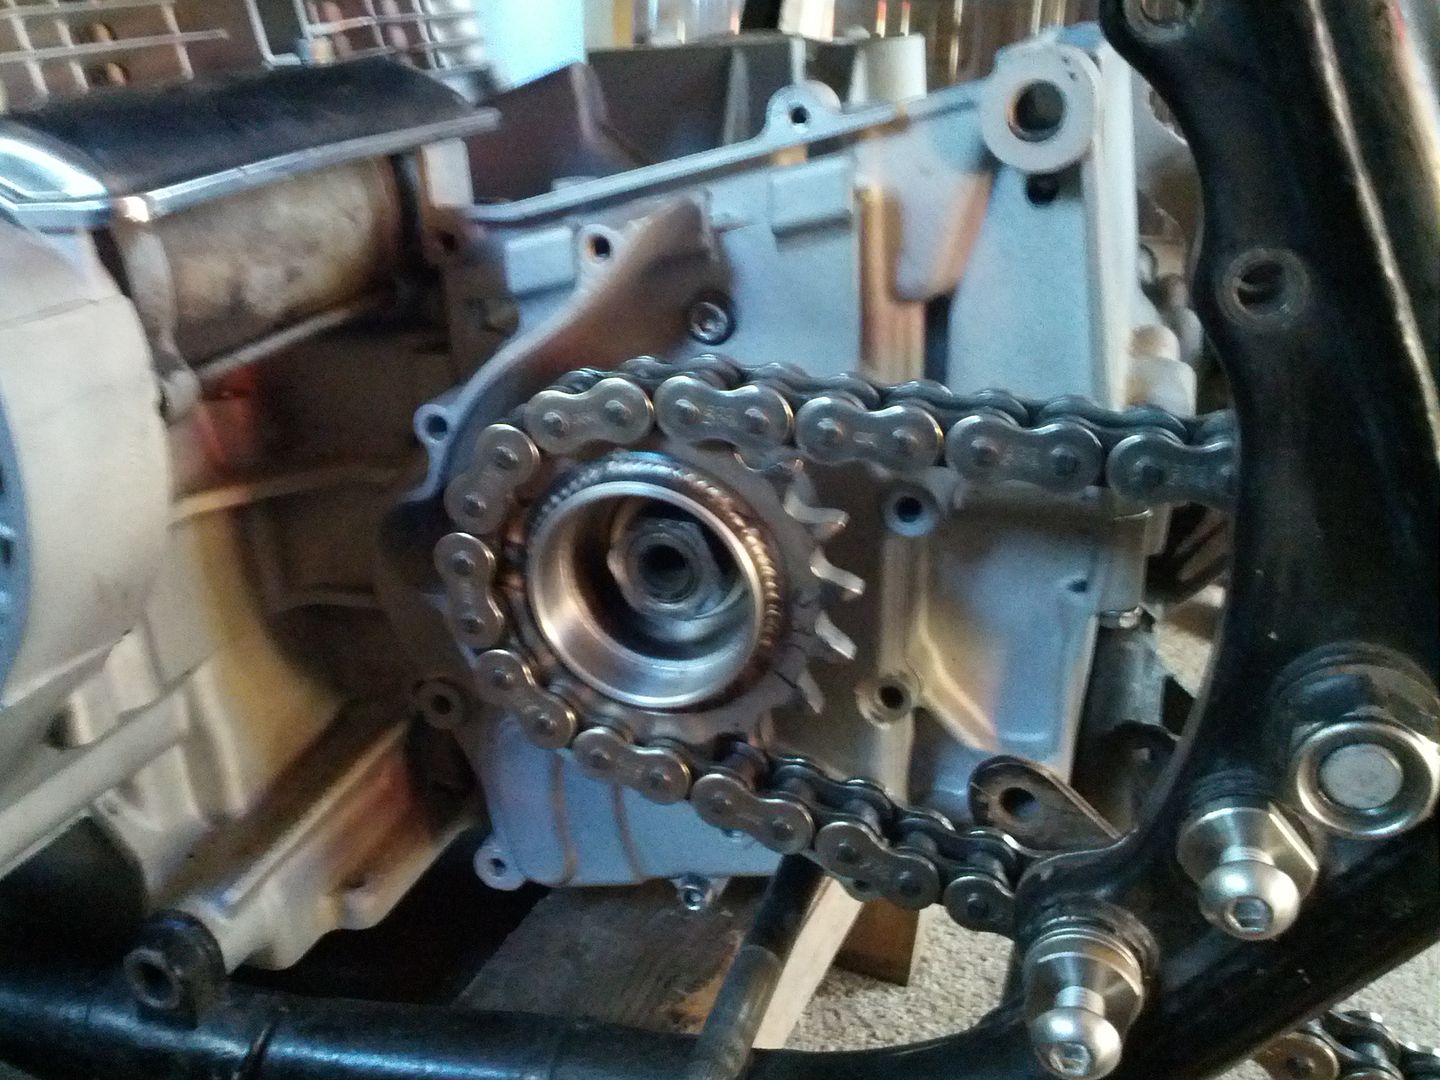
First i had to procure a 1" offset 530 sprocket from BG in Florida:

Image

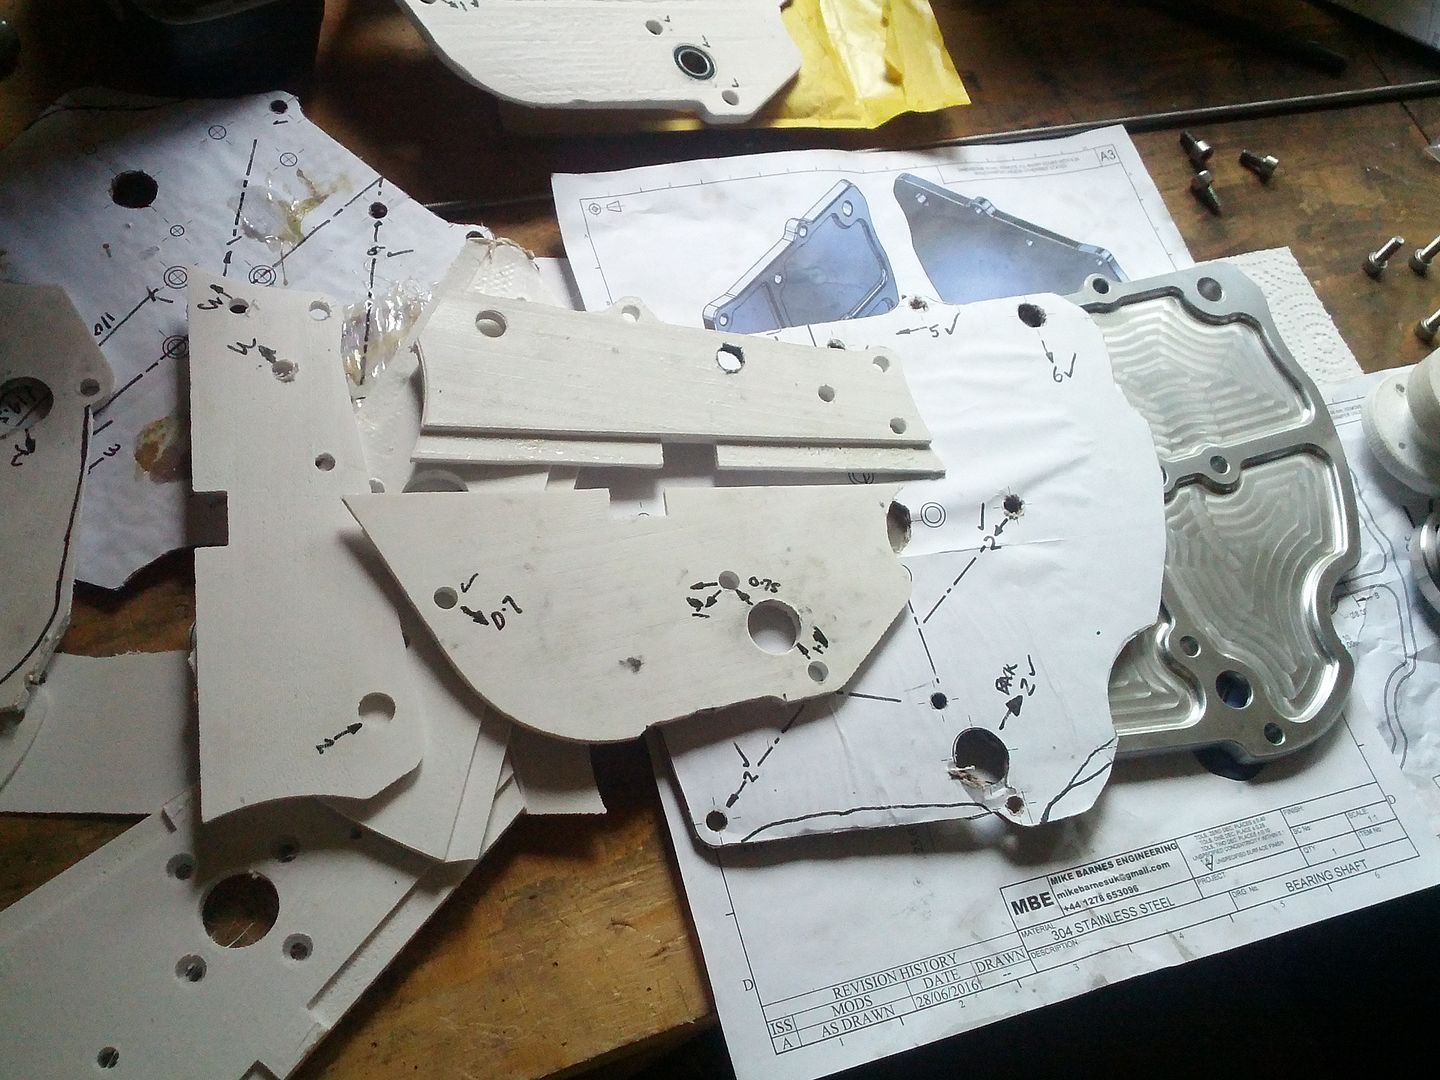
I started with many iterations of cardboard to get the fit and look right:

Image

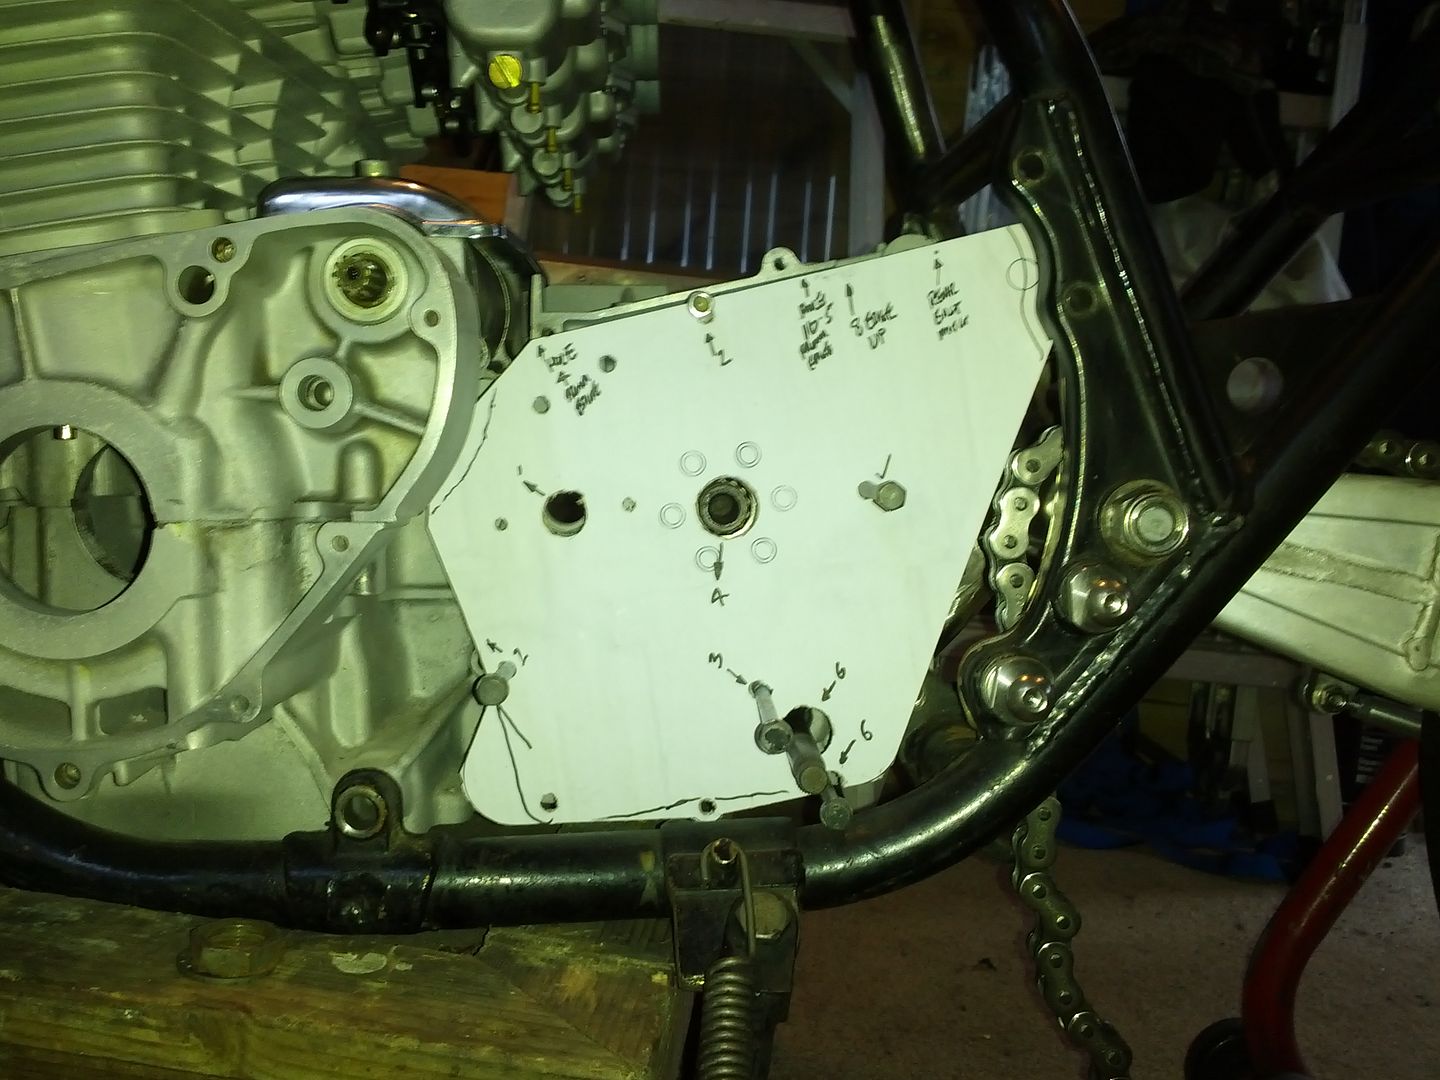
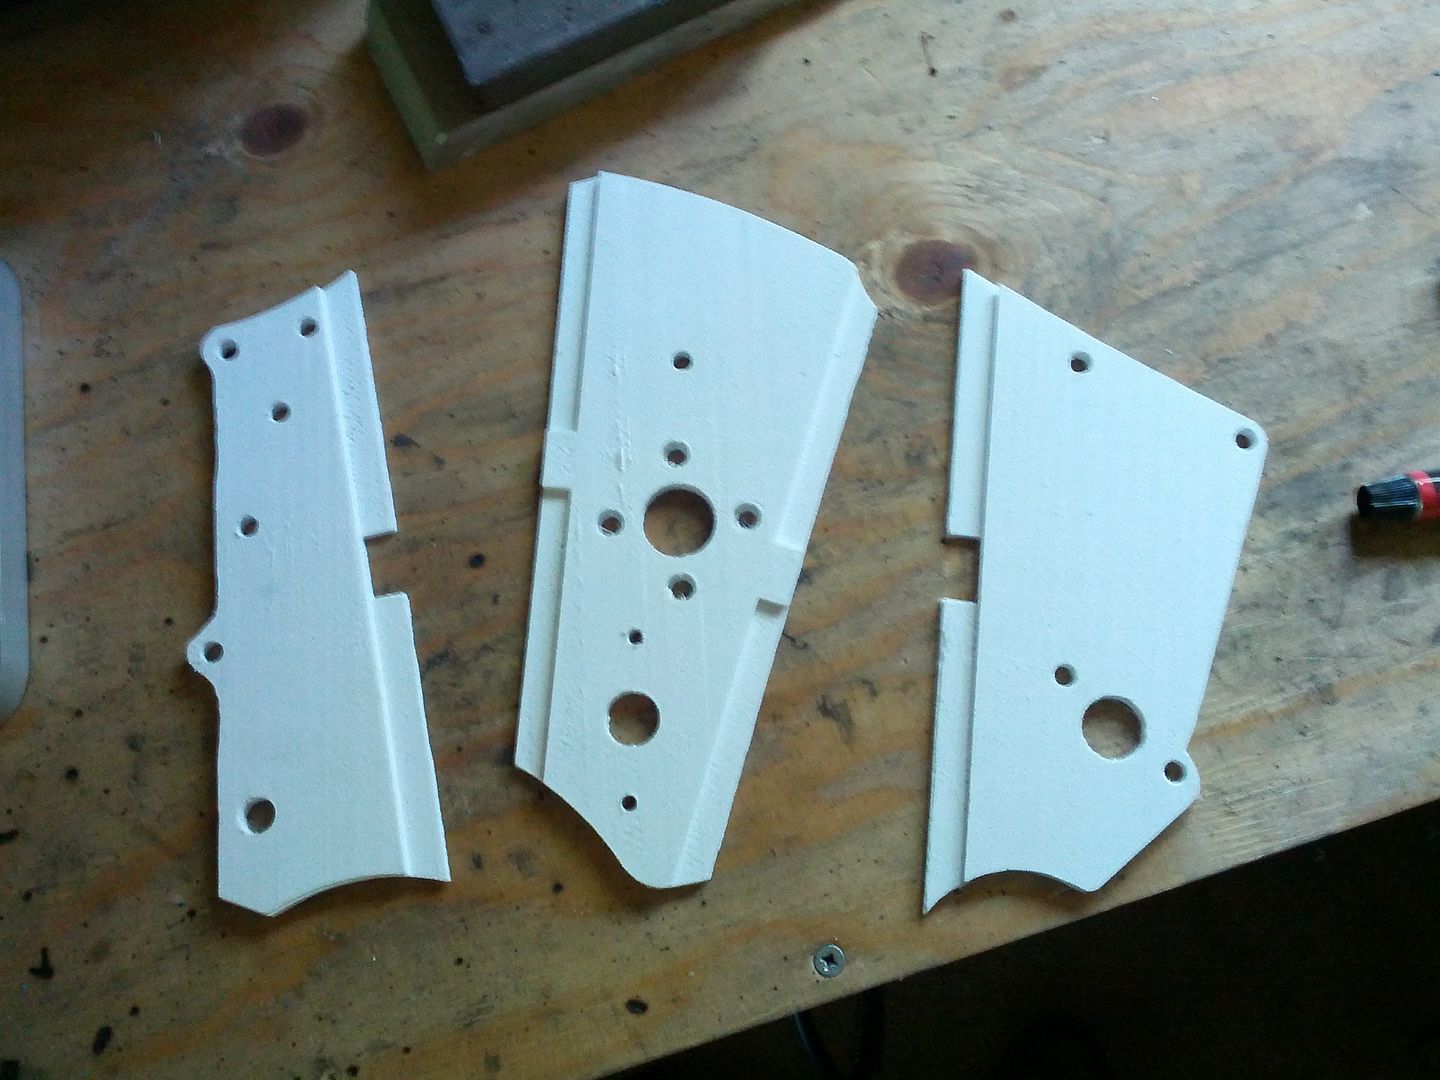
I could not get the cardboard cut accurately enough and cardboard will deflect and deform, so the next step was to use my 3D printer. The printer bed is 200mm square so its not big enough to print in one piece, so i printed 3 pieces with a keyed design to get accurate positioning and then glued them together with epoxy:

Image

I then went through several iterations of printed parts to get the final shape and fit i wanted:

Image

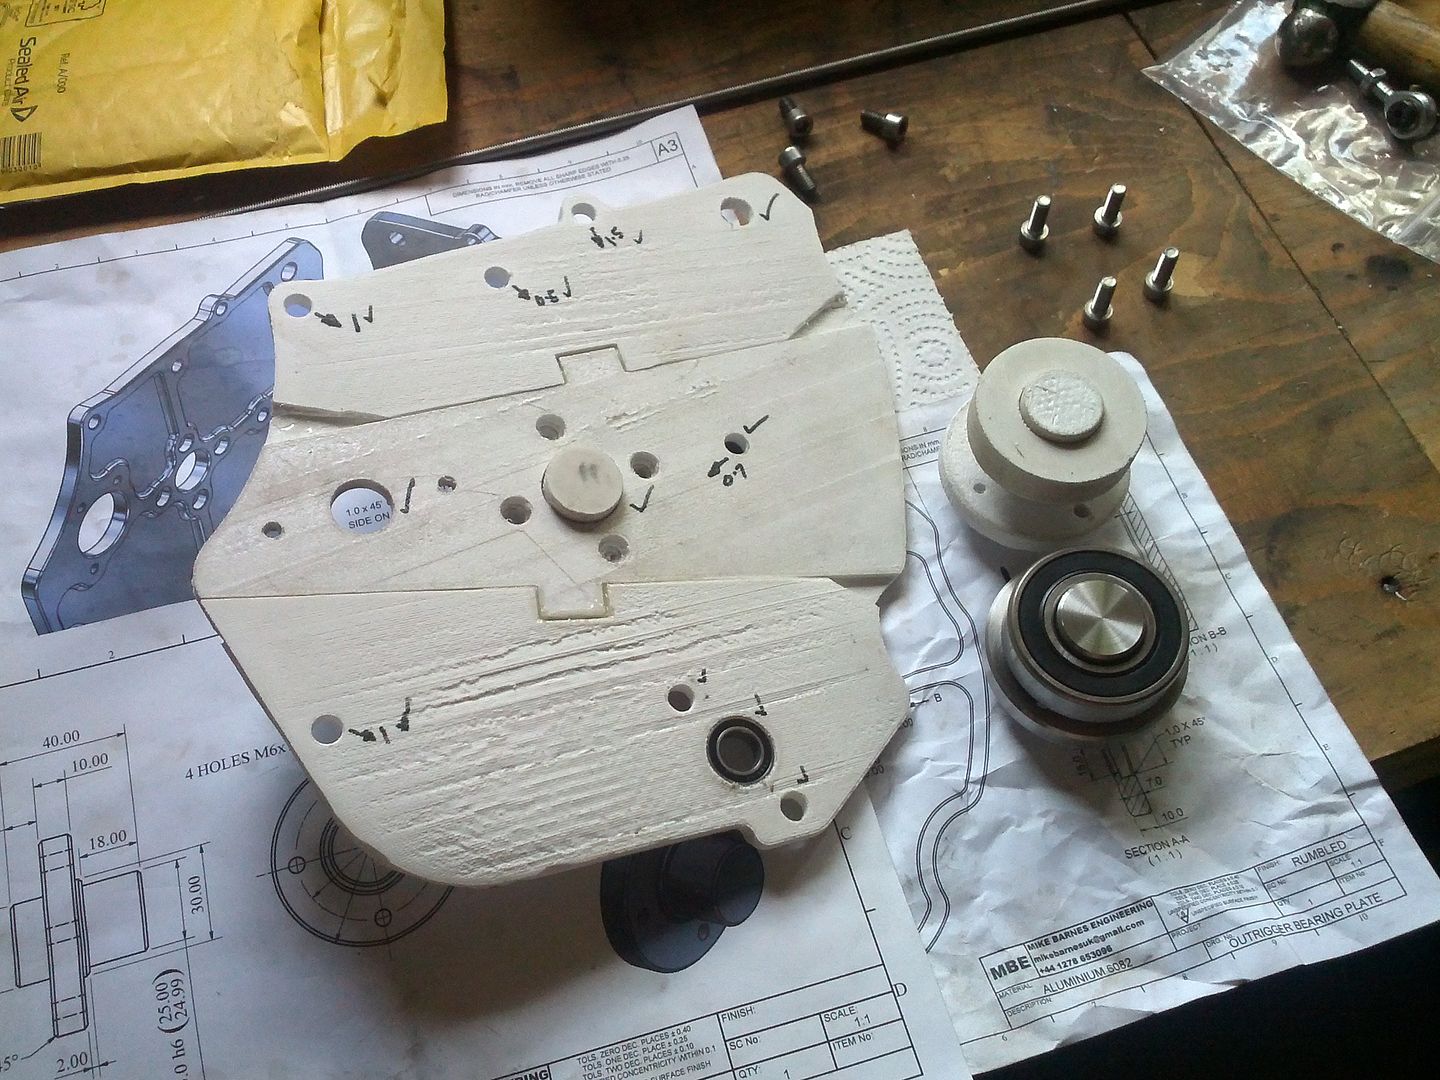
I printed the bearing stub shaft, bearing and posts:

Image

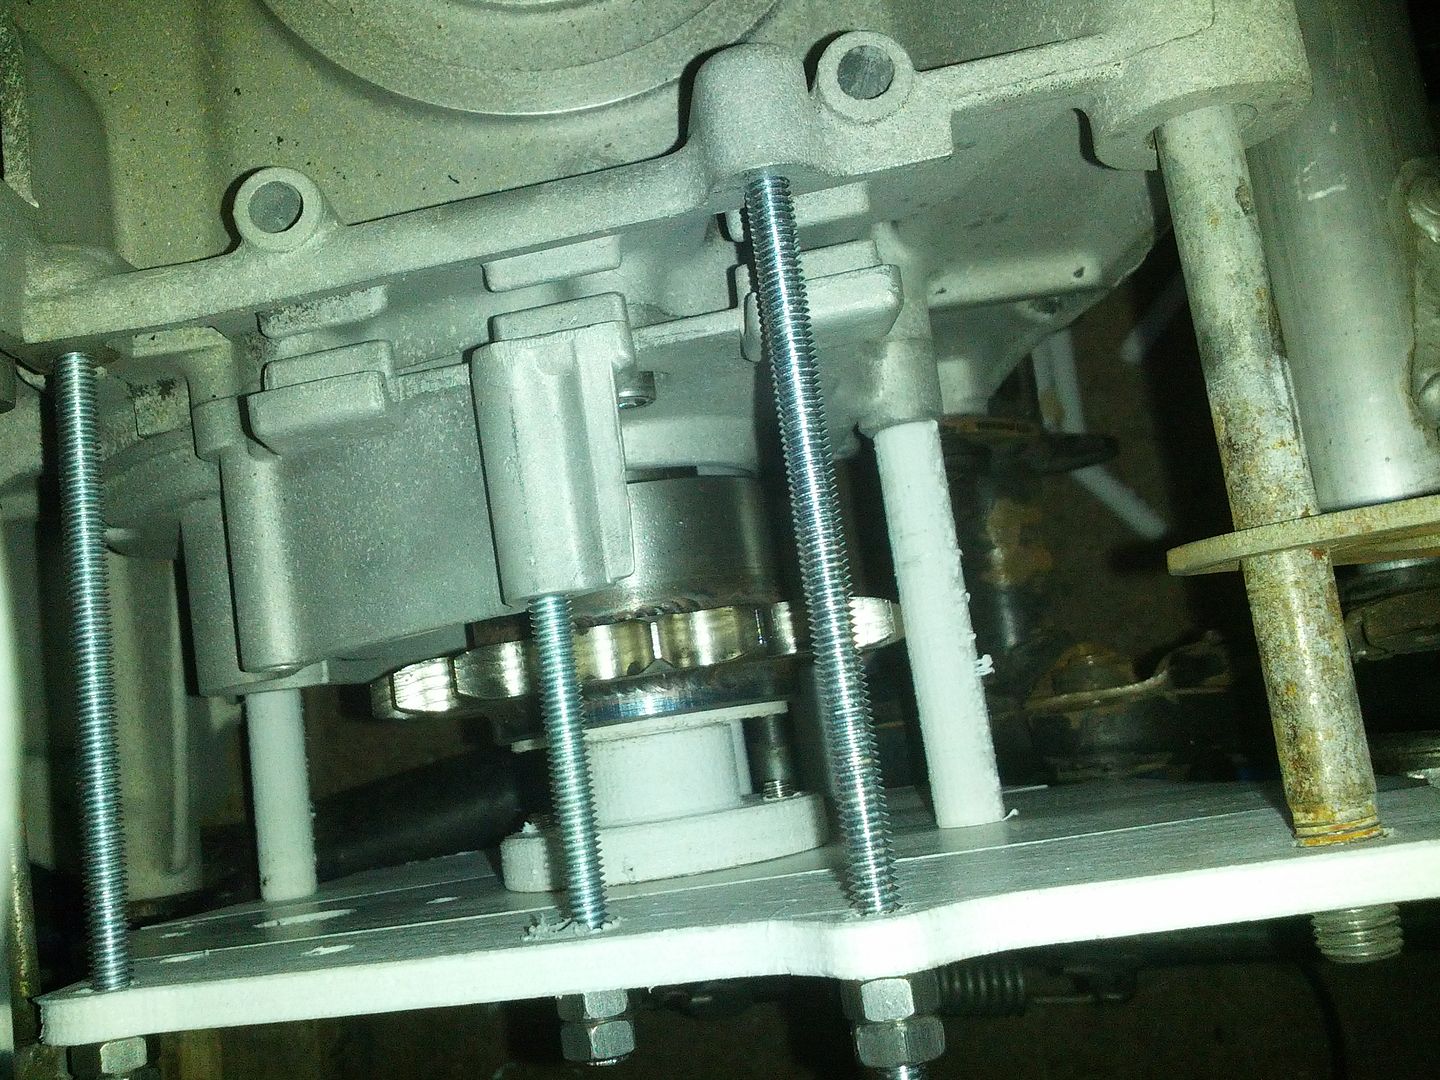
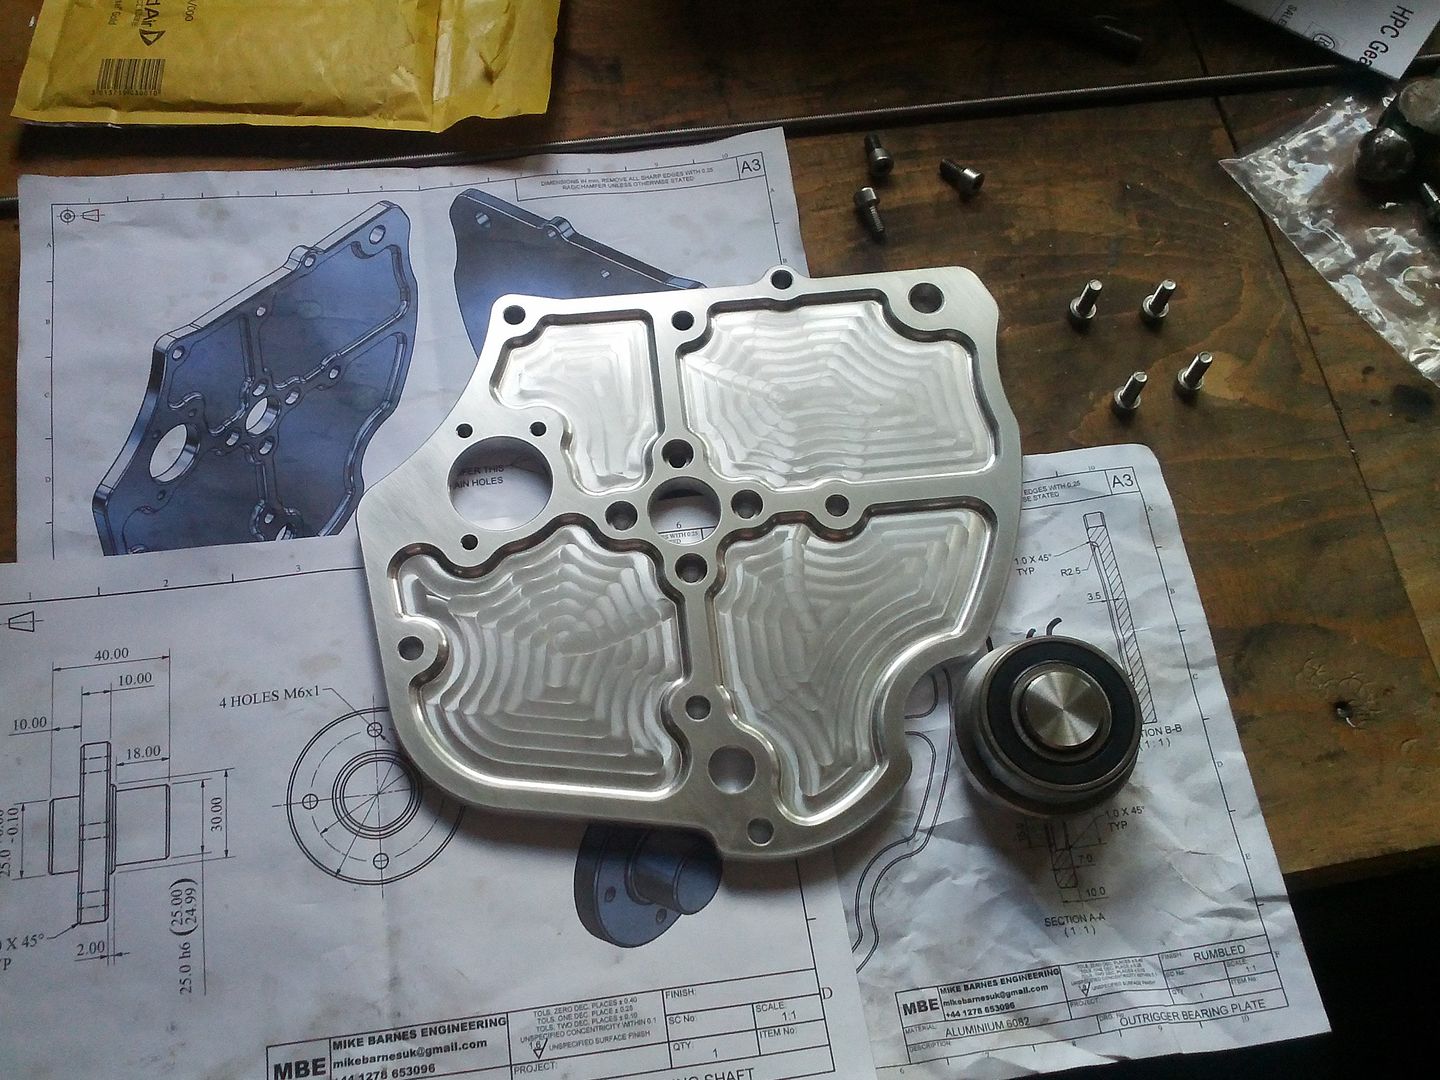
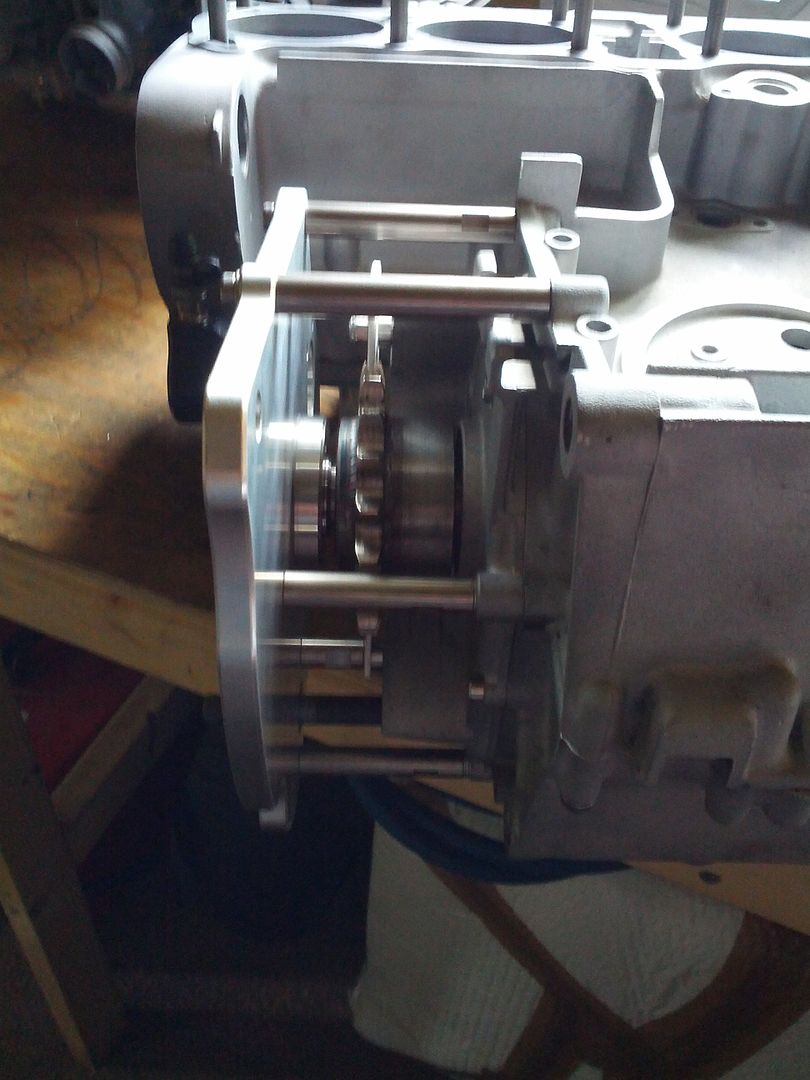
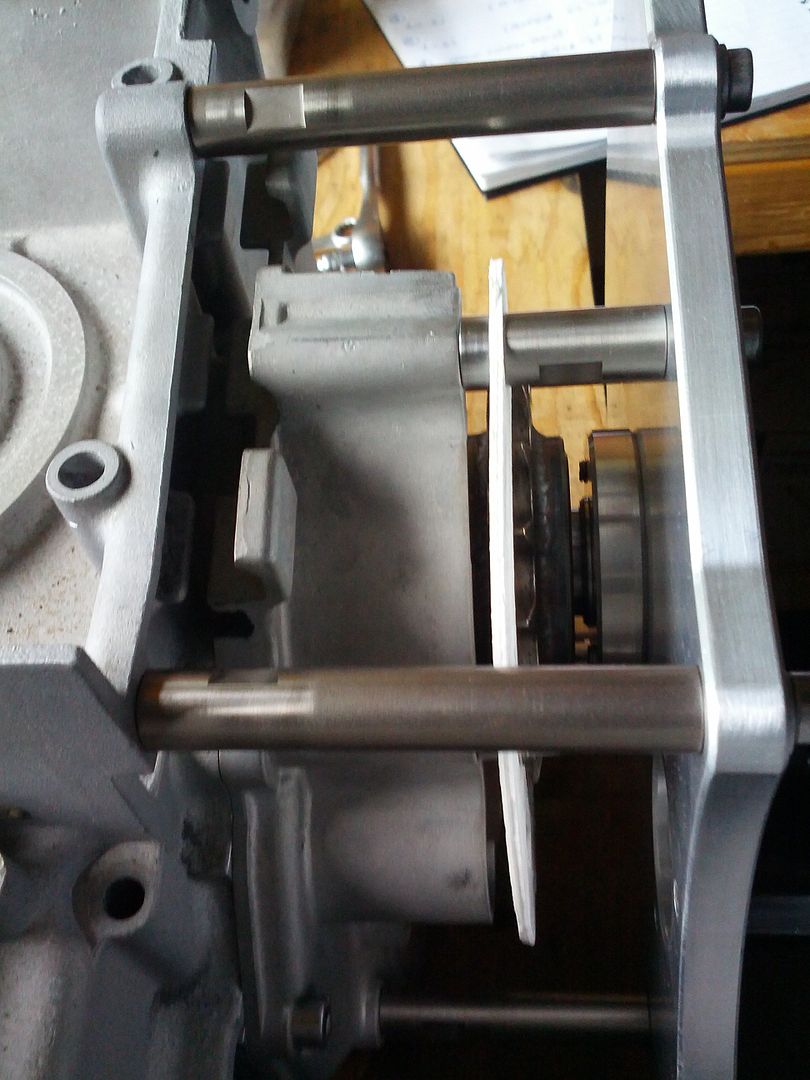
After a few more iterations of the design, i took the plunge and got the outrigger plate and bearing stub shaft CNC machined:

Image

Image

Image

Then fitted it using some threaded bar as a trial, so i could then accurately measure the lengths of the required posts:

Image

Image

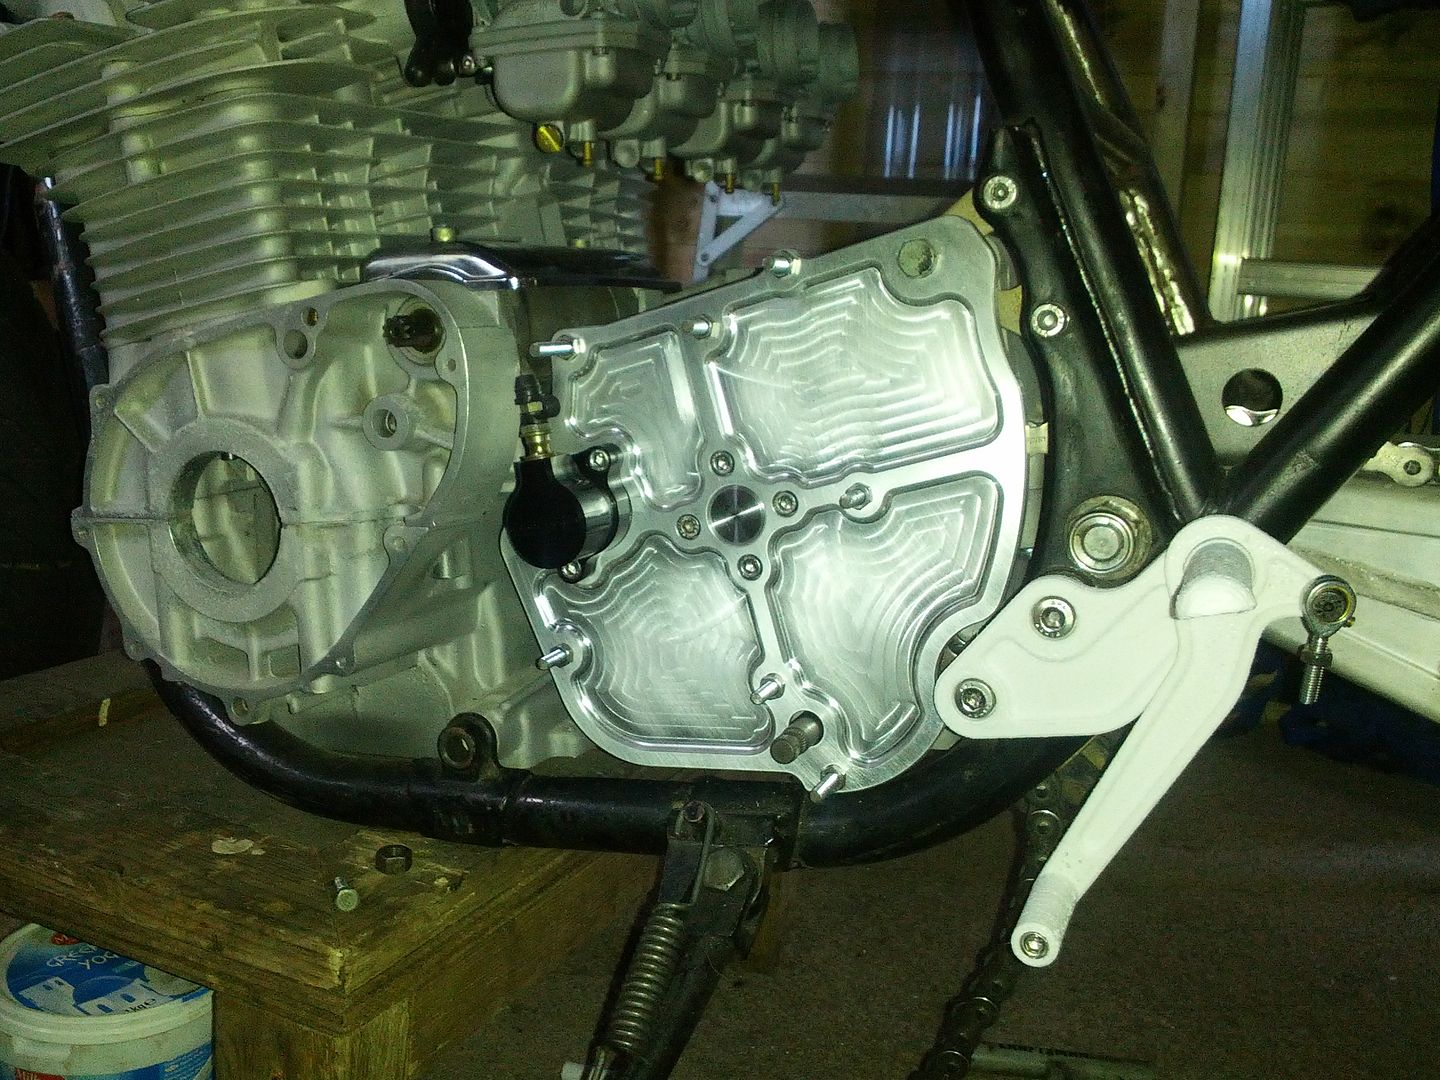
I then ordered the posts in electroless Nickel plated high tensile steel and fitted everything together:

Image

Including plastic (for now) case saver:

Image

Image

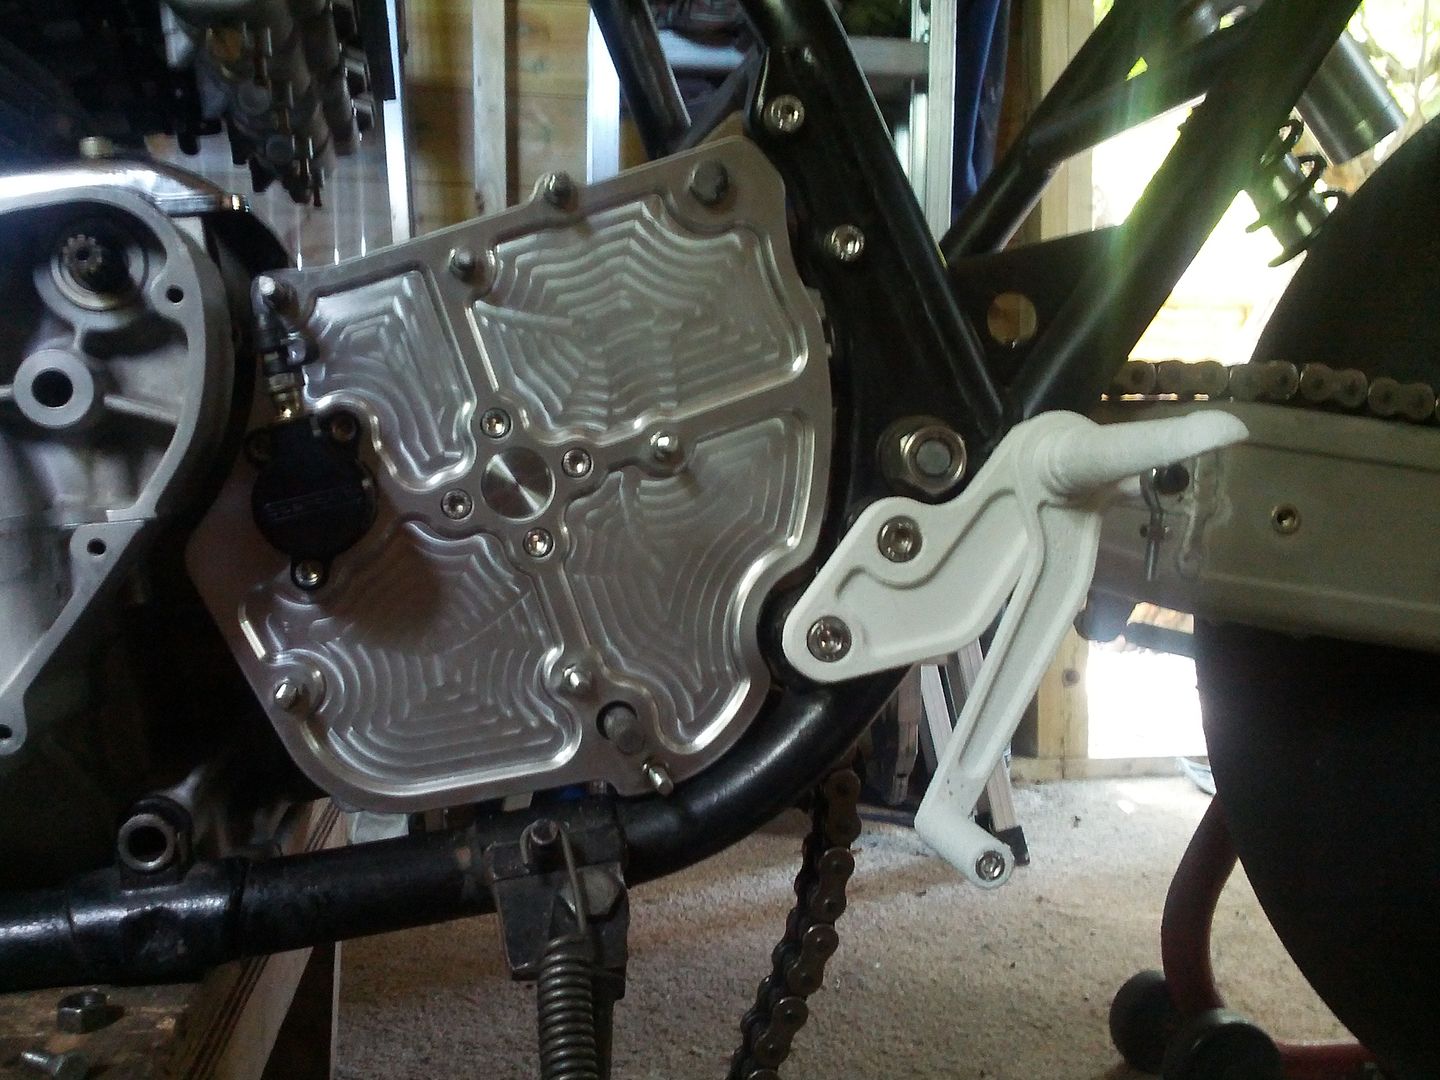
I decided then to design and print the rear engine mounts:

Image

Image

Success! But still a few details to finalise before i am happy with everything :D

Chris Riv
100Club
100Club
Posts: 193
Joined: 15th Jun 2006
Location: UK

#57 PostAuthor: Chris Riv » Sun Sep 04, 2016 9:45 am

Thats some very nice work youre doing there.

User avatar
Ginger Bear
Hardcore
Hardcore
Posts: 5512
Joined: 16th Dec 2008
Location: In the Dark.
Contact:

#58 PostAuthor: Ginger Bear » Sun Sep 04, 2016 9:51 am

As they say, 'the devil is in the detail'...........


........ I'm lovin' it. :hech :hech
Image


# 104


Phil Churchett Award Winner 2011 & 2016 :D

Buzzworkz Best Modified Zed 2016

User avatar
Zomerset Zed
100Club
100Club
Posts: 239
Joined: 30th May 2014
Location: Somerset

The Piston Saga

#59 PostAuthor: Zomerset Zed » Thu Sep 08, 2016 12:17 pm

I still required either a single Wiseco 73mm piston and liner or a complete new set of pistons and liners and this was starting to play on my mind a bit as there seemed to be nothing about that was reasonably priced (i'm tight). The alternative was to pay full retail for a complete new piston kit and liners.

Then on Ebay DK were selling a set of 73mm pistons and matching block. I called them and they said they didn't know what they were other than "big bore pistons and block". They said they were perfectly ok and useable and they looked fine in the listings photos. So i took a gamble and this is what i got:

Image

Image

Looks like someone has taken a hammer to the tops of the pistons creating a great combustion feature. The block was full of cracked fins as well, so back it went for a refund.

But no, they had another set and these were 75mm MTC pistons with block, which they wanted to do a straight swap for. So i checked and MTC only do 74mm and 76mm for Z1000, can you please remeasure? The answer was emphatically 75mm. So knowing they were either the 74mm or 76mm i told them to send. After much waiting and meeting couriers in dark alleys the swap was done, so with eager anticipation i opened up the box:

Image

Not only were they 76mm, but they also had some special lightening holes drilled with extreme accuracy in the skirts front and back!! Double bonus!

:cry:

So i asked for a refund (twice bitten). No reply.

After i contacted their "arbitration" guy with endless email threads as proof etc. i got a very unfriendly email saying "send them back" :evil:

So i sent them back at my expense then they eventually refunded me many weeks later except for the postage. So i then had to remind them of the distance selling act and they eventually refunded that too. This all took 4 months of pain and maintaining decorum at all times.

The happy ending is near and in the form of an NOS 73mm Wiseco piston kit which is immaculate and i got off a nice chap on Ebay for £300!! :D

Image

I've now also got some liners from Eastwood racing in Kent at £240, so quite happy now i have a piston solution.

And the lesson is, dont use DK. They are a bunch of dishonest, shonky bastards!

User avatar
harri183
Custard Cream
Custard Cream
Posts: 785
Joined: 20th Feb 2013
Location: N Yorkshire

#60 PostAuthor: harri183 » Thu Sep 08, 2016 1:08 pm

Is it that, or they have a set of 16 year olds on YT that don't have a clue. I have asked them many questions before buying things and some haven`t a clue. Looking good by the way.


Return to “Projects”

Who is online

Users browsing this forum: No registered users and 23 guests