What pissed me off was the dishonest way they handled my legitimate complaints and tried to ignore me again and again, probably hoping i'd go away!
Hello Guest User,
Please feel free to have a look around the forum but be aware that as an unregistered guest you can't see all of it and you can't post.
To access these 'Registered Users Only' areas simply register and login.
Please feel free to have a look around the forum but be aware that as an unregistered guest you can't see all of it and you can't post.
To access these 'Registered Users Only' areas simply register and login.
My Ultimate Zed
Moderators: chrisu, paul doran, Taffus, KeithZ1R
-
Zomerset Zed

- 100Club

- Posts: 239
- Joined: 30th May 2014
- Location: Somerset

-
Zomerset Zed
- 100Club
- Posts: 239
- Joined: 30th May 2014
- Location: Somerset
Getting Cranky
No, i'm not building a V8. Ooh now hang on, no that will have to wait:
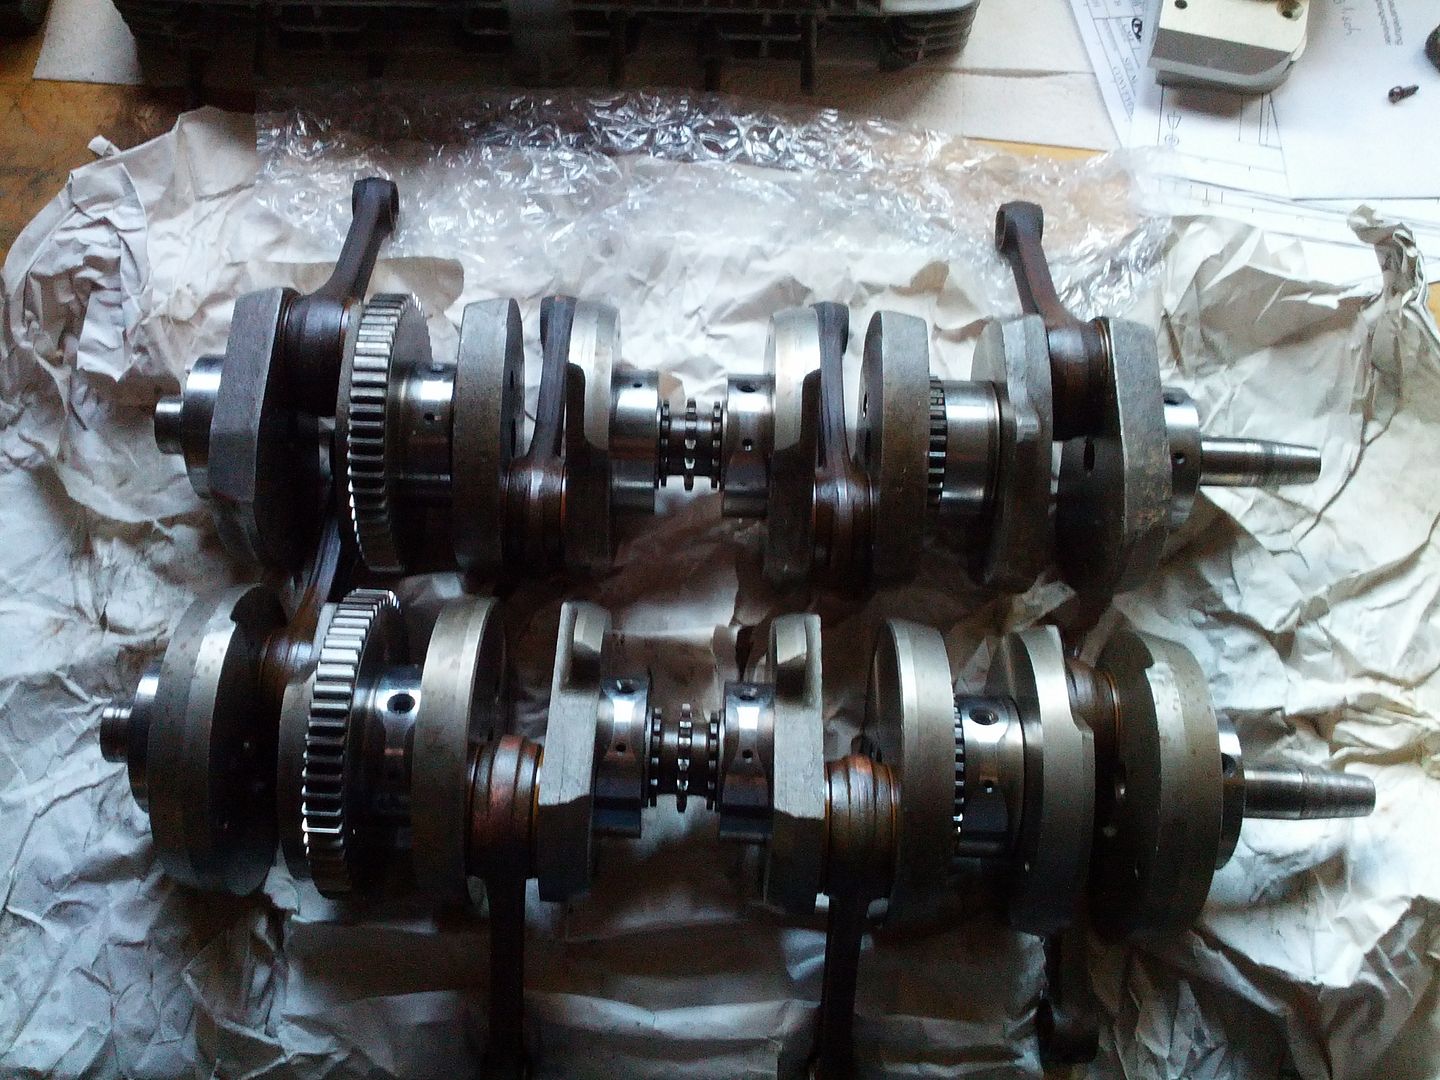
The original full web crank (bottom) had a few defects including a few part worn bearings and a cooked con-rod. So i bought a second crank, albeit the slightly lighter profiled web crank (top). This had a hammered rod though:
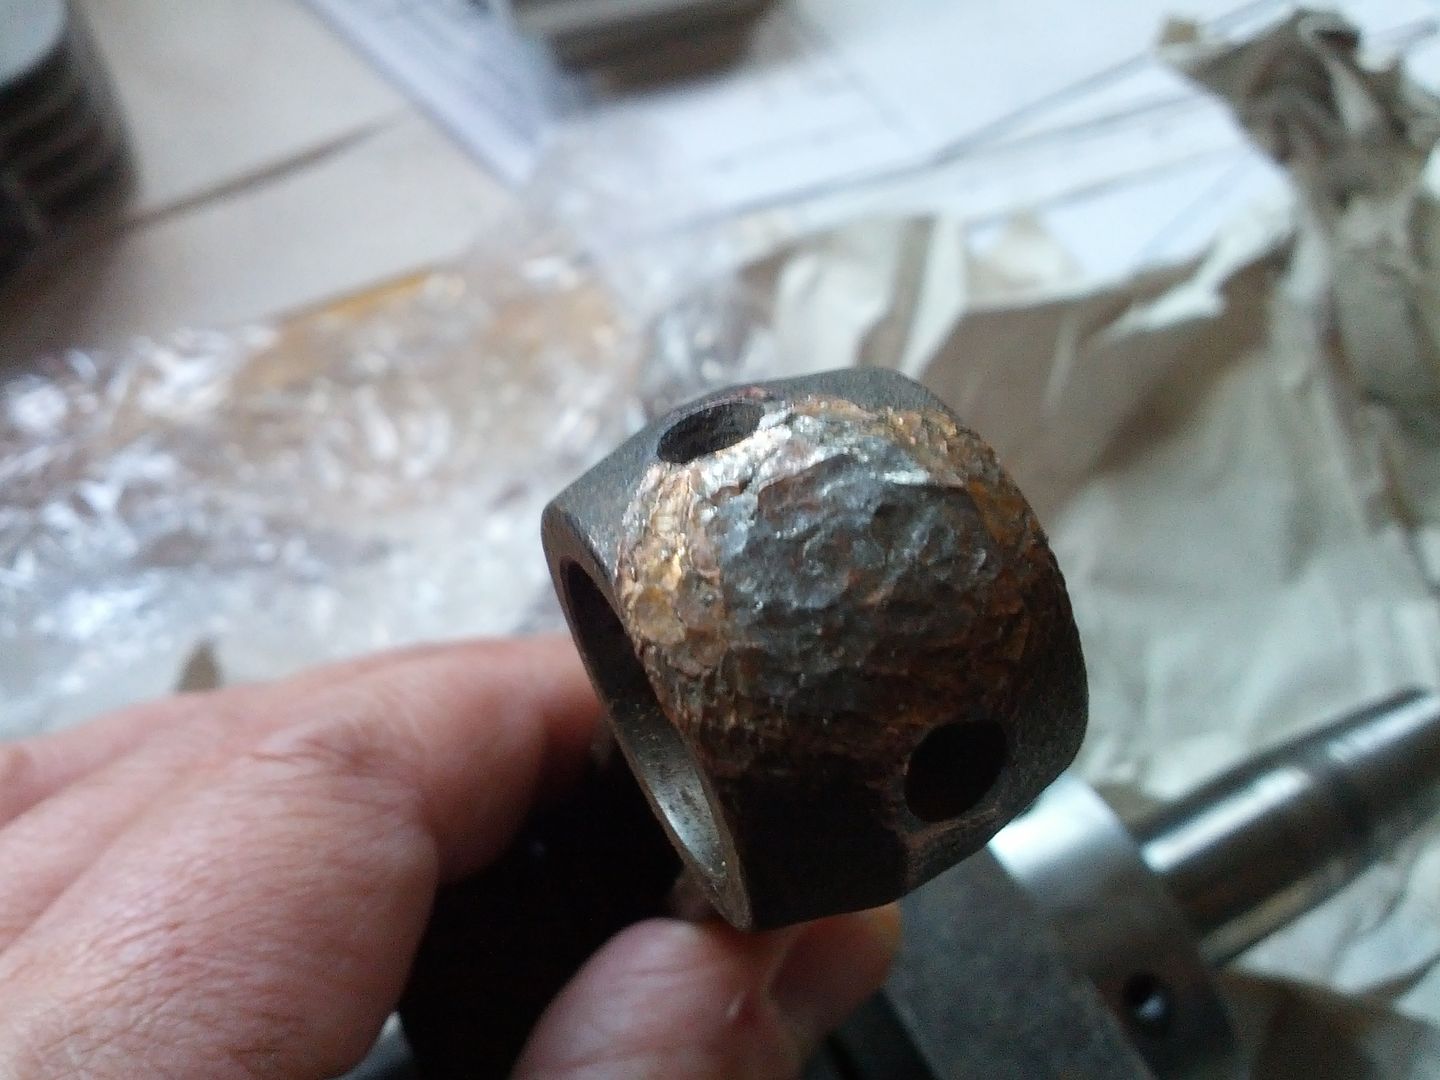
So i took them both to Ray Debben with the view to getting one good crank out of two. Ray advised that the lighter crank was a better basis for a new assembly as it had more re-usable components. This was music to my lugs as i really wanted the lighter crank which will hopefully speed up response a wee bit
This what Ray built for me:
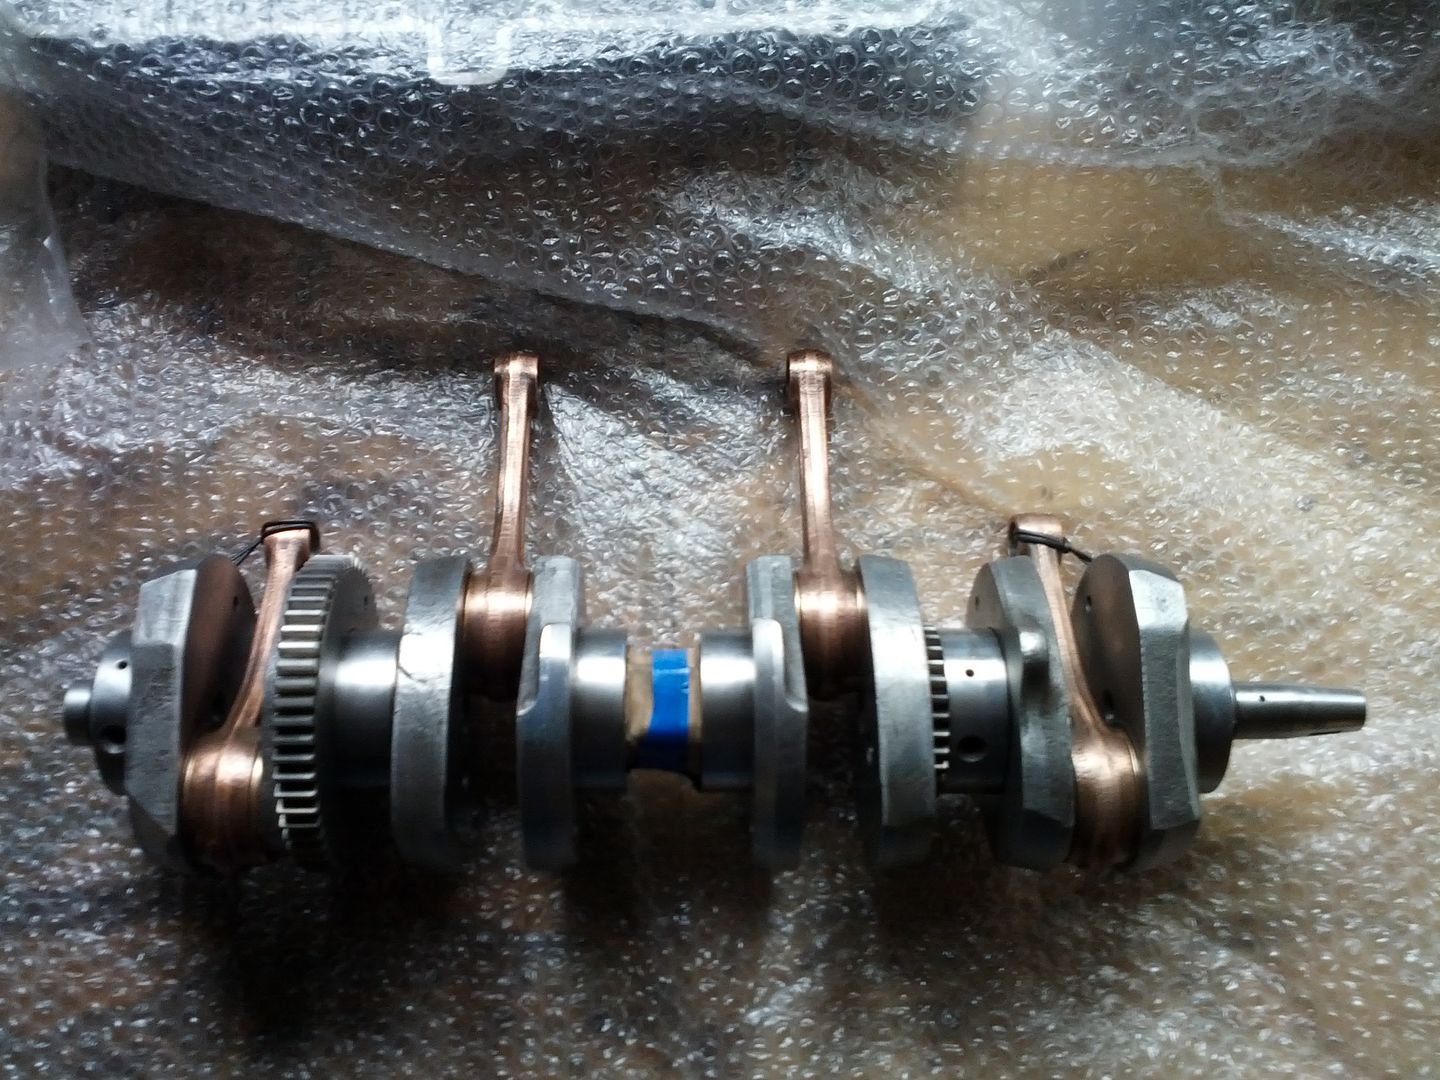
Mmmmm
Unfortunately when i came to inspect it prior to fitting (yes i know i should have checked it all straight away) i found that one of the welds was cracked (actaulay my Dad noticed it on a photo i sent him):
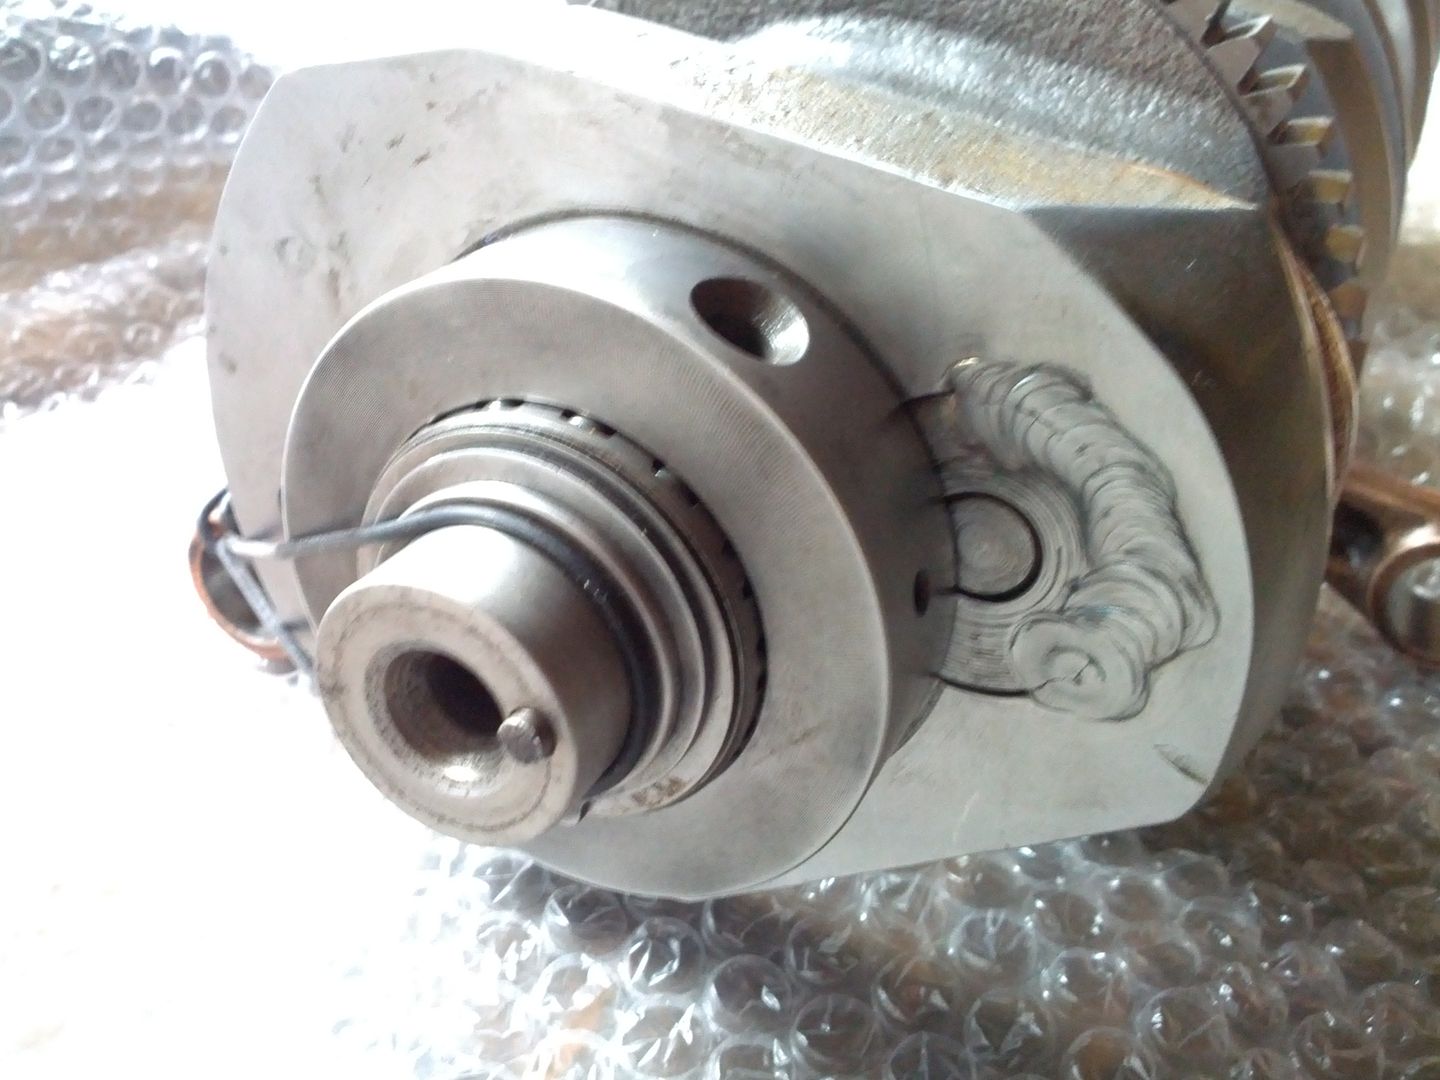
So back to Ray's where he checked alignment (all good) ground back the weld and re-welded and cleaned up. He also managed to sell me some higher rated gearbox bearings
-
Zomerset Zed
- 100Club
- Posts: 239
- Joined: 30th May 2014
- Location: Somerset
Bottom end
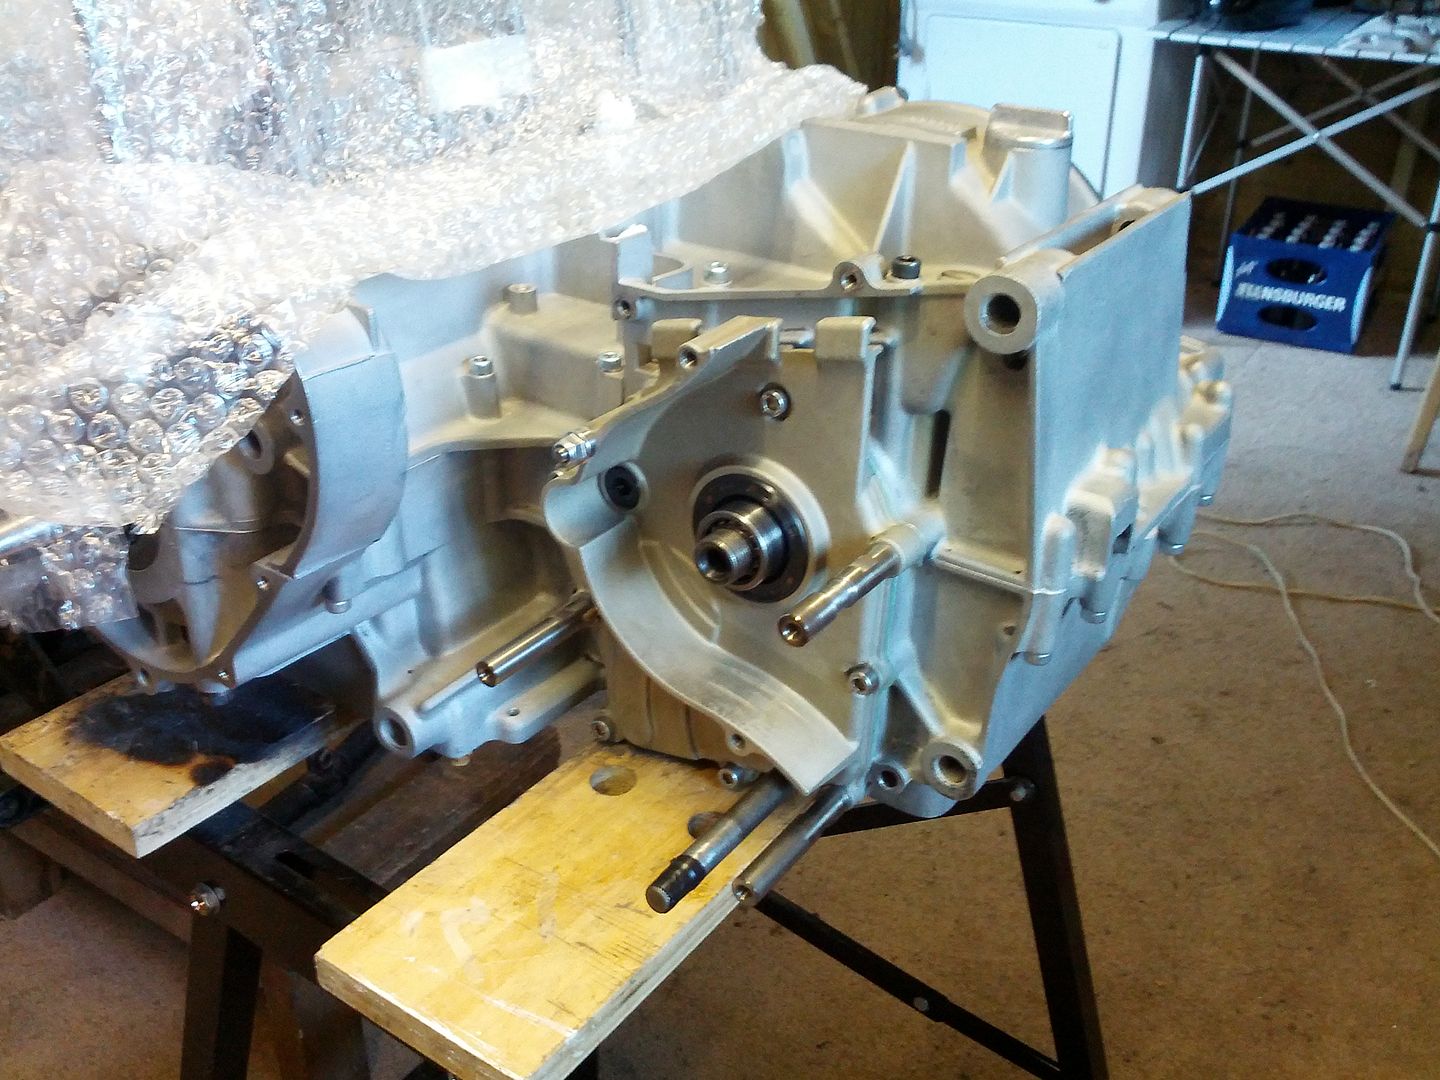
So its now time to start building up the engine. The aim is to get the bottom end , including the pistons and block built up before the shite weather and long nights set in which will detract from the whole shed experience.
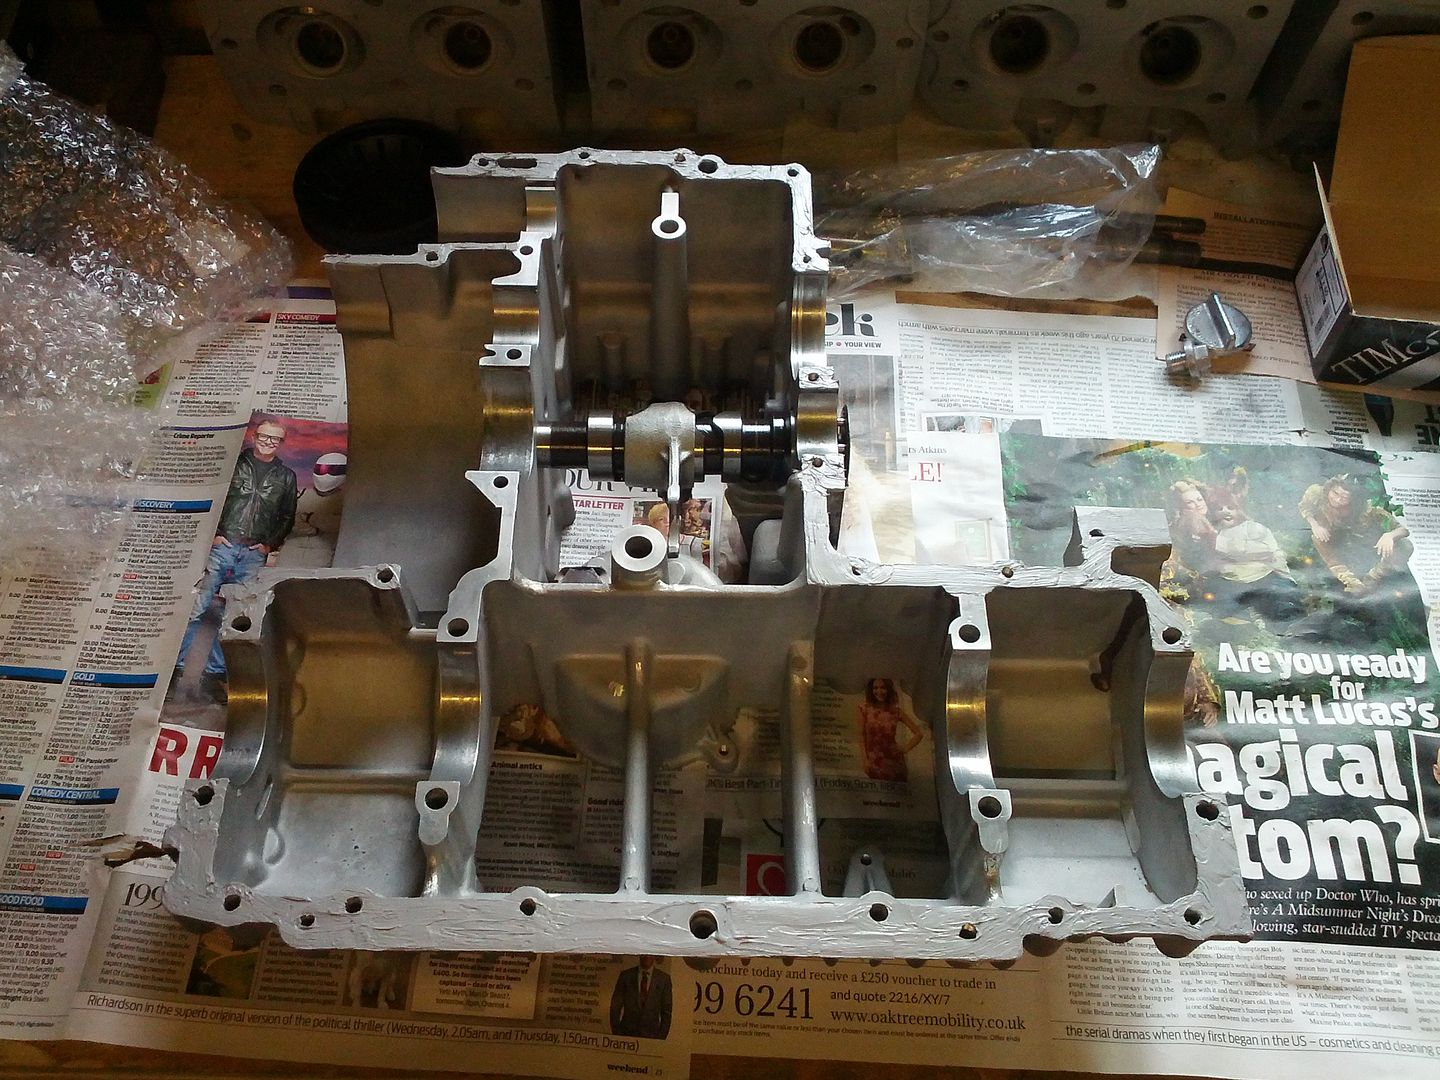
1st are the crank cases:
I removed all burrs and casting lumps left by Kawasaki san. I ordered all the required dowels circlips, bearings etc. at the same time for the gearbox build. I like to "soft edge" the crank case mating surfaces and bearing journals with a scraper and then clean them up with wire wool. I then set about a multi stage cleaning process, involving heat, solvents, water blaster, and compressed air line:
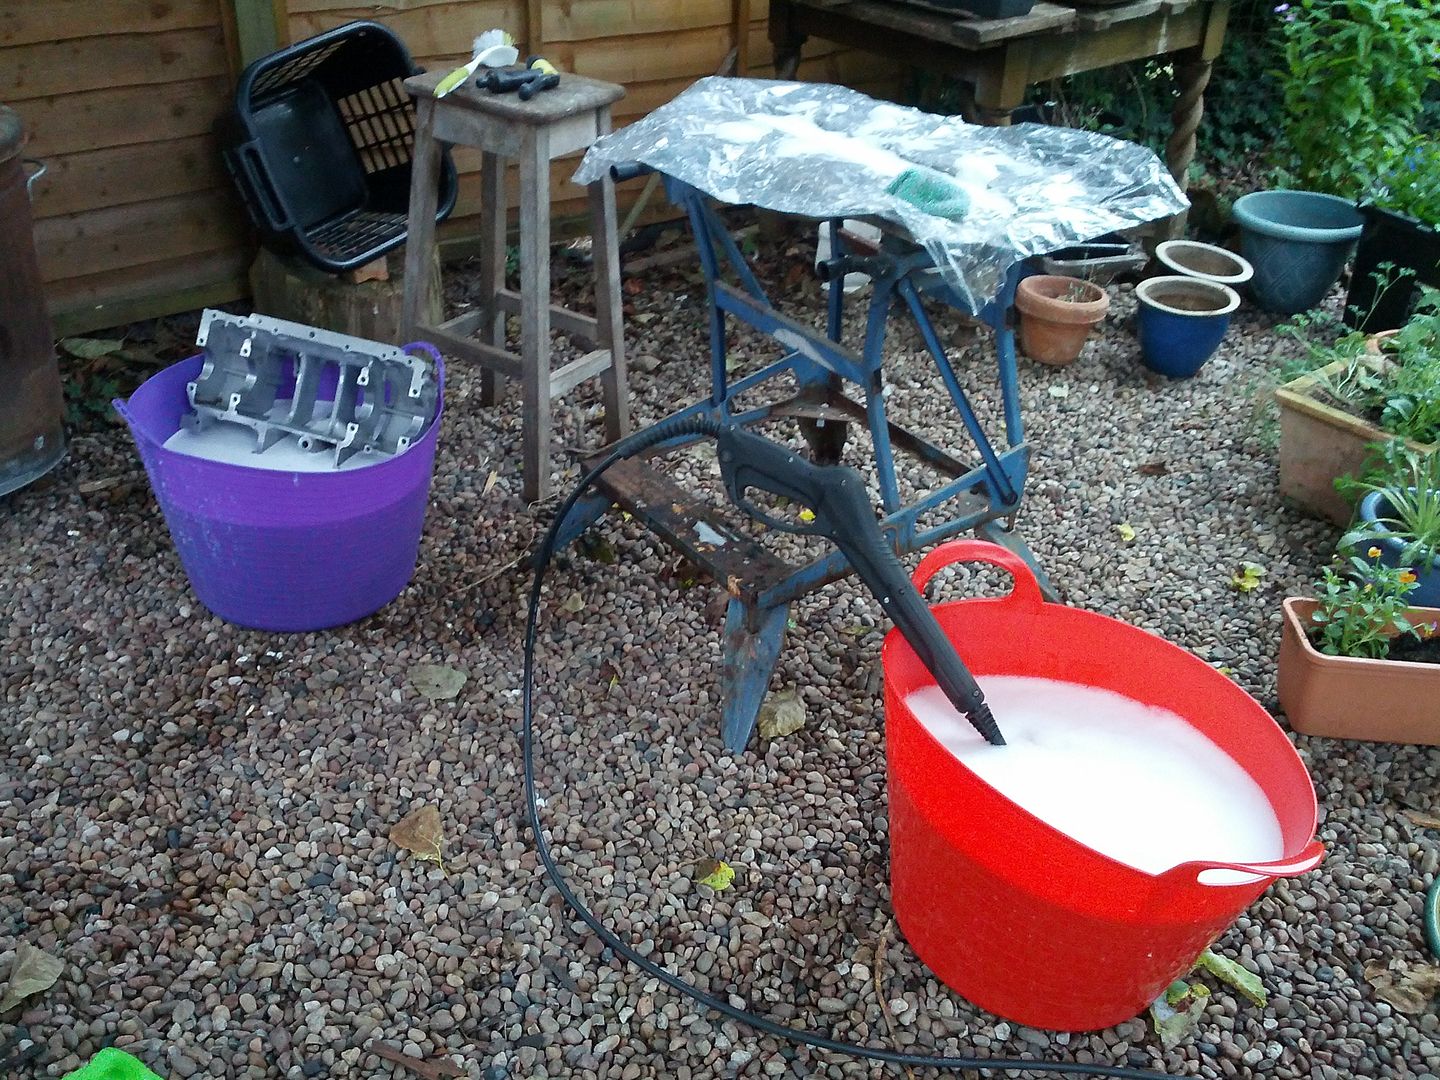
and this is the result:
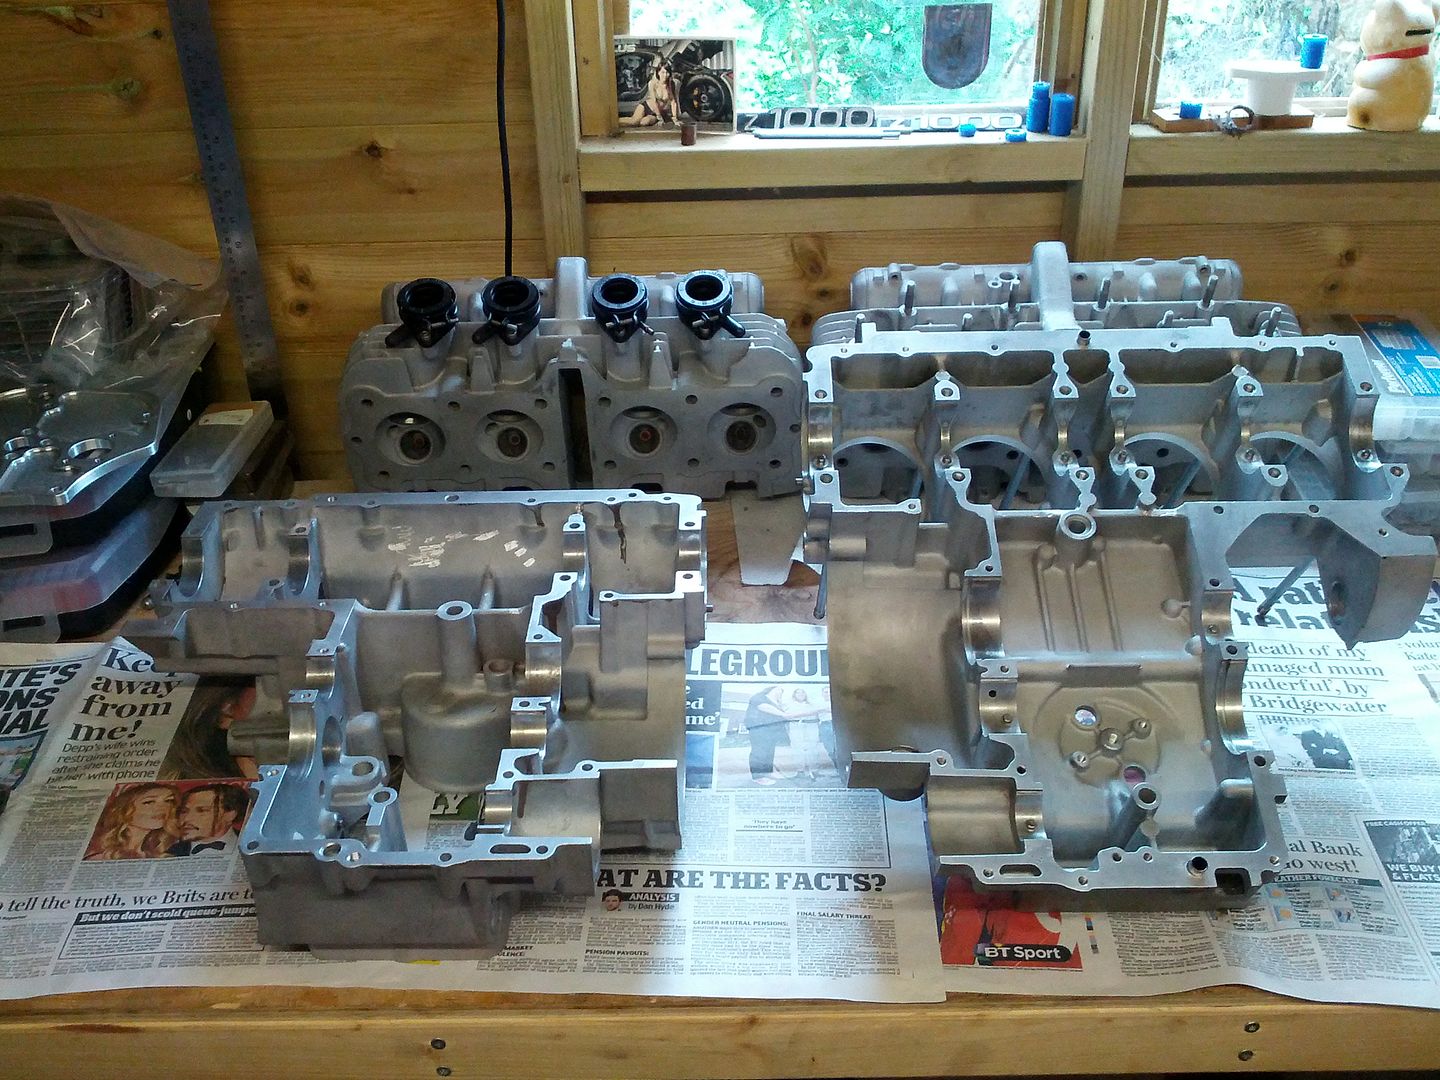
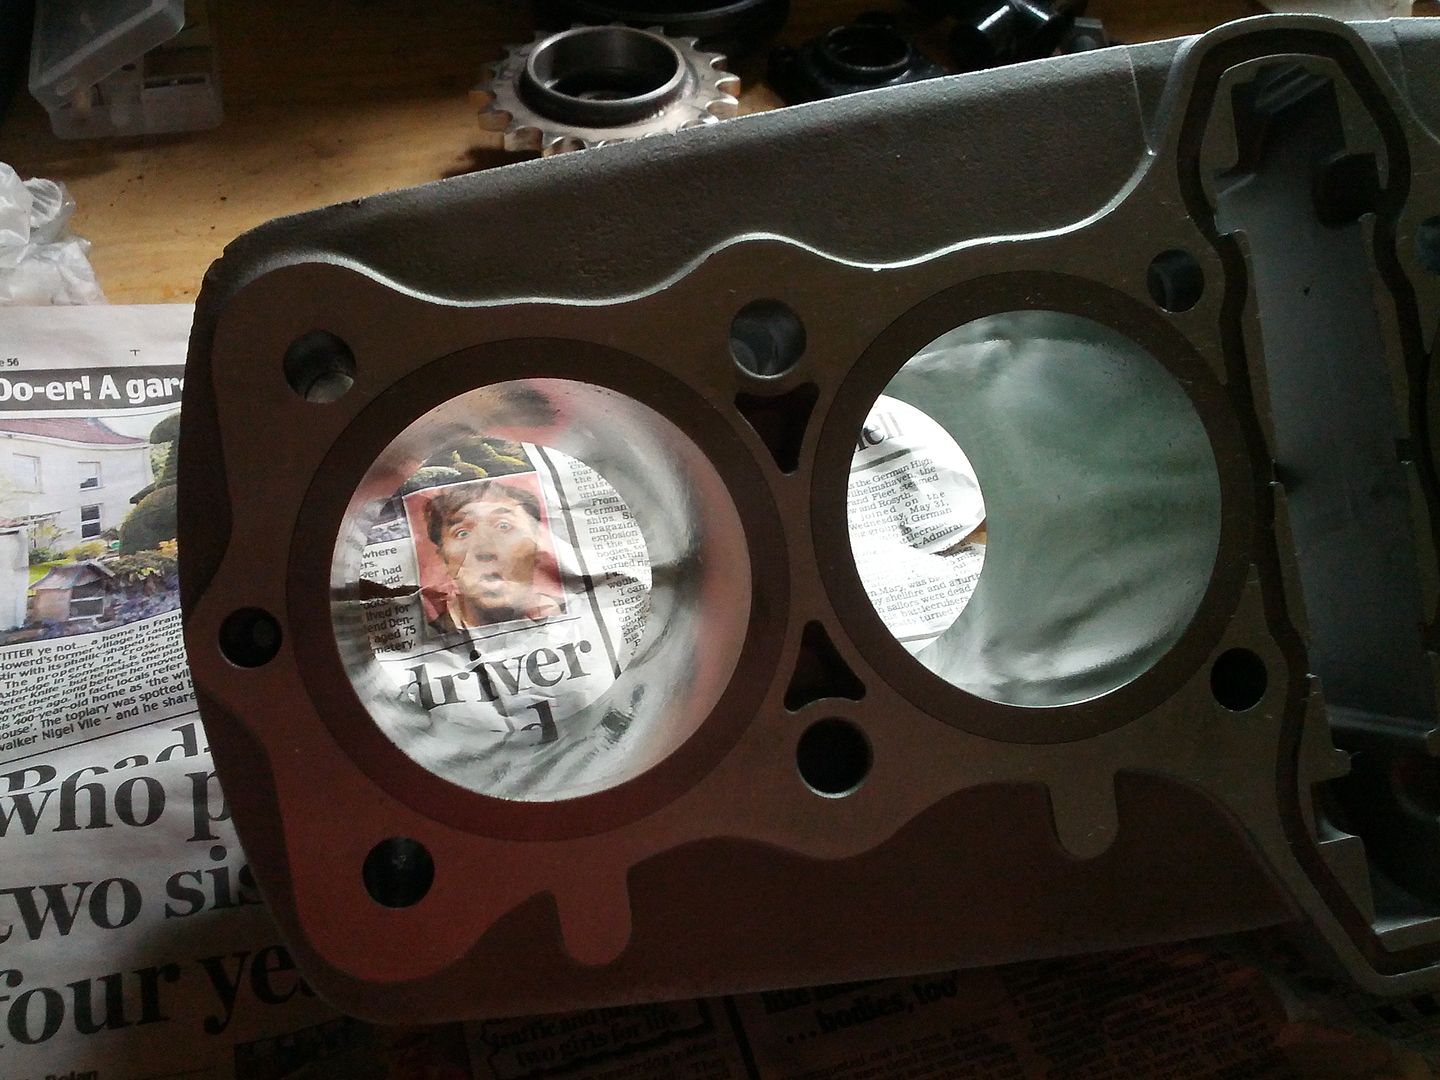
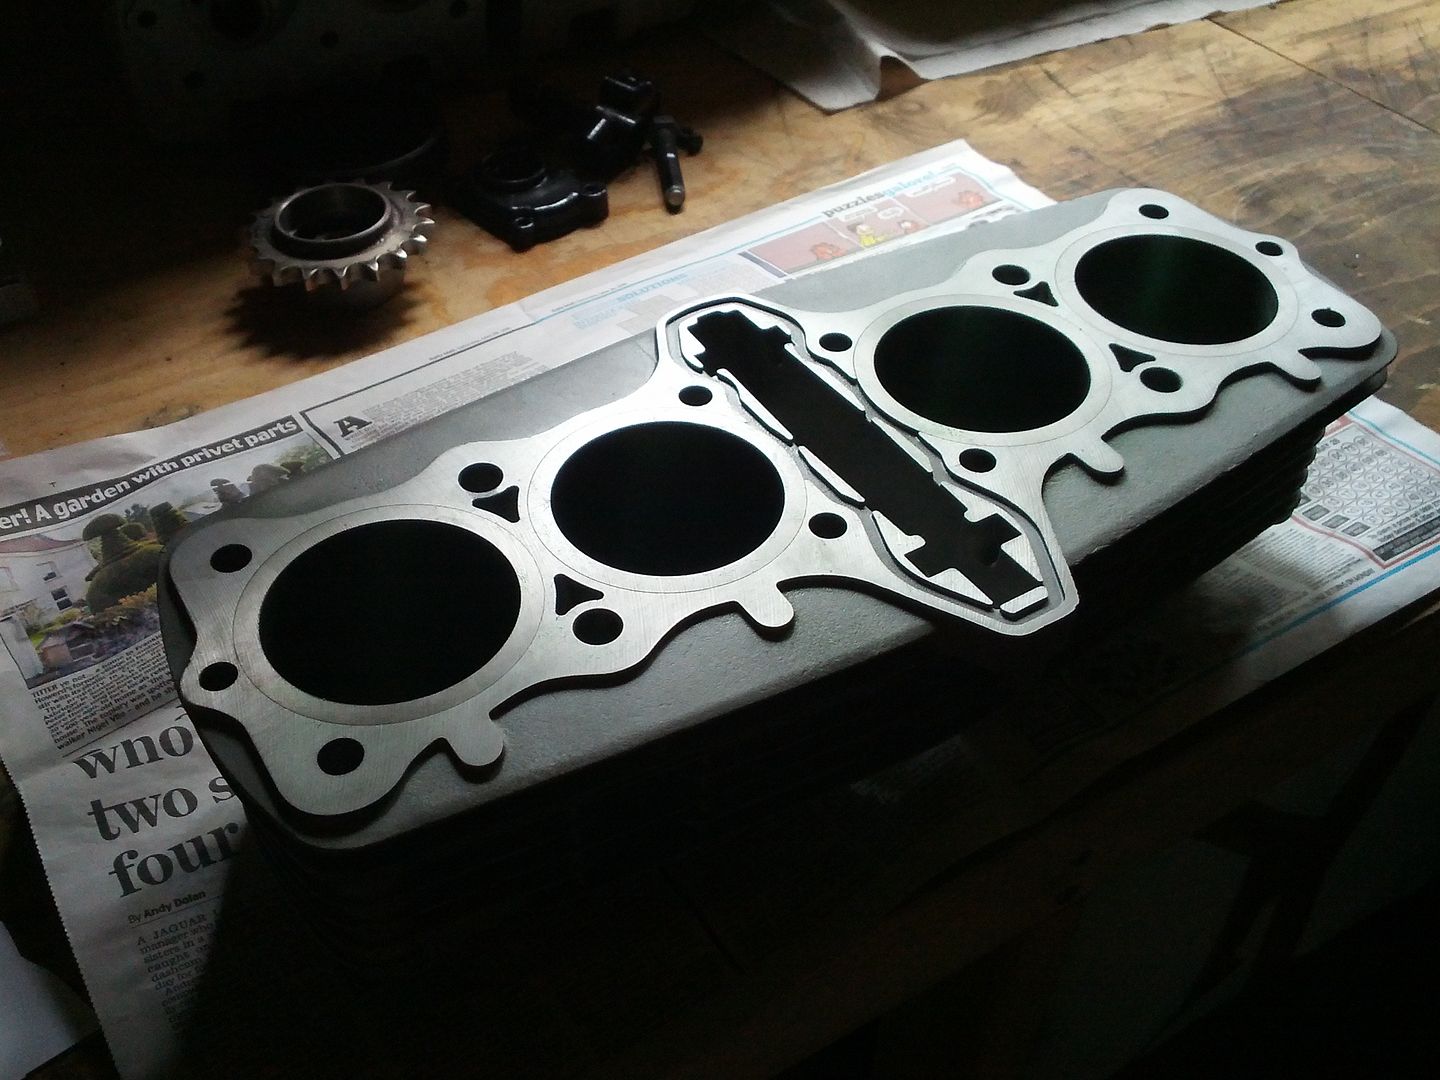
Prior to this i took my top crank case, block, new pistons and liners to Hamlins engineers in Bridgwater to remove the old liners, install new liners, bore and hone and machine the crankcase apertures for accepting the oversize liners. They have done a very good job and it seems their reputation is well deserved.
Don't you love building engines!
1st are the crank cases:
I removed all burrs and casting lumps left by Kawasaki san. I ordered all the required dowels circlips, bearings etc. at the same time for the gearbox build. I like to "soft edge" the crank case mating surfaces and bearing journals with a scraper and then clean them up with wire wool. I then set about a multi stage cleaning process, involving heat, solvents, water blaster, and compressed air line:

and this is the result:

Prior to this i took my top crank case, block, new pistons and liners to Hamlins engineers in Bridgwater to remove the old liners, install new liners, bore and hone and machine the crankcase apertures for accepting the oversize liners. They have done a very good job and it seems their reputation is well deserved.


Don't you love building engines!
-
Zomerset Zed
- 100Club
- Posts: 239
- Joined: 30th May 2014
- Location: Somerset
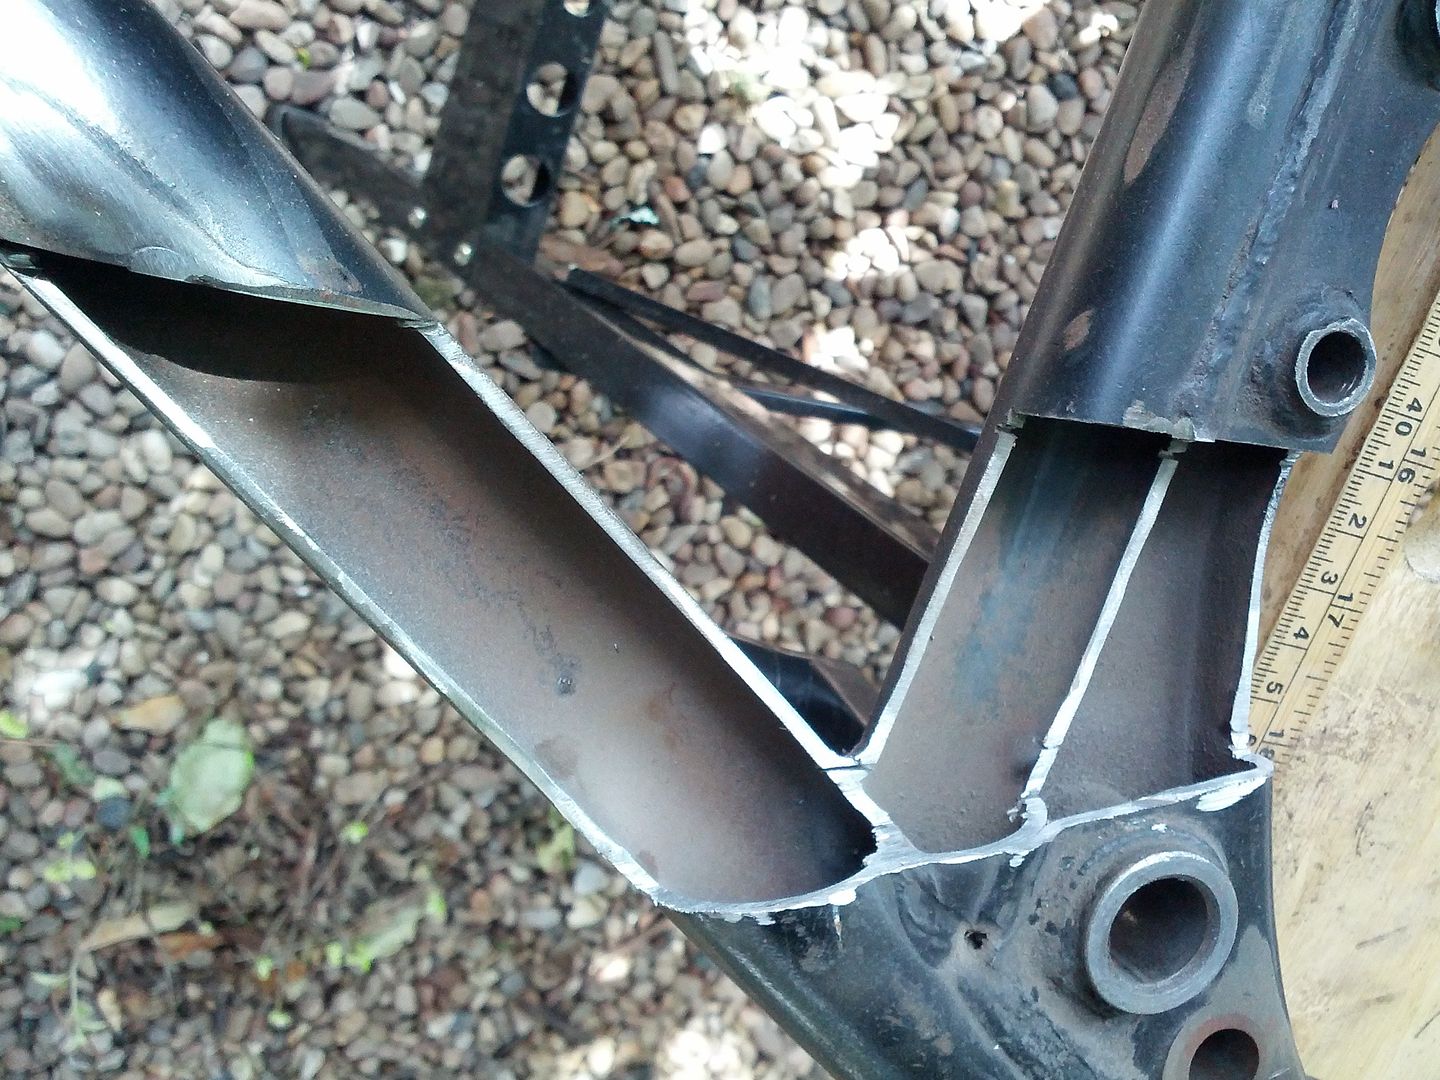
Chain run, continued
On assembling the offset sprocket and slinging on an old 530 chain i was not happy with the way the chain was hanging up on bottom flange of the upper plate i had tacked in:
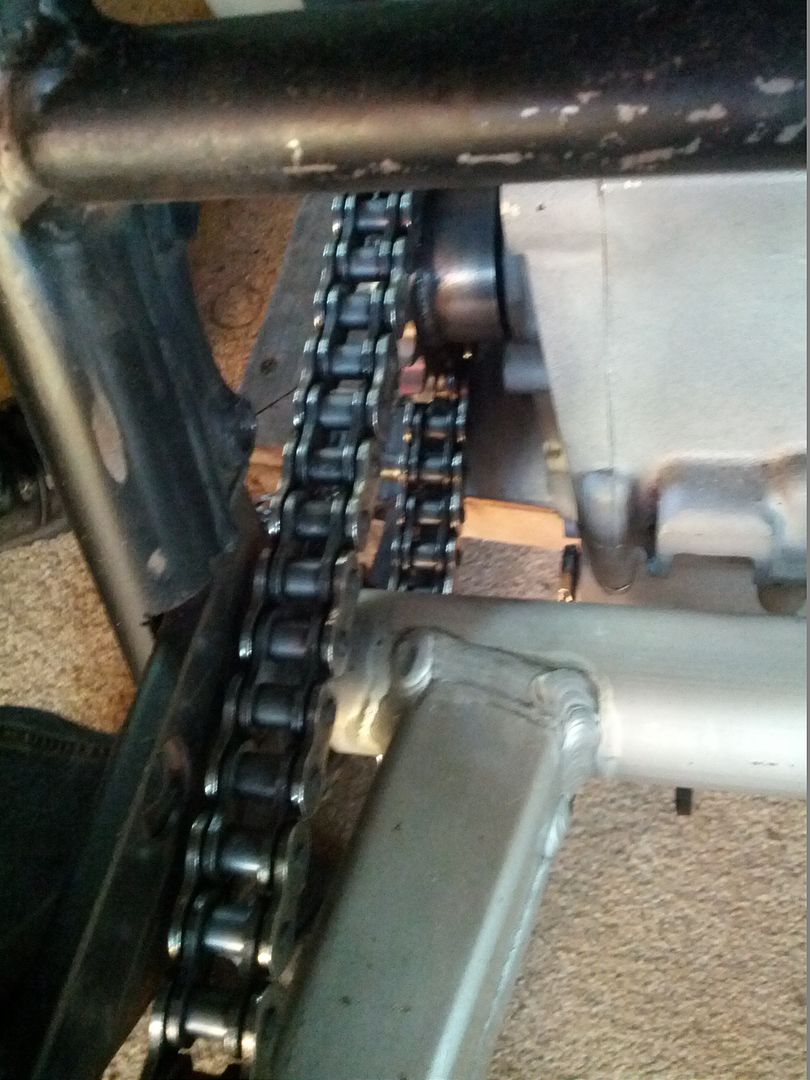

So its a re-jig of the plate to lower the rear edge by 10mm:
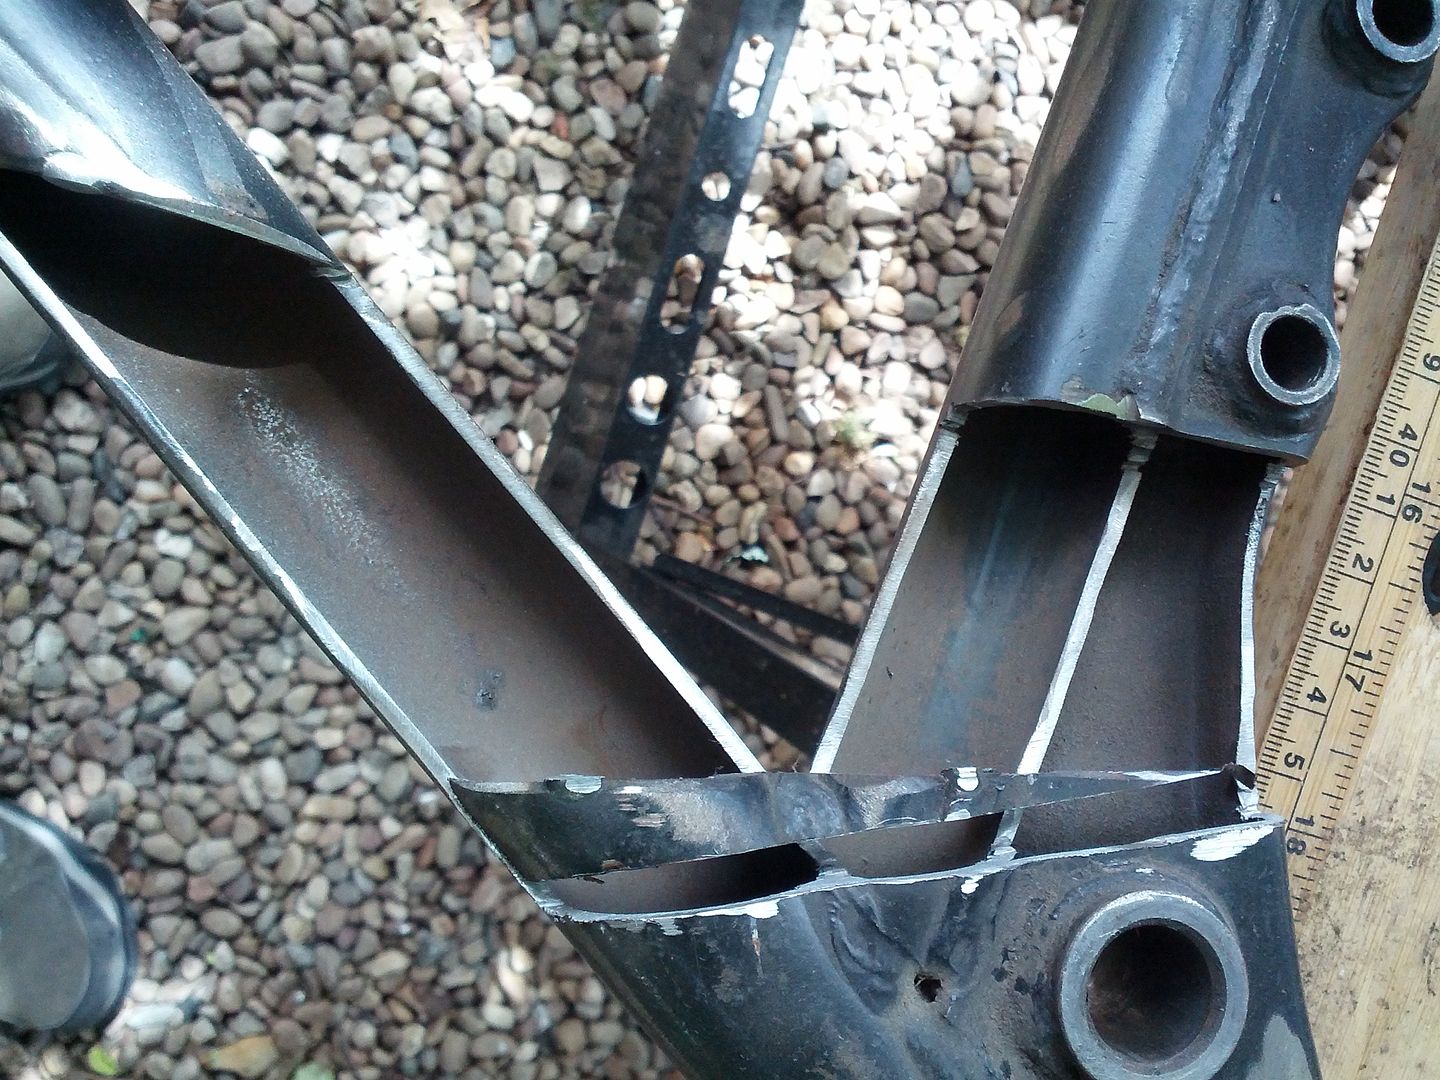
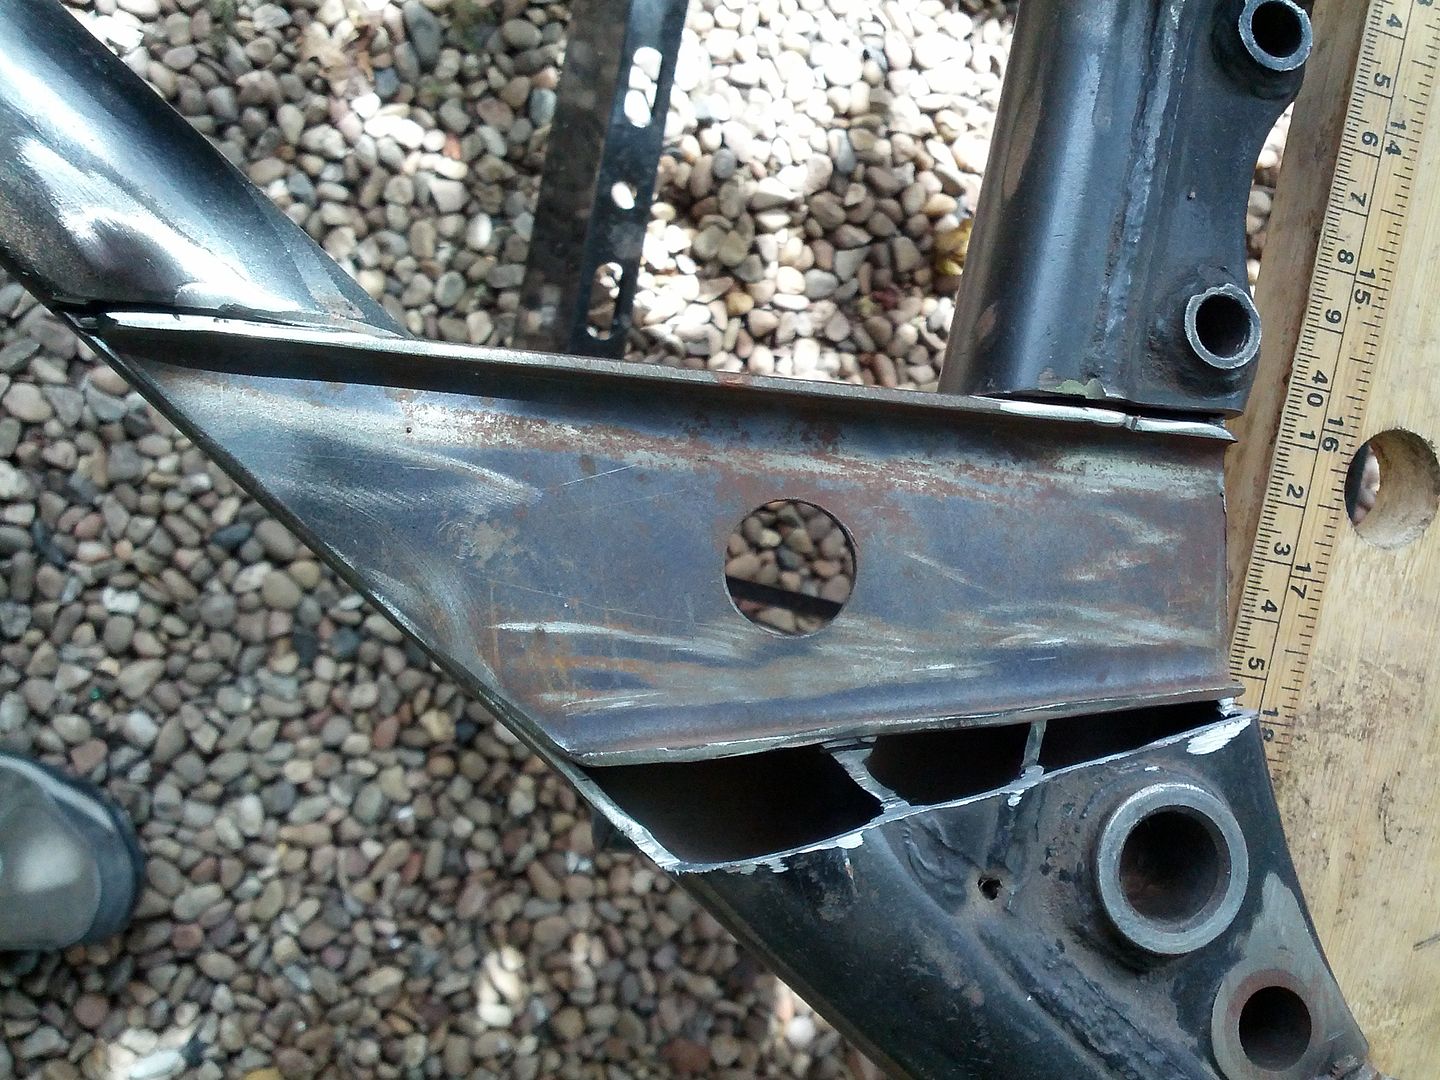
Cut a new wedge to bridge the gap:
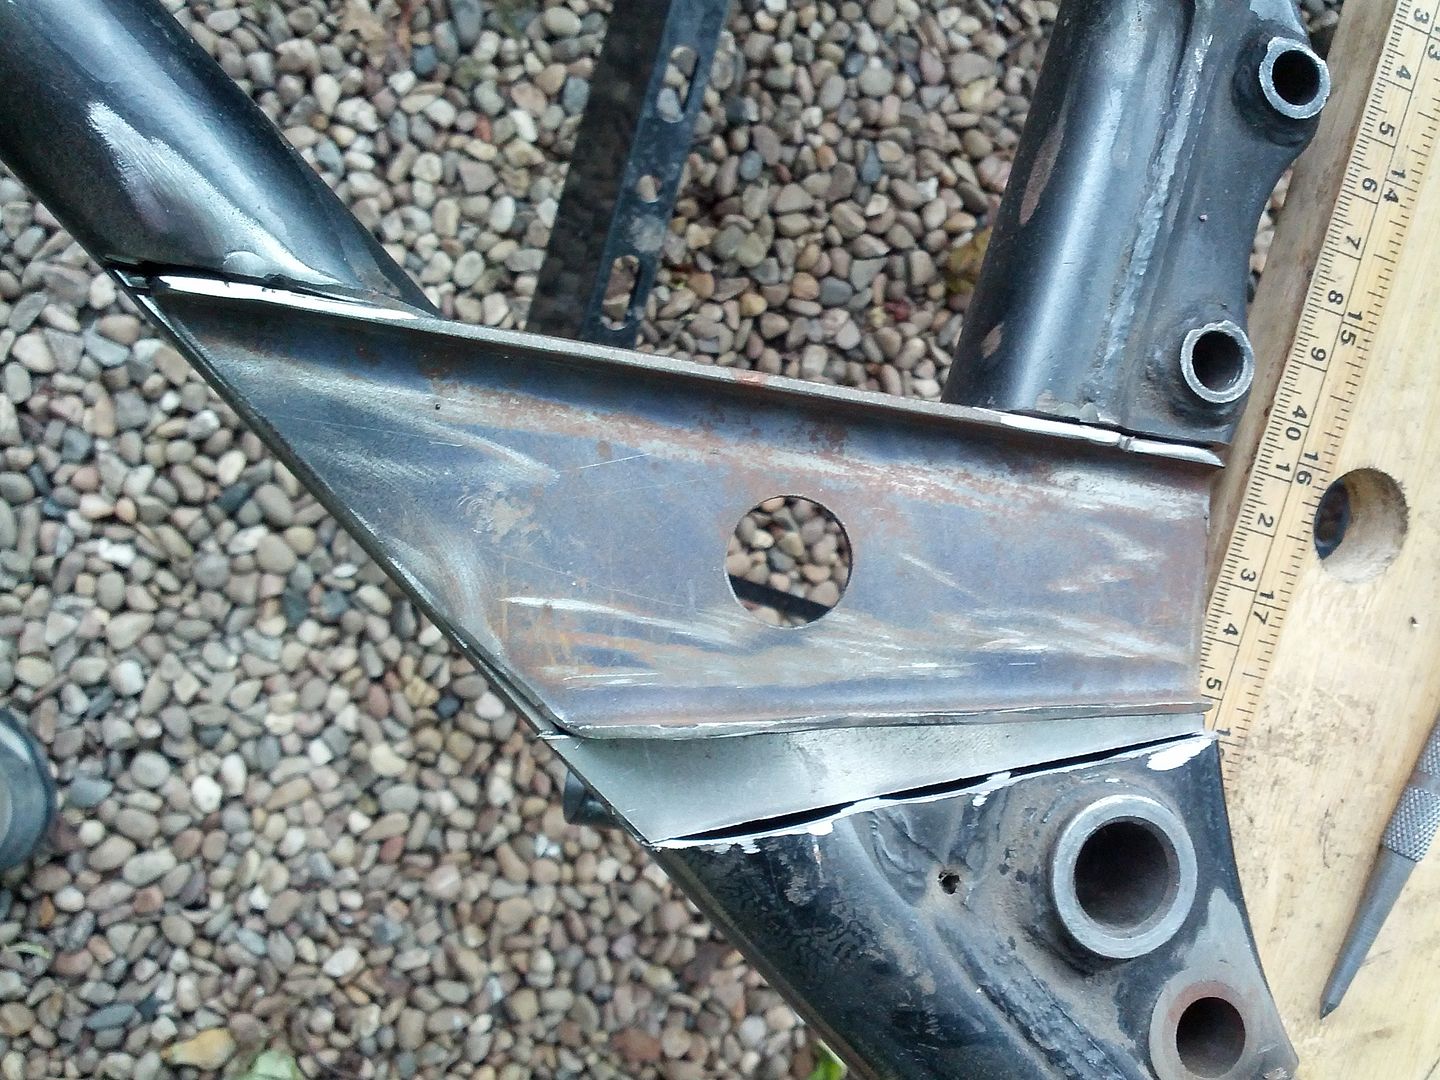
Butt welded on wedge, made up a new flange profiled to fit the frame and tacked on flange:
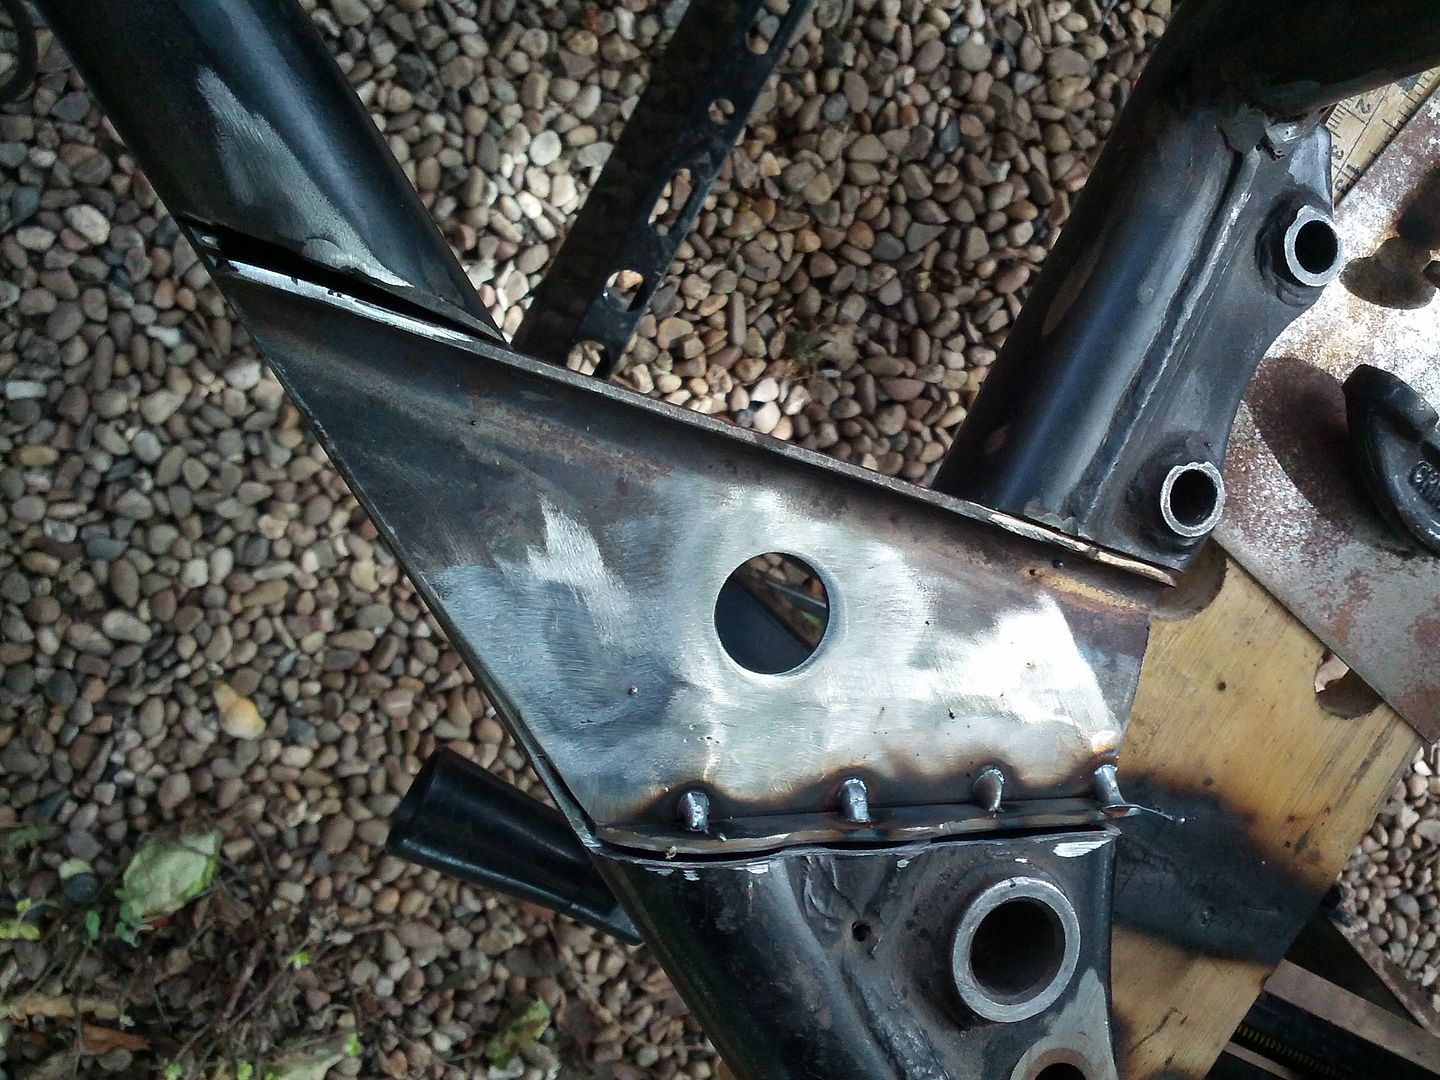
Welded and dressed to fit:

I have now fully welded these in place


So its a re-jig of the plate to lower the rear edge by 10mm:


Cut a new wedge to bridge the gap:

Butt welded on wedge, made up a new flange profiled to fit the frame and tacked on flange:

Welded and dressed to fit:

I have now fully welded these in place
-
Zomerset Zed
- 100Club
- Posts: 239
- Joined: 30th May 2014
- Location: Somerset
Engine build
Time to start on the engine build process:
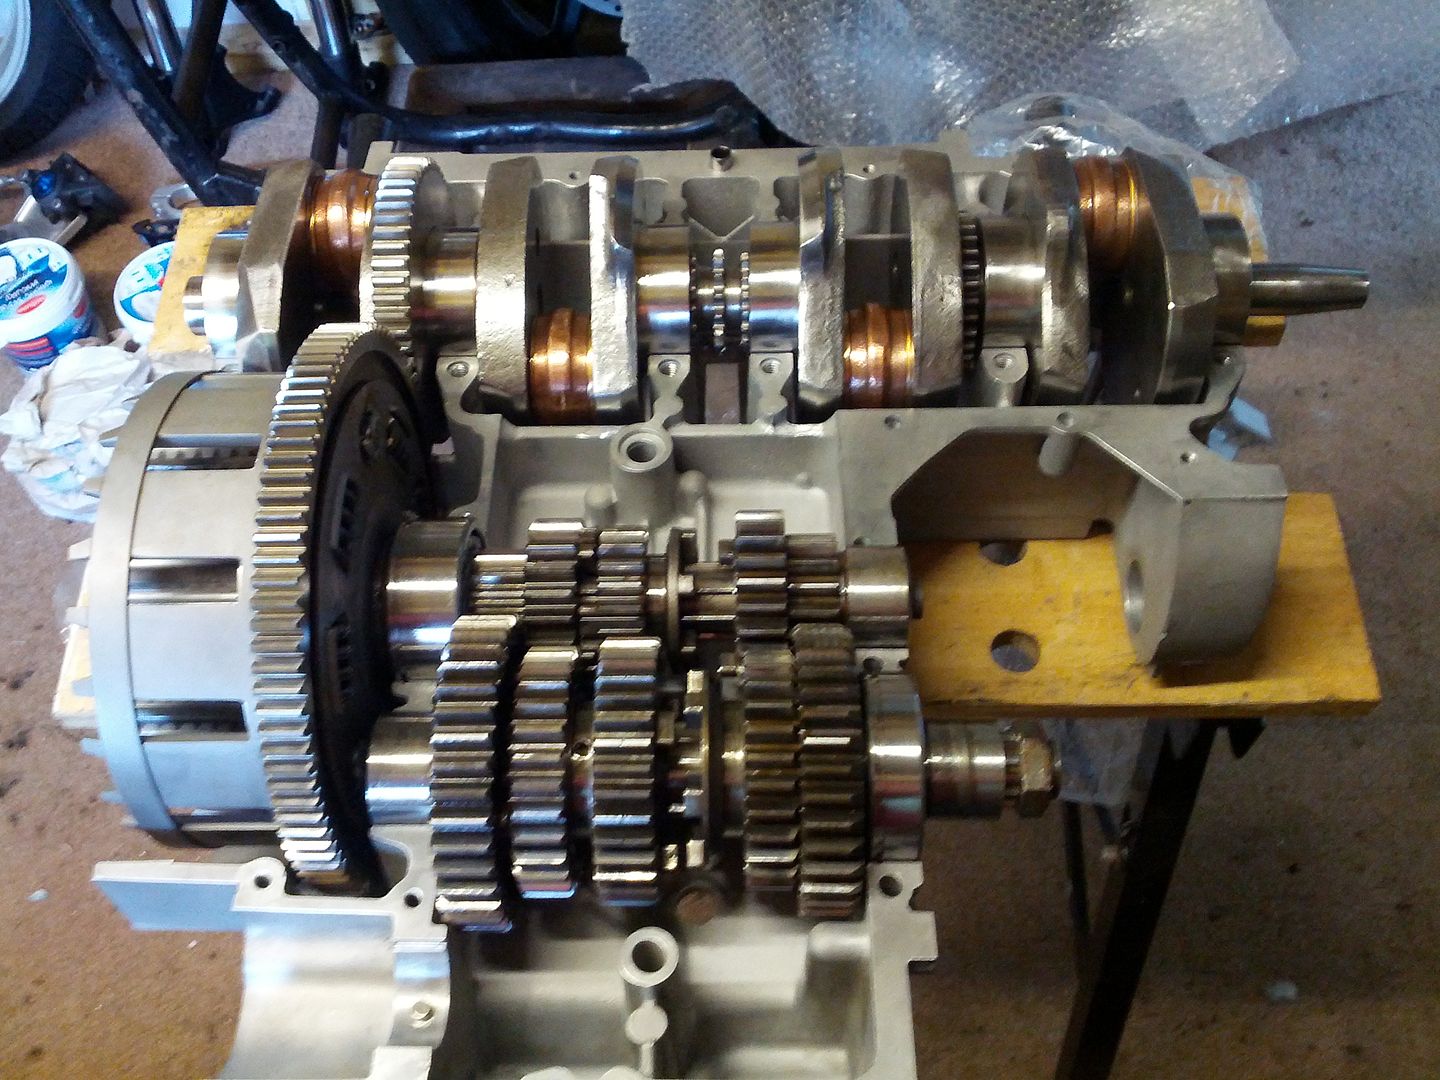
Gearbox has been fully dismantled, degreased, ultrasonically cleaned and checked for wear and problems. All gear teeth are in very good condition, dogs as well, hardly any signs of wear or abuse
All rebuilt with new bearings and circlips, o-ring etc. I have left the 3 balls out of 4th gear pinion so i can fully statically test the gearbox and make sure i can select all the gears and there is no friction present. The Haines manual i have has a couple of extra shims in it compared to the gearbox i have, so after some checking it seems that the gearbox is probably A3 or A4 origin and has a slightly longer spline section on the end for the sprocket. The shims are not required it would seem
Counted up the buggered dowels i had and ordered them and some bearings etc. from CMSNL in holland. Good service and i could recommend. They seemed the cheapest around as well and have a good easy website.
Tested the rotation of the crank with the primary on the clutch and found that there were some tight spots. Turned out on inspection with a magnifying glass to be small burrs on the ends of the gears on the clutch:
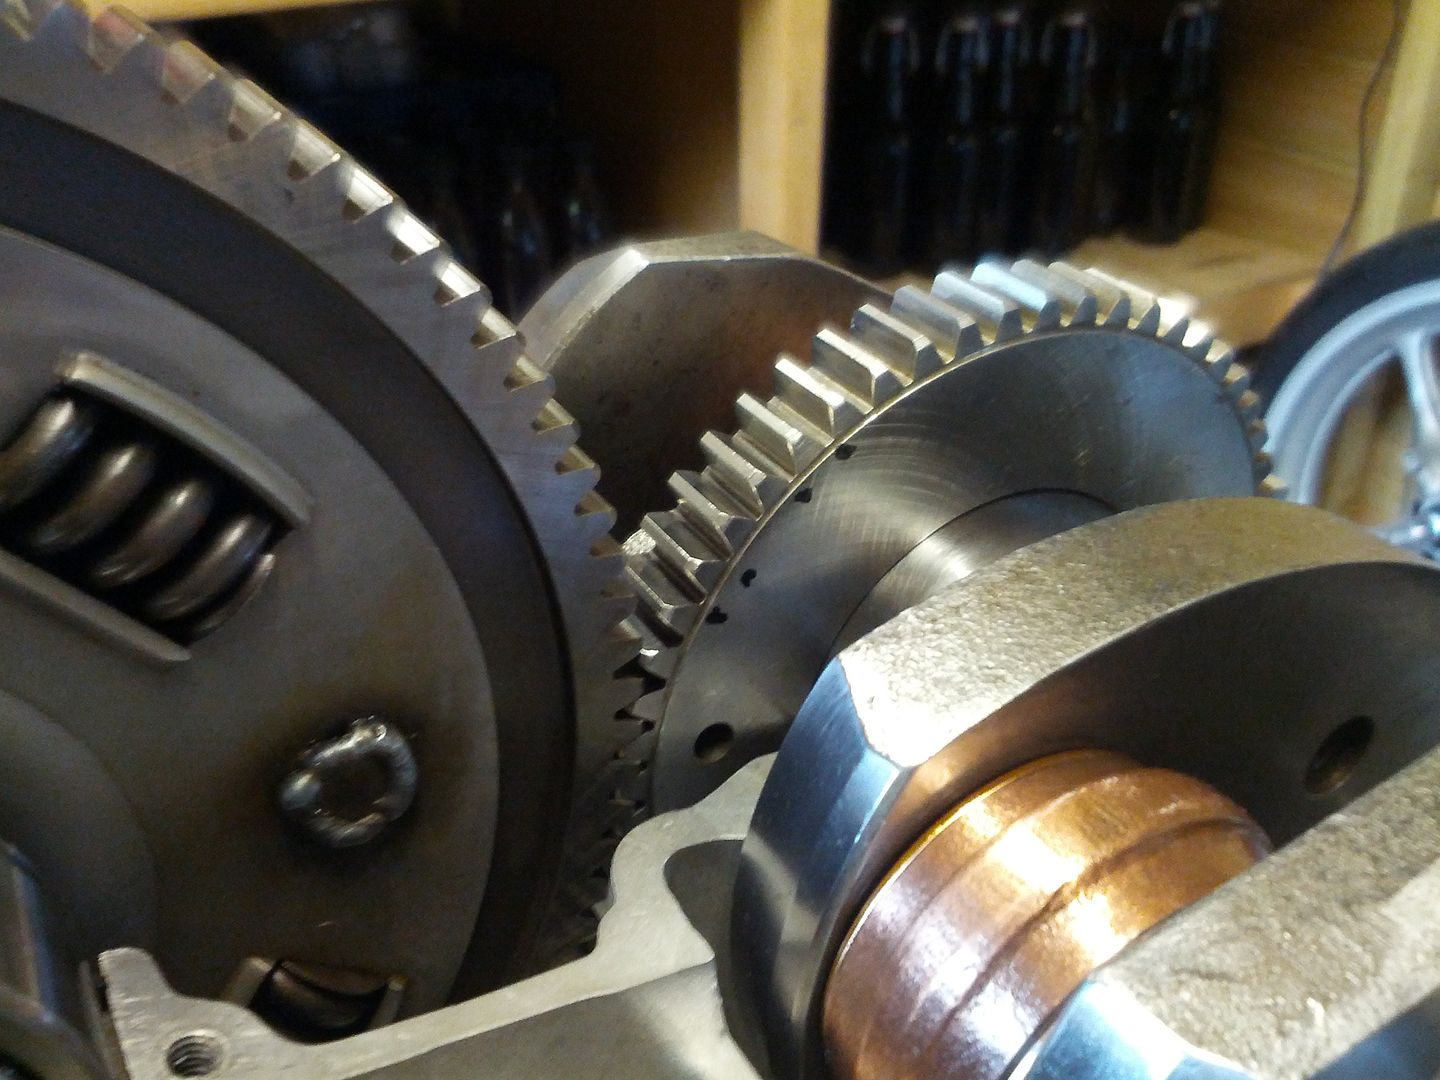
So i dressed them with swiss files. I took the crank out of the cases and masked up with plastic bags to prevent swarf ingress
Now runs very smooth with no friction.
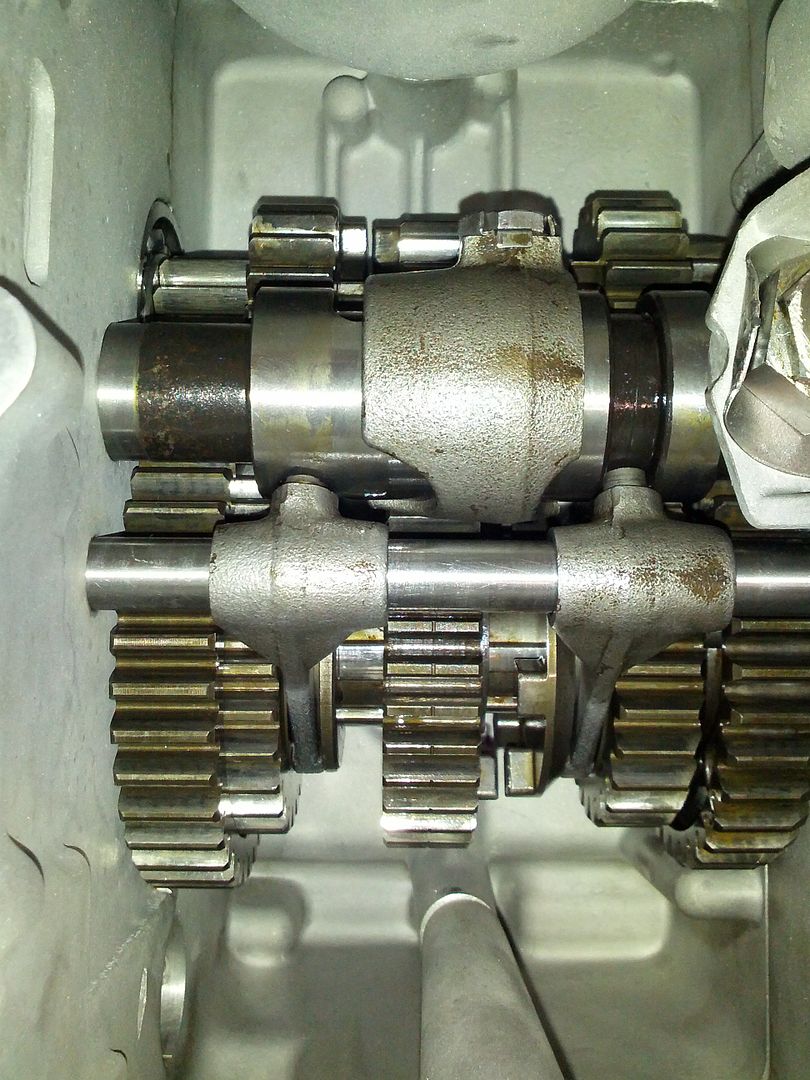
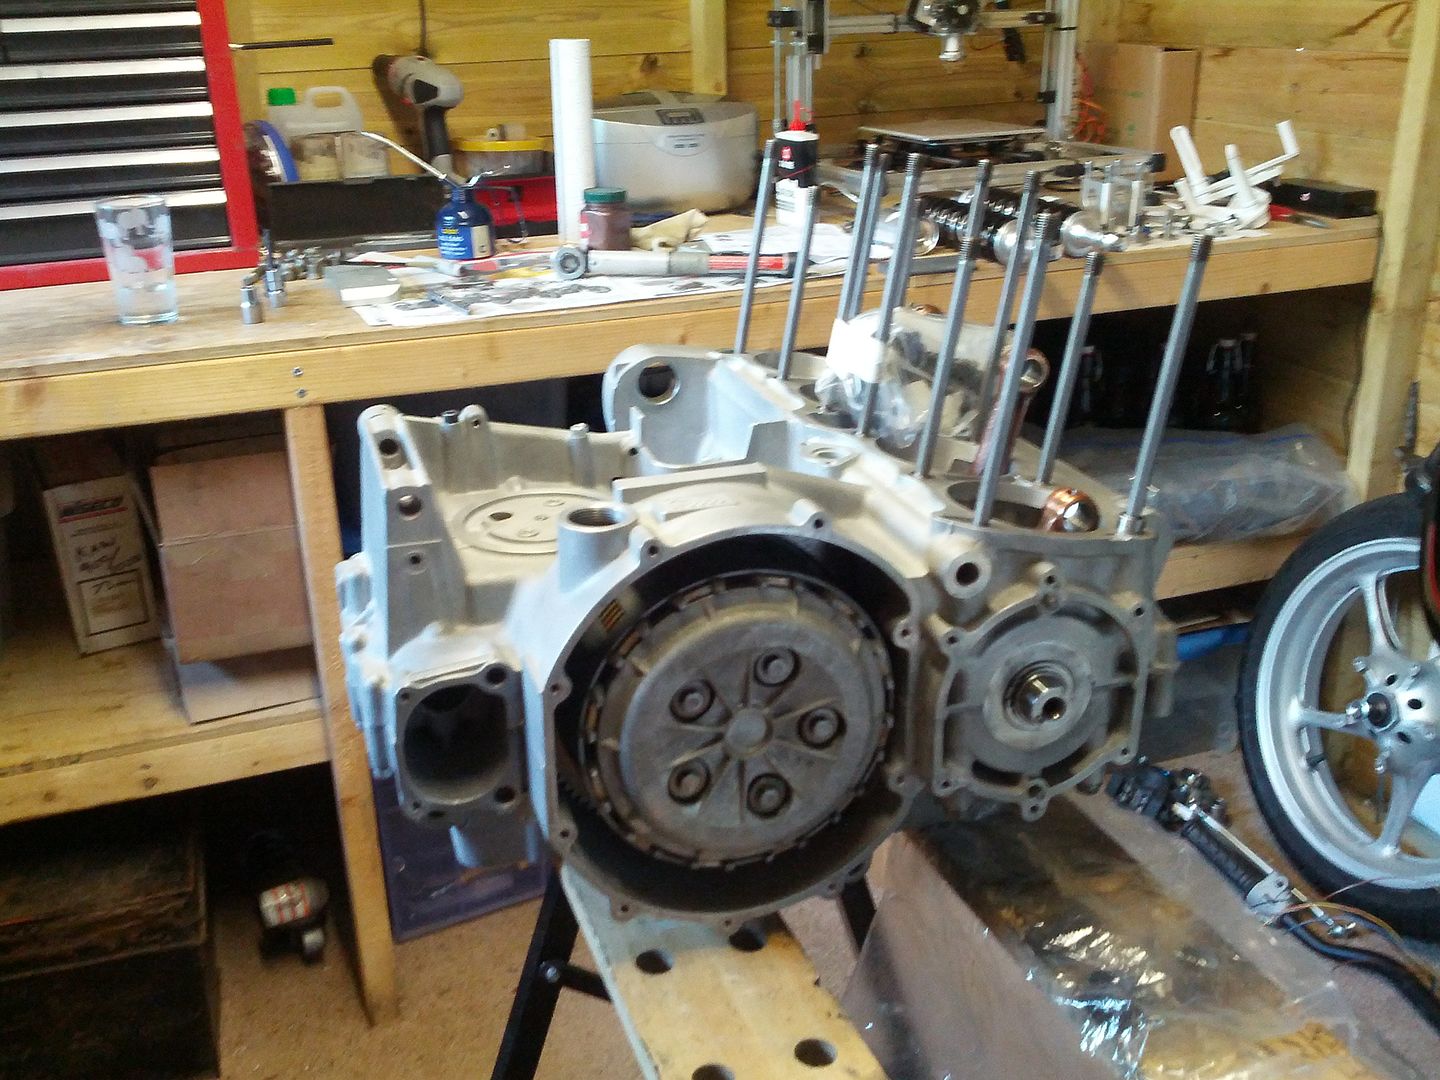
Put in a new camchain (endless) from Brookes Barn, cleaned all the 8mm crank bolts with a wire bush and torqued them up with the centre bearing cap in place.
Tested the gearbox and all good:
Time to apply the gasket material to the top half:
and glue it together:

I used some high tensile zinc plated/de-embrittled cap head bolts procured from Debbens. Only 1 of them is black. Hmmm.
Output casing on and sealed around crank case joints and Athena gasket from a complete engine kit i bought.
Used new seals all round from Legend Motorcycles.
Assembled the clutch, omitting the extra friction plate that was with the original engine and tightened the nut with the rattle gun. Clutch cover ahd a little polish then on using low profile A2 stainless cap screws which i think add a bit of up-to-date looks.
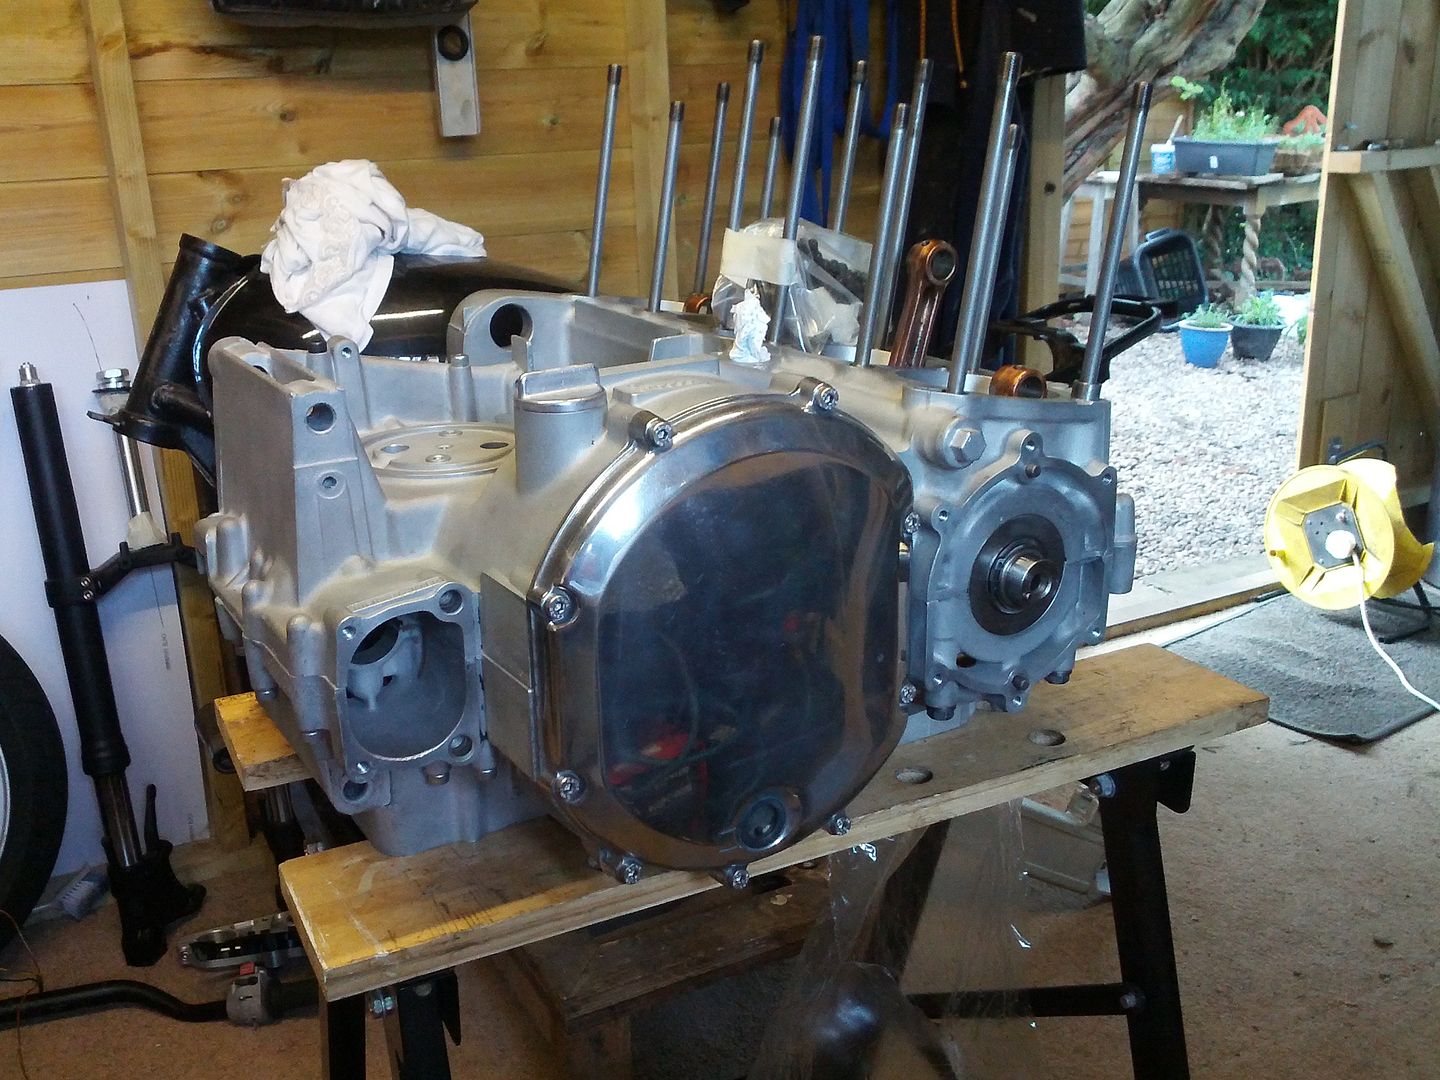
Well deserved home brew Cider in background

Gearbox has been fully dismantled, degreased, ultrasonically cleaned and checked for wear and problems. All gear teeth are in very good condition, dogs as well, hardly any signs of wear or abuse
All rebuilt with new bearings and circlips, o-ring etc. I have left the 3 balls out of 4th gear pinion so i can fully statically test the gearbox and make sure i can select all the gears and there is no friction present. The Haines manual i have has a couple of extra shims in it compared to the gearbox i have, so after some checking it seems that the gearbox is probably A3 or A4 origin and has a slightly longer spline section on the end for the sprocket. The shims are not required it would seem
Counted up the buggered dowels i had and ordered them and some bearings etc. from CMSNL in holland. Good service and i could recommend. They seemed the cheapest around as well and have a good easy website.
Tested the rotation of the crank with the primary on the clutch and found that there were some tight spots. Turned out on inspection with a magnifying glass to be small burrs on the ends of the gears on the clutch:

So i dressed them with swiss files. I took the crank out of the cases and masked up with plastic bags to prevent swarf ingress
Now runs very smooth with no friction.
Put in a new camchain (endless) from Brookes Barn, cleaned all the 8mm crank bolts with a wire bush and torqued them up with the centre bearing cap in place.
Tested the gearbox and all good:

Time to apply the gasket material to the top half:

and glue it together:

I used some high tensile zinc plated/de-embrittled cap head bolts procured from Debbens. Only 1 of them is black. Hmmm.
Output casing on and sealed around crank case joints and Athena gasket from a complete engine kit i bought.

Used new seals all round from Legend Motorcycles.
Assembled the clutch, omitting the extra friction plate that was with the original engine and tightened the nut with the rattle gun. Clutch cover ahd a little polish then on using low profile A2 stainless cap screws which i think add a bit of up-to-date looks.


Well deserved home brew Cider in background


-
Zomerset Zed
- 100Club
- Posts: 239
- Joined: 30th May 2014
- Location: Somerset
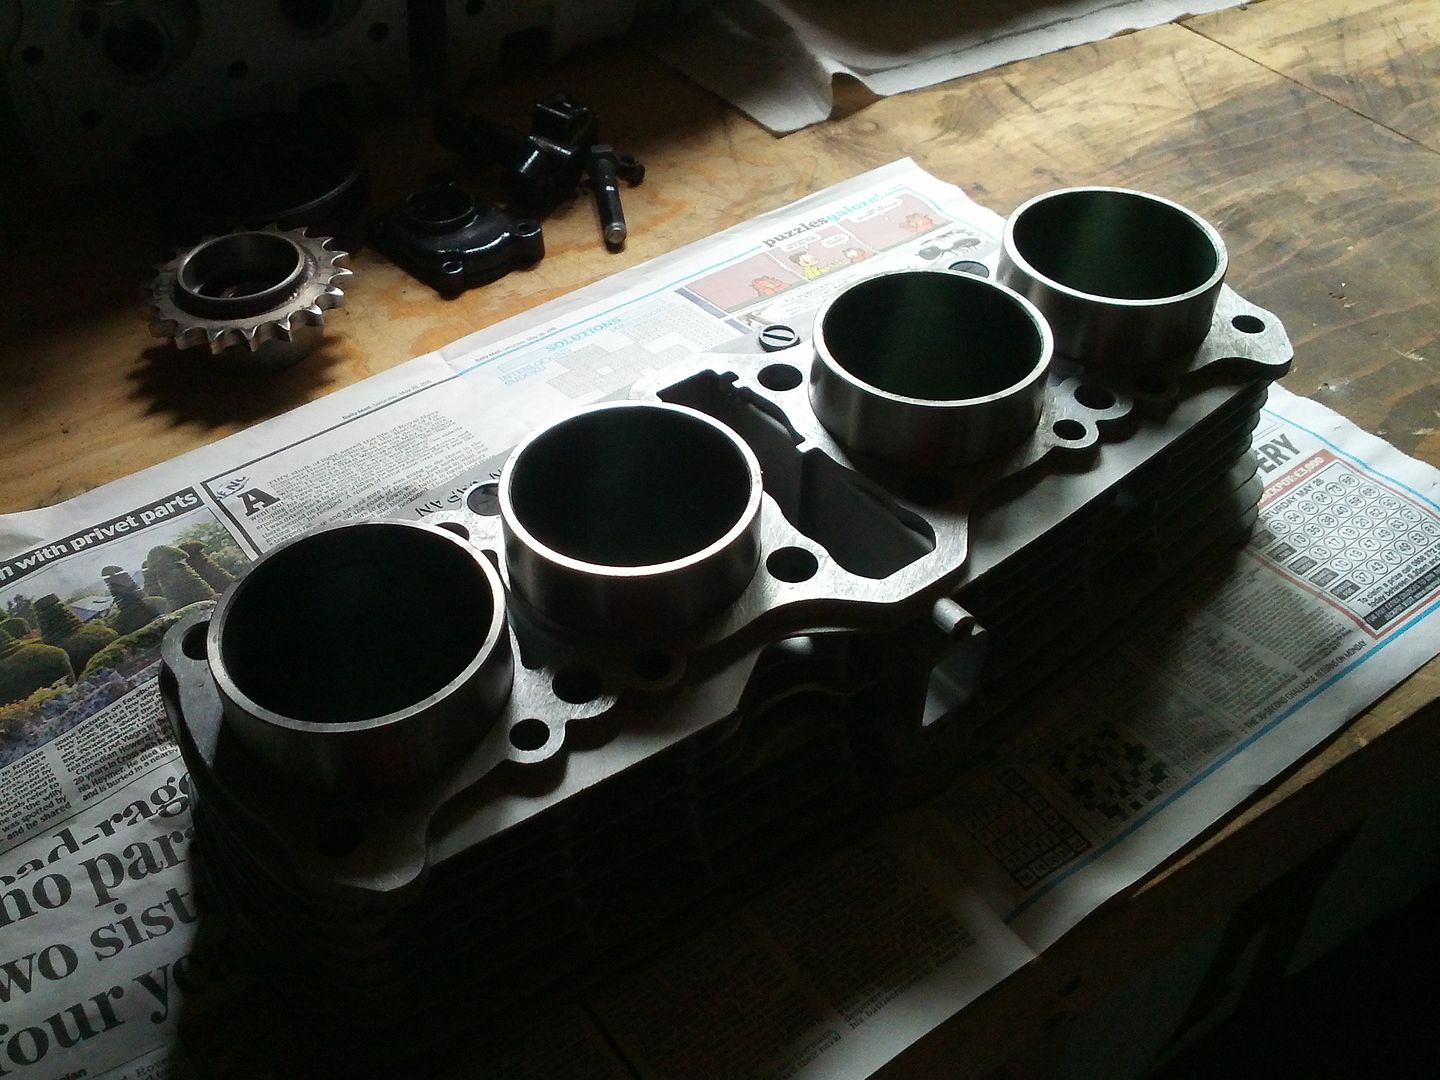
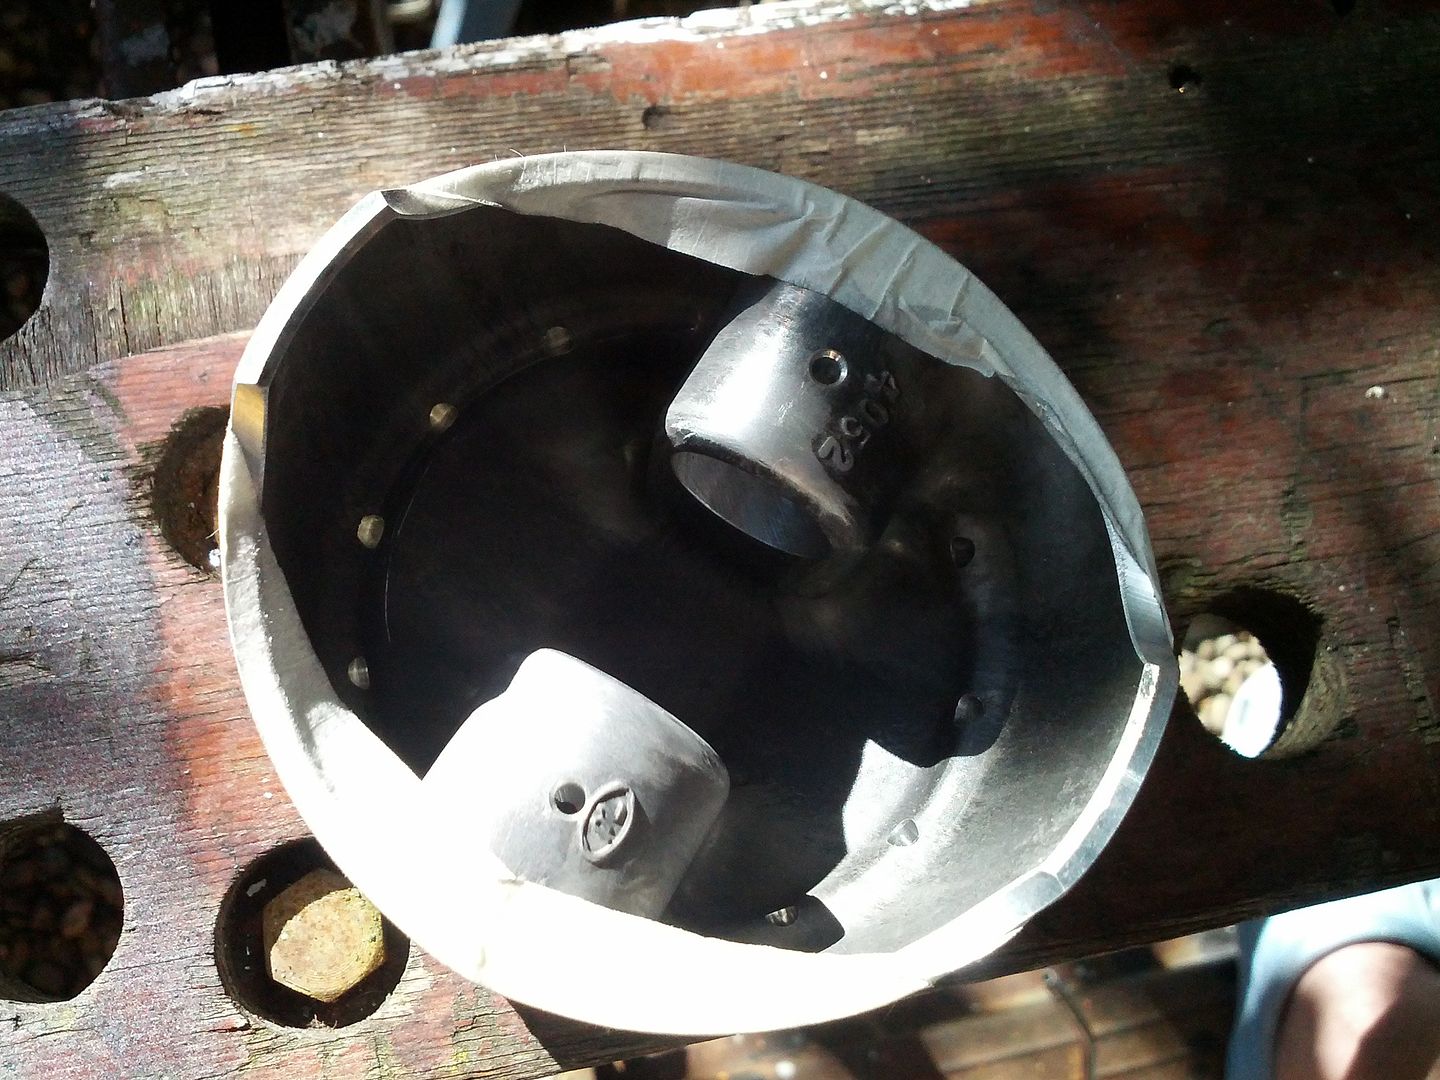
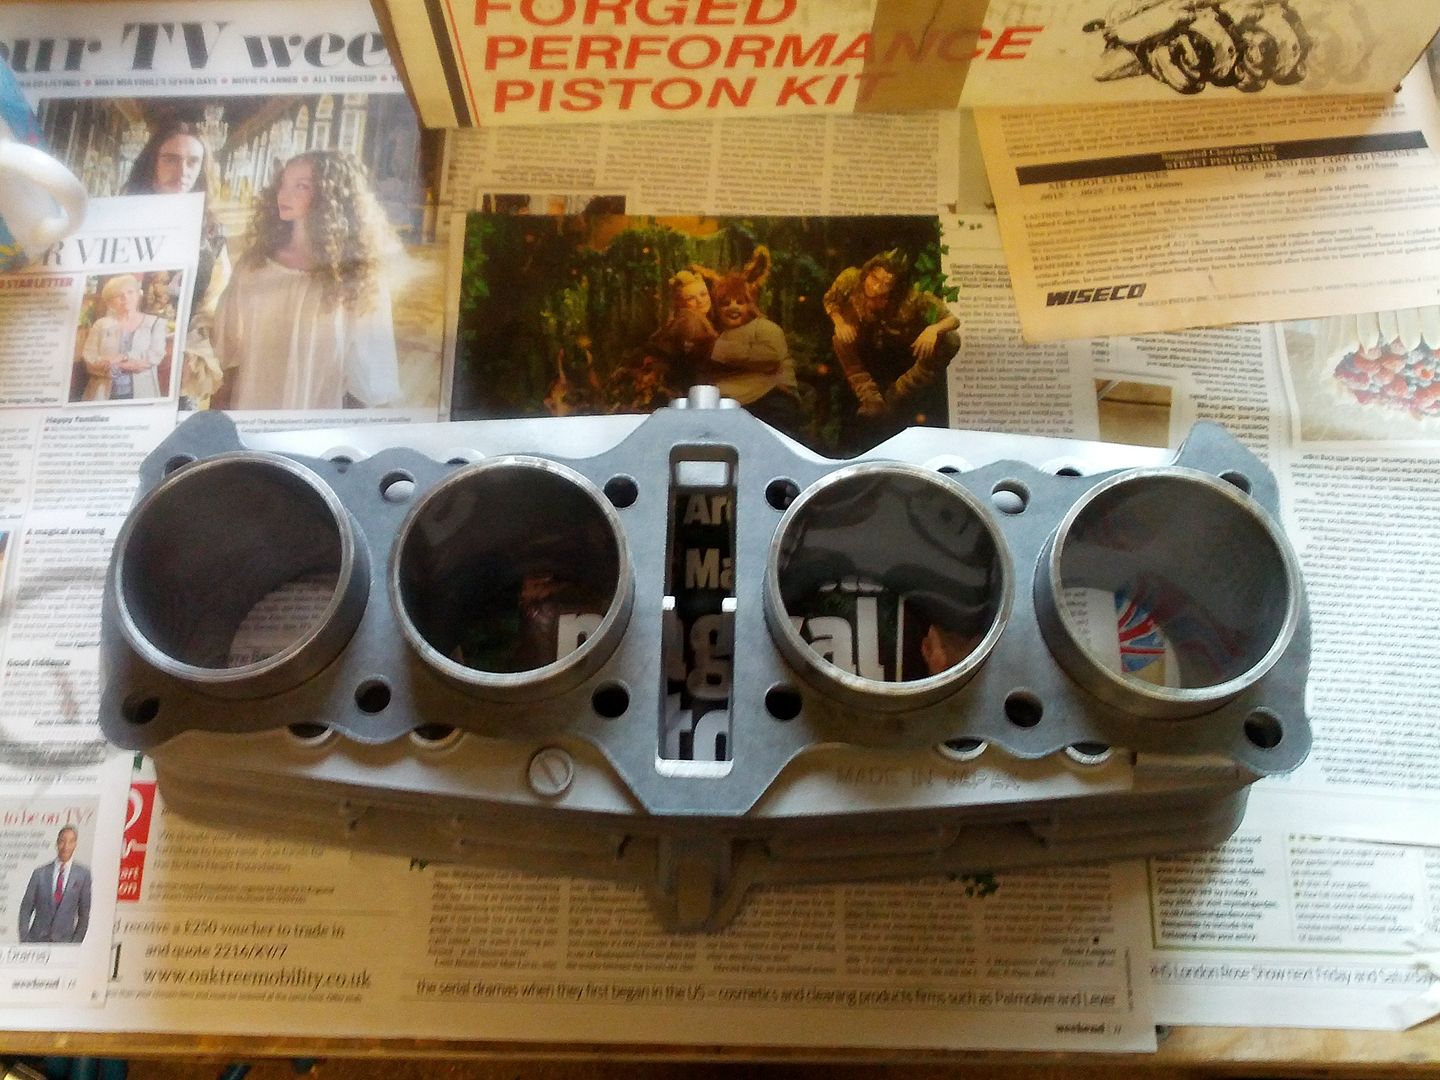
Pistons
Time to look at the pistons:
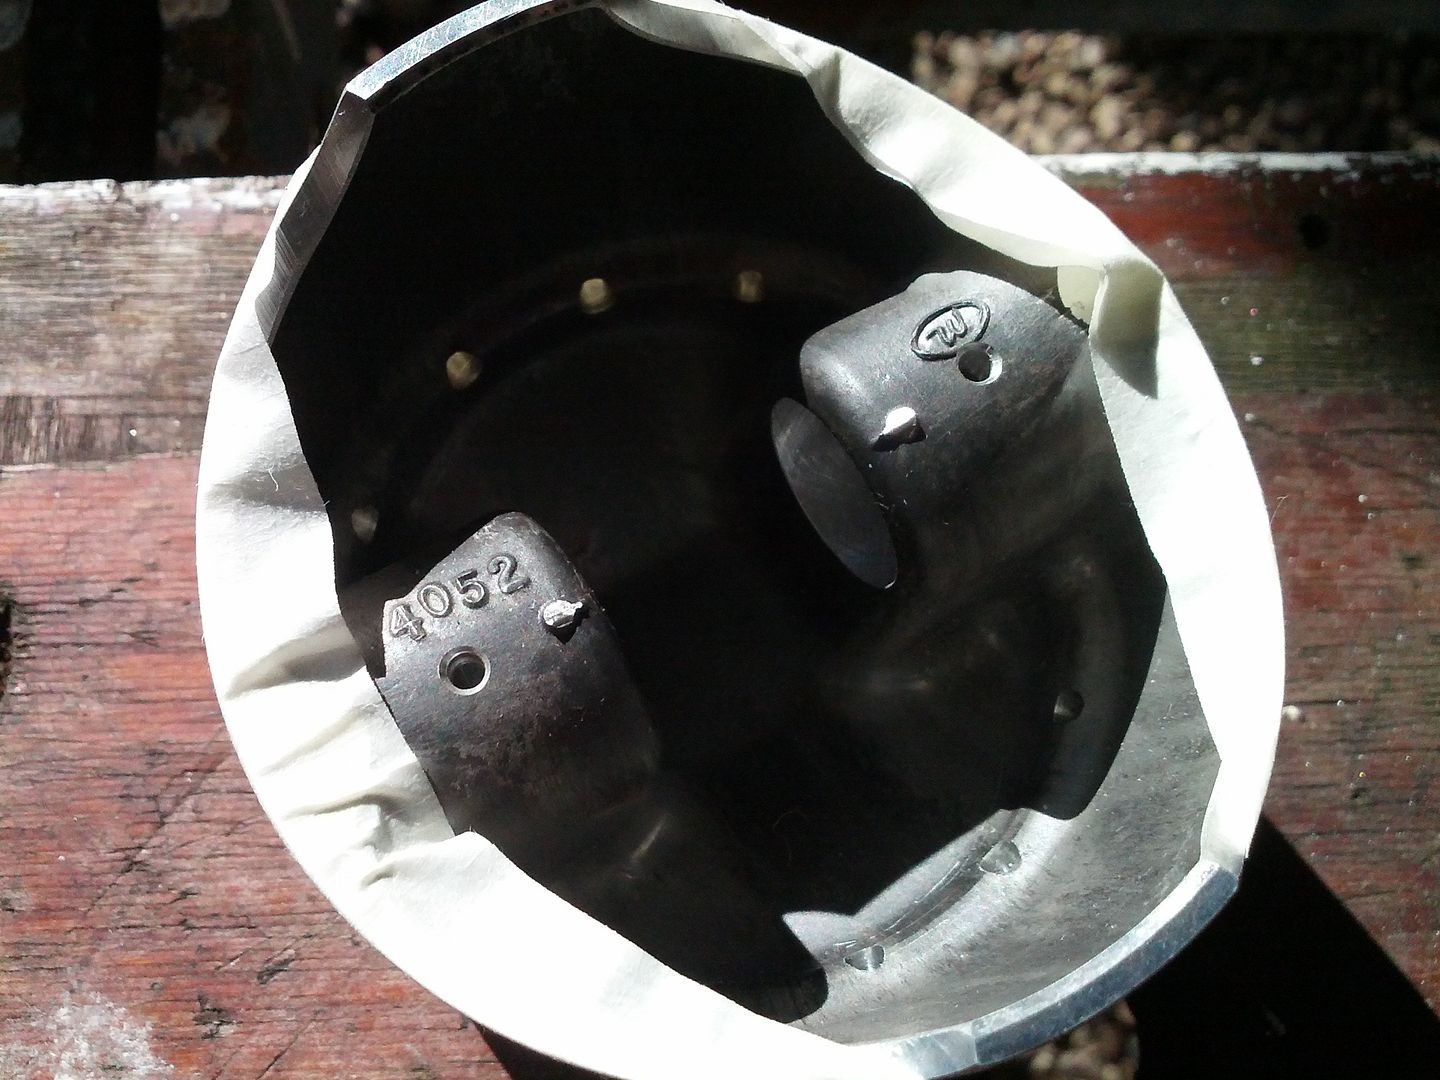
Those lugs which i assume the remnants of the forging sprues will have to come off:
Decided to see how much they weighed and how equal after sanding lumps off:

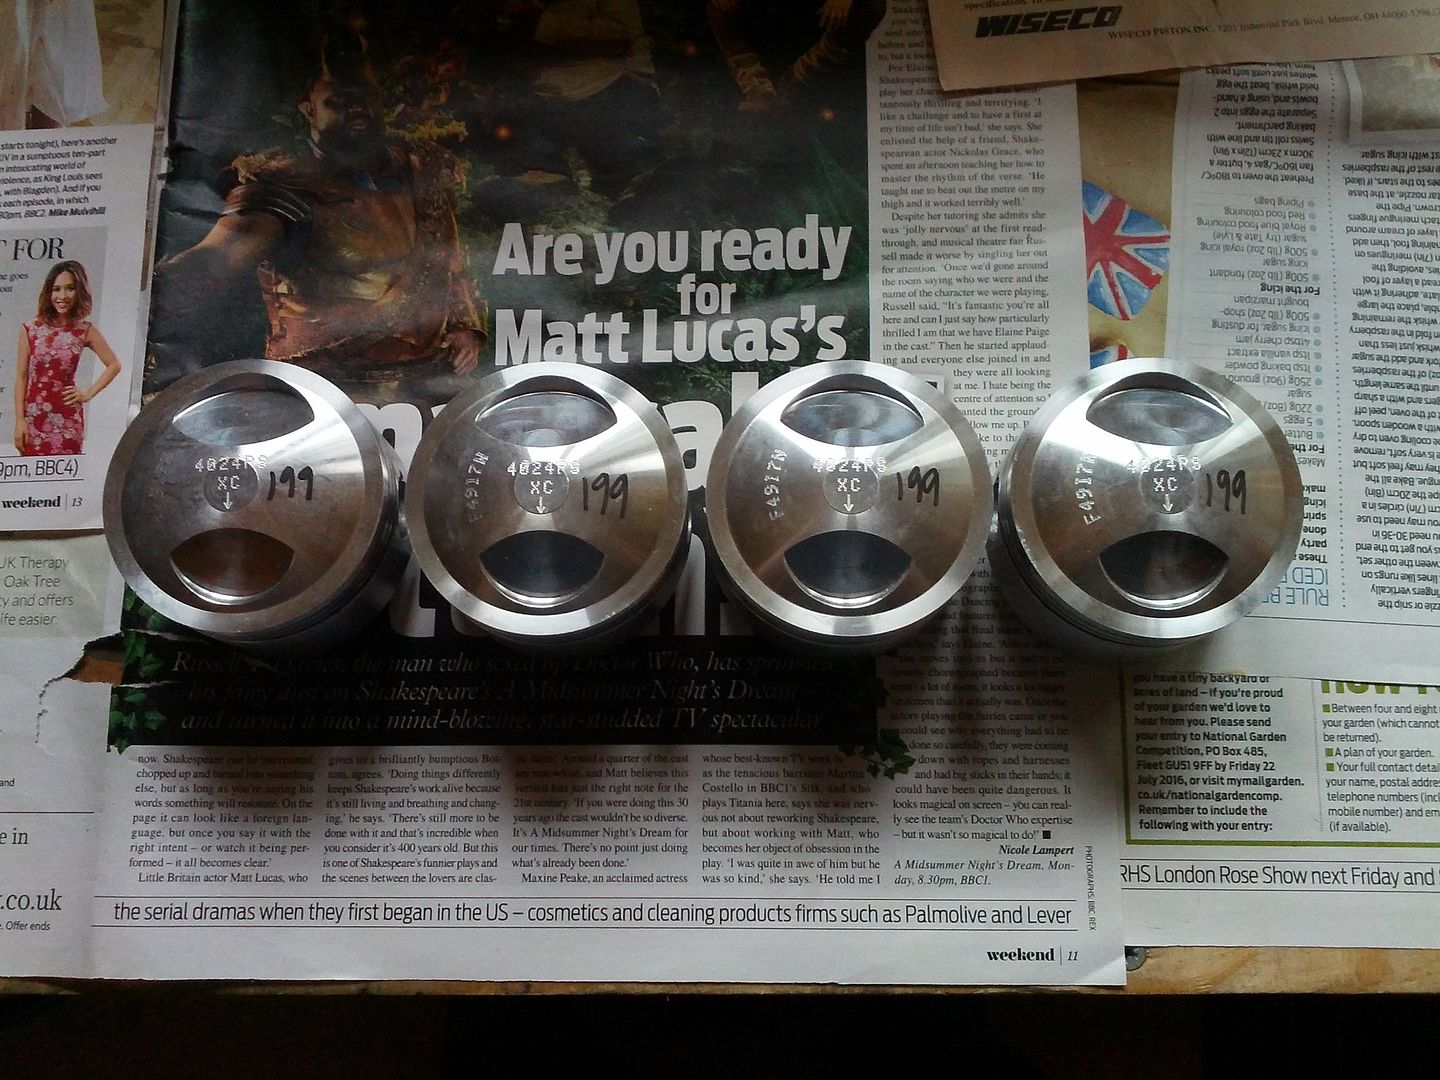
Excellent, all the same weight, at least to the nearest gram.
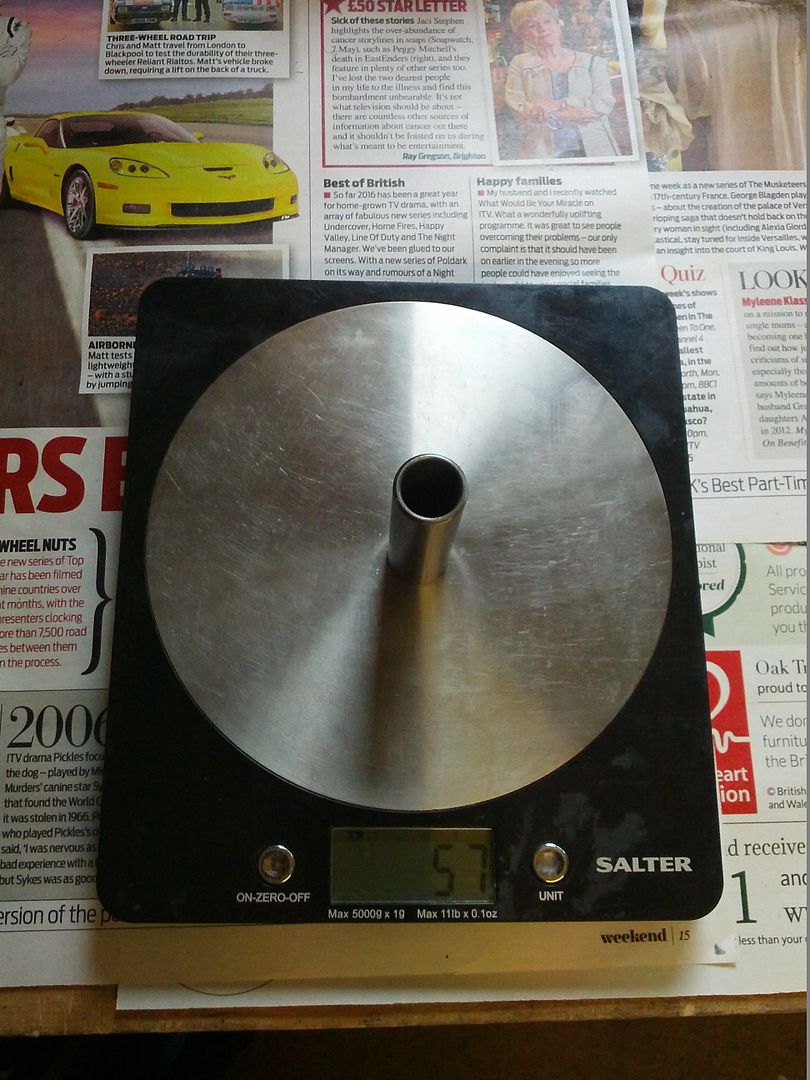
All the gudgeon pins were 57g.
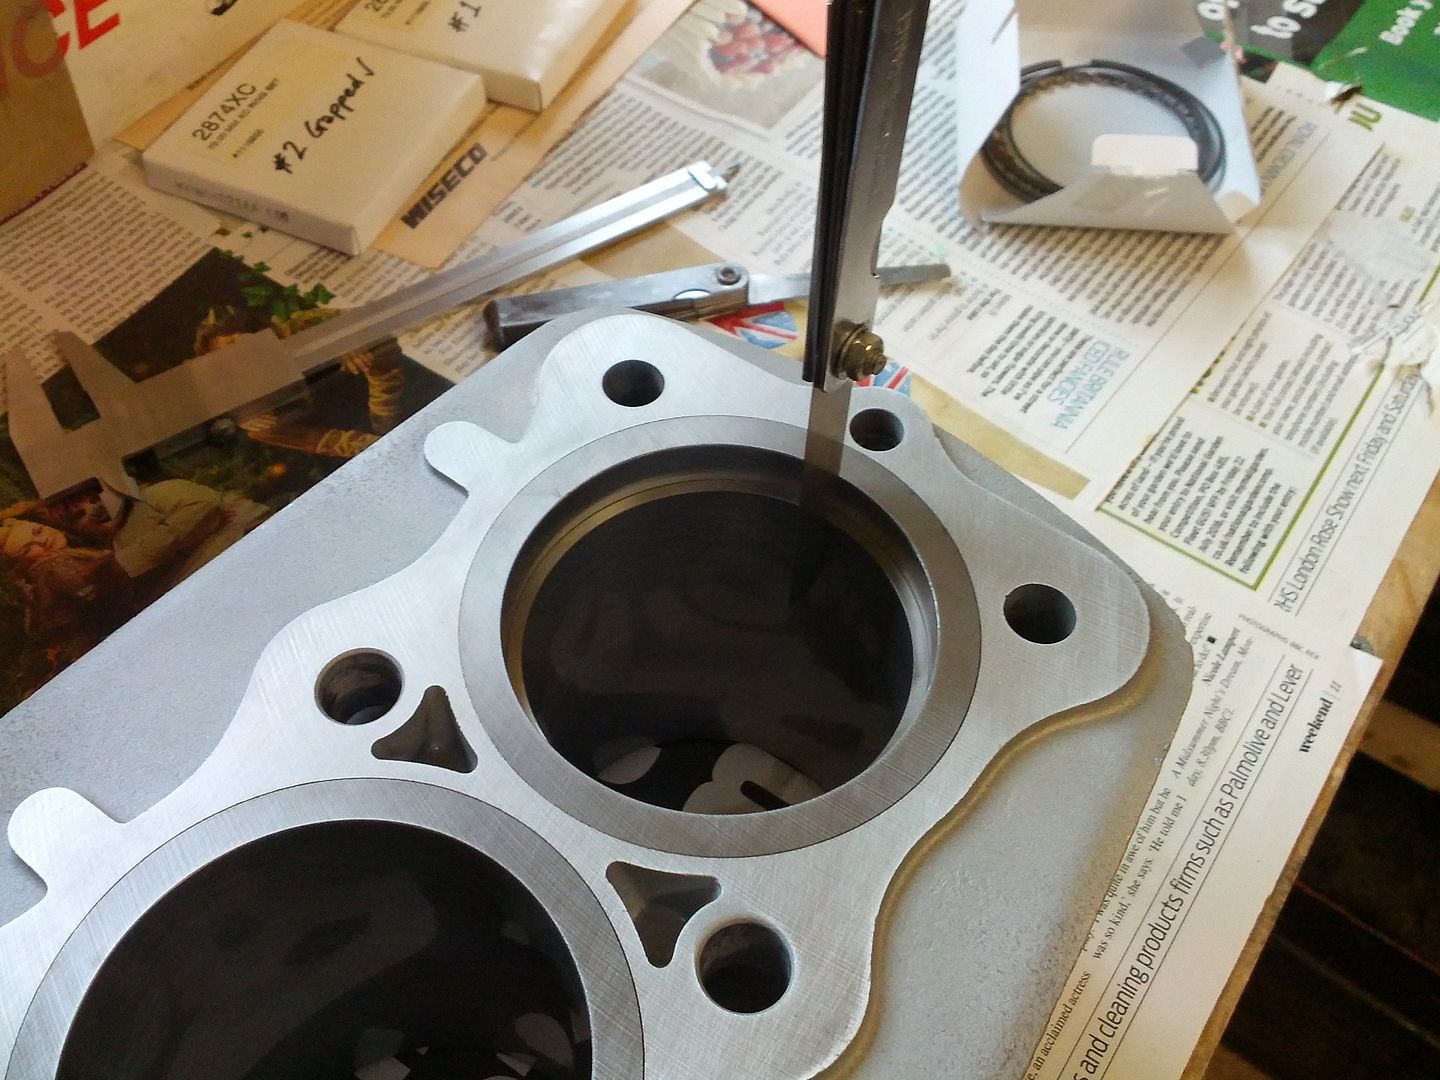
Gapped all the rings and only had to dress all the top rings with a stone to size:
Cometic gasket doesn't fit too well in places, so time to trim it up a bit. May be for another model
Move on to the head next

Those lugs which i assume the remnants of the forging sprues will have to come off:

Decided to see how much they weighed and how equal after sanding lumps off:


Excellent, all the same weight, at least to the nearest gram.
All the gudgeon pins were 57g.

Gapped all the rings and only had to dress all the top rings with a stone to size:

Cometic gasket doesn't fit too well in places, so time to trim it up a bit. May be for another model

Move on to the head next
-
Zomerset Zed
- 100Club
- Posts: 239
- Joined: 30th May 2014
- Location: Somerset
Wheels
I bought the rear R1 wheel off a racer. Why do some people think its a good idea to use stud lock (red loctite) on a reduced shoulder flanged bolt which has a torx head 
I got 4 of them out successfully with heat and the air ratchet gun. 2 others were having none of it and the heads sheared off 1st go leaving the threaded portion of the bolt still in the wheel.
I then had do drill (centrally) out the rest of the bolt (pictured is my "drill bush" for keeping the drill centred) and restore with thread inserts. This took me most of the afternoon all because someone has no clue what proper adhesive to use
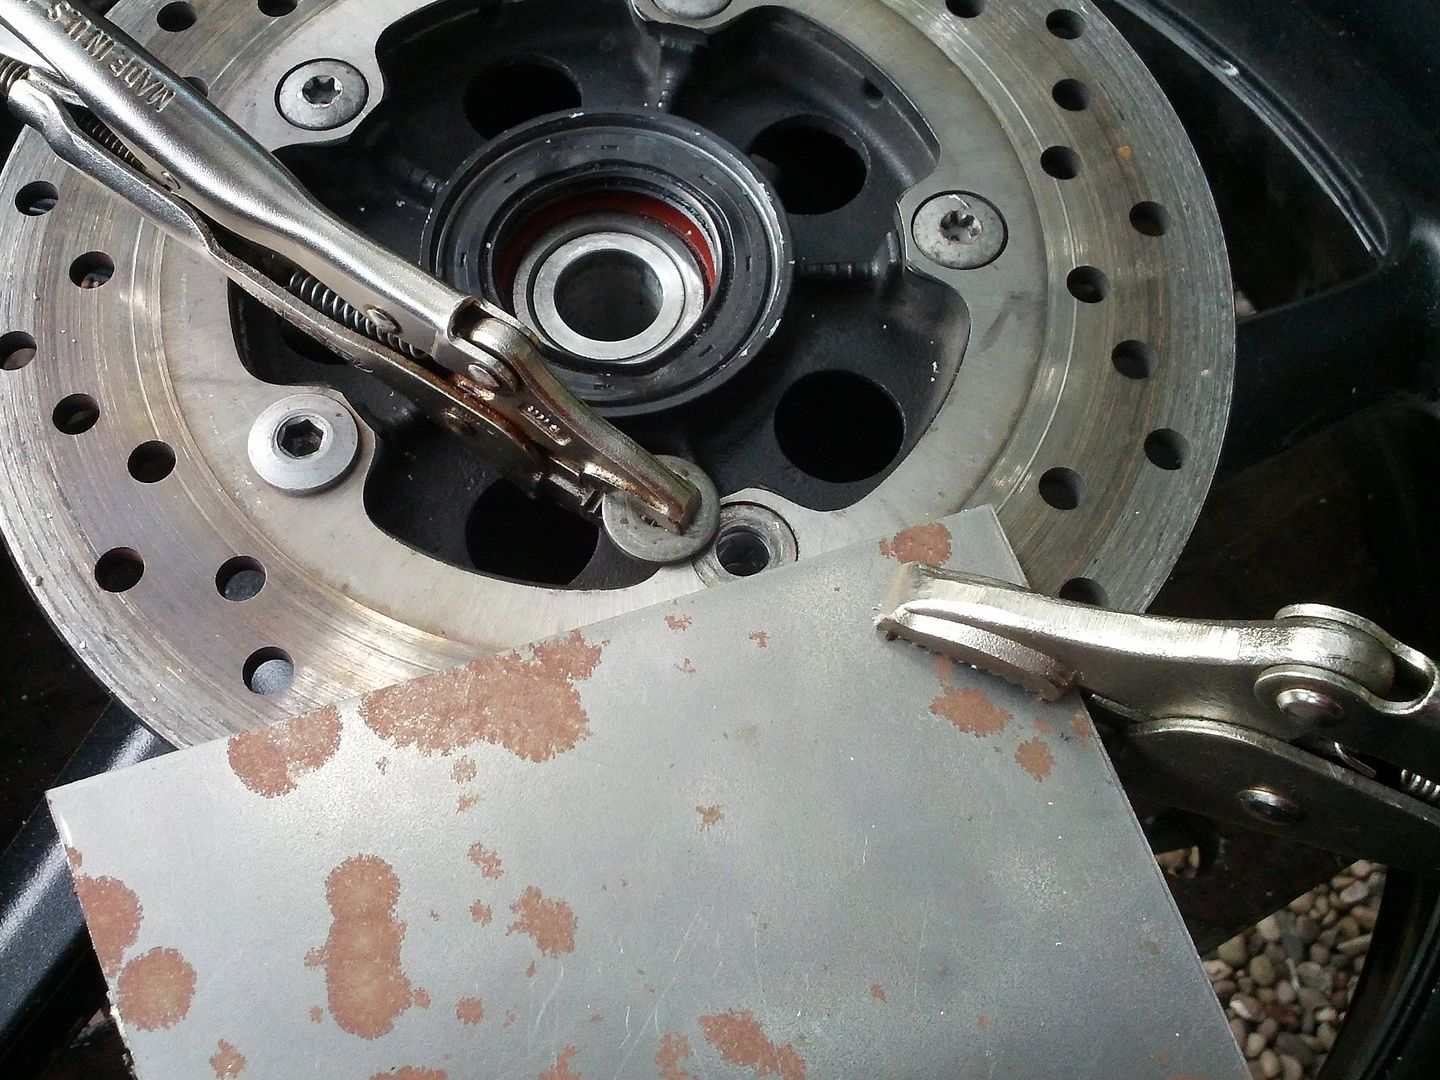
All ended well but nearly had a trashed wheel.
Sanded them up a bit to remove casting marks, removed all bearings and dropped them off at the powder coaters. Lets see how they do......
-
Zomerset Zed
- 100Club
- Posts: 239
- Joined: 30th May 2014
- Location: Somerset
Camchain running gear
Stripped, cleaned, ultrasonically cleaned and inspected the components of the camchain run, and wire brushed the steel parts :
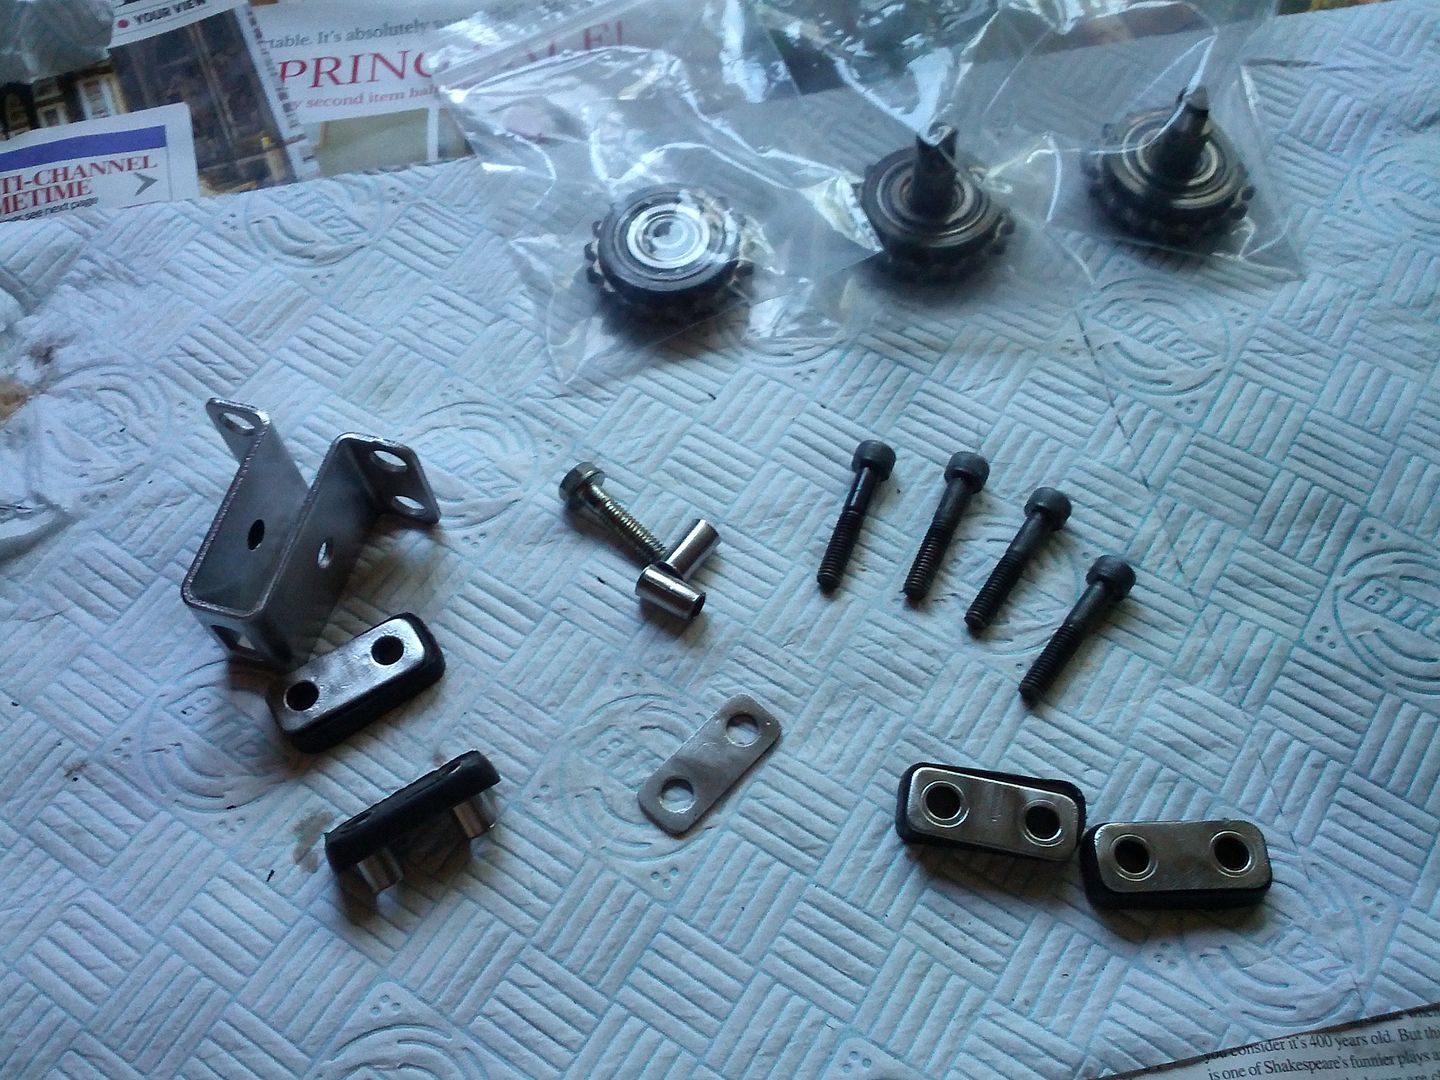
The prognosis is good
All the sprockets are in good nick and bearings free running and not worn out. The tensioning roller and the rubber blocks in the cylinder head are all farked.
I will probably source a new precision roller for the tensioner, make or re-use old shaft and weld or circlip it in position. Or just buy one of these:
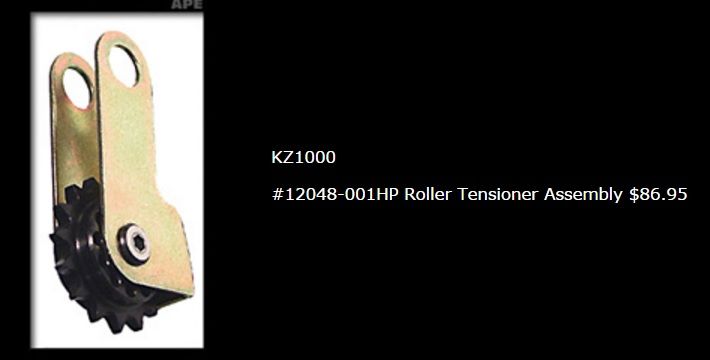
I will source a manual APE type tensioner.
I will have to replace the small rubber dampers that locate the 2 sprockets between the block and the head, but i will design and get machined some ally replacements for the larger dampers that locate the centre sprocket. Abit like this:
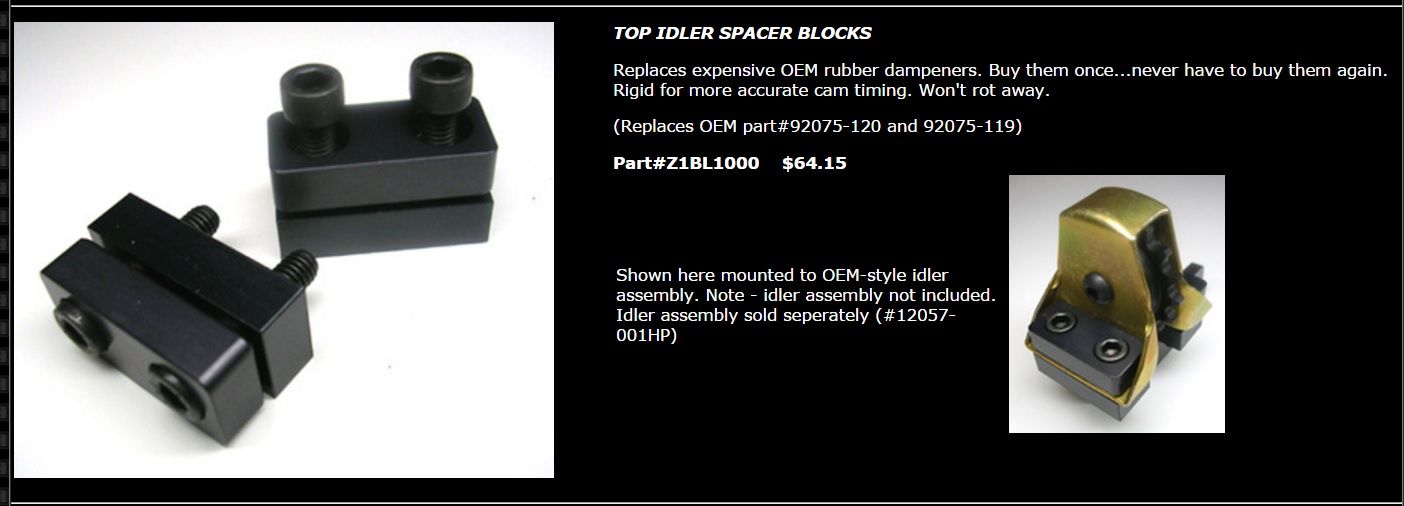
Copyright APE
-
Zomerset Zed
- 100Club
- Posts: 239
- Joined: 30th May 2014
- Location: Somerset
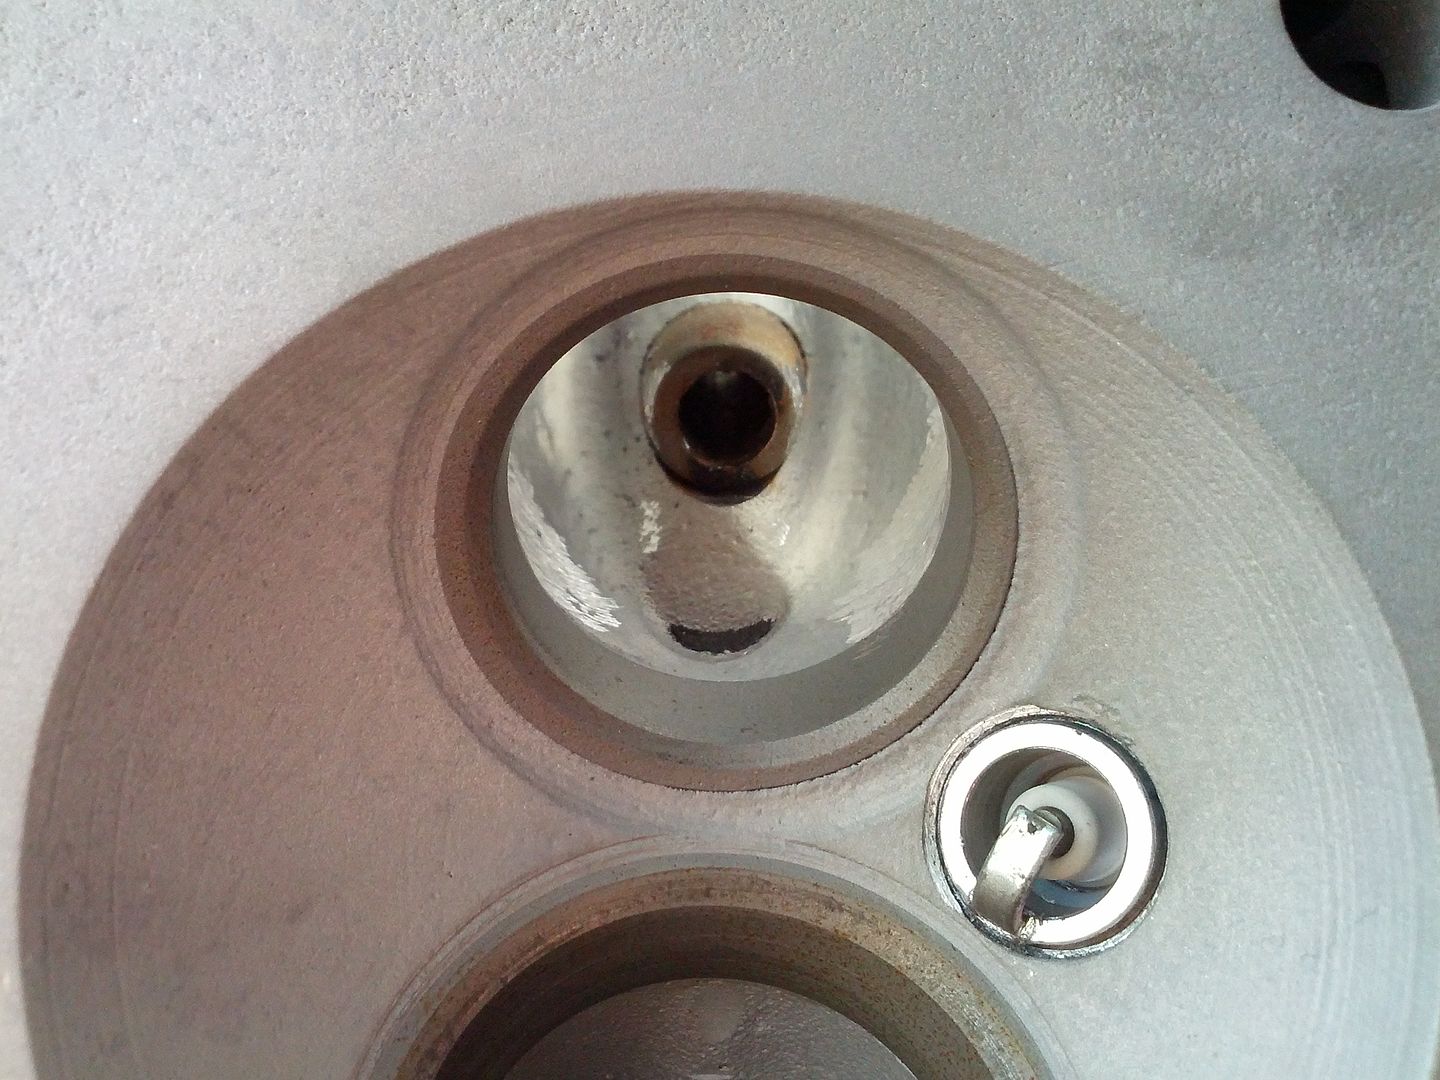
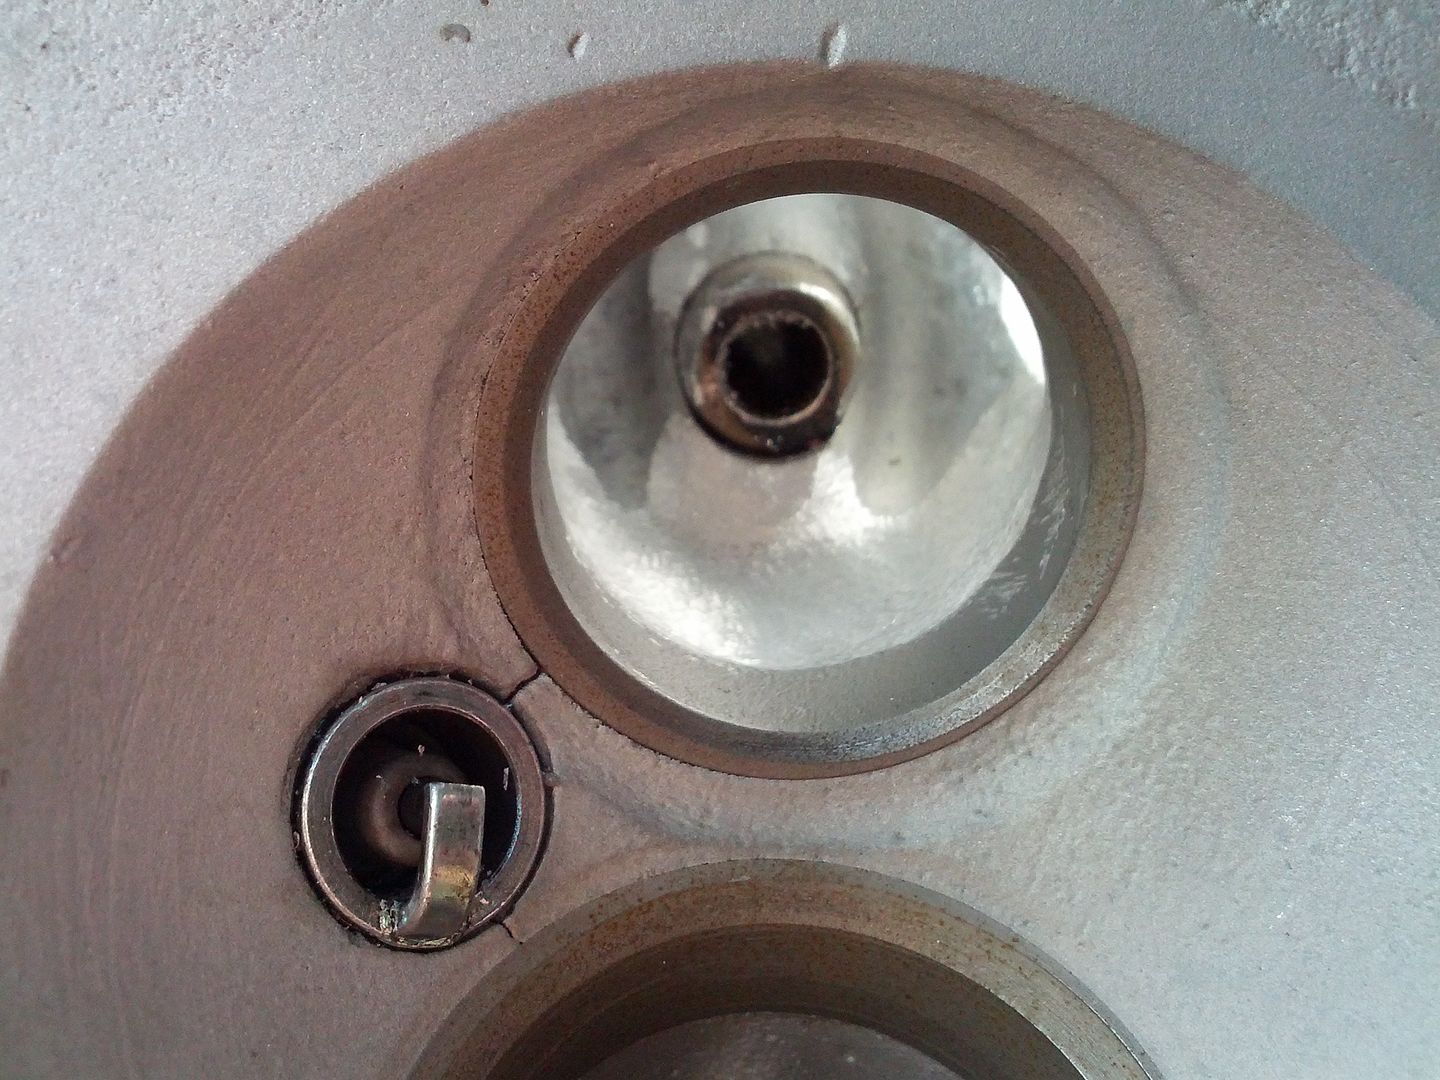
Gas flowing
Made a start on gas flowing the inlet ports:
Taper right on edge of inlet to go first.
Just roughing out first:
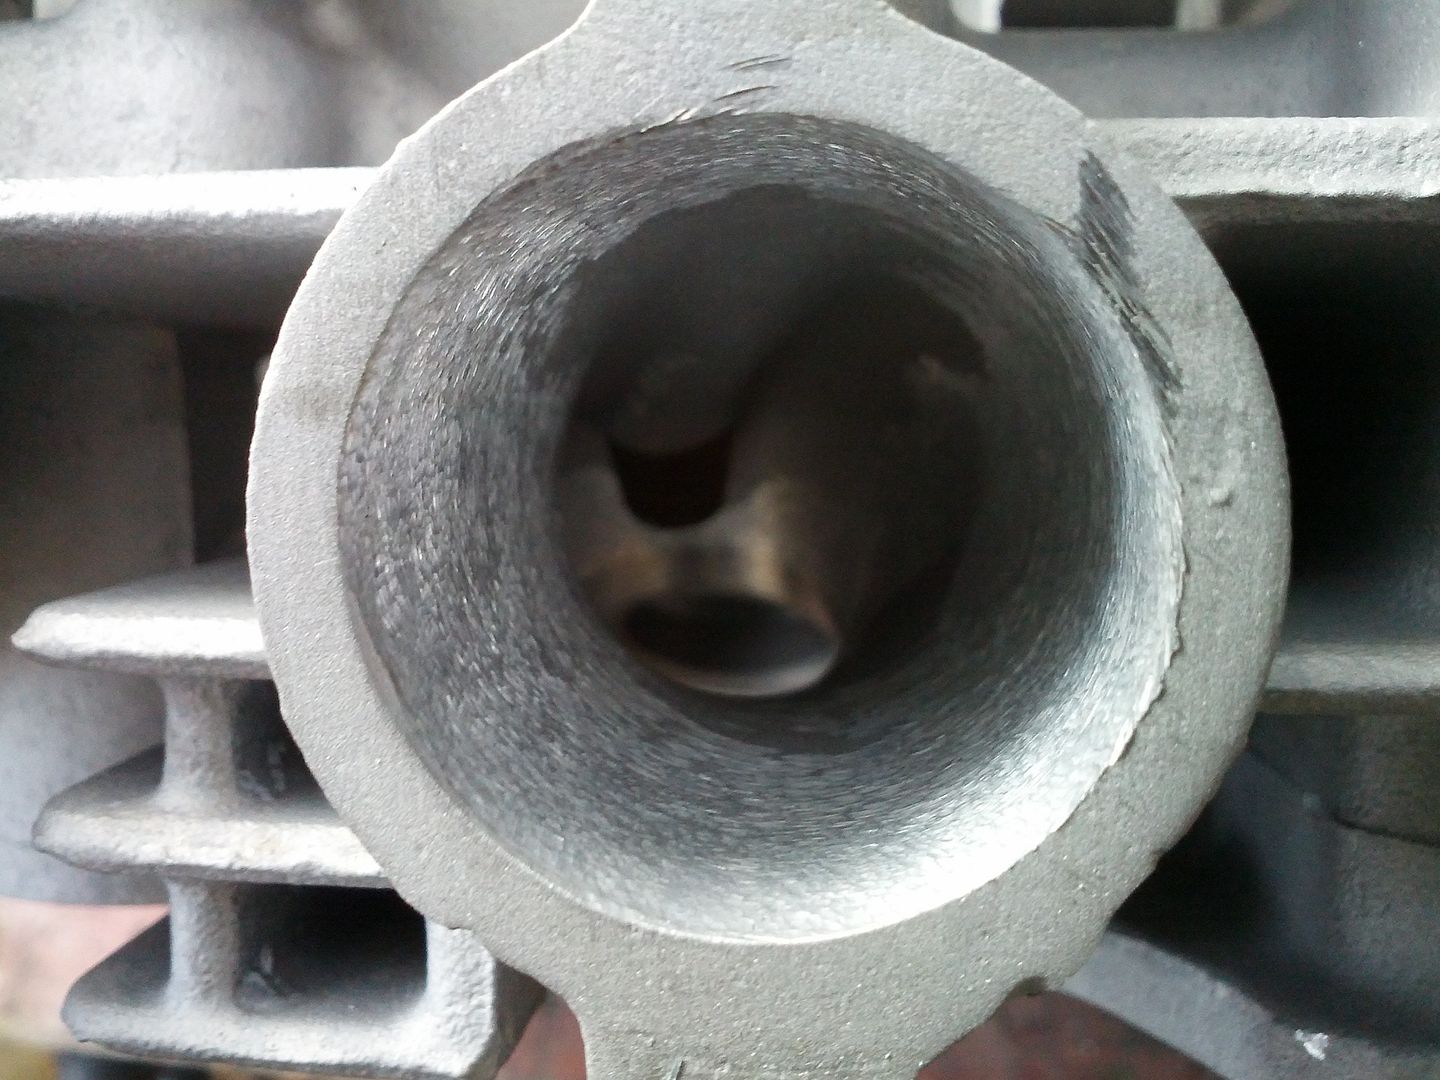
Followed by ridges left from the plugs inserted into the die when casting the ports.

The aim is to just remove all the casting marks and finish off Mr. K's fettling and get a nice smooth passage for the gas to flow as unimpeded as practically possible. Hopefully achieving a gradual taper down to about 80% around the valve guide. Finish will be coarse 80 emery.
The quality of the casting on these heads is quite good overall. I have done quite a few heads now and i think the standard of the ports' shape and finish to be better than mid 90's stuff i have done previously.
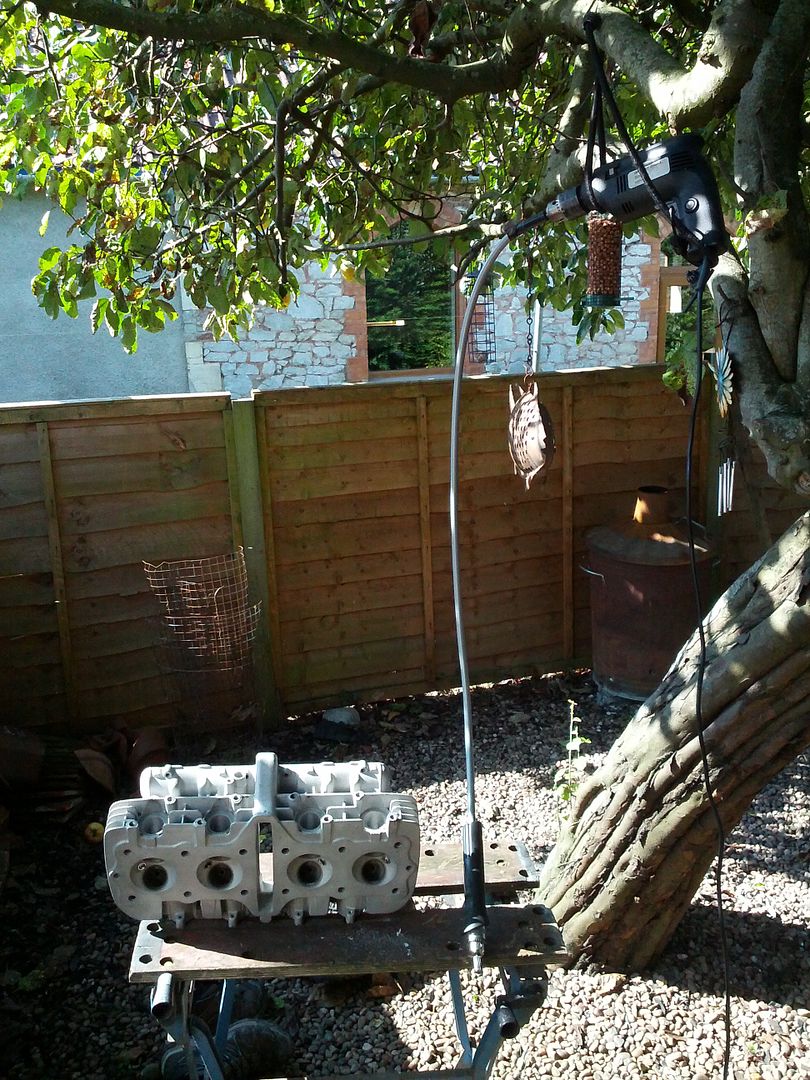
The high-tech gas flowing equipment
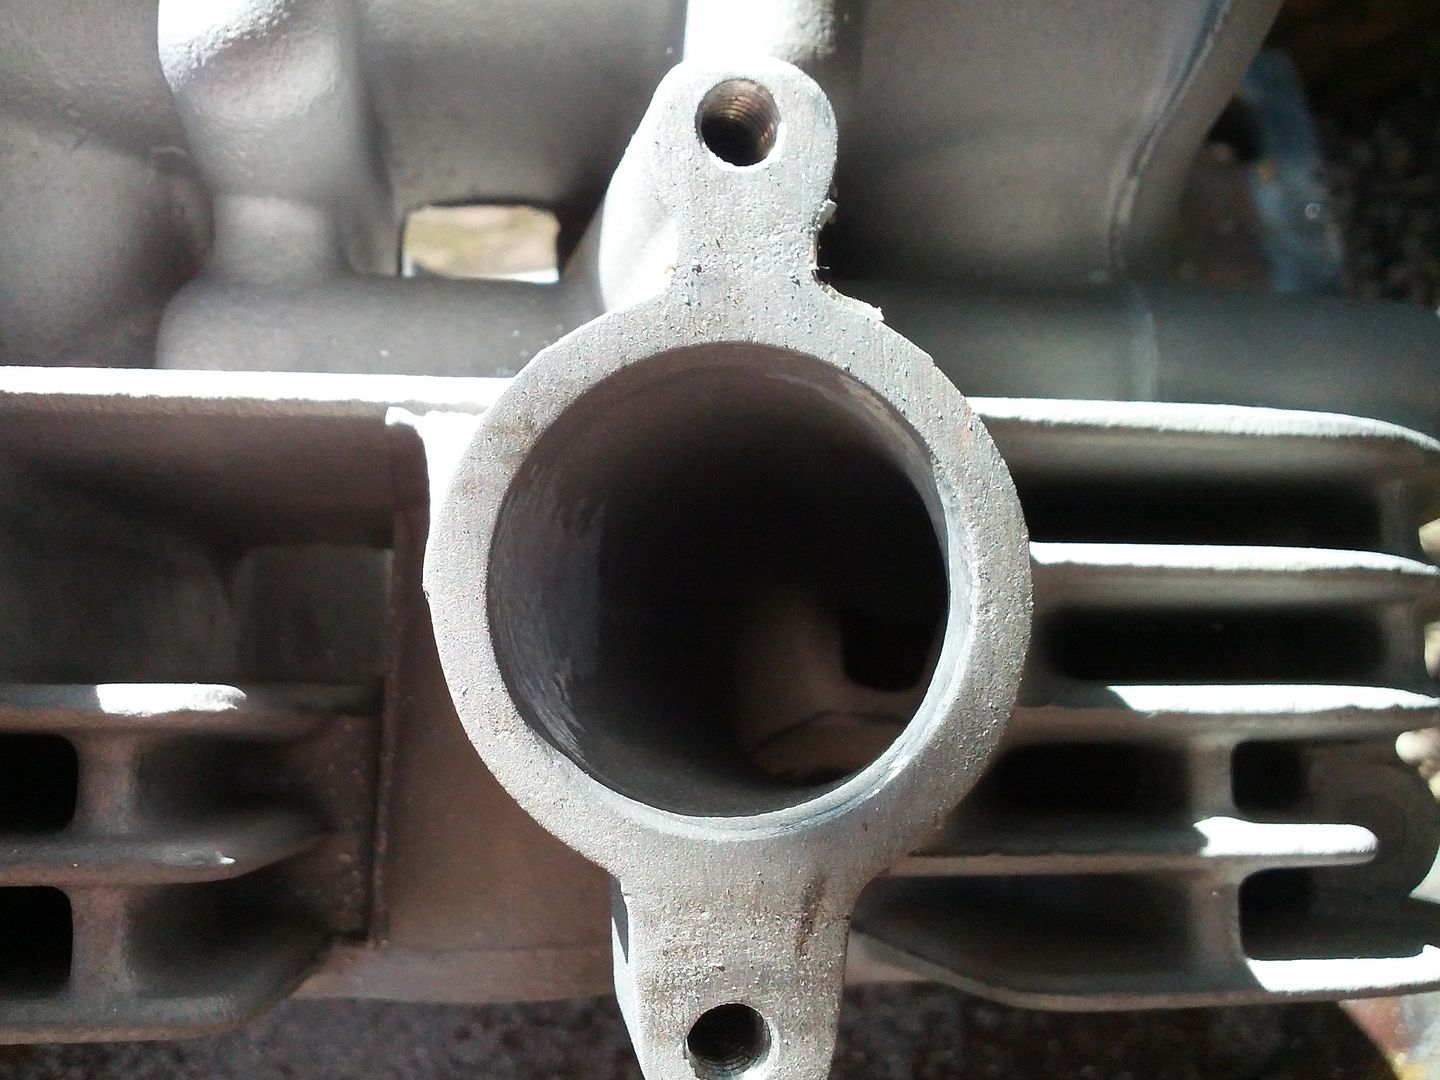
This is a US spec head so it has the "plateau" cast into the exhaust port which will have to be blended out:

Taper right on edge of inlet to go first.
Just roughing out first:

Followed by ridges left from the plugs inserted into the die when casting the ports.

The aim is to just remove all the casting marks and finish off Mr. K's fettling and get a nice smooth passage for the gas to flow as unimpeded as practically possible. Hopefully achieving a gradual taper down to about 80% around the valve guide. Finish will be coarse 80 emery.
The quality of the casting on these heads is quite good overall. I have done quite a few heads now and i think the standard of the ports' shape and finish to be better than mid 90's stuff i have done previously.
The high-tech gas flowing equipment

This is a US spec head so it has the "plateau" cast into the exhaust port which will have to be blended out:


-
Zomerset Zed
- 100Club
- Posts: 239
- Joined: 30th May 2014
- Location: Somerset
Gas flowing continued
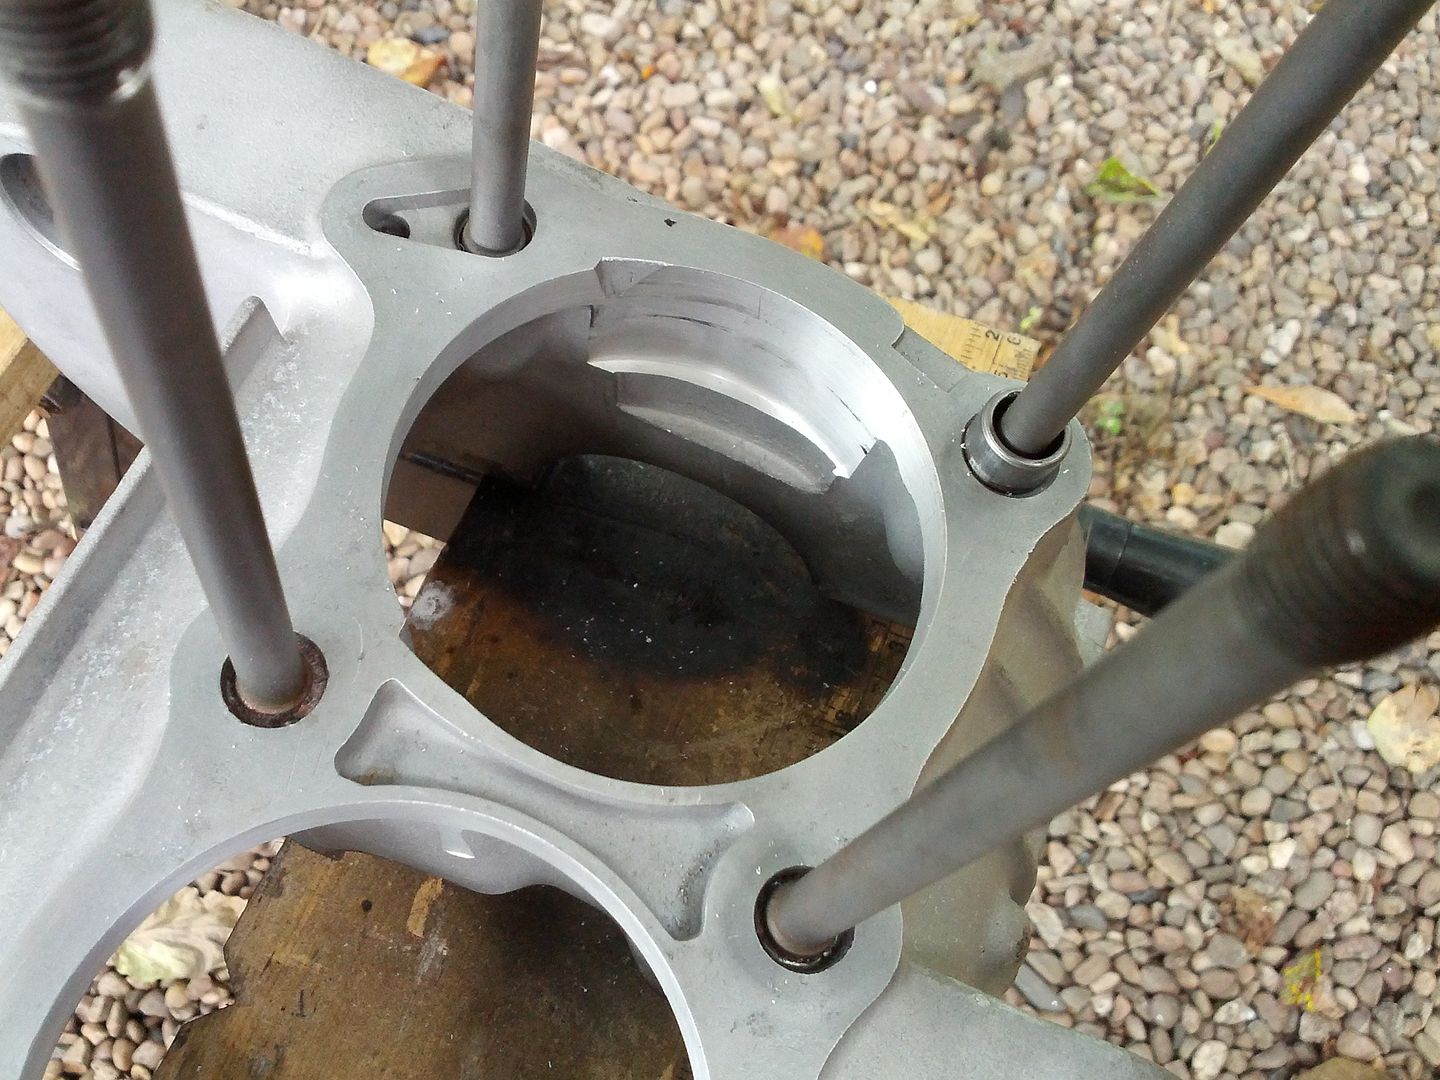
Have now done as much gas flowing work as i intend to:

Its important to match the inlet rubbers to the head to get a smooth transition. Just started in this pic. Important to know which inlet rubber for each port when you come to assembly.
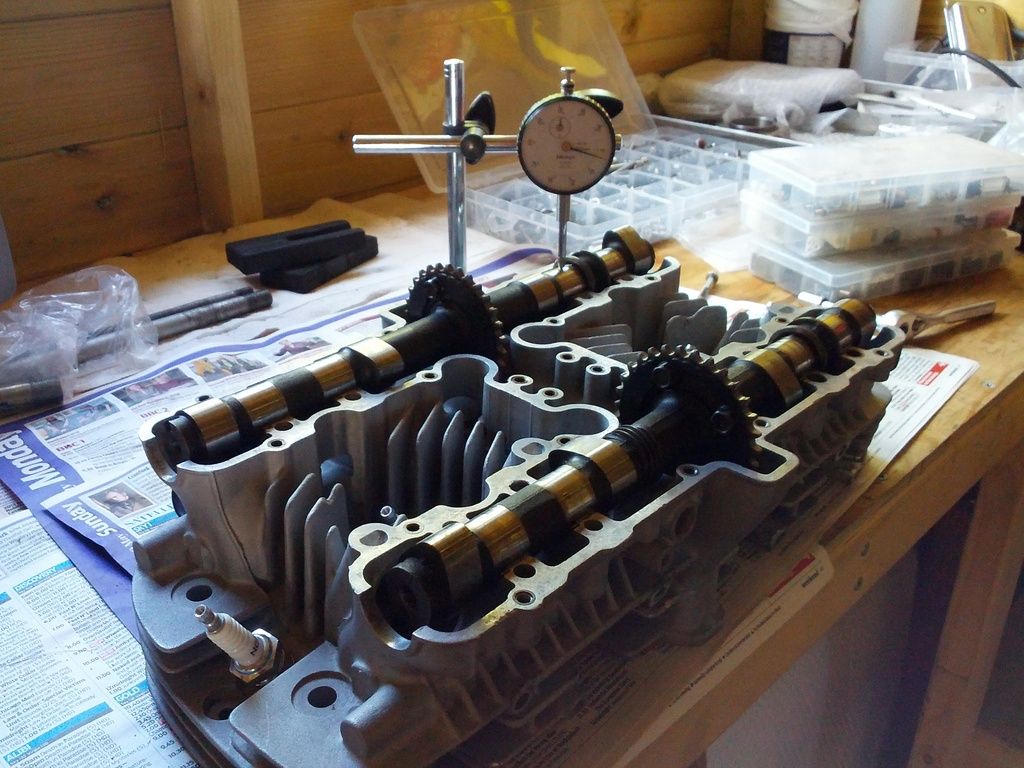
I thought i had better check the cams run smoothly in the head before i crack on with too much work, but found a problem. The exhaust cam locks when i tighten the right hand cap down with the shell bearings installed. And i mean locked
Time to investigate the problem. This what i have found:
Head is either warped or has been machined on the piss to the tune of 8 thou across the width, both faces, but in opposing directions so it is a wedge shape.
The right hand cap of the exhaust cam can be seen to have this 8 thou gap under the inside edge, but only when the dowels are fitted. When i leave the front dowel out only the cap site nice and flush and when tightened down the cam is much more free to turn.
This would suggest that when the dowel is fitted it is holding up the cap at the front and it is parallel to the top face of the head and that the top face of the head is not flat from front to back either
Hav'nt decide on a fix yet but have decided to press on with gas flowing.
Really need to decide what cams i am going to use first and try them in the head before any corrective work.
Measured the run out of the cams in the lower shells and greatest run-out measured was 0.02mm. So cams are straight and so are the bearing journals in the head, it seems just the machined faces are incorrect!

Its important to match the inlet rubbers to the head to get a smooth transition. Just started in this pic. Important to know which inlet rubber for each port when you come to assembly.
I thought i had better check the cams run smoothly in the head before i crack on with too much work, but found a problem. The exhaust cam locks when i tighten the right hand cap down with the shell bearings installed. And i mean locked
Time to investigate the problem. This what i have found:
Head is either warped or has been machined on the piss to the tune of 8 thou across the width, both faces, but in opposing directions so it is a wedge shape.
The right hand cap of the exhaust cam can be seen to have this 8 thou gap under the inside edge, but only when the dowels are fitted. When i leave the front dowel out only the cap site nice and flush and when tightened down the cam is much more free to turn.
This would suggest that when the dowel is fitted it is holding up the cap at the front and it is parallel to the top face of the head and that the top face of the head is not flat from front to back either
Hav'nt decide on a fix yet but have decided to press on with gas flowing.
Really need to decide what cams i am going to use first and try them in the head before any corrective work.
Measured the run out of the cams in the lower shells and greatest run-out measured was 0.02mm. So cams are straight and so are the bearing journals in the head, it seems just the machined faces are incorrect!

-
Ginger Bear

- Hardcore

- Posts: 5512
- Joined: 16th Dec 2008
- Location: In the Dark.
- Contact:

-
Zomerset Zed
- 100Club
- Posts: 239
- Joined: 30th May 2014
- Location: Somerset
Who is online
Users browsing this forum: No registered users and 28 guests