Great to see some progress.
You won't be disappointed with anything that Nick at Griffs does for you.
Hello Guest User,
Please feel free to have a look around the forum but be aware that as an unregistered guest you can't see all of it and you can't post.
To access these 'Registered Users Only' areas simply register and login.
Please feel free to have a look around the forum but be aware that as an unregistered guest you can't see all of it and you can't post.
To access these 'Registered Users Only' areas simply register and login.
My Ultimate Zed
Moderators: chrisu, paul doran, Taffus, KeithZ1R
-
Ginger Bear

- Hardcore

- Posts: 5512
- Joined: 16th Dec 2008
- Location: In the Dark.
- Contact:

-
Zomerset Zed

- 100Club

- Posts: 239
- Joined: 30th May 2014
- Location: Somerset
More.....
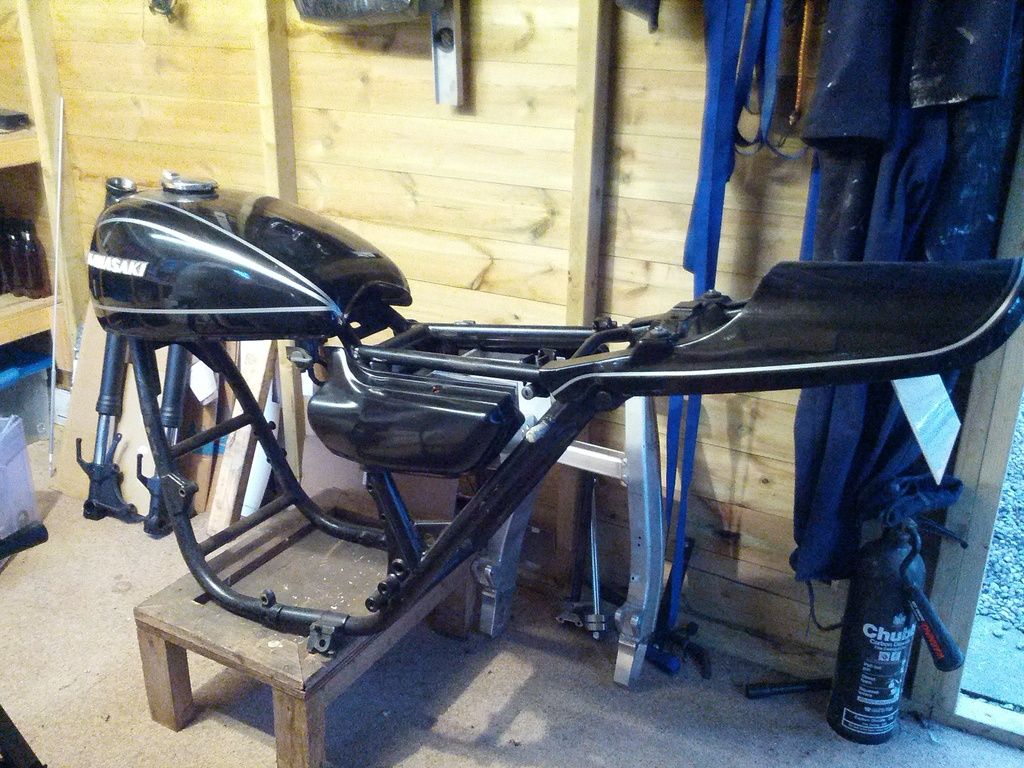
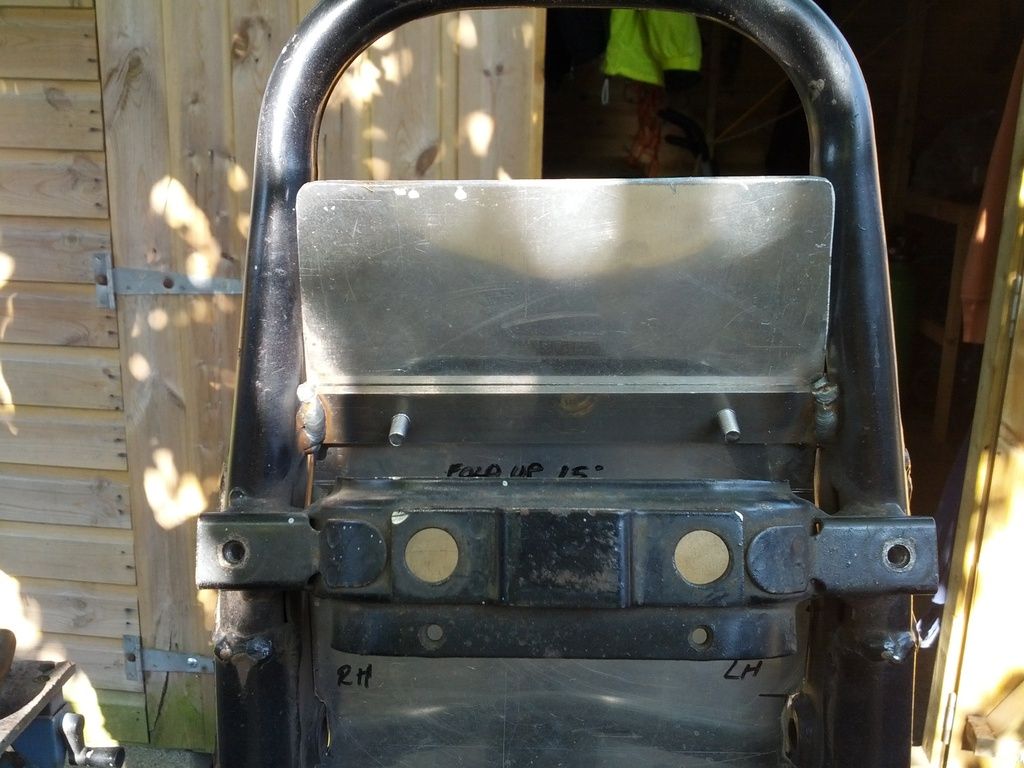
I wanted to continue the in-fill work i had done on the rear frame areas to under the seat to give the tail end a nice uncluttered look:
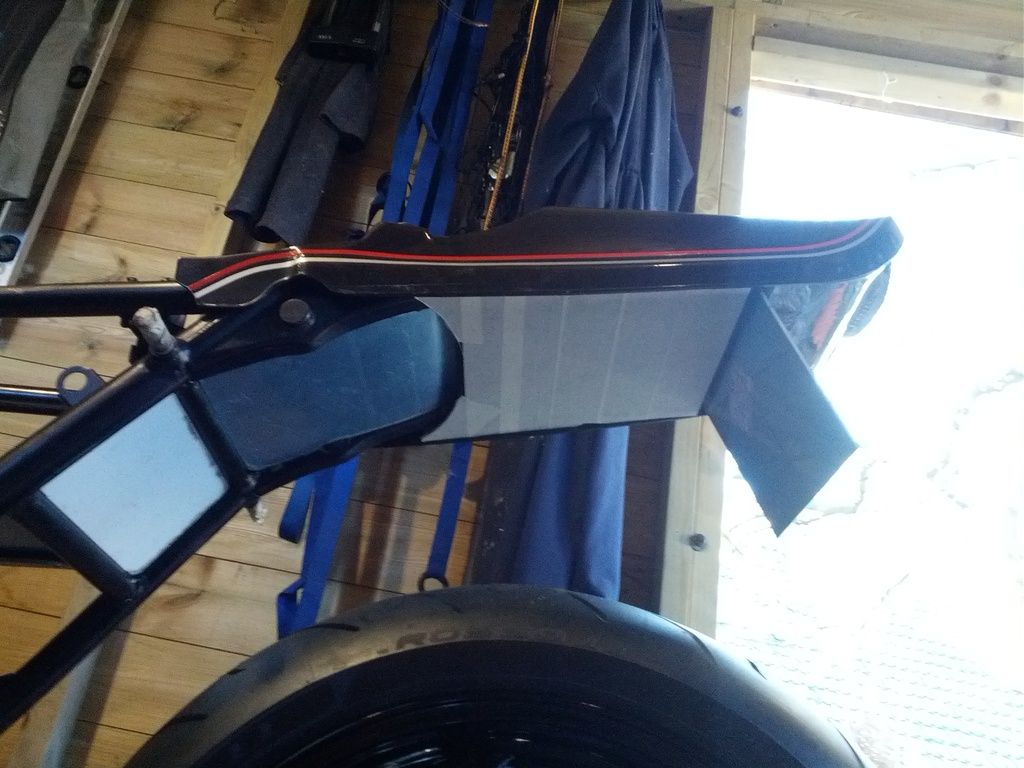
I used 2mm ABS carbon-look sheets to make the panels from. I have reinforced the top side of the flat panel in front of the number plate with aly angle VHB-taped on. Masking tape is just to mark out and protect the plastic from scratches. I recessed the panels into the duck tail as that is easier than flush to get looking good.
I have made up an aly bracket to hold the number plate which i will cut down once i have a number plate.
I found a suitable LED rear light on Ebay and made up a bracket to fit in the tail piece. I then spent considerable time re-learning the art of forming plastic around a curved object which you don't have. Then trimming it all carefully to fit the light through the hole and get a near fit:
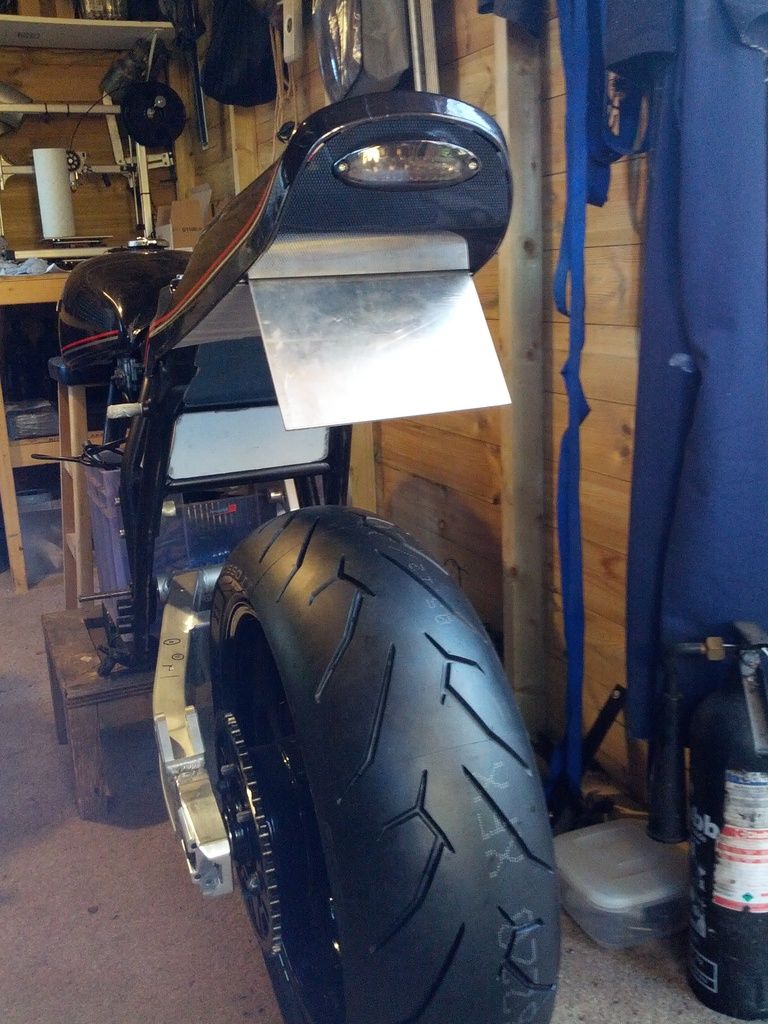
I think i will be re-doing this panel as there are some heat marks on it, the curve isn't quite right and there are a few gaps around the rear edges.
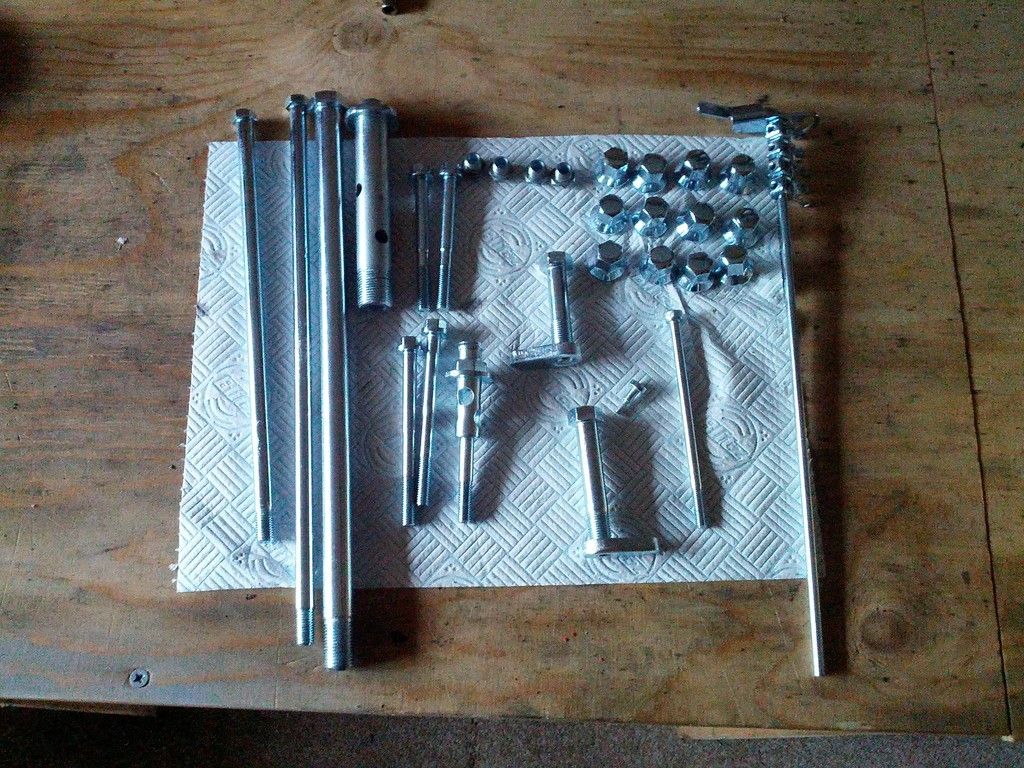
Also got few shiny bits back from Mikey:


I used 2mm ABS carbon-look
I have made up an aly bracket to hold the number plate which i will cut down once i have a number plate.
I found a suitable LED rear light on Ebay and made up a bracket to fit in the tail piece. I then spent considerable time re-learning the art of forming plastic around a curved object which you don't have. Then trimming it all carefully to fit the light through the hole and get a near fit:

I think i will be re-doing this panel as there are some heat marks on it, the curve isn't quite right and there are a few gaps around the rear edges.
Also got few shiny bits back from Mikey:

-
Zomerset Zed
- 100Club
- Posts: 239
- Joined: 30th May 2014
- Location: Somerset
Re: My Ultimate Zed
Made up the electrical box to hold battery, reg/rec unit, starter relay, indicator relay, and fuse box etc. from aly plates:
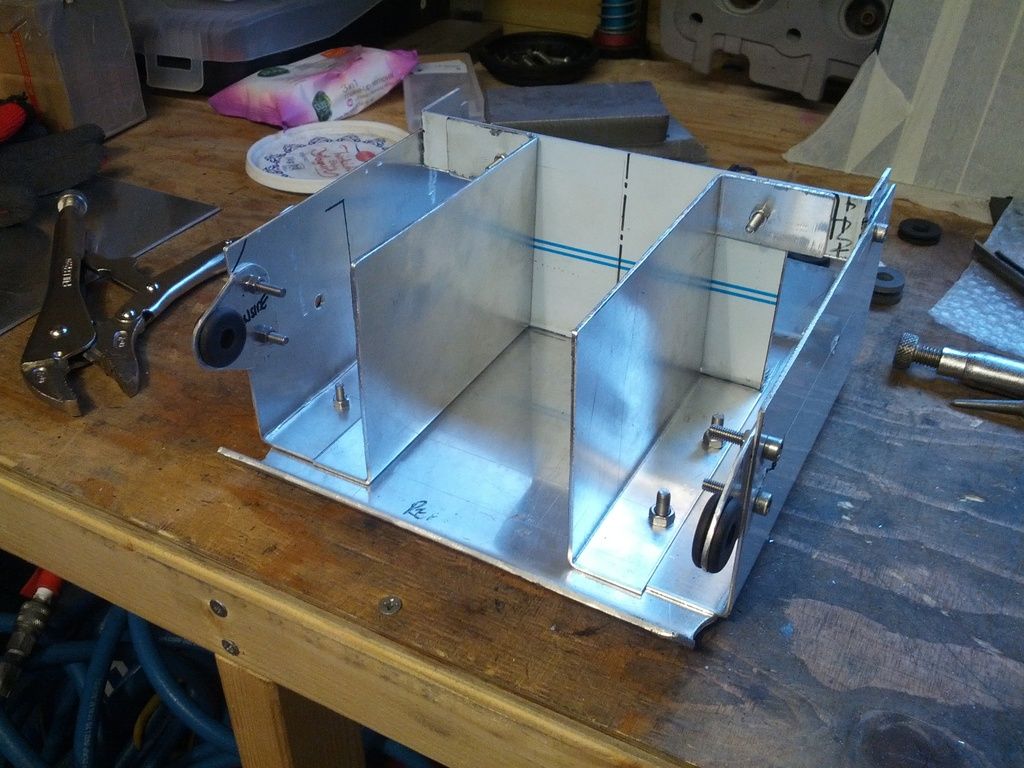
I have bought some Z1a/b replica side panels, but alas they have 2 of the 3 mounting lugs in different positions, so i have to incorporate some brackets into the box for the rear ones.
Also had a play around with the "graphics". Decided that to get "finished" this year the cruddy black paint stays for now, but just seeing if the classic Z lines will work.
Had to lop off the rear part of the lh side panel to get clearance for the seat lock which is one of the few standard things on the frame left:
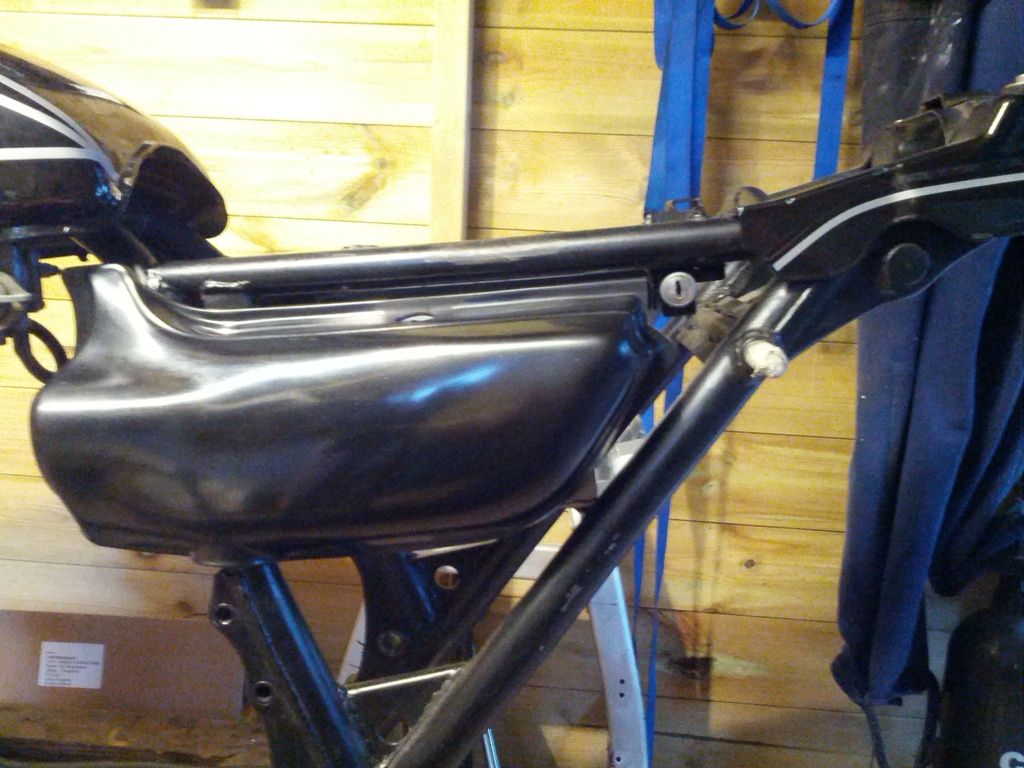
I'm going to have to re-make the lh side to the electrical box to fill in that gap at the rear
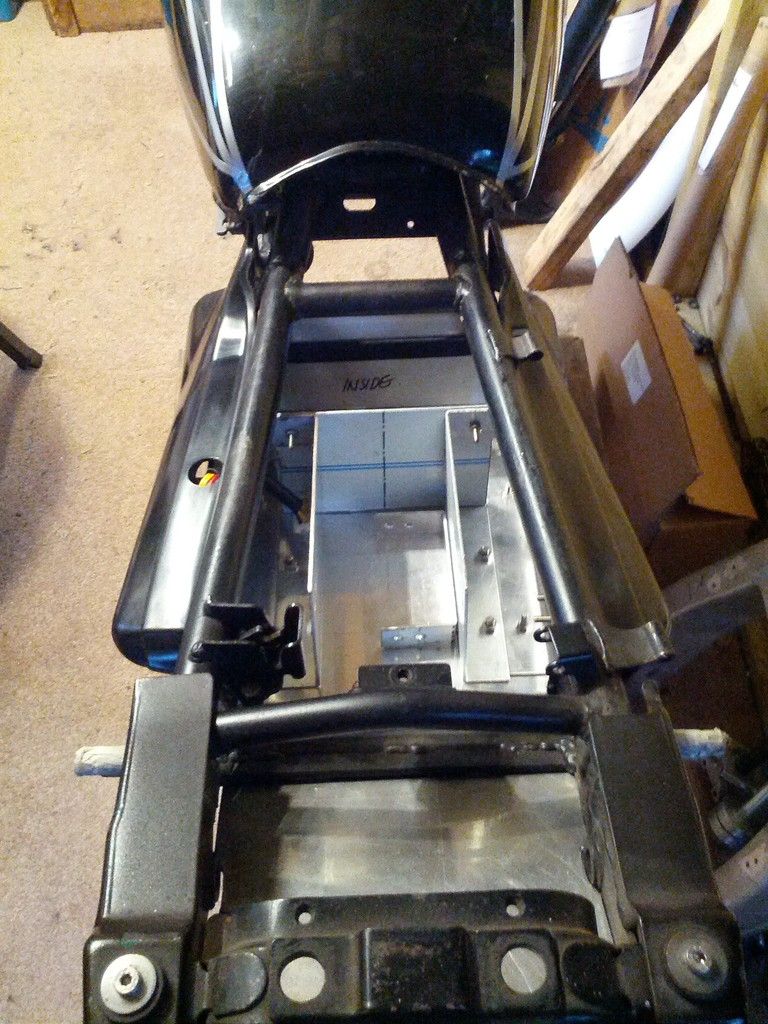
Battery will go in the middle bit. Already have a LI battery to go in but not sure if its a good idea with standard reg/rec and generator anyone using LI batteries ok with standard electrical charging circuit
Brackets for the front lugs on the side panels:
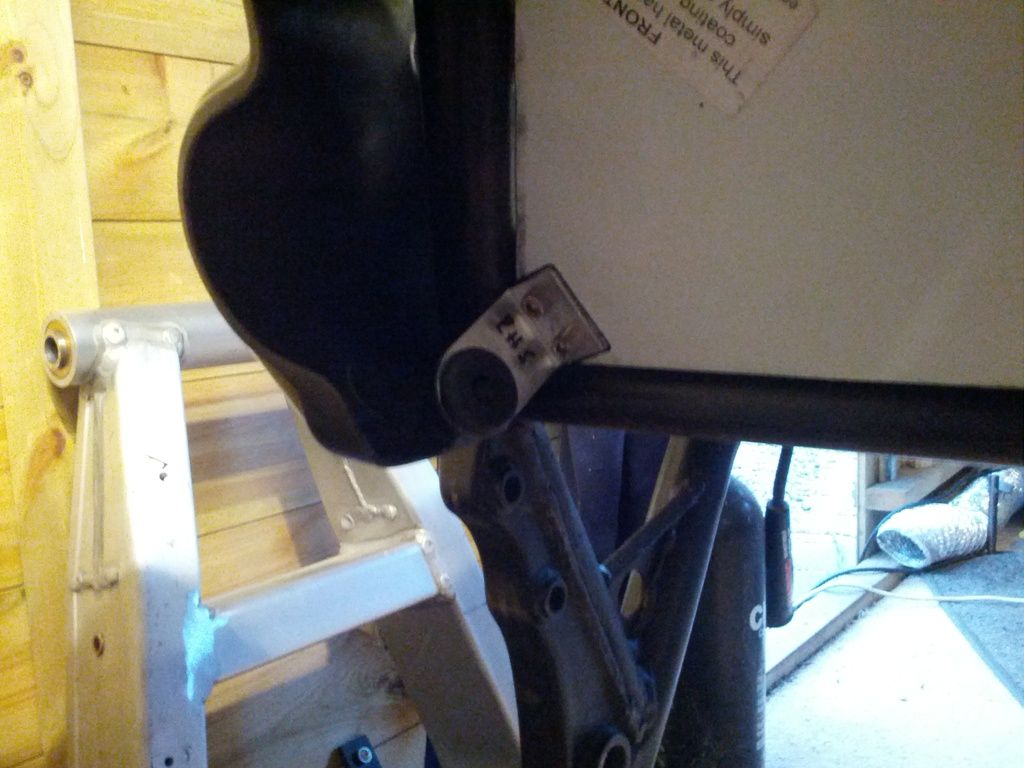
All bolted together so easy to take apart (again and again) but will eventually riveted.
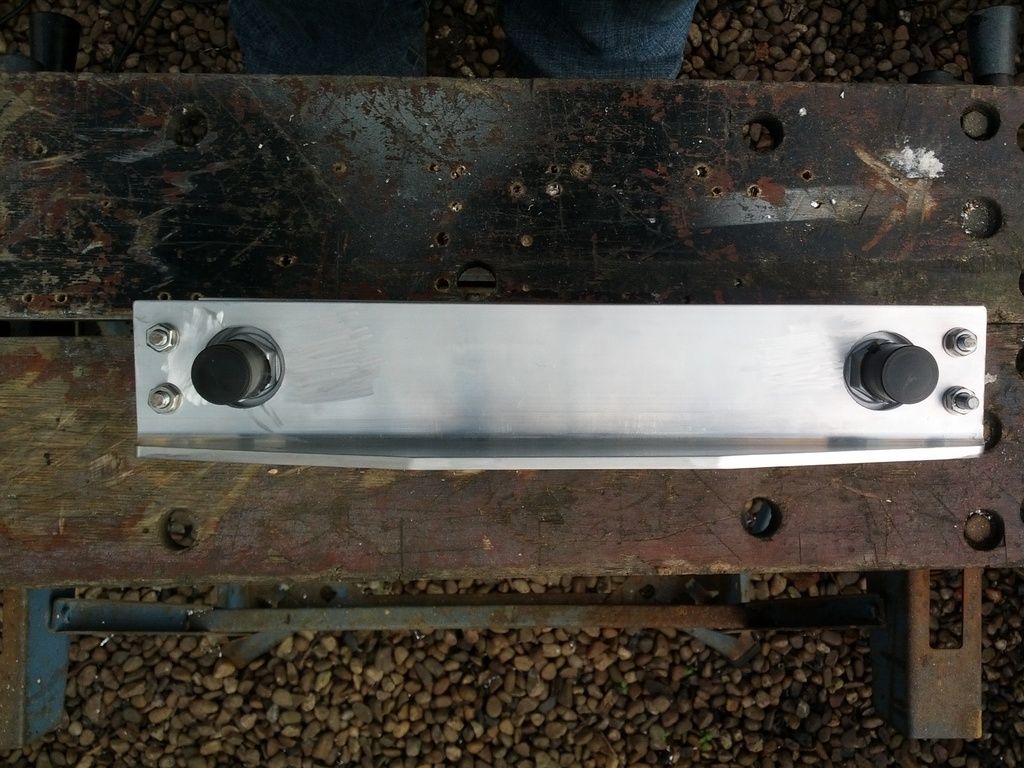
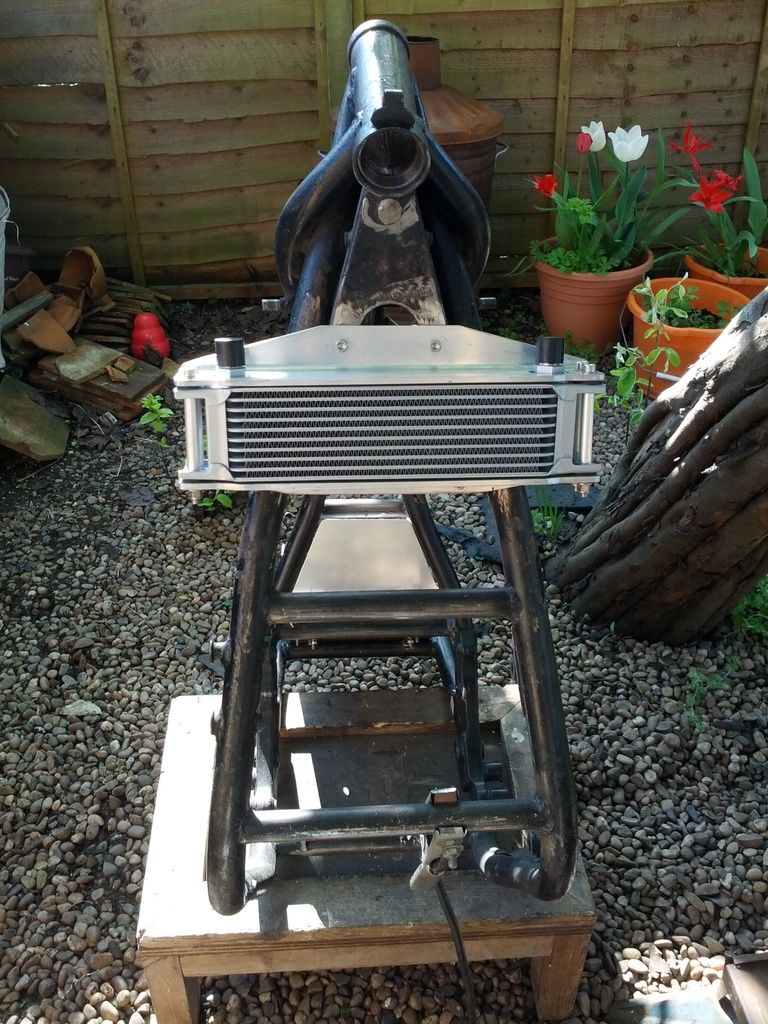
Bought an oil cooler for a golf rally car, was the only one i could find with small connectors. Most coolers seem to have AN10 or even AN12 fittings these days, but managed to get this one with AN8 male fittings. So made up some brackets to fir to the frame, but really need to get another dry build together as lots of things still to work out and measure:
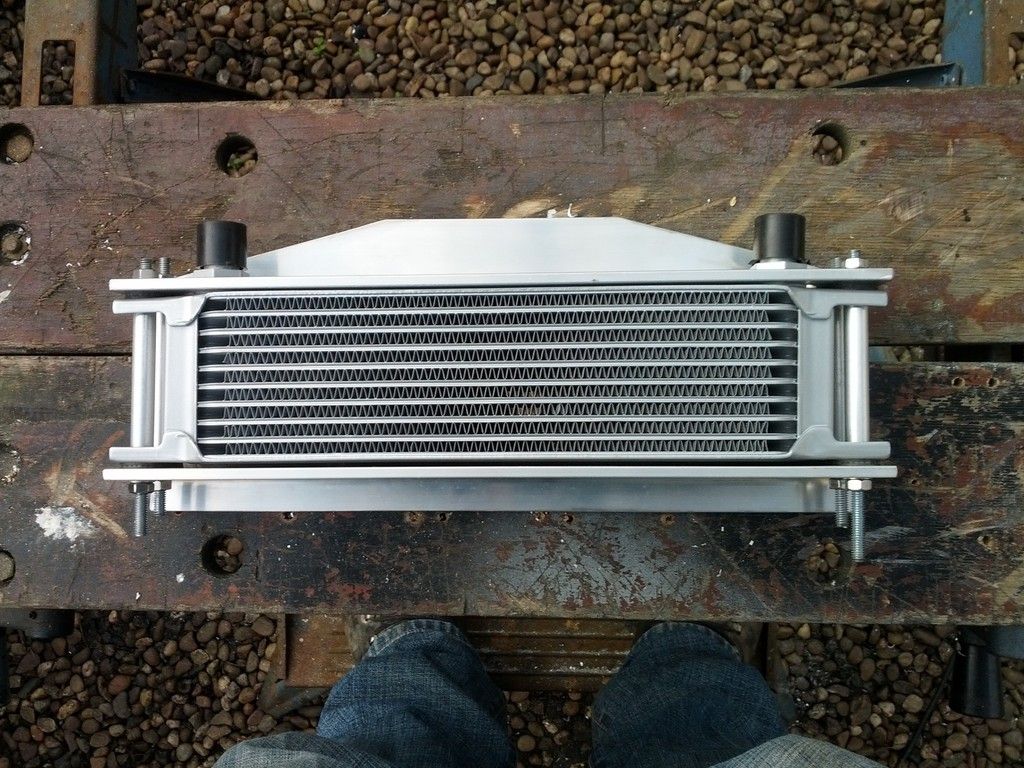
Threaded rod will do, right?
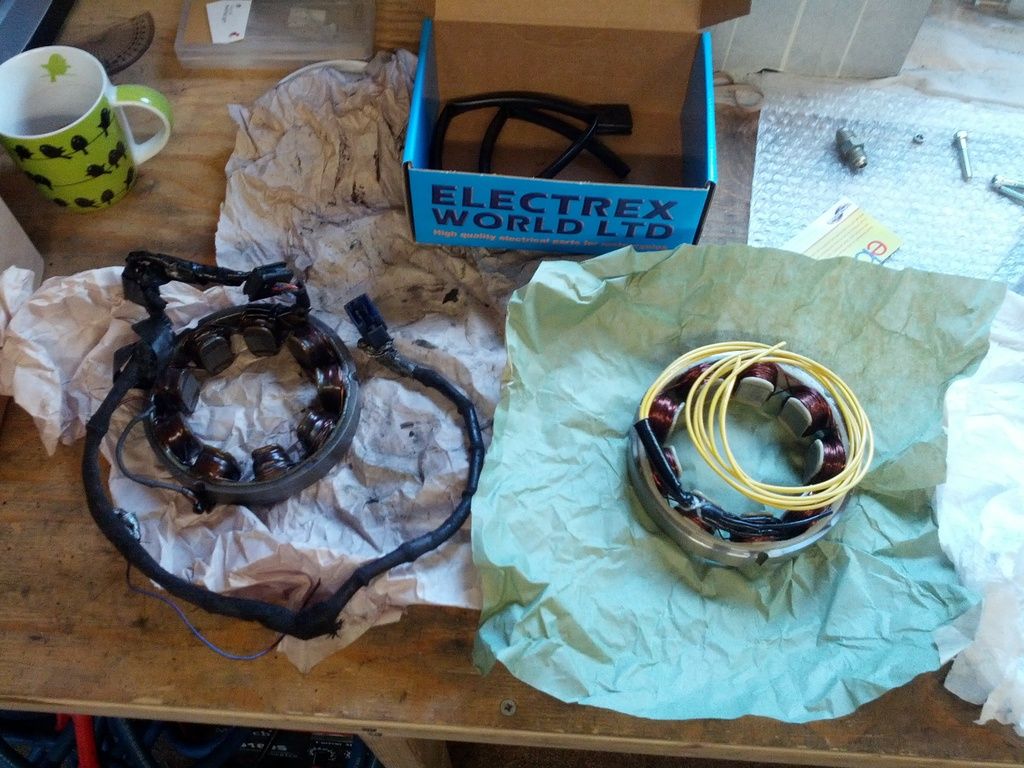
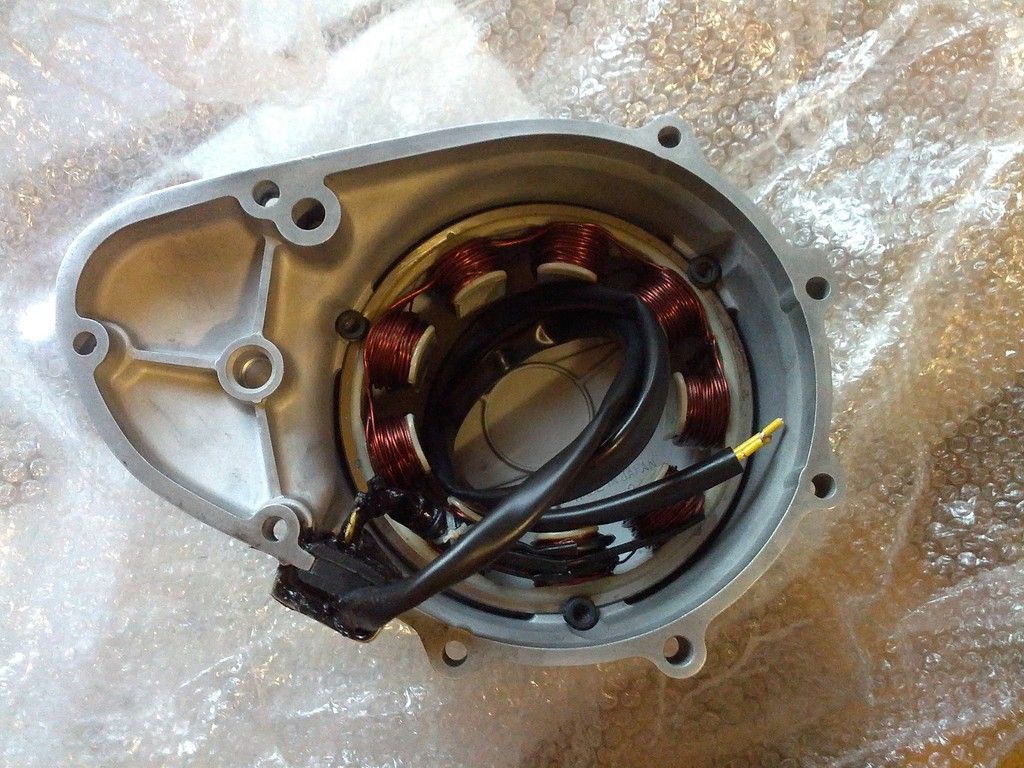
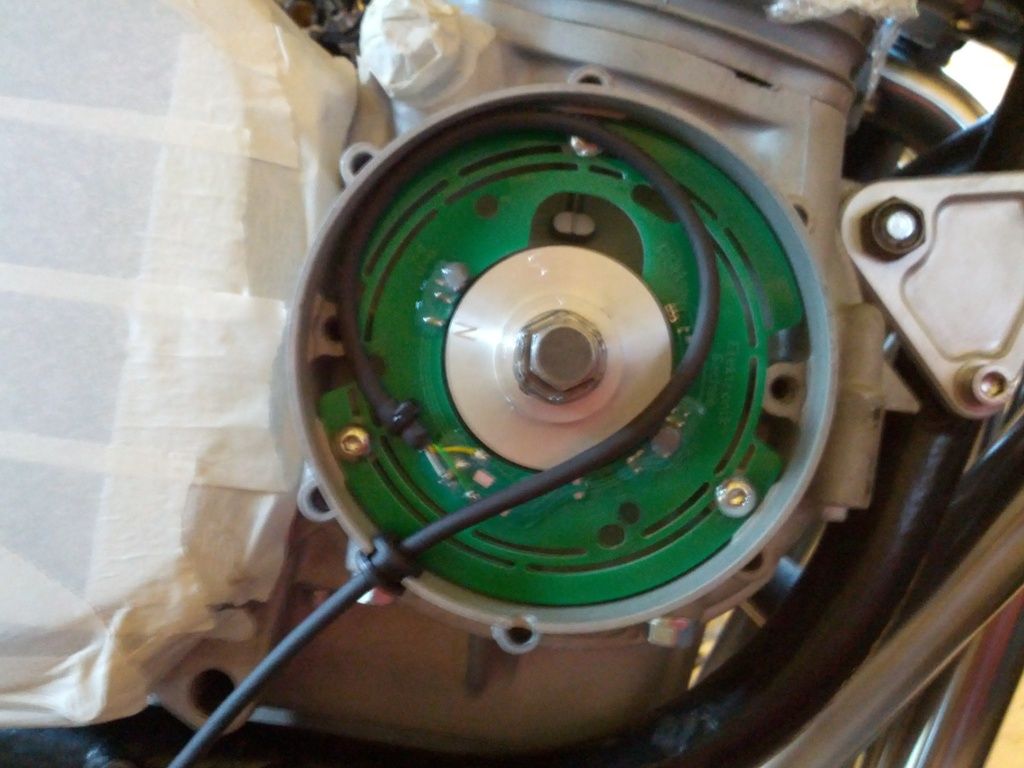
Picked up an electrex gen for £33!! Existing one tests out ok but wires were fried and rigid and seal looks crap, so at least i will have a spare:
Polished gen cover fresh from Mikey's:
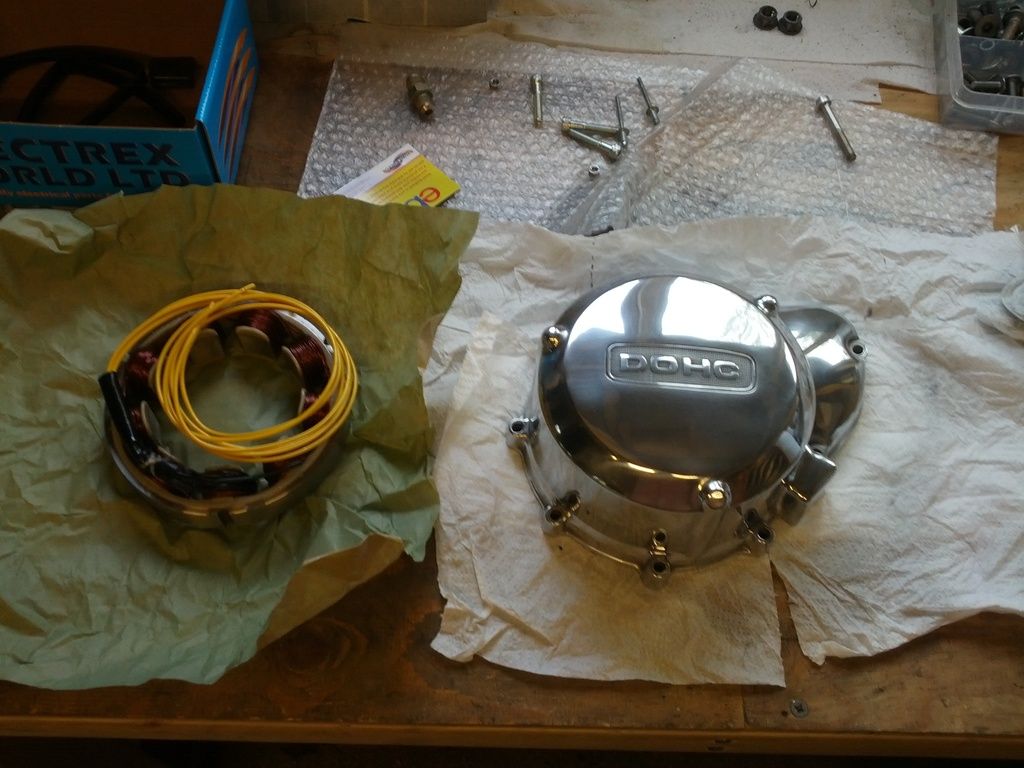
Had to sand the OD of the coil down a wee bit to get in the casing, then applied RTV Si to the cables and all around the joint of the seal:

I have bought some Z1a/b replica side panels, but alas they have 2 of the 3 mounting lugs in different positions, so i have to incorporate some brackets into the box for the rear ones.

Also had a play around with the "graphics". Decided that to get "finished" this year the cruddy black paint stays for now, but just seeing if the classic Z lines will work.
Had to lop off the rear part of the lh side panel to get clearance for the seat lock which is one of the few standard things on the frame left:

I'm going to have to re-make the lh side to the electrical box to fill in that gap at the rear

Battery will go in the middle bit. Already have a LI battery to go in but not sure if its a good idea with standard reg/rec and generator
Brackets for the front lugs on the side panels:

All bolted together so easy to take apart (again and again) but will eventually riveted.
Bought an oil cooler for a golf rally car, was the only one i could find with small connectors. Most coolers seem to have AN10 or even AN12 fittings these days, but managed to get this one with AN8 male fittings. So made up some brackets to fir to the frame, but really need to get another dry build together as lots of things still to work out and measure:

Threaded rod will do, right?

Picked up an electrex gen for £33!! Existing one tests out ok but wires were fried and rigid and seal looks crap, so at least i will have a spare:

Polished gen cover fresh from Mikey's:

Had to sand the OD of the coil down a wee bit to get in the casing, then applied RTV Si to the cables and all around the joint of the seal:


Re: My Ultimate Zed
Kool 
I'm running an li battery on me Harris - been on the bike 3 yrs now with no problems. I do top it up a couple of times over winter - it's got a set of 3 x LED's to show charge status.
http://www.ebay.co.uk/itm/Kawasaki-Z900 ... SwiwVWRIdu
Excellent cranking power & weight F.A.
I'm running an li battery on me Harris - been on the bike 3 yrs now with no problems. I do top it up a couple of times over winter - it's got a set of 3 x LED's to show charge status.
http://www.ebay.co.uk/itm/Kawasaki-Z900 ... SwiwVWRIdu
Excellent cranking power & weight F.A.
And on the 7th day... Zeds were created!
-
Zomerset Zed
- 100Club
- Posts: 239
- Joined: 30th May 2014
- Location: Somerset
Re: My Ultimate Zed
Cheers Piggy,
The listing has smallest height of 133mm and i am limited to 110mm height, i already have a small LI battery so i will try using that otherwise i could use one of these and lay it on its side
The listing has smallest height of 133mm and i am limited to 110mm height, i already have a small LI battery so i will try using that otherwise i could use one of these and lay it on its side
Re: My Ultimate Zed
Yeah, mines on its side - strapped under the seat unit.
And on the 7th day... Zeds were created!
-
Zomerset Zed
- 100Club
- Posts: 239
- Joined: 30th May 2014
- Location: Somerset
Re: My Ultimate Zed
Yeah, mines on its side - strapped under the seat unit.
Genius
-
Zomerset Zed
- 100Club
- Posts: 239
- Joined: 30th May 2014
- Location: Somerset
Re: My Ultimate Zed
Reassembled carbs with new carb rebuild kits:
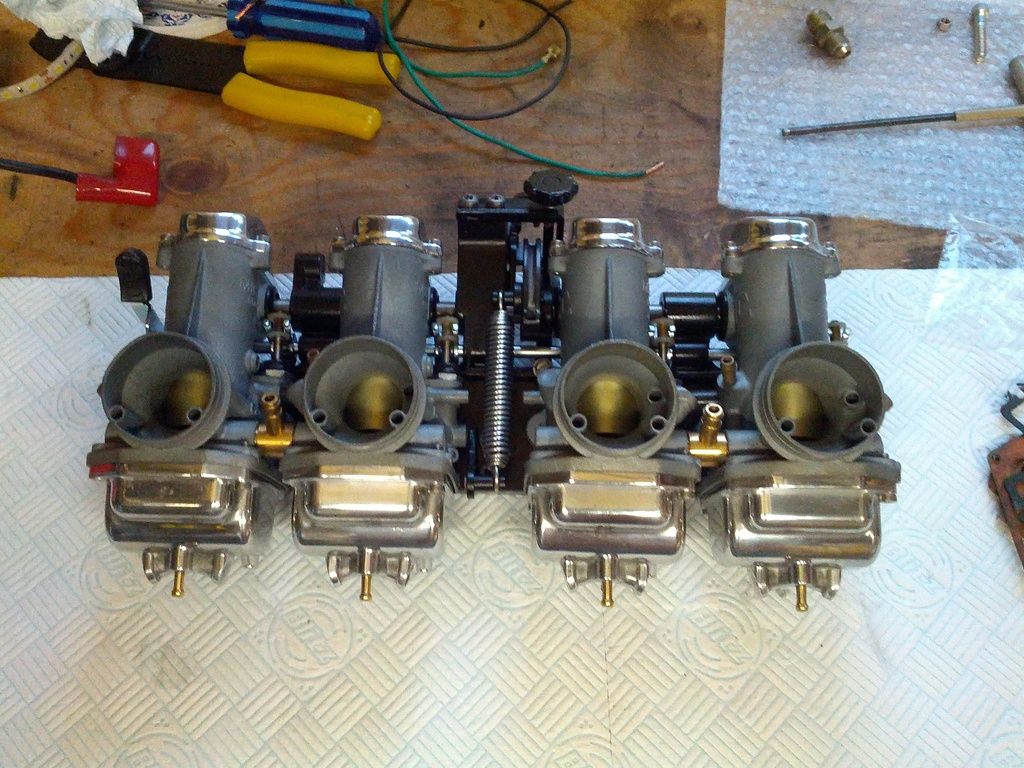
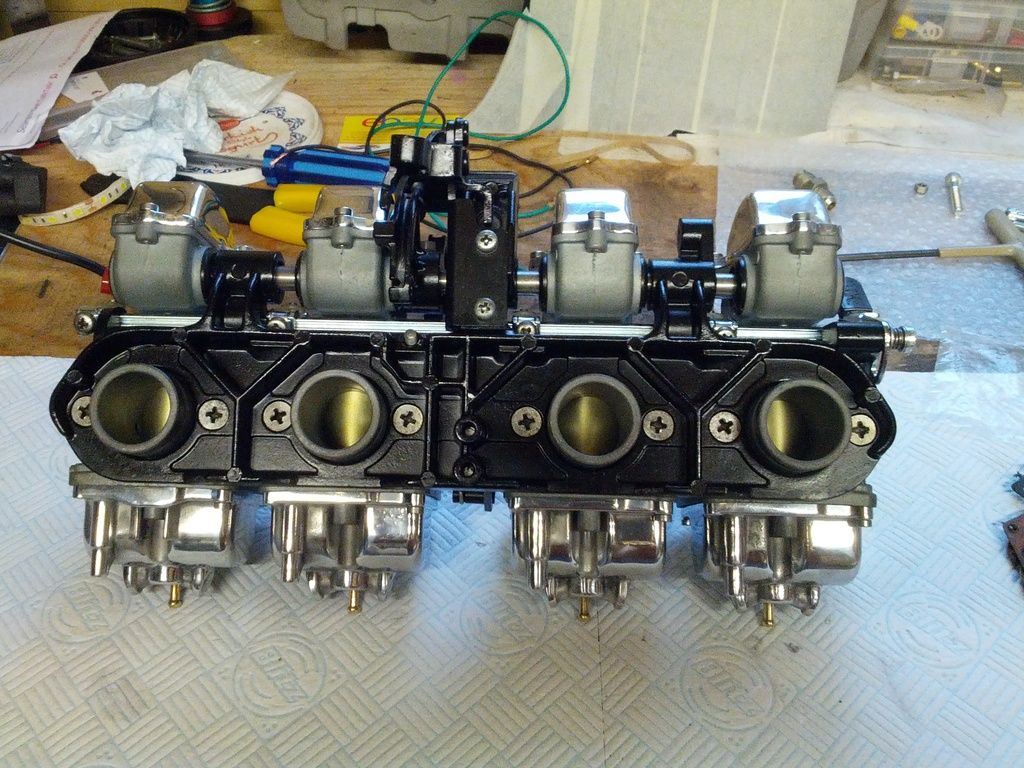
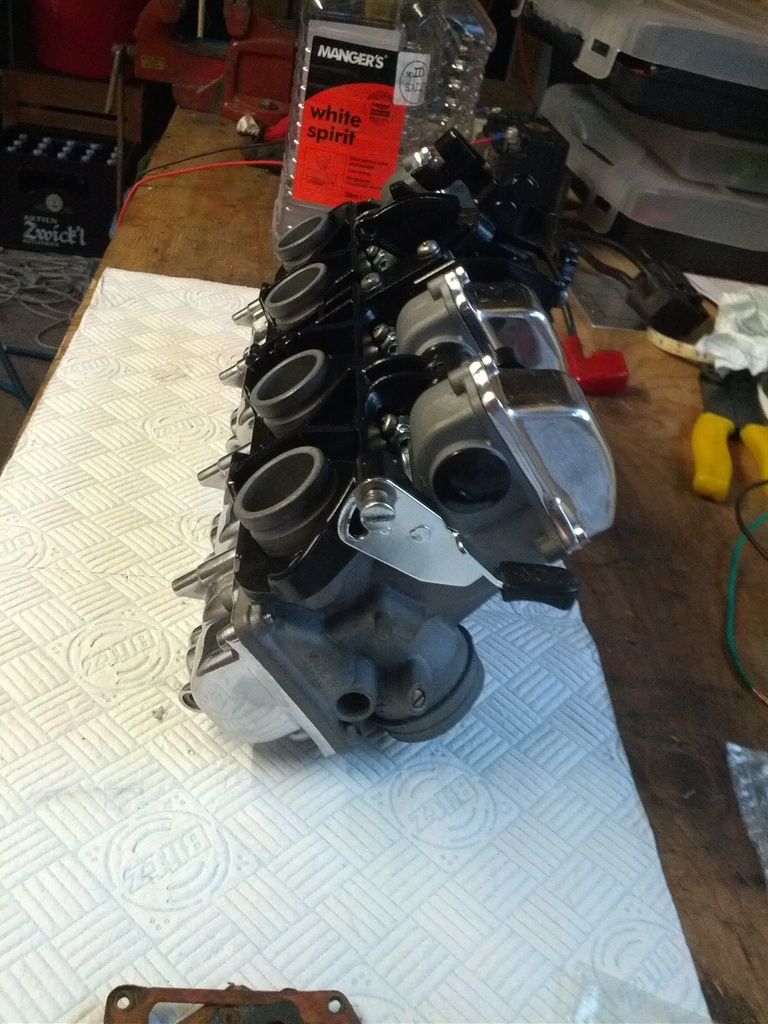
Polishing and plating courtesy of Mikey
Got oil cooler in rough position:
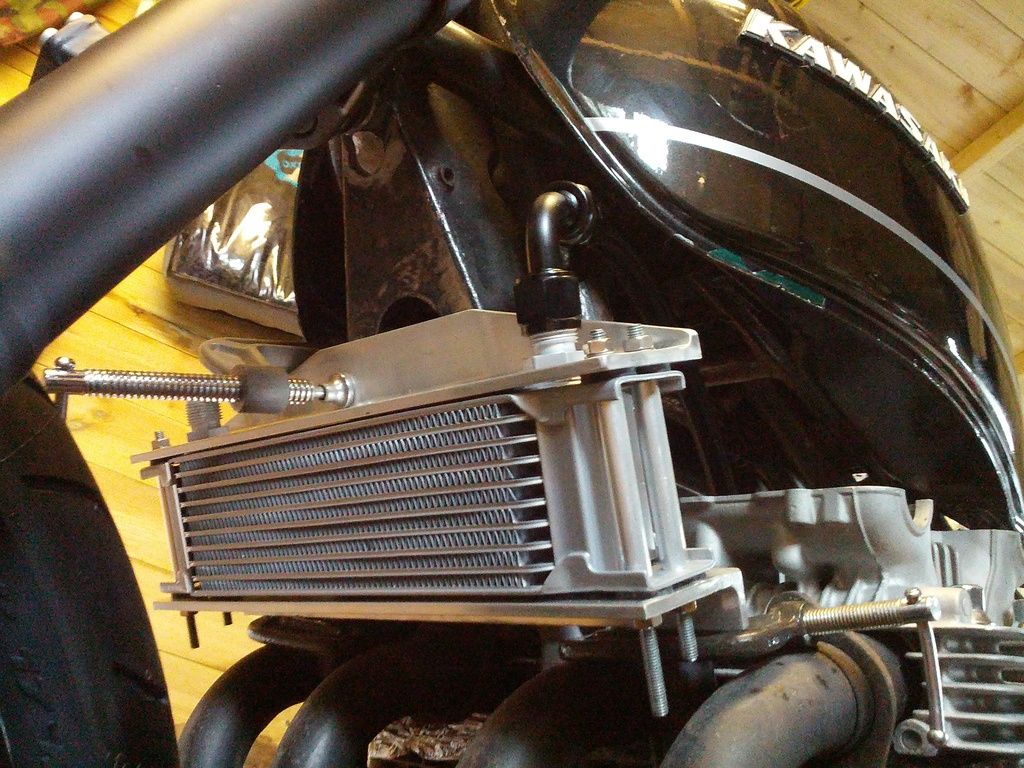
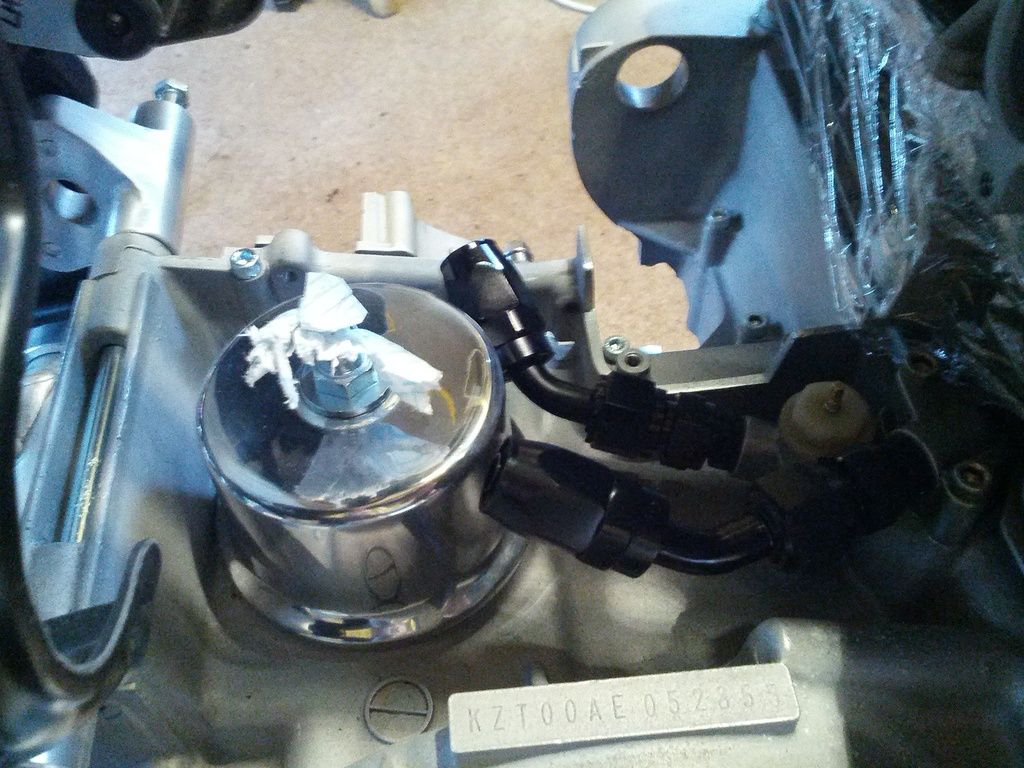
Just enough room to get the oil hoses under the front of the tank. Very close also between the fitting other end and the oil breather:
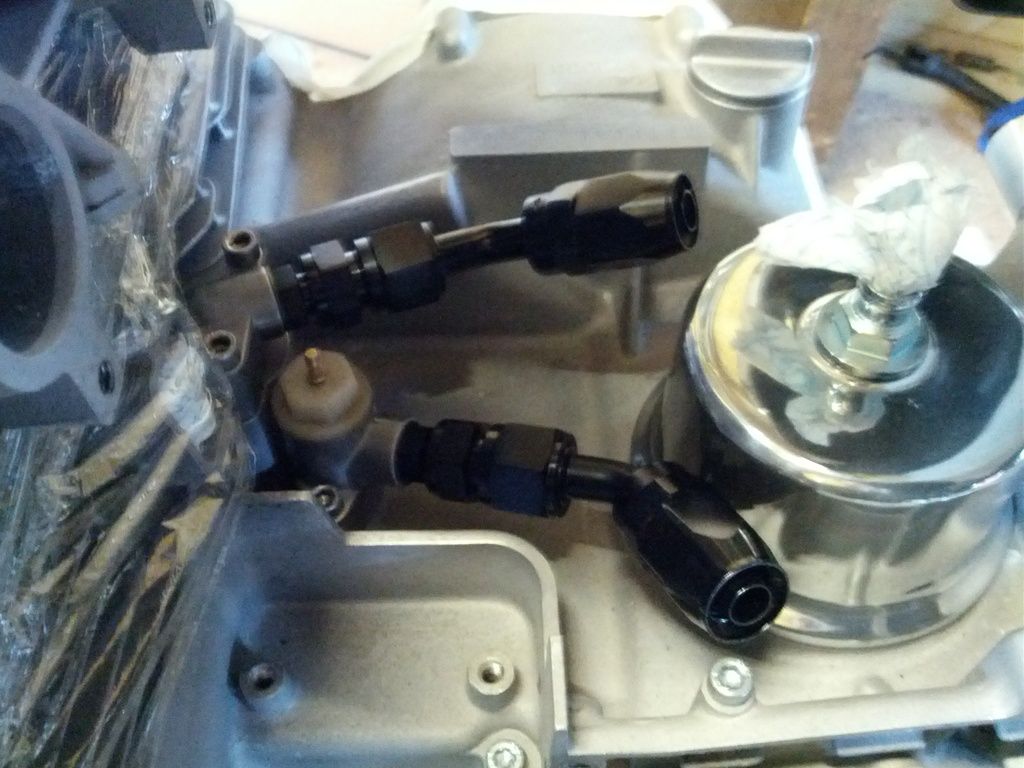
Angle the hose will be at will be a problem, so i may fit a low breather cover and use a straight fitting so i run the hoses almost hidden in a loop over the carbs attached to the frame rails. Thats the idea anyway:


Polishing and plating courtesy of Mikey
Got oil cooler in rough position:

Just enough room to get the oil hoses under the front of the tank. Very close also between the fitting other end and the oil breather:

Angle the hose will be at will be a problem, so i may fit a low breather cover and use a straight fitting so i run the hoses almost hidden in a loop over the carbs attached to the frame rails. Thats the idea anyway:

-
Zomerset Zed
- 100Club
- Posts: 239
- Joined: 30th May 2014
- Location: Somerset
Re: My Ultimate Zed

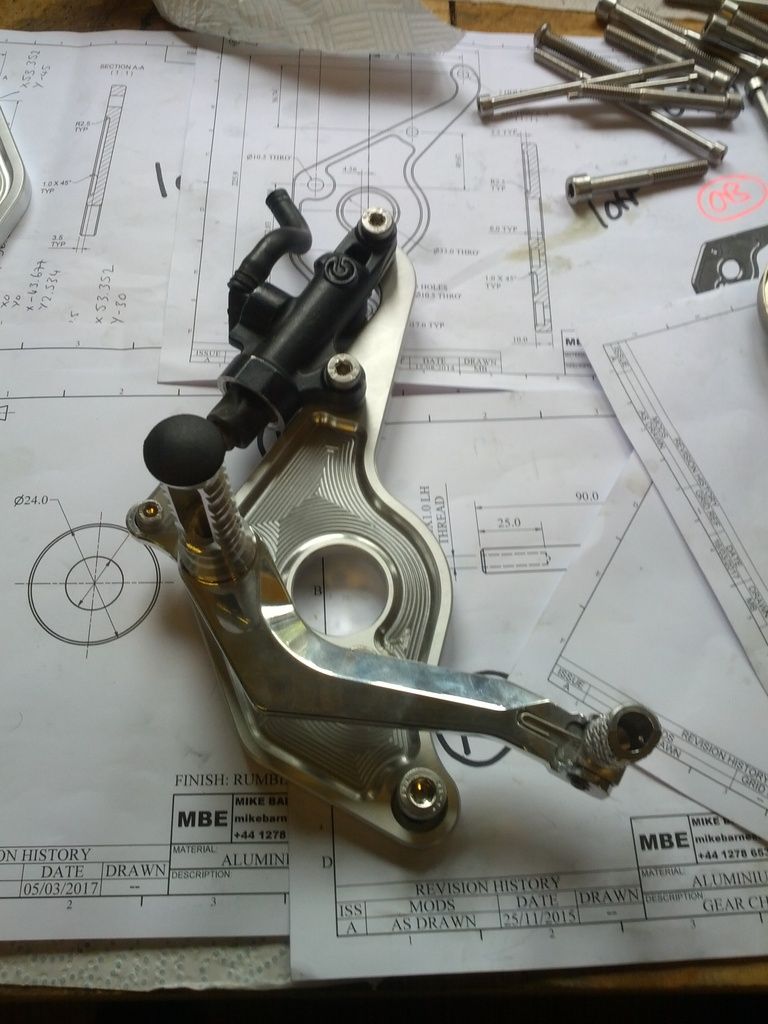
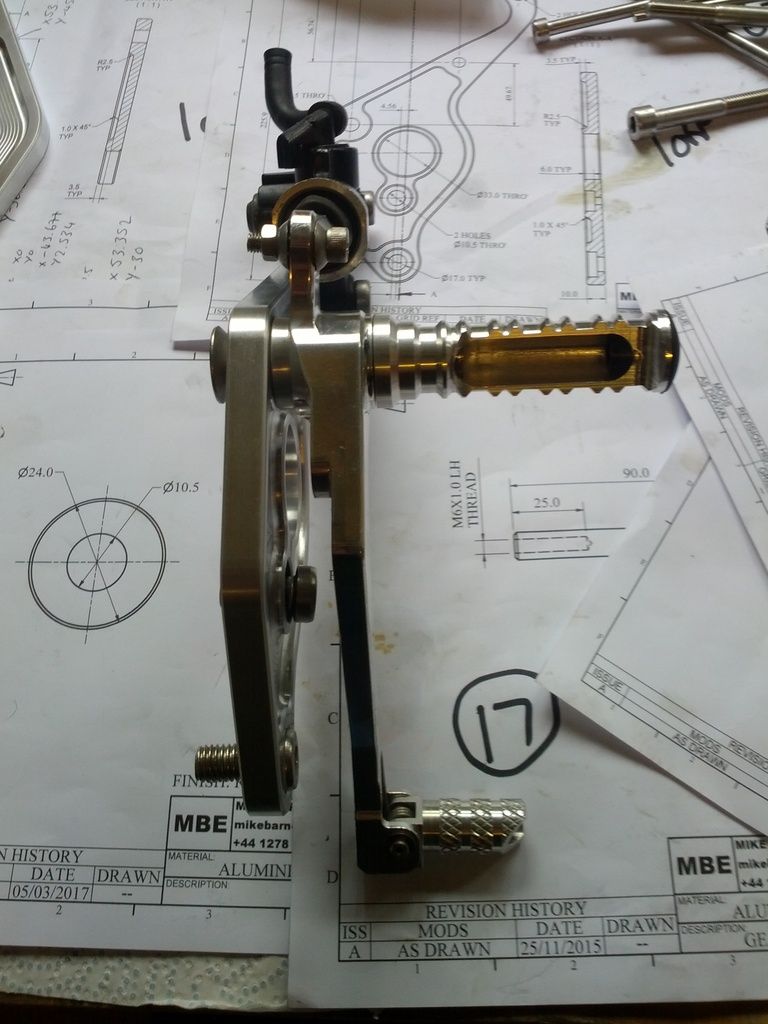
Got some Harris R1 yv5 levers and pegs to fit to my own plates.

Made up some cardboard brackets to hold the RC30 front muddy i picked up at Bristol bike show.

Now in Aly

Also got the exhaust craft Harrisey stainless pipe tacked up so i can re-alaign if needed, which i did...


Re: My Ultimate Zed
That beast is really coming together now 
And on the 7th day... Zeds were created!
-
Zomerset Zed
- 100Club
- Posts: 239
- Joined: 30th May 2014
- Location: Somerset
Re: My Ultimate Zed
More progress:
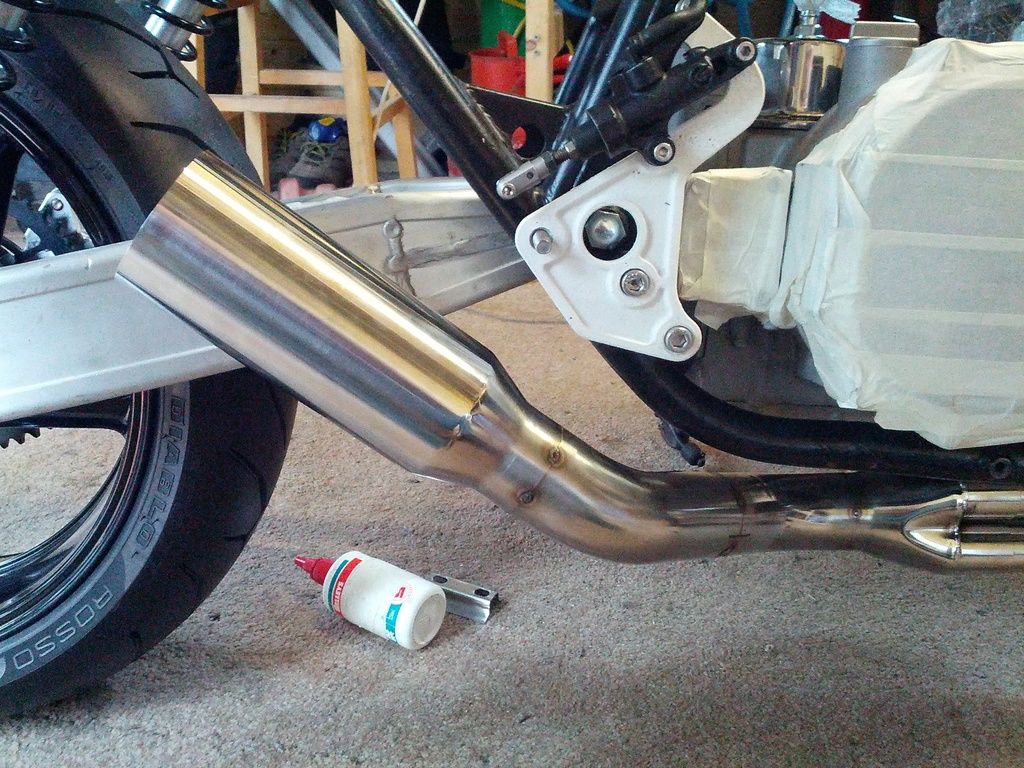
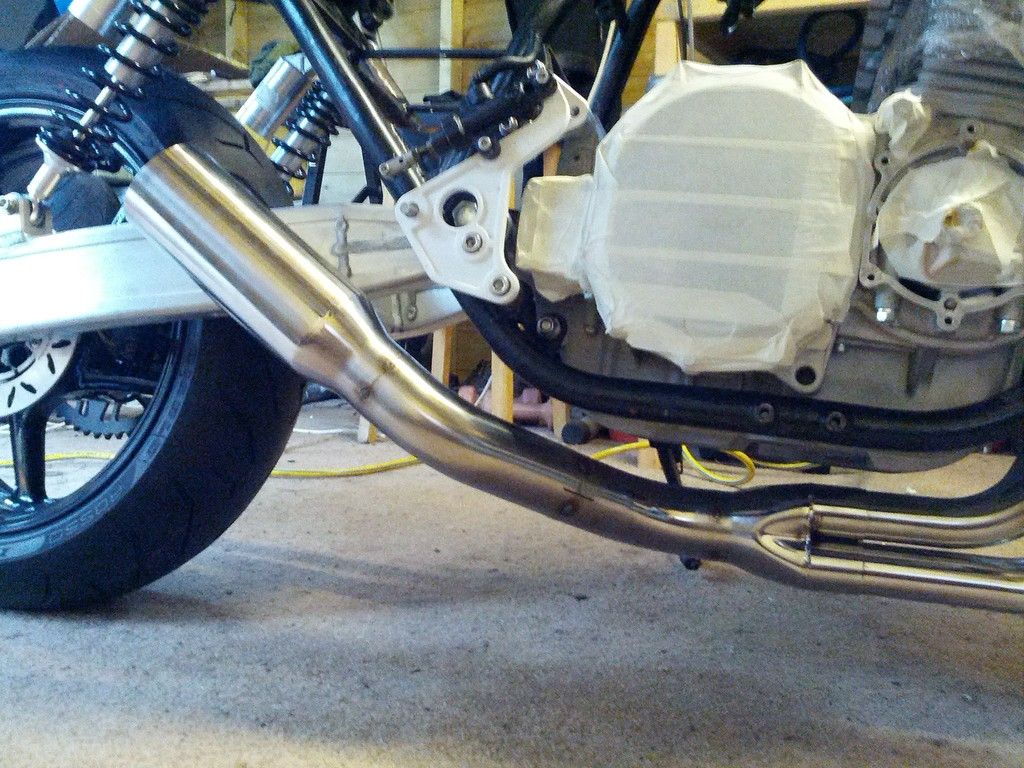
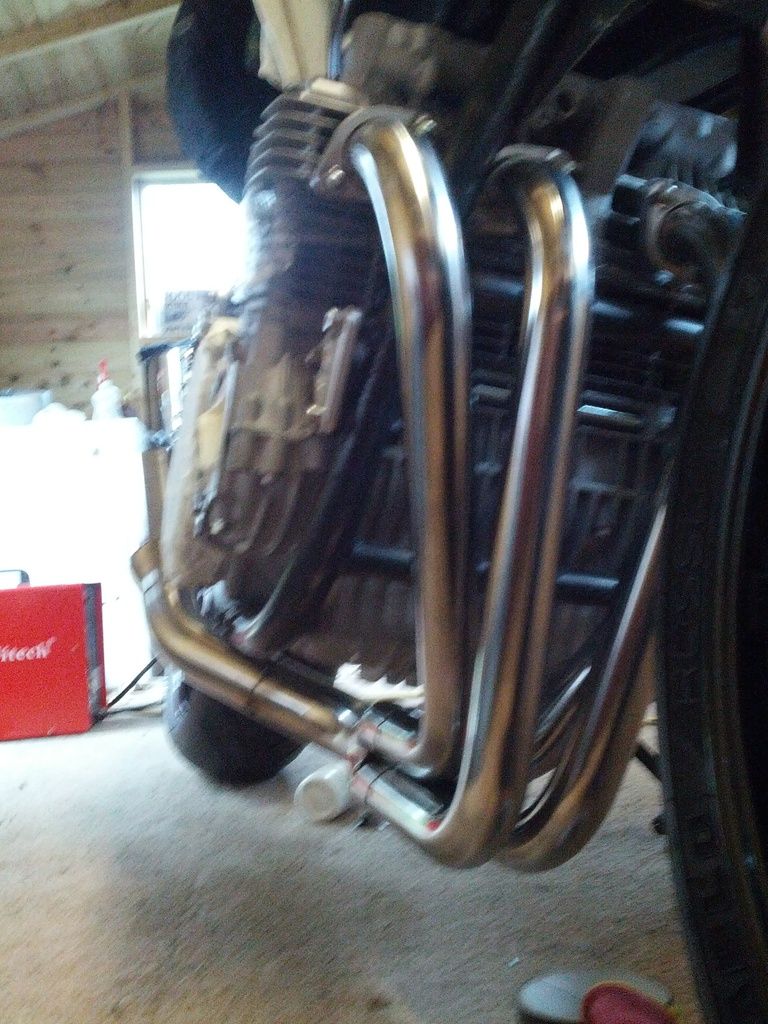
Re-tacked the exhaust link pipe and can to get a bit better ground clearance and get it more tucked in. This has the effect of angling the can up a bit more which i like
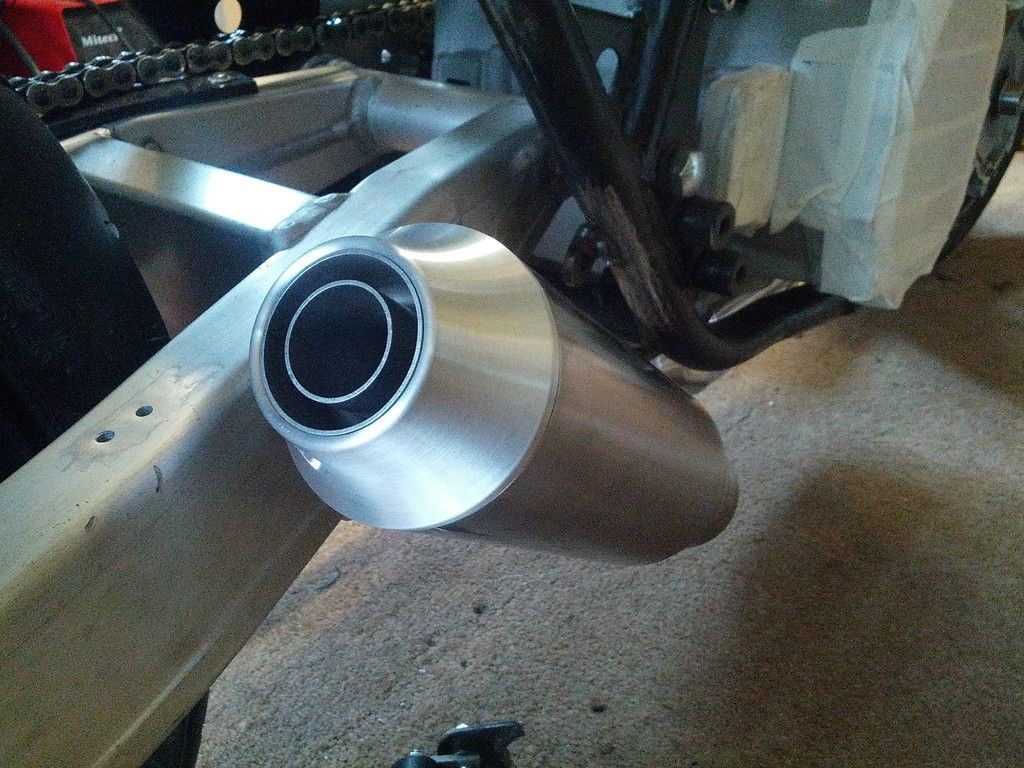
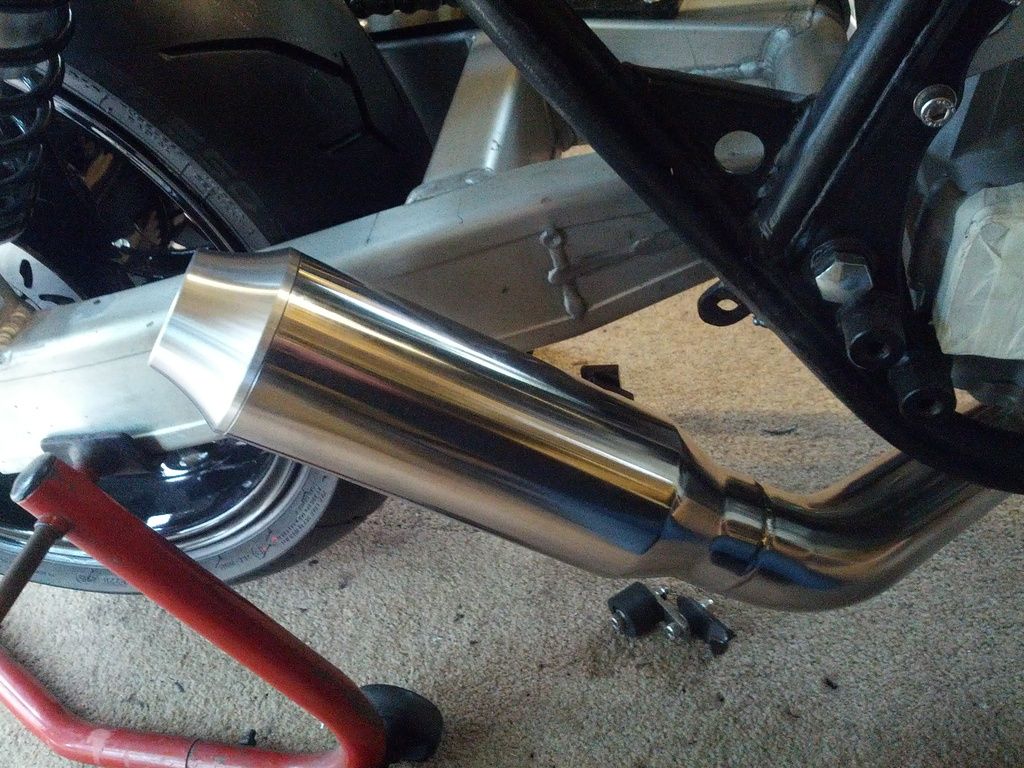
I designed a new "cone" and had machined from 6082. Reasons for this; to look more like a Harris works style, to incorporate a "dB" killer type stainless baffle i have procured from Fuel exhausts (so it can get through an MOT and get on tracks with stricter noise limits), looks the dogs i think. Will be even better when polished up a bit. Tacked the can bracket in position for welding.

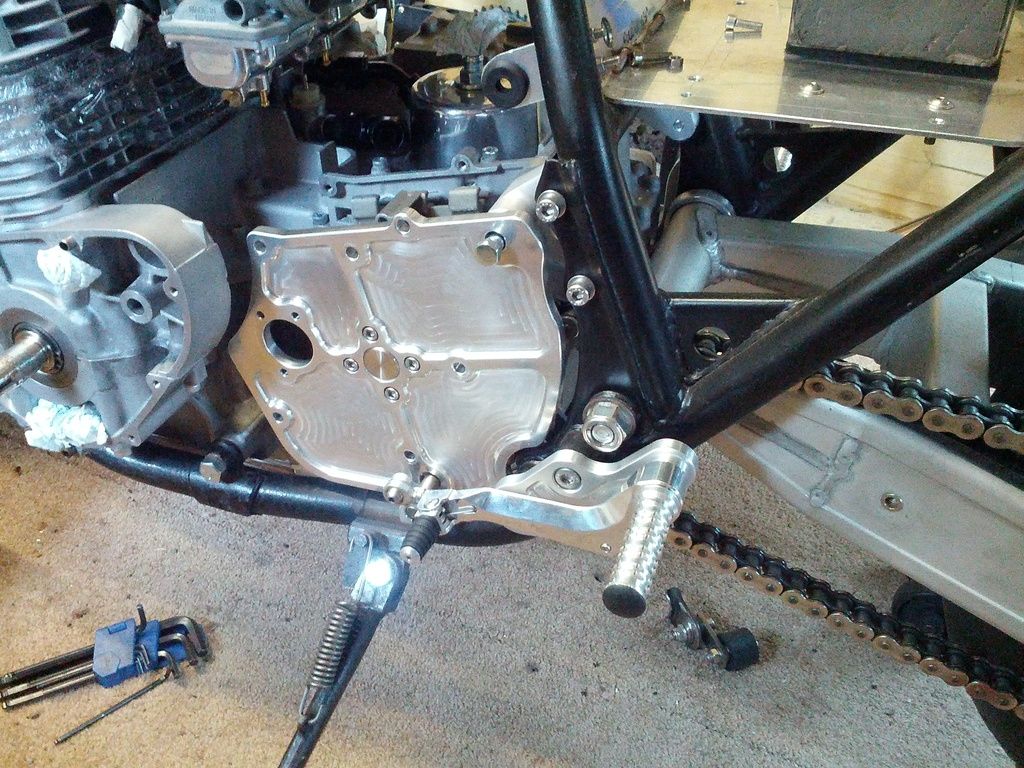
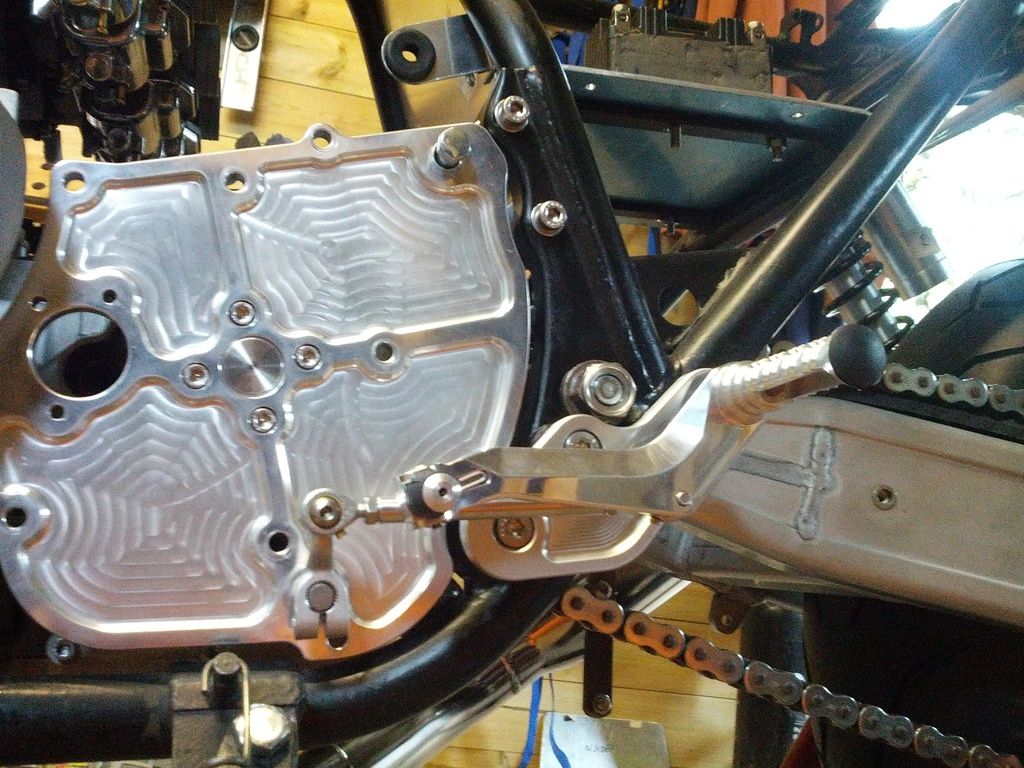
Finally took the plunge and finished the design of the rear set plates and a few other parts and got them CNC machined:
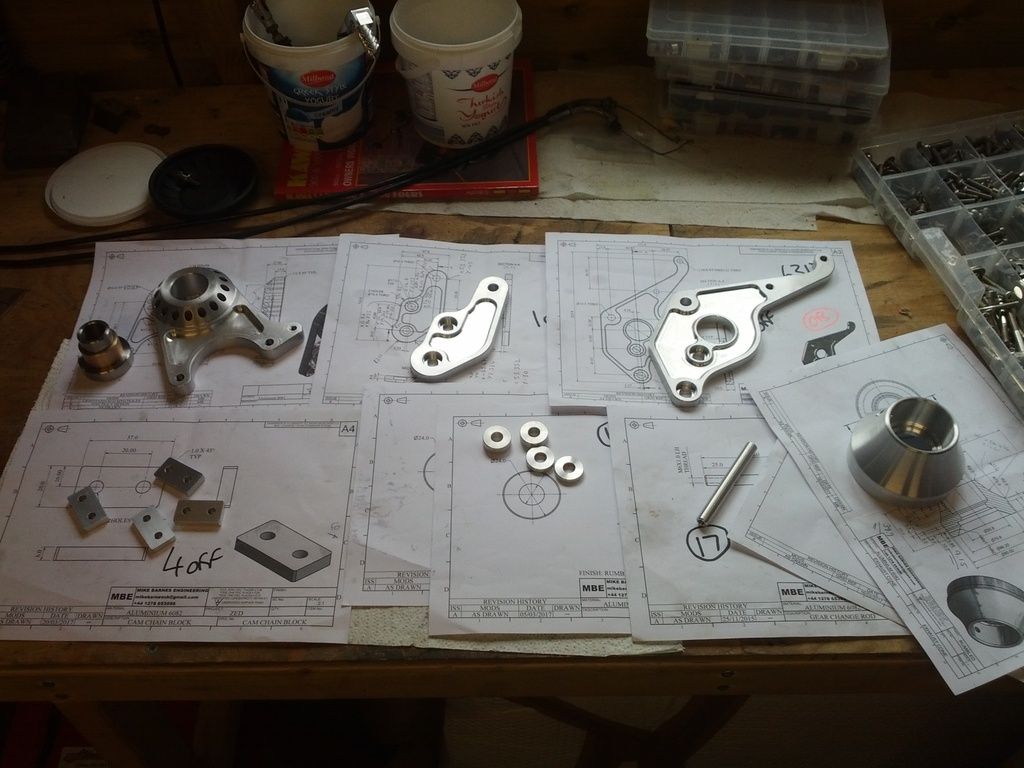
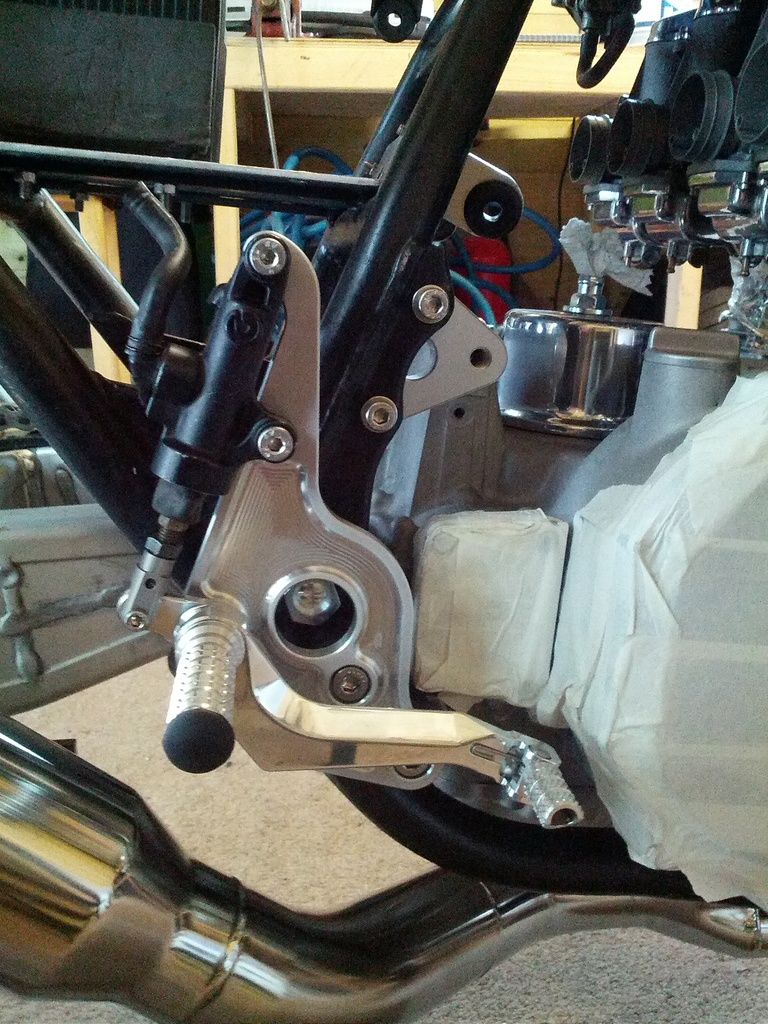
Rear sets trial assembled:
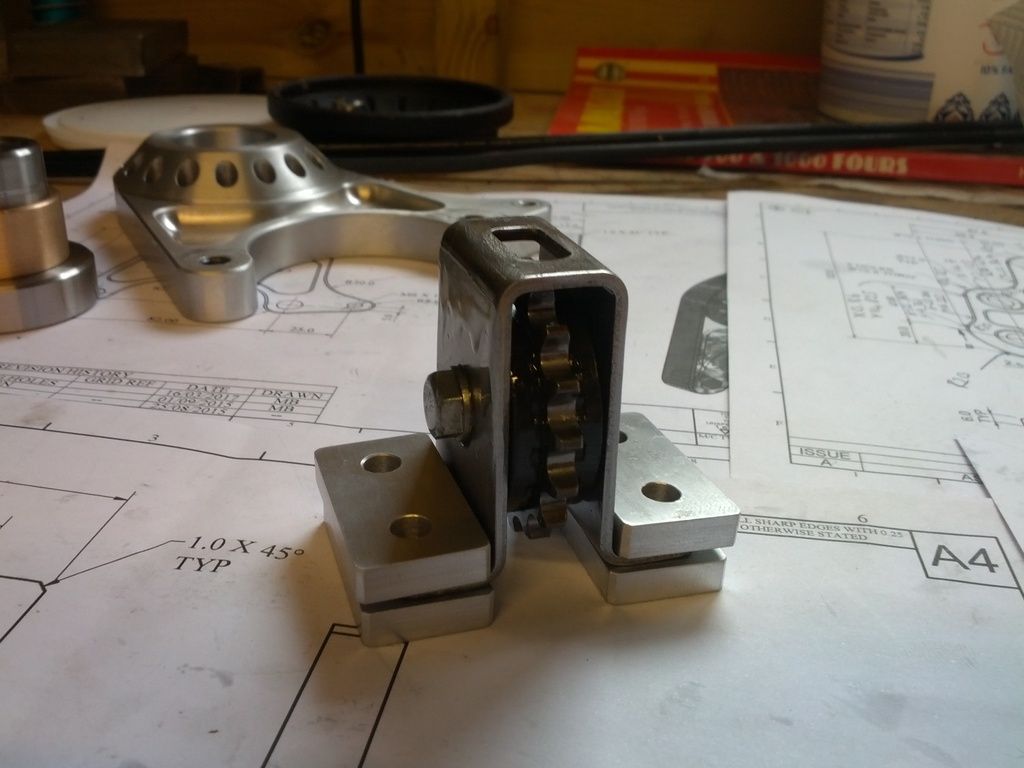
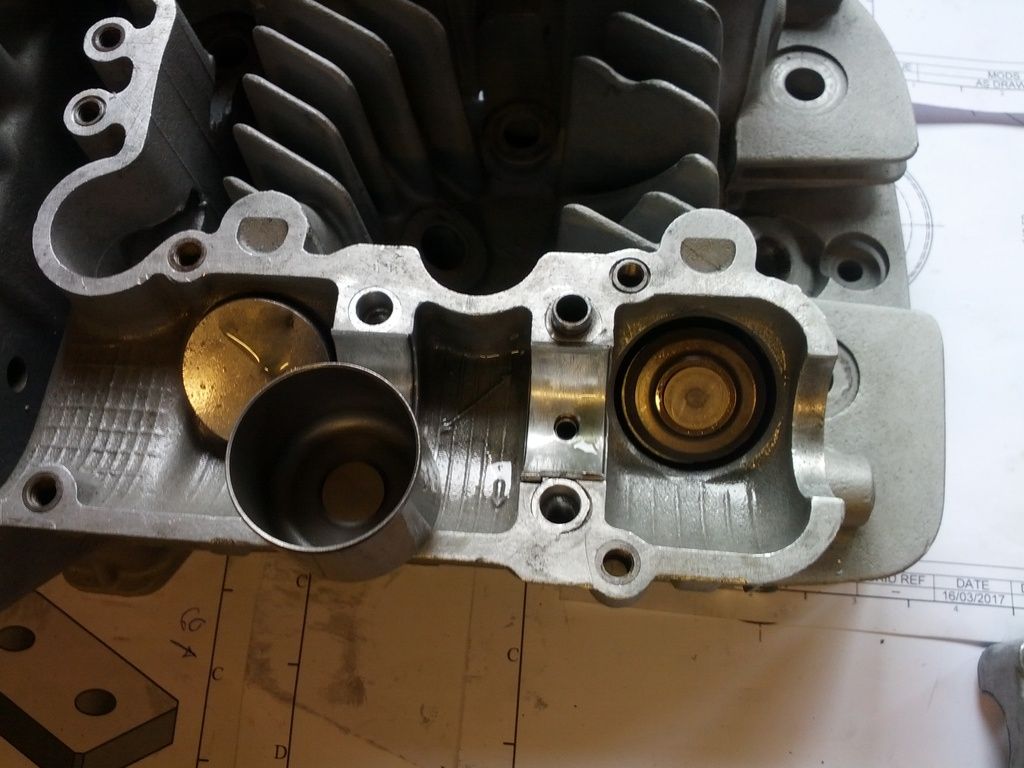
Made up some top camchain idler blocks to replace the tired rubbery things that are standard fare:
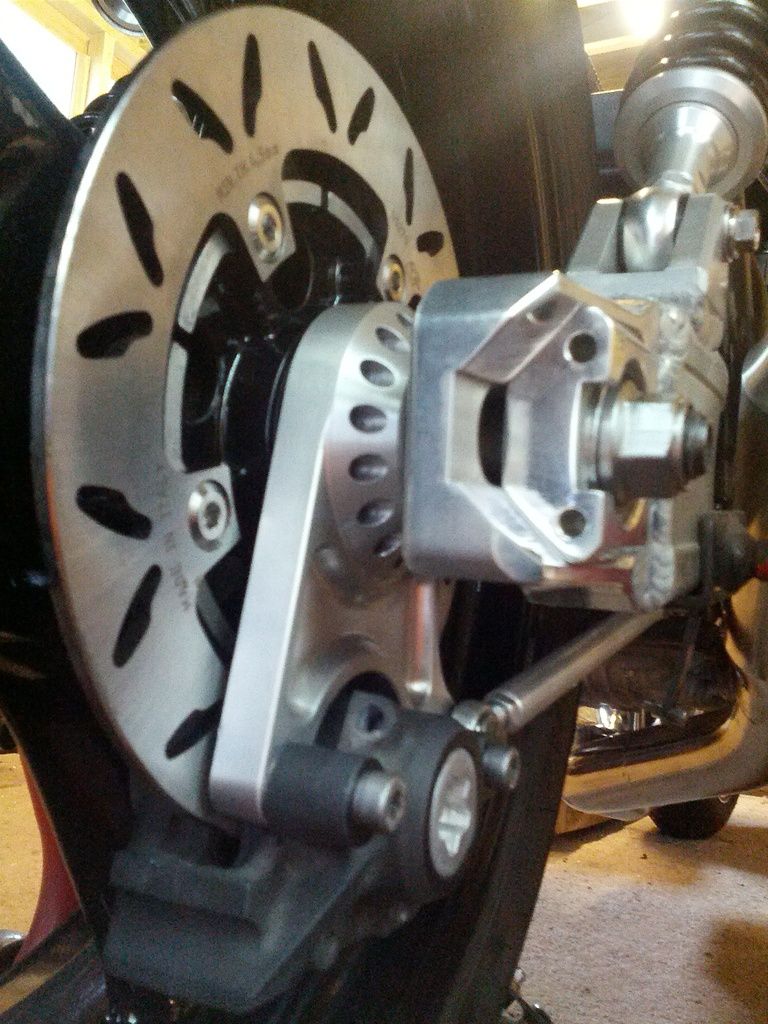
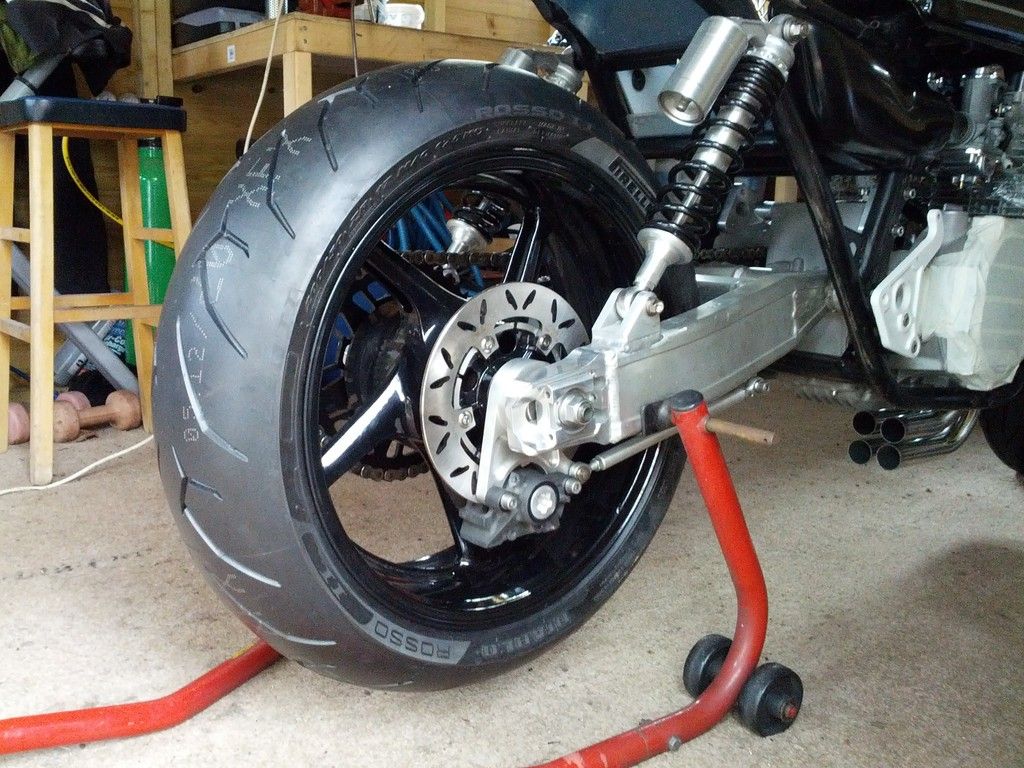
Lightened and re-styled rear brake caliper:
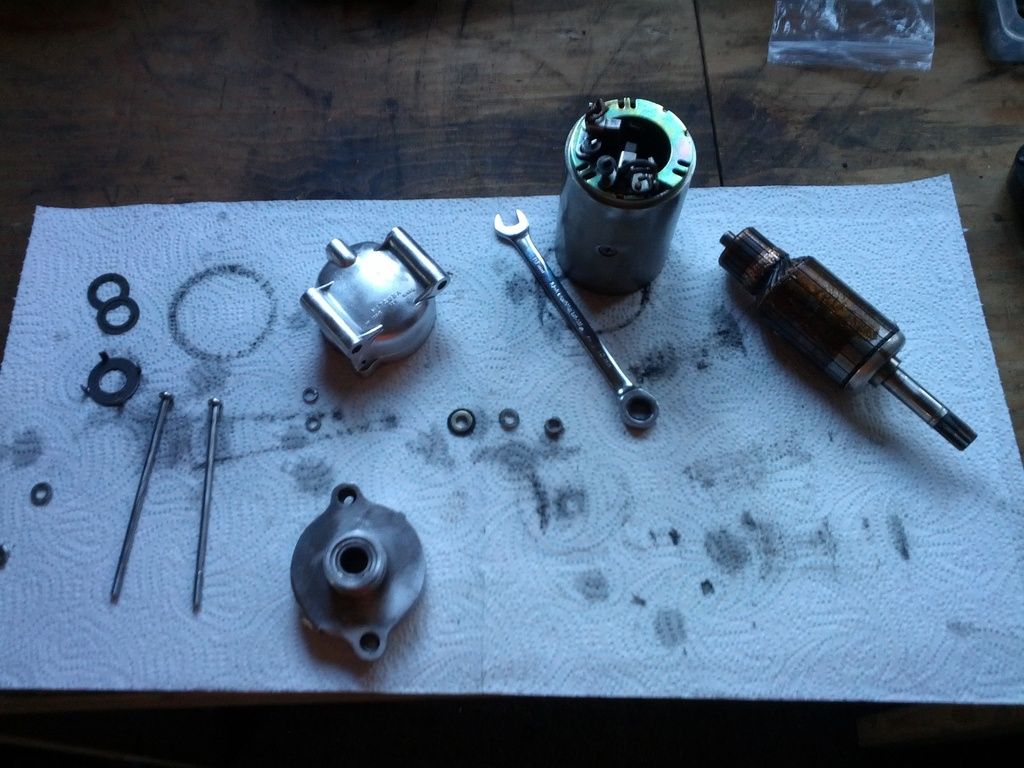
Refurbished starter motor:
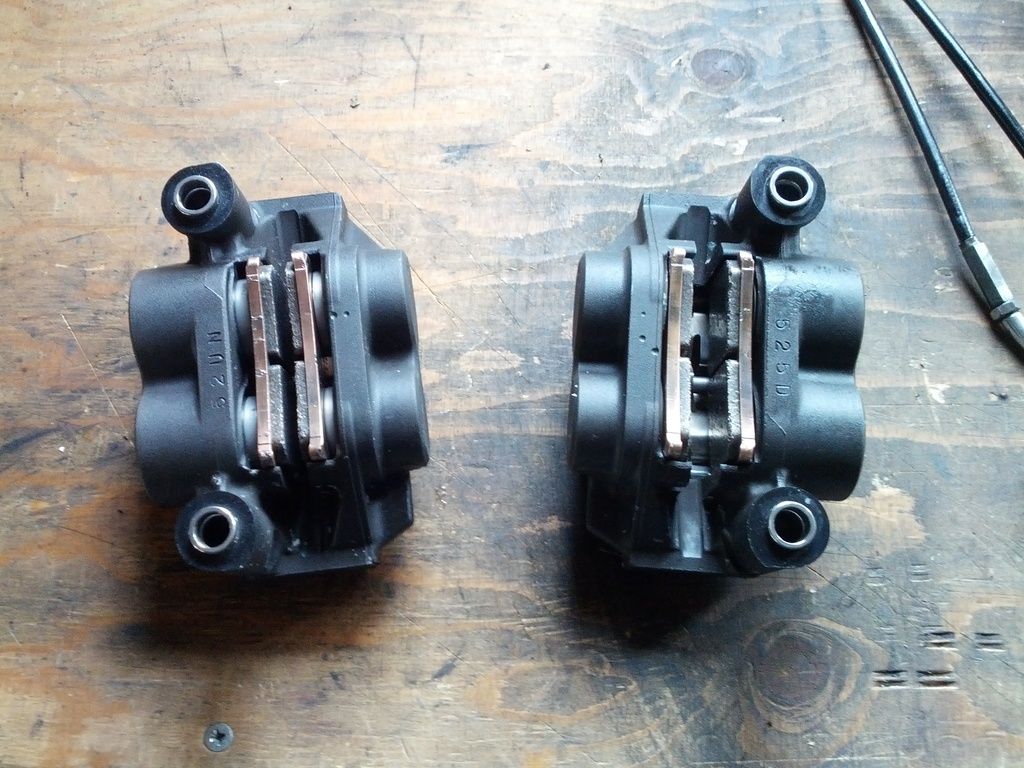
Rebuilt front calipers, bonus standard sumitomo pads as well:
Elektronic Sacshe ignition turned up as well. We use these systems on the Phase 1 bikes and my P&M will have one too, so may as well use the same system and have a spare for racing. Great unit with 9 pre-set curves and infinitely adjustable timing, plus rev limit and tacho drive features:


Re-tacked the exhaust link pipe and can to get a bit better ground clearance and get it more tucked in. This has the effect of angling the can up a bit more which i like
I designed a new "cone" and had machined from 6082. Reasons for this; to look more like a Harris works style, to incorporate a "dB" killer type stainless baffle i have procured from Fuel exhausts (so it can get through an MOT and get on tracks with stricter noise limits), looks the dogs i think. Will be even better when polished up a bit. Tacked the can bracket in position for welding.


Finally took the plunge and finished the design of the rear set plates and a few other parts and got them CNC machined:

Rear sets trial assembled:


Made up some top camchain idler blocks to replace the tired rubbery things that are standard fare:

Lightened and re-styled rear brake caliper:


Refurbished starter motor:

Rebuilt front calipers, bonus standard sumitomo pads as well:

Elektronic Sacshe ignition turned up as well. We use these systems on the Phase 1 bikes and my P&M will have one too, so may as well use the same system and have a spare for racing. Great unit with 9 pre-set curves and infinitely adjustable timing, plus rev limit and tacho drive features:

-
Zomerset Zed
- 100Club
- Posts: 239
- Joined: 30th May 2014
- Location: Somerset
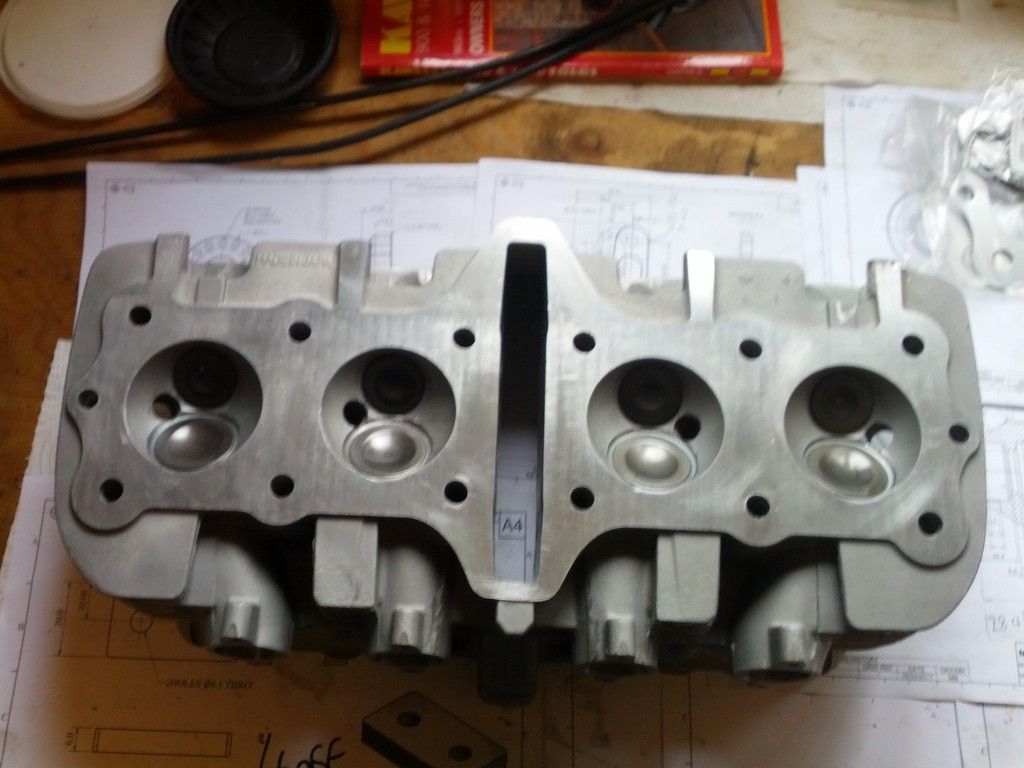
Re: Cylinder head
Got my head back from Salter.
This is the first time i have ever got anyone to build up a cylinder head for me as i usually do it all myself, but i had to procure so many parts to make a good job of it that it worked out cheaper to send the bare head off to Graham and get him to supply all the parts mostly from his massive stock than to buy all the parts myself
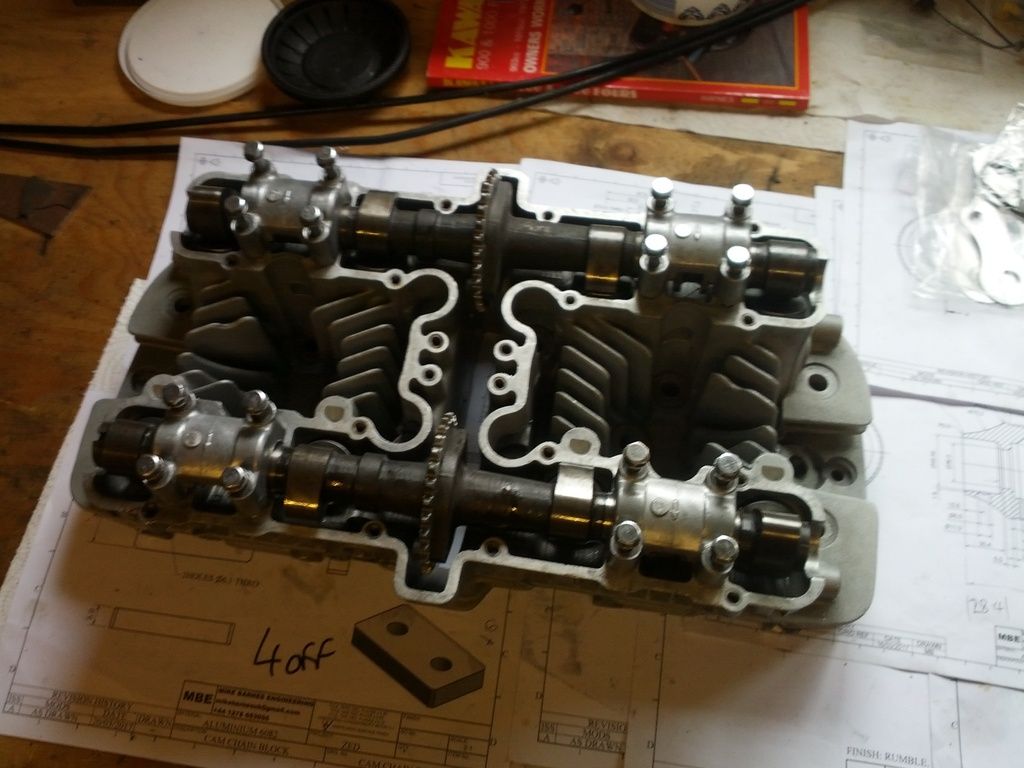
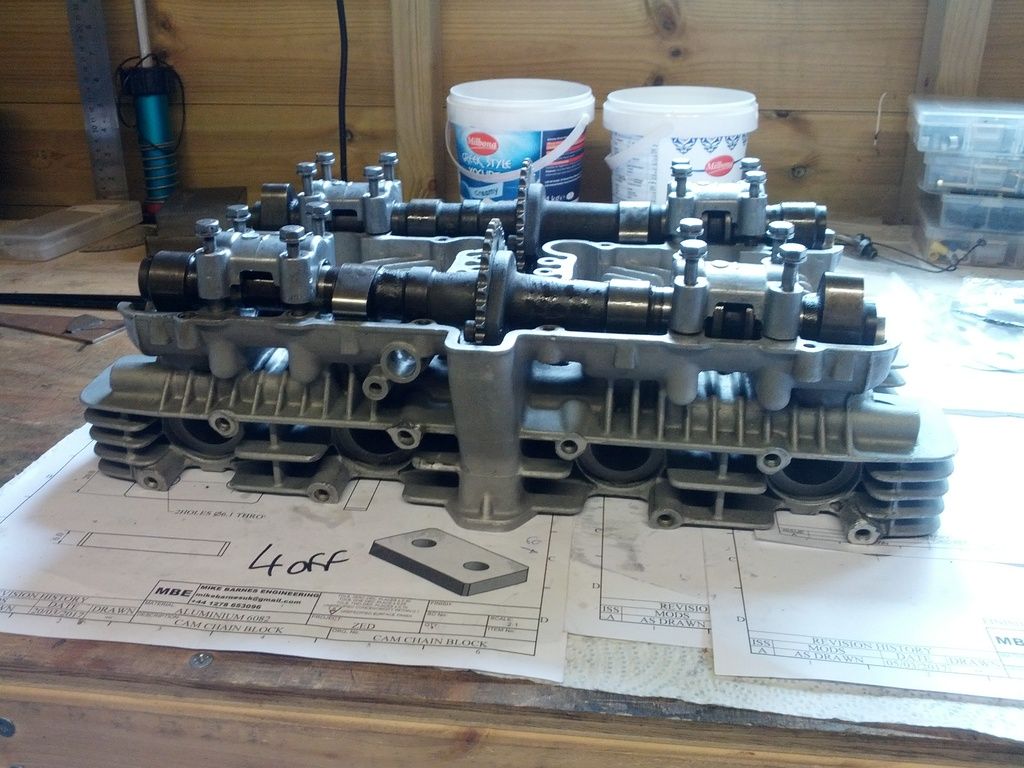
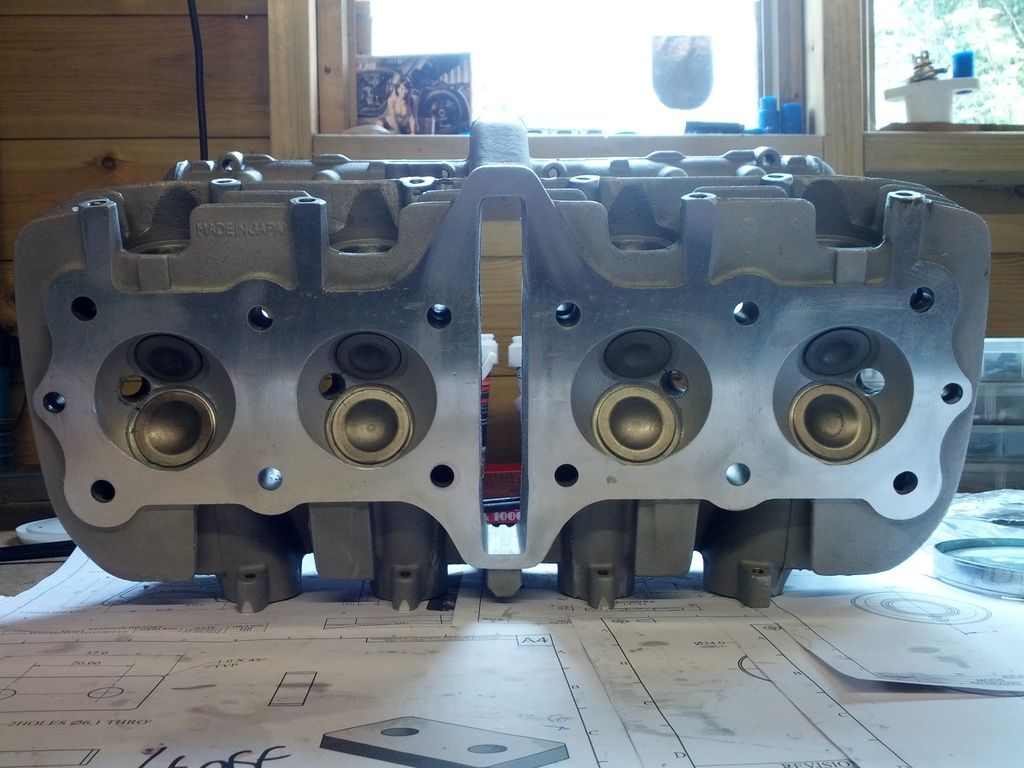
Here's a recap:
I gas flowed the head myself and then found i had a cam binding problem with the Unitrac cams i procured from paul Dorran. Cams were fine but the head that i had also procured from another Z1 member probably didn't have the original caps with it. The head was also warped on the combustion face and the cam journal face.
I got a local engine builders to skim the minimum required to clean up the combustion face whilst supported on mandrels/vee blocks in the cam journals so we could get the head parallel to the cams in X and Y. We removed 7 thou to clean up. Head back on block but still binding cams
So Salter said send it up and i'll find some better fitting caps from his box full. Also register in caps was not wide enough to take the location flanges on the cams. Graham found some appropriate fitting caps and had to slightly relieve some of the shells to get the correct running clearance.
He also did the following:
Re-inserted all 16 cam cap threaded inserts with new dowells
Re-worked my original cam wheels to fit the Unitrac cams (i am running roller chain not Hyvo)
Supplied: Unitrac valves (8), APE exhaust valve guides (originals were just about falling out), Valve springs, seats, retainers, collets, Buckets and shims (now shim under)
He also shimmed the head
Cut the valve seats
Since i have had the head back i have checked all the clearances, valve sealing etc.
Basically i now have a Unitrac 1100 spec head in a 1015 A2 head.
I have now done squish, CR and next is valve to piston clearance checks, but more on this to follow.
This is the first time i have ever got anyone to build up a cylinder head for me as i usually do it all myself, but i had to procure so many parts to make a good job of it that it worked out cheaper to send the bare head off to Graham and get him to supply all the parts mostly from his massive stock than to buy all the parts myself


Here's a recap:
I gas flowed the head myself and then found i had a cam binding problem with the Unitrac cams i procured from paul Dorran. Cams were fine but the head that i had also procured from another Z1 member probably didn't have the original caps with it. The head was also warped on the combustion face and the cam journal face.
I got a local engine builders to skim the minimum required to clean up the combustion face whilst supported on mandrels/vee blocks in the cam journals so we could get the head parallel to the cams in X and Y. We removed 7 thou to clean up. Head back on block but still binding cams
So Salter said send it up and i'll find some better fitting caps from his box full. Also register in caps was not wide enough to take the location flanges on the cams. Graham found some appropriate fitting caps and had to slightly relieve some of the shells to get the correct running clearance.
He also did the following:
Re-inserted all 16 cam cap threaded inserts with new dowells
Re-worked my original cam wheels to fit the Unitrac cams (i am running roller chain not Hyvo)
Supplied: Unitrac valves (8), APE exhaust valve guides (originals were just about falling out), Valve springs, seats, retainers, collets, Buckets and shims (now shim under)
He also shimmed the head
Cut the valve seats
Since i have had the head back i have checked all the clearances, valve sealing etc.
Basically i now have a Unitrac 1100 spec head in a 1015 A2 head.
I have now done squish, CR and next is valve to piston clearance checks, but more on this to follow.
-
Zomerset Zed
- 100Club
- Posts: 239
- Joined: 30th May 2014
- Location: Somerset
Re: Bits n bobs
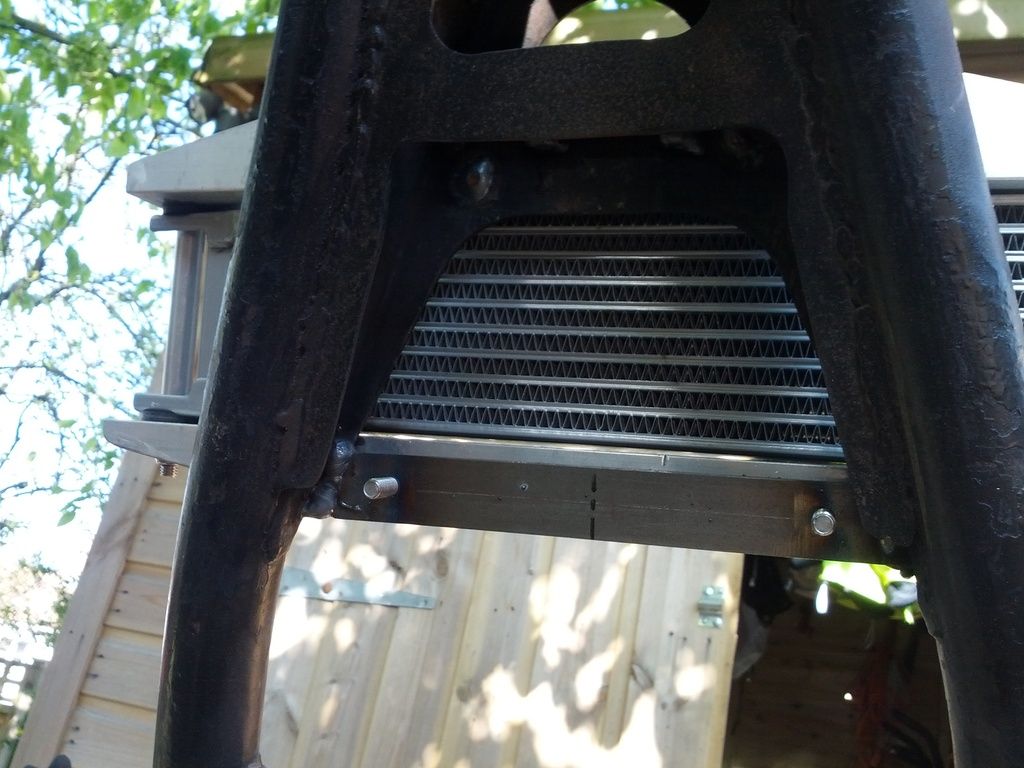
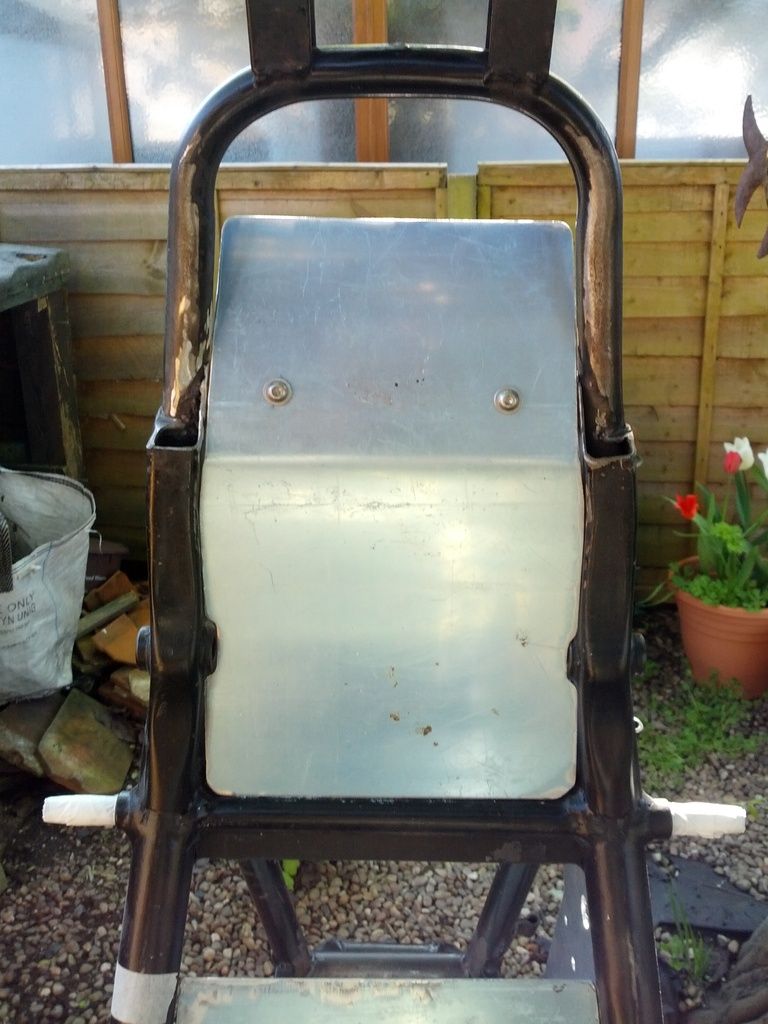
Now that the engine is back out of the frame its time to finish off some frame jobs:
Oil cooler brackets now welded in place.
Under tray mounting brackets in place:

Oil cooler brackets now welded in place.

Under tray mounting brackets in place:


Re: My Ultimate Zed
Some nice work going on here. Like the back brake and hanger...
Who is online
Users browsing this forum: No registered users and 121 guests