Page 6 of 13

Gas flowing finished

Posted: Mon Oct 03, 2016 3:36 pm
Author: Zomerset Zed
Image

Image

Image

Image

Some small cracks around the guide boss on the exhausts, will have to be dressed out when the guides are out :roll:

Another dry build

Posted: Tue Oct 11, 2016 5:48 pm
Author: Zomerset Zed
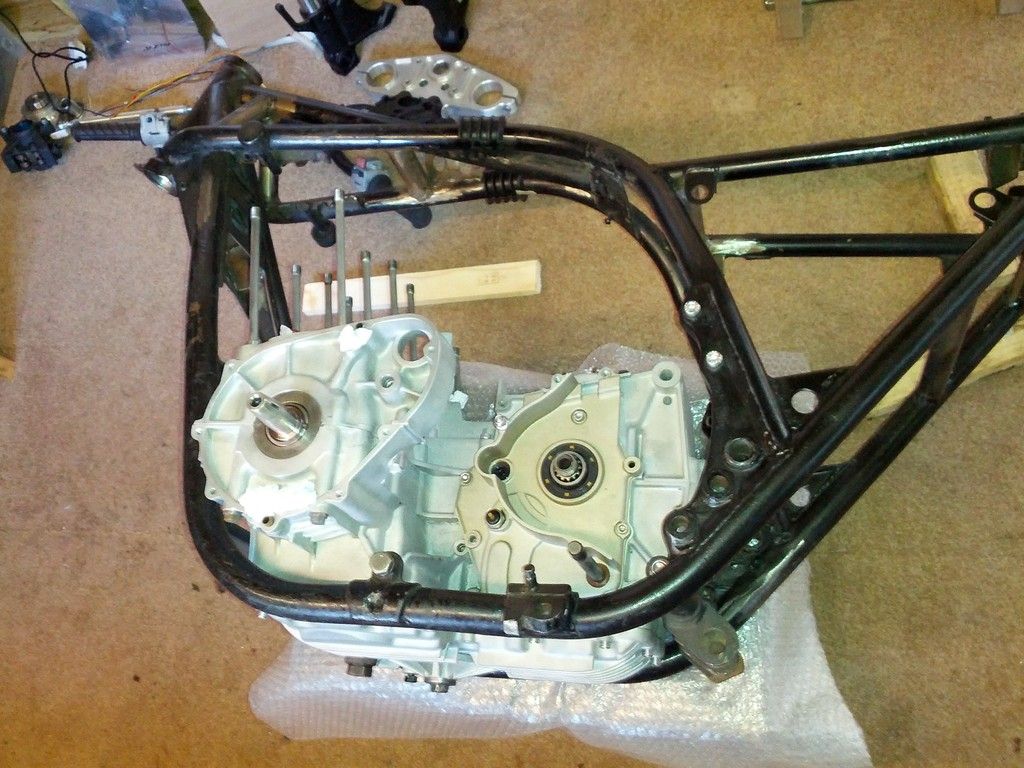
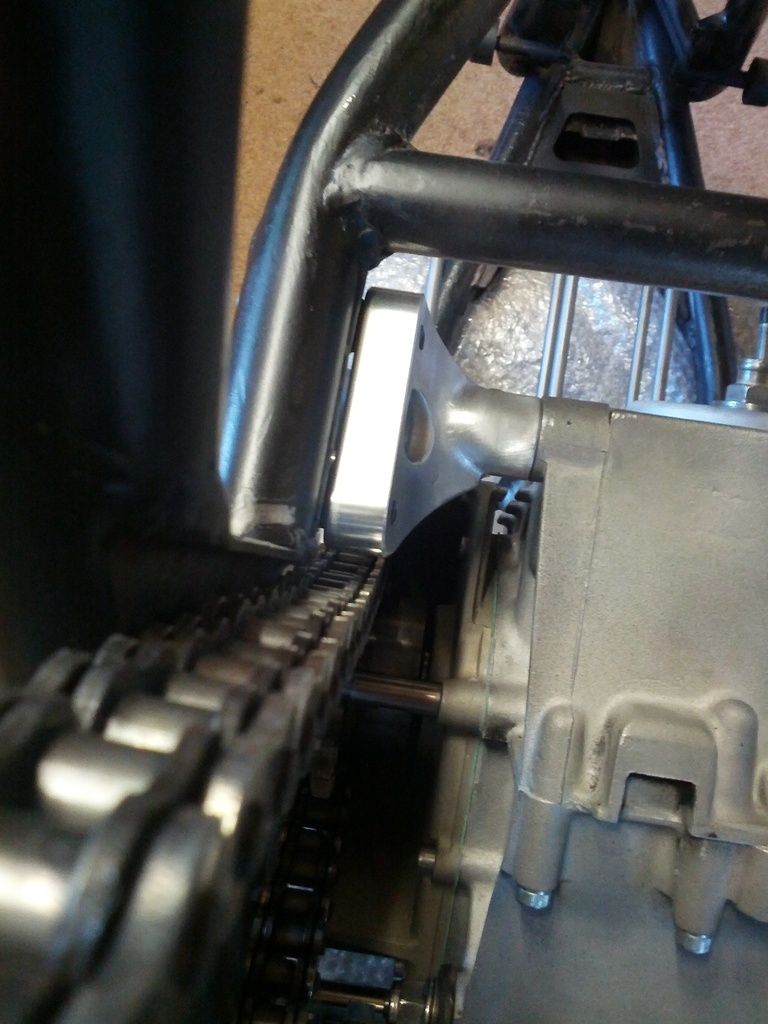
i Slung the bottom end in the frame for a final dry build of the chain/outrigger and a few other odds and sods to check:

Image

Picked up latest batch of CNC parts, hence the build up:

Image

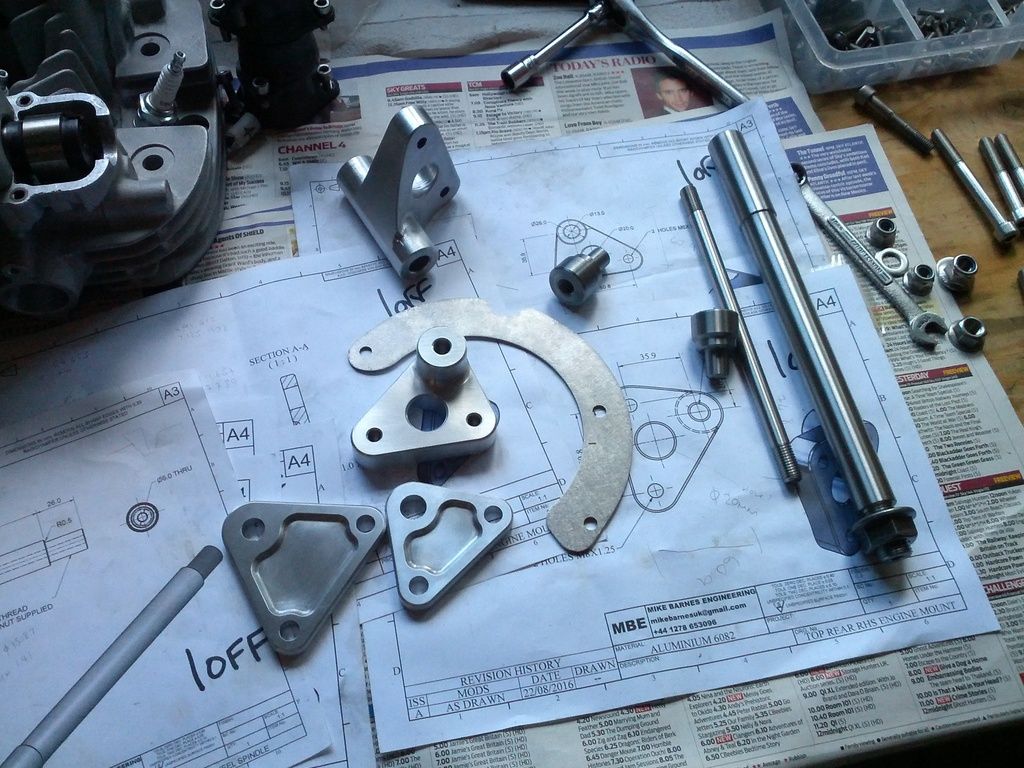
Spindle on the right is for my Dads Duc TT2 replica.

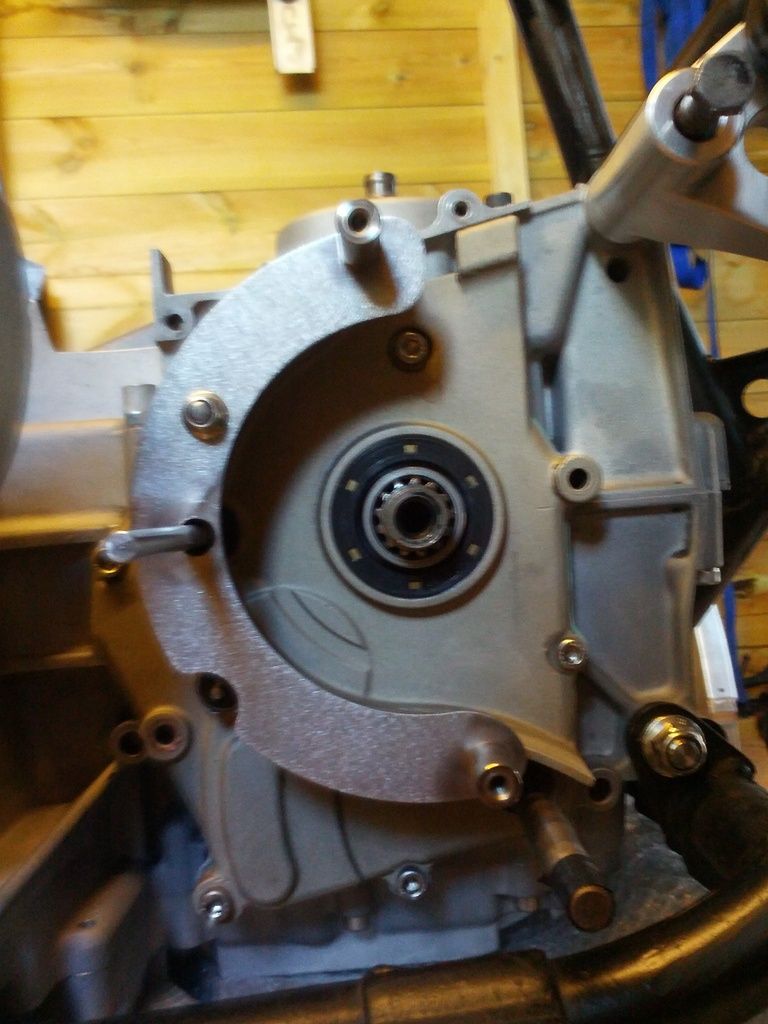
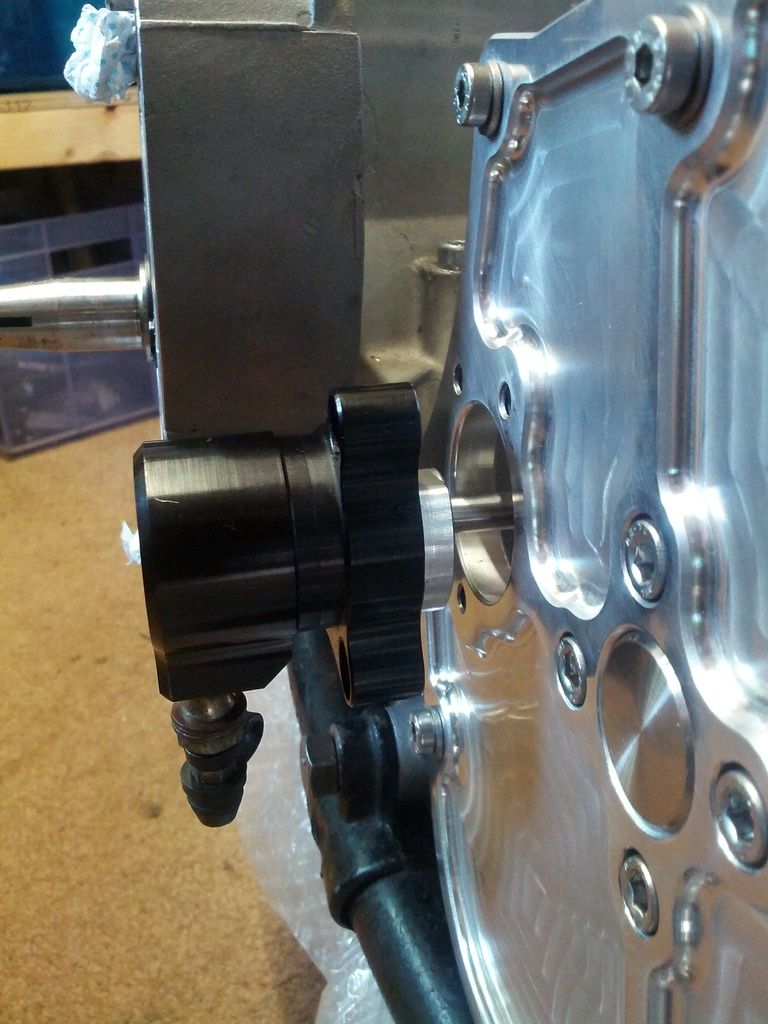
Steel case saver fitted and clutch rod hole repositioned :oops:

Image

Top left rear engine mount fitted:

Image

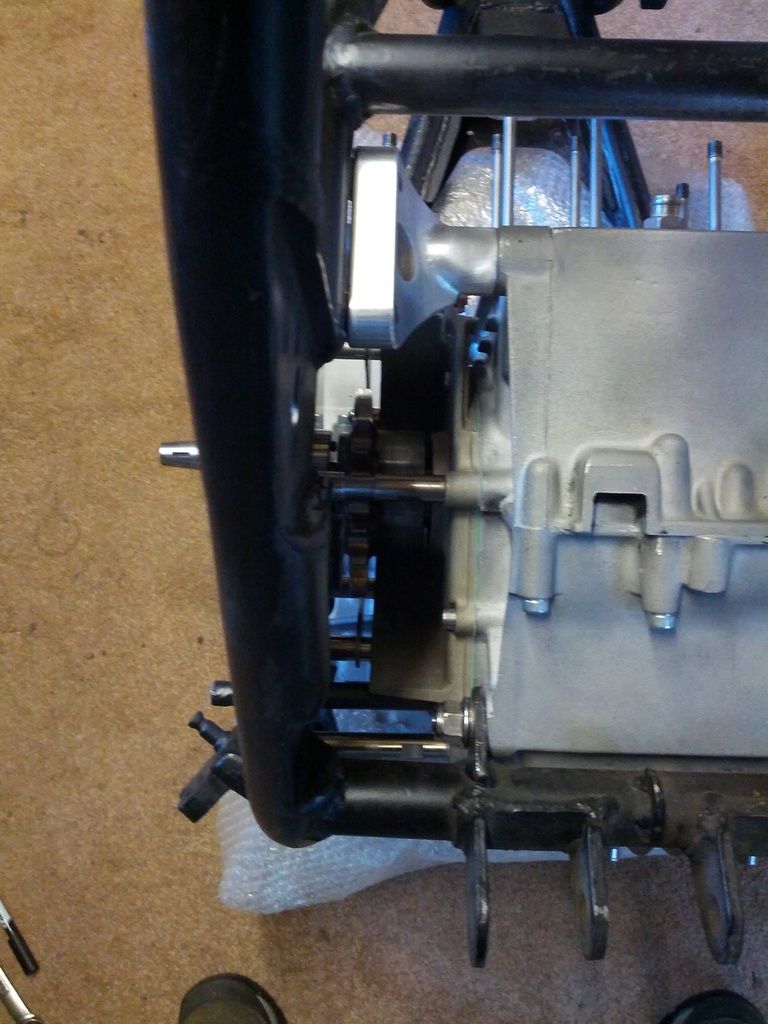
I will have to take a sander to the 2 steel tubes welded into the frame as the inner faces are on the piss a wee bit, other than that, it fits well :D :D

Even better the chain will just contact the top of the flange of the steel channel before contacting the mount:

Image

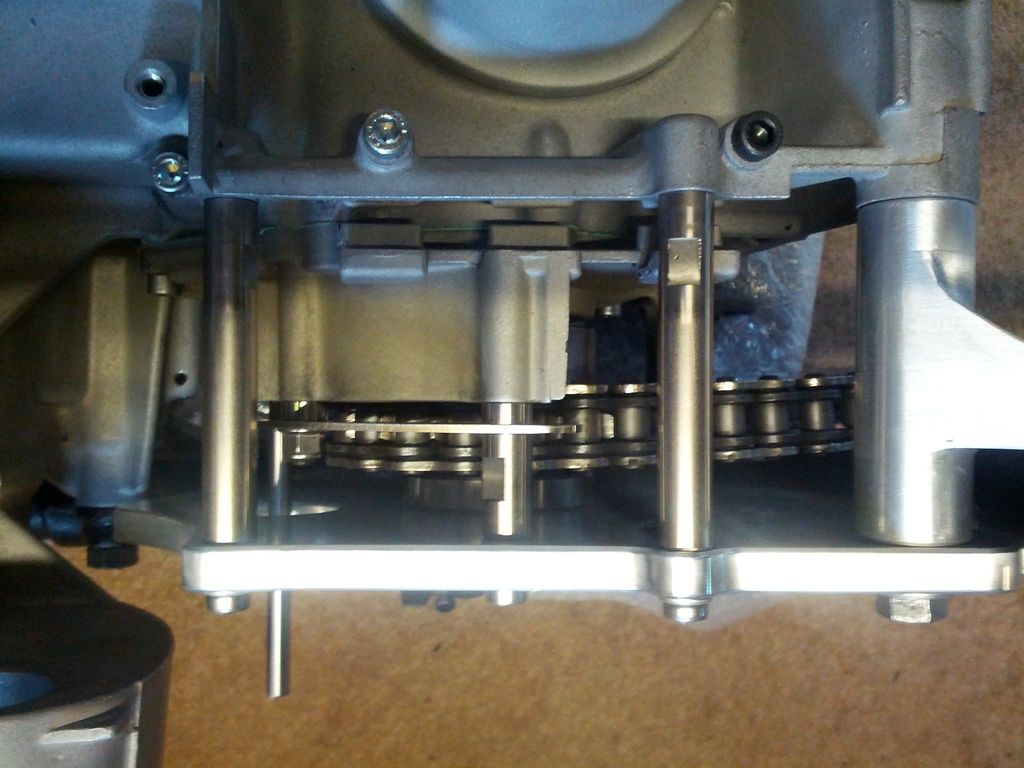
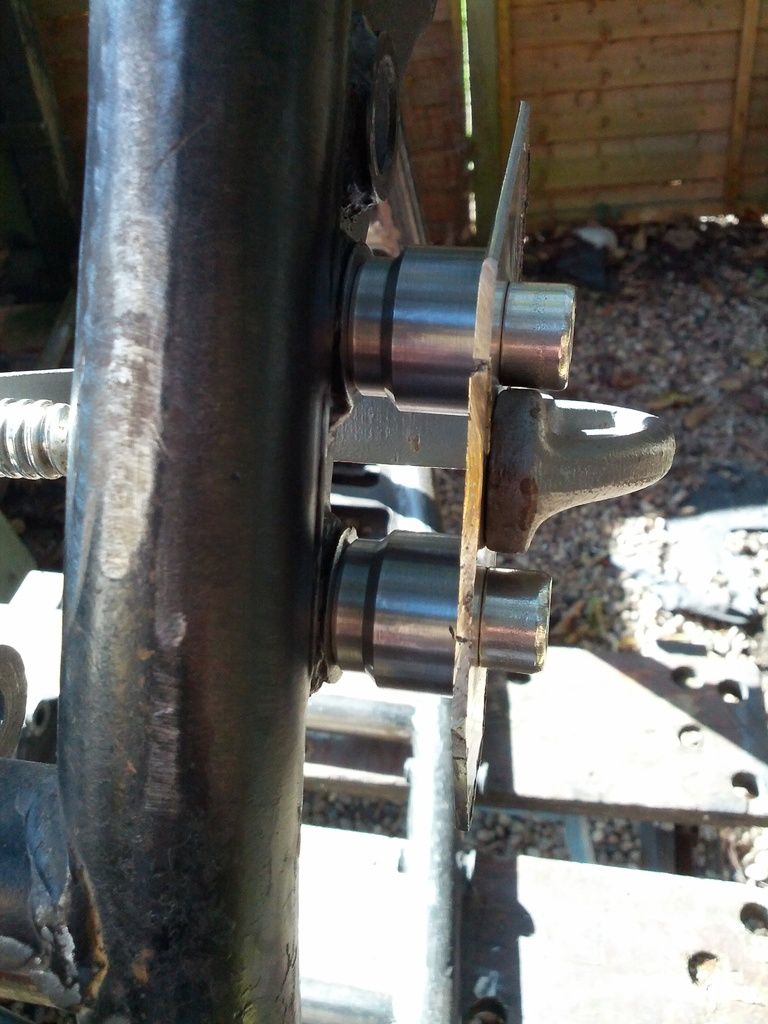
I then spent some considerable time :shock: grinding down some of the posts by 0.1 to 0.3mm to get the outrigger plate dead flat on the ends of the posts and the bearing at the correct depth in the sprocket:

Image

Now i can fit the clutch cylinder an see how much i have to cut off the new tool steel rod fitted:

Image


The eagle eyed may have noticed in previous posts these rear sets i have printed in PLA from the design i did a while back:

Image

Image

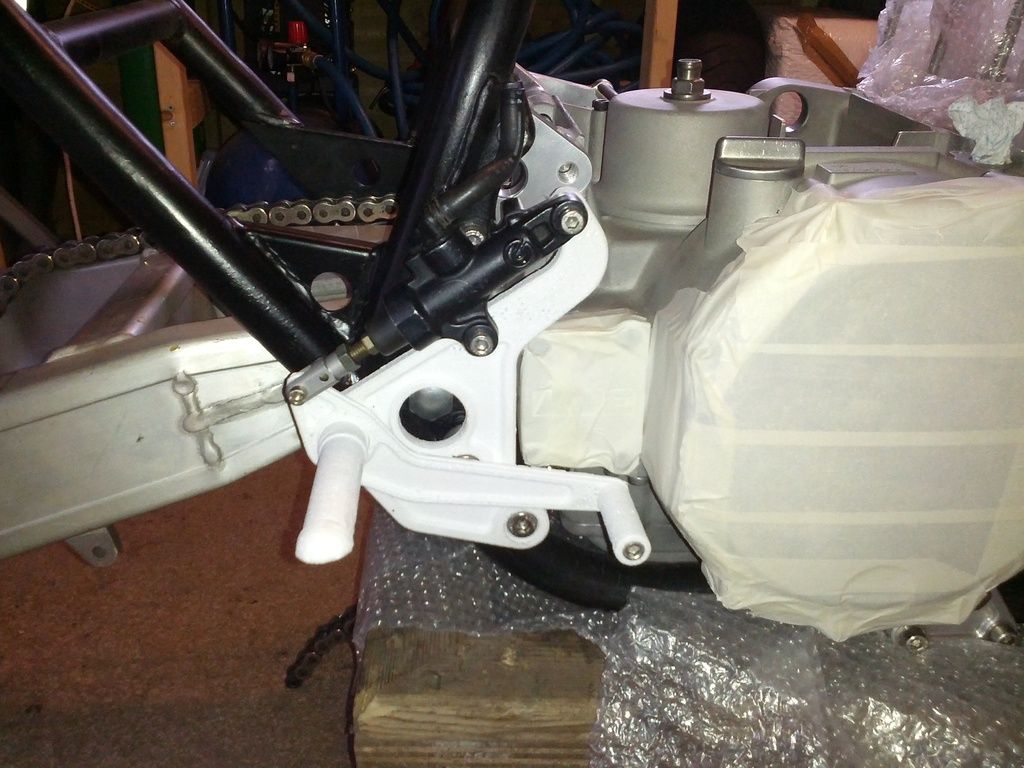
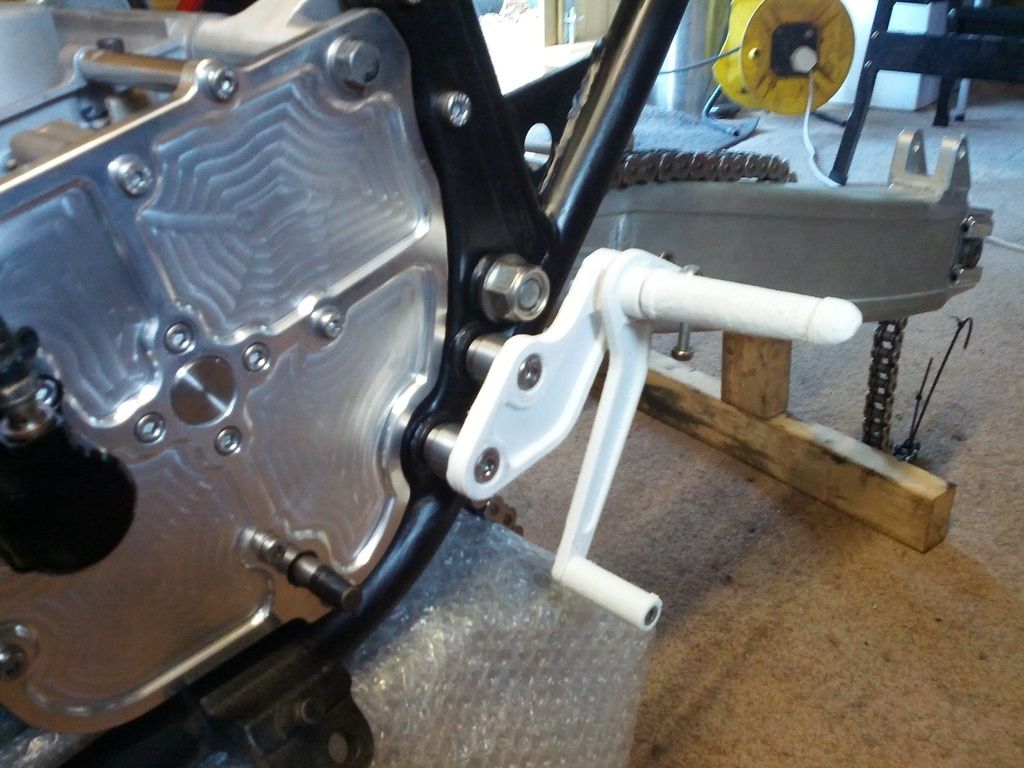
Fitted them to get the correct position for the mounts/spacers i will be welding into the frame and check overall function, they even work :!: :

Image :??

Also wanted to see how the linkage for the gear shift will fit, but i need to buy some rod for that. Quite happy with the shape fit and function, but when i got all the parts priced it was north of £400 which is a bit salty so im going to talk to my machinist about reducing the cost by using simpler parts (minimal relief and fillets). But i do like the releif which will match the other CNC parts i have made. Im in a quandry :?:

Battery box

Posted: Tue Oct 11, 2016 6:12 pm
Author: Zomerset Zed
A while back i mocked up what i wanted the battery box and undertrays to look like:

Image

Image

Image

Image

Image

Last week i got a chance to start on it in Ally plate:

Image

Used the clamped steel RHS in a vice and hit it with a peice of wood technique to make the folds :roll:

Image

Image

Image

Image

Image

:P

Posted: Tue Oct 11, 2016 7:58 pm
Author: zed1015
Regarding the head.
I suggest that you bolt the head down to either a surface plate or dry build on to the cases and barrels with no gaskets and recheck the cam binding situation.
If the caps are original you may find that the problem disappears once the head is bolted down.
I've seen this many times and easing the cam caps with the head in a free state to un bind the cam will create excessive journal clearance once it's back on the engine.
Also having an apparently warped or twisted head skimmed flat puts the cam journals on the piss once the head is on.
If the cam still binds with the head bolted down any adjustments to the offending cap should be done with the head still bolted flat.

Posted: Wed Oct 12, 2016 8:35 am
Author: Zomerset Zed
Cheers Zed1015, i think this is good advice and will be my next step.

Posted: Wed Oct 12, 2016 8:57 am
Author: paul doran
I have not found those cam yet or are You sorted now

Posted: Wed Oct 12, 2016 9:00 am
Author: Zomerset Zed
No still looking for cams

Posted: Wed Oct 12, 2016 9:17 am
Author: paul doran
I am off for a few days so will get a good chance to dig them out

Posted: Wed Oct 12, 2016 3:46 pm
Author: paul doran
I found those cams they are in good condition

Posted: Thu Oct 13, 2016 3:15 am
Author: ollie
Really great to see this coming together . :wink:

Zed project.

Posted: Fri Oct 14, 2016 7:03 pm
Author: nick pearce
Just been reading through the progress. The working out and machining is a master piece. Well done with all the patience , the yam brakes really work well, I've put them on a few bikes now as an upgrade including a Z1000J. keep up the good work Zomerset Zed.

Posted: Sun Oct 16, 2016 5:54 pm
Author: Zomerset Zed
Really great to see this coming together . Wink


Chees Ollie, nice to know people are reading it :D

Just been reading through the progress. The working out and machining is a master piece. Well done with all the patience , the yam brakes really work well, I've put them on a few bikes now as an upgrade including a Z1000J. keep up the good work Zomerset Zed.


Cheers Nick. The outrigger plate in particular became a real test of my patience. It took me months to get it right and sometimes it felt like i was going backwards :evil:

Worth it in the end though. Thinking of developing this as a kit to sell :?:

Wobble head

Posted: Sun Oct 16, 2016 6:11 pm
Author: Zomerset Zed
Well i cleaned up the head as i did with the crank cases, dried it in the oven, then cleaned up all the head nuts internal threads with a tap and air gun etc.

Fitted the head with dowels fitted to the barrels without a head gasket. No base gasket either. When the head is fitted loose you can actually see the uneven joint either side of the cam chain tunnel with the light passing through.

The exhaust cam now binds up with just cap no.1 on the left hand side. So its worse. I think what is happening is the head is now being bent with tightening it down which is causing the journals to be out of line.

First step i think is to support the head on mandrels running through the journals and the mandrels supported either end and possibly in the middle by vee blocks, clamp it down and plane the bottom face until it cleans up. I'm guessing about 10 thou will do it. Then i will have the face parallel in both x and y to the cam journals. Then see what happens when i bolt the head down :roll:

If it comes to it i can skim the top face until it cleans up now being parallel to the bottom face and cam journals. Then fit the caps and line bore the difference on the caps to restore to original bore size......This may take a while :(

Re: Overdue update

Posted: Sat Jan 21, 2017 7:33 pm
Author: LeeJackson
I designed a drill and tap jig to repair threads in the head for the exhaust studs:

Image


I don't suppose you could print and extra one of these could you :) might get me out of bother..

Update time

Posted: Mon Feb 20, 2017 6:55 pm
Author: Zomerset Zed
High time for some updates: Got the Yam wheels powder coated gloss black and clear lacquered:

Image

Found some clearance Grimeca semi-floating discs to fit the wheels. They had a good name back in the day. Good value at £77 each for the fronts and £35 for the rear new.
Got some "all balls" bearing and seal kits and fitted them too. Then fitted the tyres using the cable tie method.

Used new stainless disc bolts on the front and Titanium on the rear. What evers cheapest wins :wink:

<iframe></iframe>

Image

Pretty pleased with them overall, but seeing as "alloy wheel specialists" coated them, i have seen (and had) better. I think i will use Griffs from now on as they seem to have a good rep. and Mikey used to work there i think :oops: :?: