Page 2 of 5
Re: Z1000A1 - Basket Case Build
Posted: Sun Jun 18, 2017 2:09 pm
Author: kev edwards
ollie wrote:Use Vesrah/cometic gaskets,avoid athena gaskets at all costs .

Never had issues with Athena gaskets.
Re: Z1000A1 - Basket Case Build
Posted: Sun Jun 18, 2017 4:20 pm
Author: ollie
Kev ,i had some and they were not even the correct shape and very thin ,could have been a bad batch ,but i was not impressed .
Re: Z1000A1 - Basket Case Build
Posted: Tue Jun 20, 2017 7:07 am
Author: csx355
I had some 'iffy' Athena gaskets when I did some work on my TY175. I ended up cutting my own out of gasket sheet.
Sundays progress.
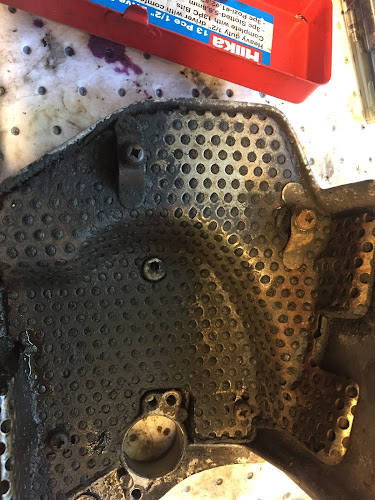
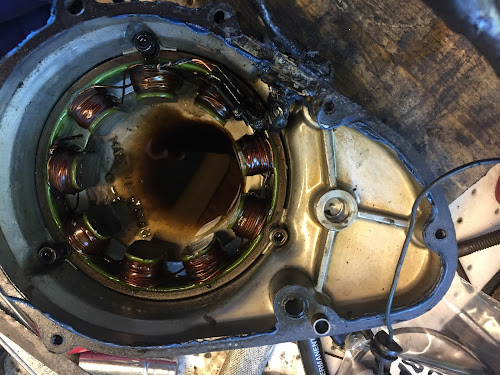
Sunday was mainly spent stripping the final components off the cases
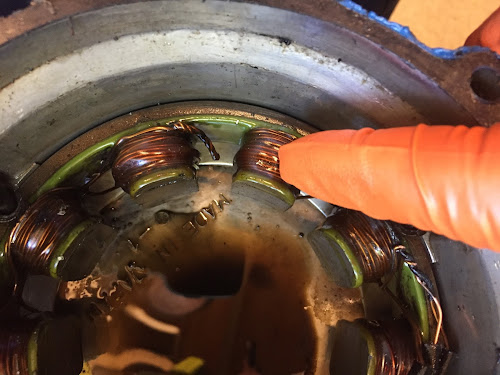
Noting that there is a break in the windings of the stator - pretty sure that it's as it should be though
Cleaning off more blue goo.
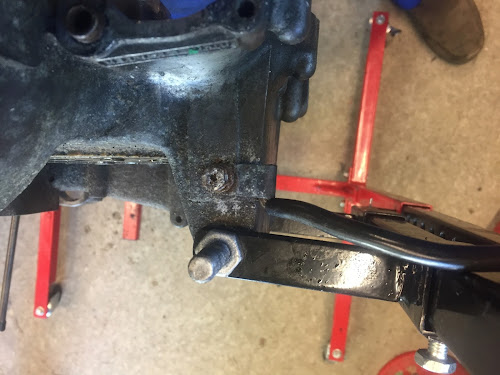
Drilling out and re-tapping seized and sheared casing studs.
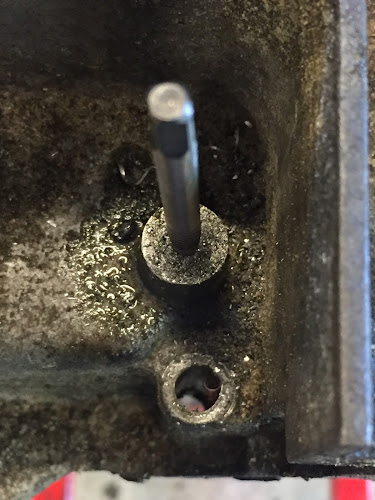
Loads of heat - I'm always amazed how much of a friend a heat gun or gas torch can be on seized threads.
Re-tap the threads once the studs is out to make sure everything goes back smoothly.
And check it -
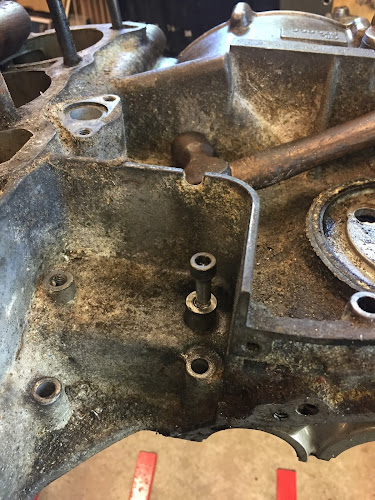
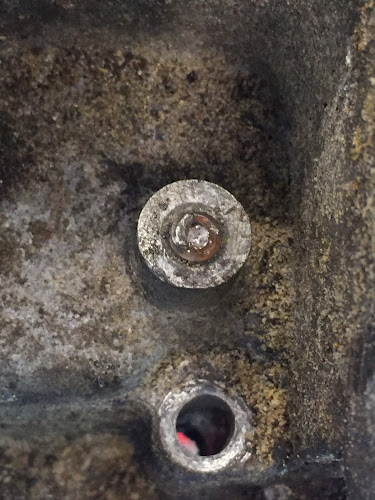
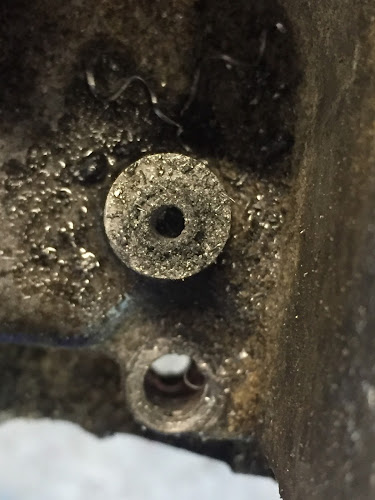
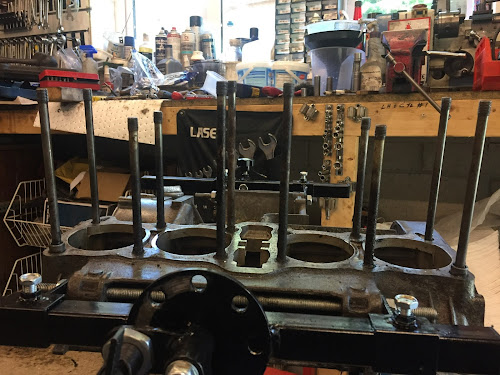
Not really sure if I need to take the studs out or not - they seem pretty good - took this pic for reference given there are three different lengths.
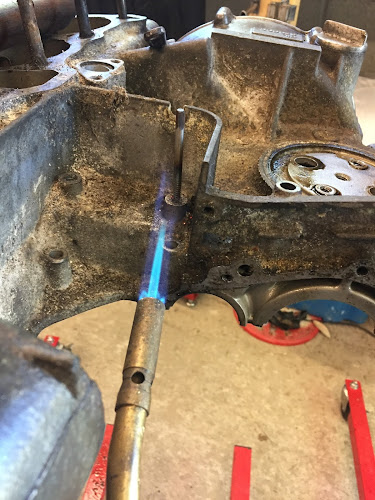
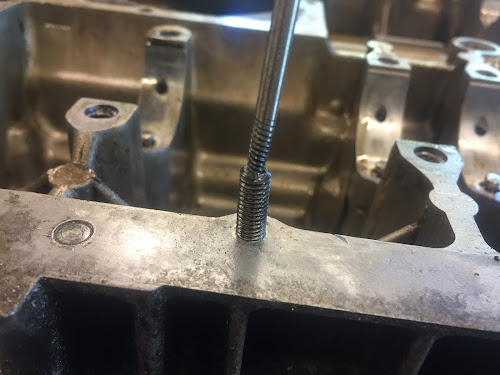
Another sheared casing stud - rare for me to use an easy-out and actually have it work easily!
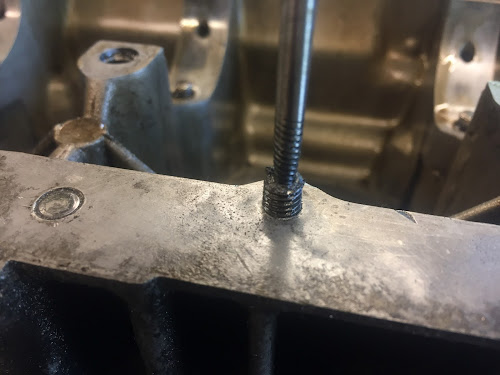
And she's out -
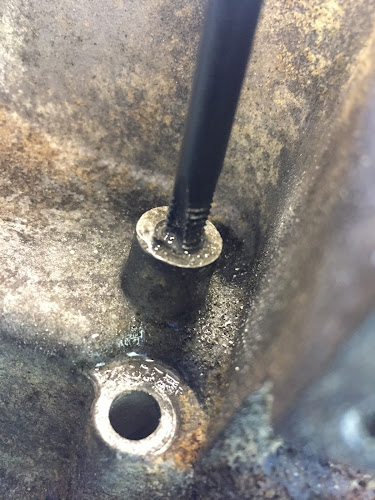
Some signs of a previous case repair - Nothing too drastic and can be forgiven seeing the bike is 40 years old.
I now have to clean the lower case prior to getting a small crack sorted and then it's off for vapour blasting. I want to get all the little niggly jobs done on the cases first as when they come back I want to polish as much as I can.
Re: Z1000A1 - Basket Case Build
Posted: Wed Jun 21, 2017 1:38 pm
Author: Hinckley
Not really sure if I need to take the studs out or not - they seem pretty good - took this pic for reference given there are three different lengths.
Not unless they are damaged/corroded or the vapour blaster prefers them out.
I can't see why you couldn't mask them with heatshrink to protect them from the blasting.
Two things come to mind:
Originals are good quality - they seem to easily last 40+ years.
They can be a bugger to get out.
Re: Z1000A1 - Basket Case Build
Posted: Thu Jun 22, 2017 7:07 am
Author: csx355
Not unless they are damaged/corroded or the vapour blaster prefers them out.
I can't see why you couldn't mask them with heatshrink to protect them from the blasting.
Two things come to mind:
Originals are good quality - they seem to easily last 40+ years.
They can be a bugger to get out.
Good stuff, they are in good condition so rather than waste time and effort getting them out and possibly damaging them I'll leave them. The vapour blasting is pretty gentle and barely touches steel.
I thought that I would measure up and inspect my pistons and cams last night -
The pistons measure 69.25mm +/- at the skirts. So I think it's standard with no previous rebore. They are in really good condition just coked up on the crowns. They don't have any oversizes marked on them just KL250? Is this right? I suppose the numbers would add up, I have a KL250A1 as well!!
really ought to crack on and finish that some time.
The cams lobes measure up at 36.16mm for exhaust and 36.15mm for inlet with the base circle reading 28.23 for both. All the cam lobe surfaces are unmarked with just slight marking on one of the cam journals which measure 24.47mm. I think I read somewhere here that an 8mm difference between base circle and cam lobe height indicates standard cams so given the condition of them that's the way they will stay given they are within wear tolerance - I have bought a works manual via a forum admin member so can check it out when it arrives.
Picking the frame up from the blasters today as they noticed some corrosion that needs addressing before powder coating.
Re: Z1000A1 - Basket Case Build
Posted: Fri Jun 23, 2017 5:26 am
Author: garyd
yup. Kwak 250 pistons were the same part No.
Have a vauge memory of there being another std piston you could put in to give a higher compression. Anyone else remember that?
If a job's worth doing!!
Posted: Sun Nov 26, 2017 6:03 pm
Author: csx355
So after a fairly hectic summer in the real world (outside of the sanity-sanctuary of my garage) my Z1000 has begun to take shape. The motor has been vapour blasted revealing some external pitting on the cam cover and one or two of the cases. I'm not too worried as this was never going to be a show pony. The engine build has been progressing nicely with me exerting a calm and patience that I did not think that I had. Build it a bit, find a snag or part that need attention, stop and get it sorted. Move on to the carbs, or frame, or wiring . . . . or cylinder head. Mmnn
The valves and seats looked really good I cleaned the valves up and checked them with a dial gauge and v blocks. Perfect. I thought a little light lapping would not go amiss. So I lightly lapped and thought 'Why stop here? Lets get this thing together'. So slowly and methodically I refitted all the valves back into the head from where they came. Easy, an hour and a half.
Happy with that. Now move on to something else. scrabbling in my new parts section I moved the gasket set to one side thinking
'won't be long and I'll be needing that'
when something made me stop, and think what are those lill black sealy things for? Argh I know F***ing valve stem seals, that's what they are. Bollox.
Anyway having honed my new found valve replacing skills down to a fine art I got my time down to 40 minutes. Magic all my nice new Viton valve stem seals snugly bedded down for the next 30000 miles.
Now whats next? I know while I'm sorting seals I will check my lovely satin finished vapour blasted cases and make a shopping list.
'Hello what's this?'
A couple of little zip tied baggies in with the freshly cleaned alloy. Good job I looked, I thought, the cylinder head spigots are there, be needing those shortly. They must have been removed by the vapour blast chappy - good man along with this bag of . . . what look like . . . F***ing Tussing Valve spring seats!! You see I didn't take them out myself, they must have been time welded into the head. And the vapour blasting freed them up.
and then I forgot to check -
and the Kawasaki manual says fit the valve stem oil seals first -
and then fit the spring seats over the seals -
But not these fat lill F**ckers because the first one wouldn't go over and ate the cowing seal -
And now I'm waiting for a valve stem oil seal removal tool and need to find my self (hopefully) a single valve stem oil seal.
And that was my Sunday.
Re: Z1000A1 - Basket Case Build
Posted: Mon Nov 27, 2017 9:32 am
Author: PAULJAC47
You are doing well on this project,doing similar bike meself not as good at taking piccies to show progress though!
Thats an easy oversight with the seals,been there T shirt etc

Re: Z1000A1 - Basket Case Build
Posted: Tue Nov 28, 2017 3:43 pm
Author: csx355
Thats an easy oversight with the seals,been there T shirt etc
Cheers Paul - I was just having a bit of a whinge - have to say that other than then cylinder head two step things have been going pretty smoothly. - Probably shouldn't of said that.
Re: Z1000A1 - Basket Case Build
Posted: Wed Nov 29, 2017 7:16 am
Author: Philippe
Hi csx355
great job you're doing! I just love to work on basket cases myself as they can give you much satisfaction when you see a nice old Zed in the end.
Allow me to give you some advice when rebuilding the engine.
Don't just replace the cam chain, replace all the components of the distribution! Use new rubbers, rollers, sprockets, cam chain guides, etc... if you use the old parts your engine will be rattling when it runs.
The old cam chain sprockets on the camshafts themselves are normally OK but the original sprockets at the front and at the back of the cilinderblock are usually gone after 4 decades...
There are good replacement sprockets that you can buy and that will perform as good as the original ones and will last longer.
Rebuilding a complete engine takes time and money.
I suppose you have a shop repair manual. Read it and read it again, when rebuilding the engine follow the steps described in it but try them out before you secure anything. It'll save you time and work.
When something is not really clear to you, ask some advice on the forum! There are plenty of people around to help you, don't be shy!
Just mind, when heating the aluminium of the engine to remove broken bolts, not to overheat it! Aluminium is a strange metal! It can melt all of a sudden.
When you take your engine to a specialised shop for welding, choose a good one! It's very difficult to weld aluminium that has been soaked in oil for decades!
Just one last advice! When you did the rebuilt and you try to shift the gears you can only get it into first gear! The other gears only engage when the engine is running or when you can get the sprocket shafts turning.So don't be alarmed ! Just make sure the shift forks are positioned correctly when putting the lower engine cases together.
Good luck and keep them pictures of the progress coming!
Greetings from Belgium
Philippe
Re: Z1000A1 - Basket Case Build
Posted: Thu Nov 30, 2017 8:55 pm
Author: csx355
Whoops - I seem to have acquired a gentleman's inconvenience!
Picked these up this morning from Justin at Mark Skinner auto-bodies. The colour is Mazda Noble Green. It has a deep metallic fleck, and depending on the light conditions the colour appears to range from deep metallic blue, reptilian iridescent green to a classy rich purple.
Any way I'm just off to mop up!
Re: Z1000A1 - Basket Case Build
Posted: Thu Nov 30, 2017 9:32 pm
Author: DavidZ1R
Nowt like a different colour for a rest
Re: Z1000A1 - Basket Case Build
Posted: Thu Nov 30, 2017 9:33 pm
Author: DavidZ1R
[quote="DavidZ1R"]Nowt like a different colour for a resto /quote]
Re: Z1000A1 - Basket Case Build
Posted: Thu Nov 30, 2017 9:45 pm
Author: csx355
Hi Dave - I think yours is a little lighter than mine and probably closer to the original as a result - your panels are looking spanking.
I love this part of a build. I'm tidying up the badges and will probably have a dress rehearsal on Sunday. Still have a lot to do but getting the panels done is always a real incentive boost.
Re: Z1000A1 - Basket Case Build
Posted: Sun Dec 03, 2017 12:04 am
Author: Andy M
. F***ing Tussing Valve spring seats!! You see I didn't take them out myself, they must have been time welded into the head. And the vapour blasting freed them up.
and then I forgot to check -
and the Kawasaki manual says fit the valve stem oil seals first -
and then fit the spring seats over the seals -
Ha ha I was doing my 900 head on Friday and as I had installed the seals on new guides then the seats went on although a bit tight .
