Hello Guest User,

Please feel free to have a look around the forum but be aware that as an unregistered guest you can't see all of it and you can't post.

To access these 'Registered Users Only' areas simply register and login.

Z1A Restoration

Work in Progress

Moderators: chrisu, paul doran, Taffus, KeithZ1R

Message
Author
User avatar
steve452
Custard Cream
Custard Cream
Posts: 622
Joined: 3rd Jun 2014
Location: Chandler's Ford

Re: Z1A Restoration

#91 PostAuthor: steve452 » Mon Feb 22, 2021 2:08 pm

MrDavo wrote:All fitted, with the clutch end play adjusted and the footrest fitted. The footrest was a ball ache, the pin didn't quite line up with the holes, I ground a tad off the inside end of the peg to make it line up, without thinking of the consequences, which was a droopy footrest! A penny washer got araldited where you can't see it, but with no more unsightly droopage. Also I replaced the side stand spring, which was a chunky replica, with the real Mcoy, much neater looking.Gear lever is a replica, before I tighten it up I want to dig out a suitable hex head screw rather than the allen screw supplied. What is an upset screw? Has someone been nasty to it? I think it means a flanged head but I'm not certain.


Upset screws have depressed heads (maybe that's why they're so upset :D ). See bottom of page 5 of John Brookes book for a description. The original Z1-A GL bolt was a 110N0-620 which is a plain hex-head. Kawasaki later replaced 110's with 112's, which are upsets, but no 112's were originally fitted to Z1's (ref. John Brookes).

HTH
Z1-B, 400bhp ZX1000NGF

90% of questions that begin "Why..." can be answered with "Because people are stupid."

User avatar
MrDavo
100Club
100Club
Posts: 260
Joined: 20th Jul 2020
Location: Manchestershire

Re: Z1A Restoration

#92 PostAuthor: MrDavo » Mon Feb 22, 2021 3:47 pm

Thanks Steve. Using that info I've managed to find a close match, sadly not a #7 bolt though, I'll have to keep an eye out for that.
1974 Z1A
1969 H**** CL450 ‘Scrambler’
2005 H-D XL1200R Sportster
1985 Porsche 911 3.2 Carrera Sport

User avatar
MrDavo
100Club
100Club
Posts: 260
Joined: 20th Jul 2020
Location: Manchestershire

Re: Z1A Restoration

#93 PostAuthor: MrDavo » Mon Mar 01, 2021 12:40 pm

As reported elsewhere, the Delkevic exhaust set arrived on Friday, all present and correct, but now stashed in the attic, as I can't fit the pipes until the bike is off the crate and on its own centre stand.

Image

Before the bike comes off the crate, first I need to fit the back wheel. A plan to fit the back tyre came to nothing when I unwrapped the inner tube that came with the bike. Oddly it was another front one, 19". A suitable 18" Michelin tube has been ordered off the bay of fleas.

Next problem to sort is the gear change. I fitted the new gear lever, only to find that the lever has no interest in self centering, and just stays up or down, wherever you push it. Interestingly the one solitary spare part that came with the bike is a gearchange shaft, complete with the centering spring. So the previous owner seems to have realised there was a problem here and bought the part to fix the problem, hopefully. I was worried that it meant engine out and split the cases, but it can be done in place if I remove the sprocket and inner gear cover.

Z power's website says that early bikes have a return spring with 3 coils. this has 4 so it is later - does that matter?

Edit: Looking at John Brookes' book, the answer is yes - to incorporate the bigger spring, KHI modified the boss in the cases, and used a 6mm longer shaft, without changing its part number. measuring my spare it is the later type. I wonder if my faulty return spring is down to mixing and matching earlier and later parts, I won't know until I get it apart and find out what I have in there.
1974 Z1A
1969 H**** CL450 ‘Scrambler’
2005 H-D XL1200R Sportster
1985 Porsche 911 3.2 Carrera Sport

User avatar
MrDavo
100Club
100Club
Posts: 260
Joined: 20th Jul 2020
Location: Manchestershire

Re: Z1A Restoration

#94 PostAuthor: MrDavo » Tue Apr 06, 2021 11:51 am

The whole job got held up because of the sticking gearchange, see the help thread for details of that.

Now that has been resolved and the trans cover, footrests etc are back on, time to make some progress with the rear end. I fitted the new BT46 to the rear wheel, which had been rebuilt by Hagons. I was surprised how quickly I got the tyre on, not Moto GP standards, but quick for me, using the right lube and experience helps (no smutty giggling at the back, thankyou). Here is the back wheel, a new set of damper rubbers and ready for the sprocket carrier.

Image

With the sprocket carrier and rear brake fitted, ready to go in. although the first pair of locking tabs for the sprocket nuts were done with a hammer and screwdriver, after some thought I did the rest super neatly using a socket drive extension.

Image

Wheel in place, at last the bike looks more like a motorcycle than parts of one. All went in straightforward, but I can't fasten up and get the bike off the box until I have the stoppers that bolt into the end of the swing arm (ordered from Z Power). The spindle has to come out one more time as the marks on the chain adjusters are in the wrong place, I didn't know there was a wrong way round for these until they were!

Image

Image
1974 Z1A
1969 H**** CL450 ‘Scrambler’
2005 H-D XL1200R Sportster
1985 Porsche 911 3.2 Carrera Sport

User avatar
MrDavo
100Club
100Club
Posts: 260
Joined: 20th Jul 2020
Location: Manchestershire

Re: Z1A Restoration

#95 PostAuthor: MrDavo » Mon Apr 12, 2021 1:35 pm

Back at it this weekend. The rear wheel spindle came out, then back in again with the chain adjusters the right way round. The chain was adjusted and the rear brake set up. I am short of the adjuster at the end of the brake rod but I'll use a 6mm nut until I know if there are other genuine parts to order, I can only see them for sale in the UK at Cradley Kawasaki.

Next up was the rear mudguard, which has been stashed in the attic since it came back from the chromers.A bit of a struggle but I got there in the end. The two allen screws holding the guard to the frame bracket are temporary, the 30mm x 6mm hex bolts supplied with the PMC fitting kit are 2mm too short, and dont go far enough to get the thread started. I have ordered some 35mm hex heads, the allen screws I used for now are too long, I have shredded tyres on overlong mudguard bolts before, its surprising how far a rear wheel can travel upwards on full bump. Grommets, tail lamp wiring and the number plate stop are also fitted.

Image

Next I'll probably do the rear indicators if I have all the right bits before I fit the tailpiece, but that also came out of the attic for a trial fit.

Image

This is the first time I've seen all the body kit on the bike. It does look nearly there save the pipes, my missus thinks she will be going out any day now on the back. I tried to explain that fuel, oil and electricity all have to go in yet, including cutting pipes, setting float levels, getting oil pressure, checking everything electrical lights up or works etc, and general snagging, all of which are never as straightforward as you'd expect.

Image
1974 Z1A
1969 H**** CL450 ‘Scrambler’
2005 H-D XL1200R Sportster
1985 Porsche 911 3.2 Carrera Sport

Philippe
Hardcore
Hardcore
Posts: 1999
Joined: 26th Oct 2017
Location: België

Re: Z1A Restoration

#96 PostAuthor: Philippe » Mon Apr 12, 2021 4:20 pm

Hi MrDavo

she looks stunning!!! You'll have a great bike when she's finished.
It's nice to see that there are other rivet counters restoring old Zeds ! I'm not alone, thank God for that!
GrtZ
Philippe
the differences between a little boy and an adult man is the price and size of their toys!

User avatar
MrDavo
100Club
100Club
Posts: 260
Joined: 20th Jul 2020
Location: Manchestershire

Re: Z1A Restoration

#97 PostAuthor: MrDavo » Tue Apr 13, 2021 11:53 am

Thanks, I'm thinking I might do all the electrics and fuel malarkey before it comes off the plastic crate, simply because its at a better height to work on.

Then I only have to add exhaust pipes, oil filter and oil once it's off the crate, plus sort out the dragging front brakes once the bike can be moved away from the wall and the front end can be jacked up with the bike on the centre stand.

Next are the rear indicators and mount the tailpiece properly, then the rear light. I've also been weighing up batteries, my other 2 bikes both have Motobatt ones, although I did notice another brand of gel battery that looked a lot less yellow. Also I have to rebuild the fuel tap, I have an O ring kit ready.

I've found a black Vertex battery listed by M&P, so I think I'll get that.

https://www.ebay.co.uk/itm/Kawasaki-Z-9 ... 3587457079

Image

Having gone to all that trouble to make the bike look as original as possible, a huge shock of yellow when I lift the seat is to be avoided if possible.
1974 Z1A
1969 H**** CL450 ‘Scrambler’
2005 H-D XL1200R Sportster
1985 Porsche 911 3.2 Carrera Sport

User avatar
MrDavo
100Club
100Club
Posts: 260
Joined: 20th Jul 2020
Location: Manchestershire

Re: Z1A Restoration

#98 PostAuthor: MrDavo » Wed Apr 14, 2021 4:23 pm

It's nice to see that there are other rivet counters restoring old Zeds ! I'm not alone, thank God for that!


I can't be certain but I think the term 'rivet counters' comes from railway modelling, which funnily enough was my hobby before I got into motorbikes as a teenager. The model railway layout had to go from Mum's garage so I could get bikes in there. Even at 17 I had two bikes, a Hodna 150cc twin and an AJS 250 single, some things don't change.

Rivet counting makes more sense in railway modelling, as there are rivets, say on the side of a steam engine cab or tender, and if you get it wrong there is the same 'I think you'll find...' types, that in our world would be telling us that our wheel rimes had the wrong date code for the bike. Both are annoying, but also usually right.

Image

Count the rivets! You not only have to get the number right, but also the spacing.
1974 Z1A
1969 H**** CL450 ‘Scrambler’
2005 H-D XL1200R Sportster
1985 Porsche 911 3.2 Carrera Sport

User avatar
MrDavo
100Club
100Club
Posts: 260
Joined: 20th Jul 2020
Location: Manchestershire

Re: Z1A Restoration

#99 PostAuthor: MrDavo » Tue Apr 20, 2021 3:07 pm

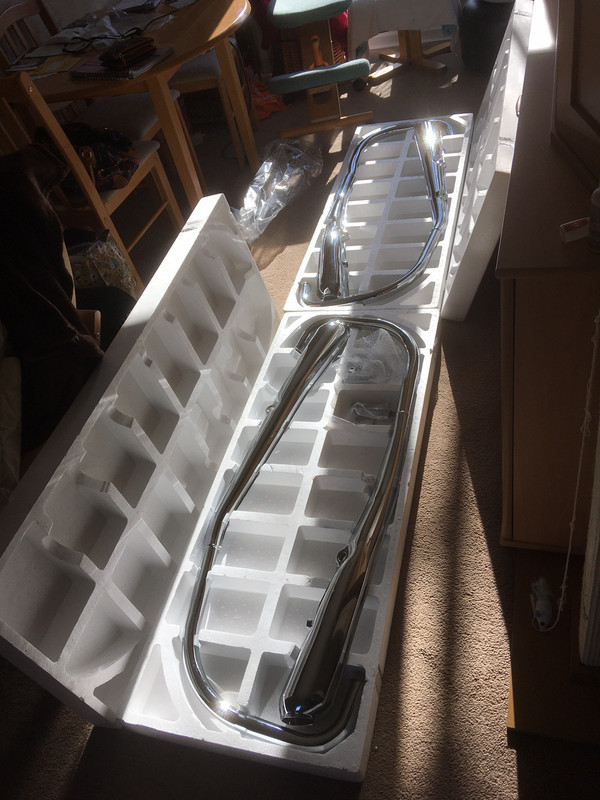
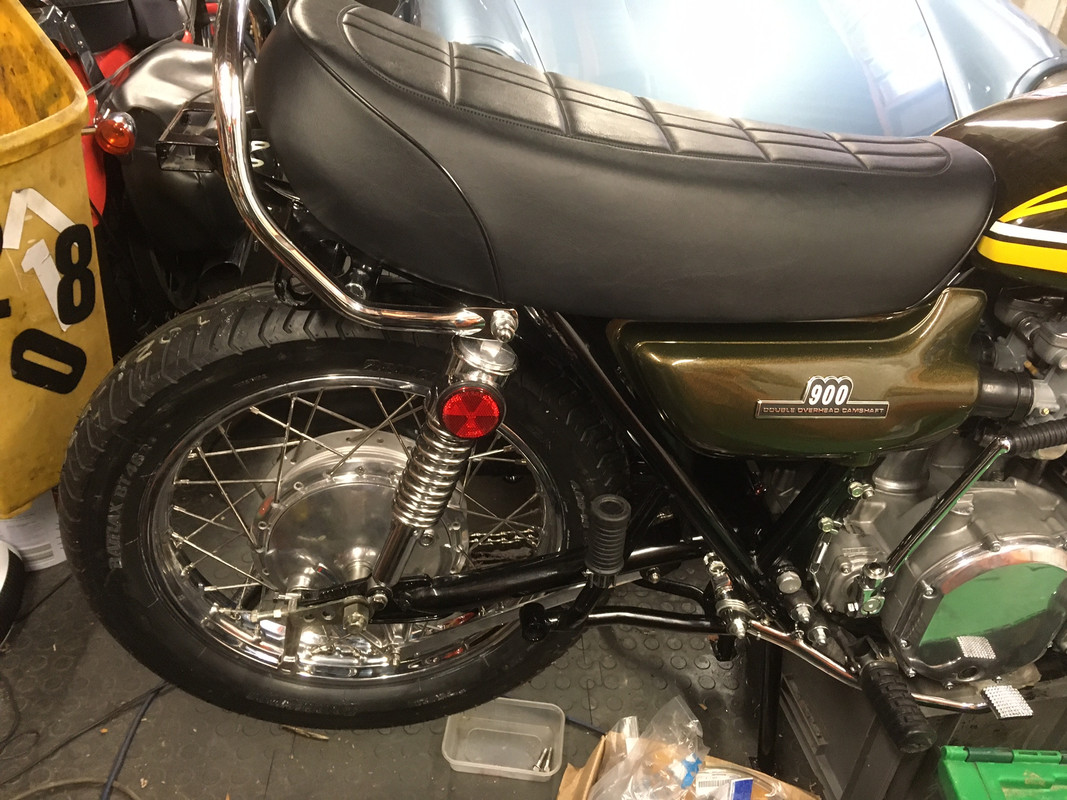
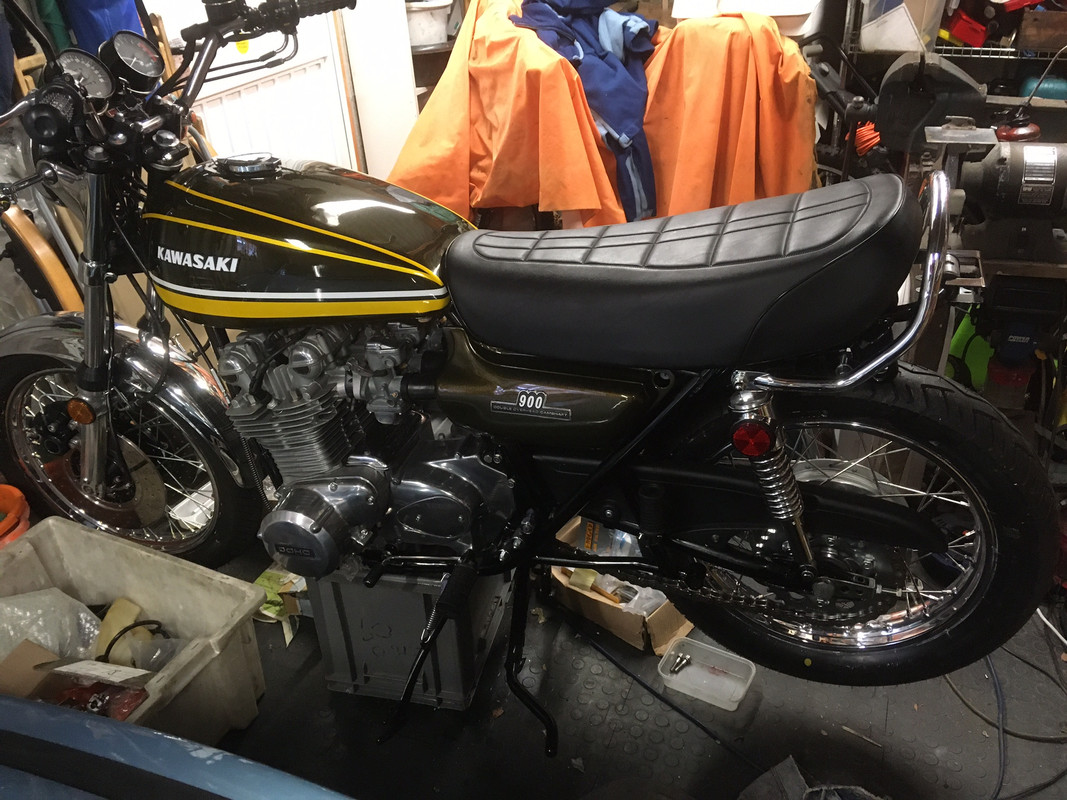
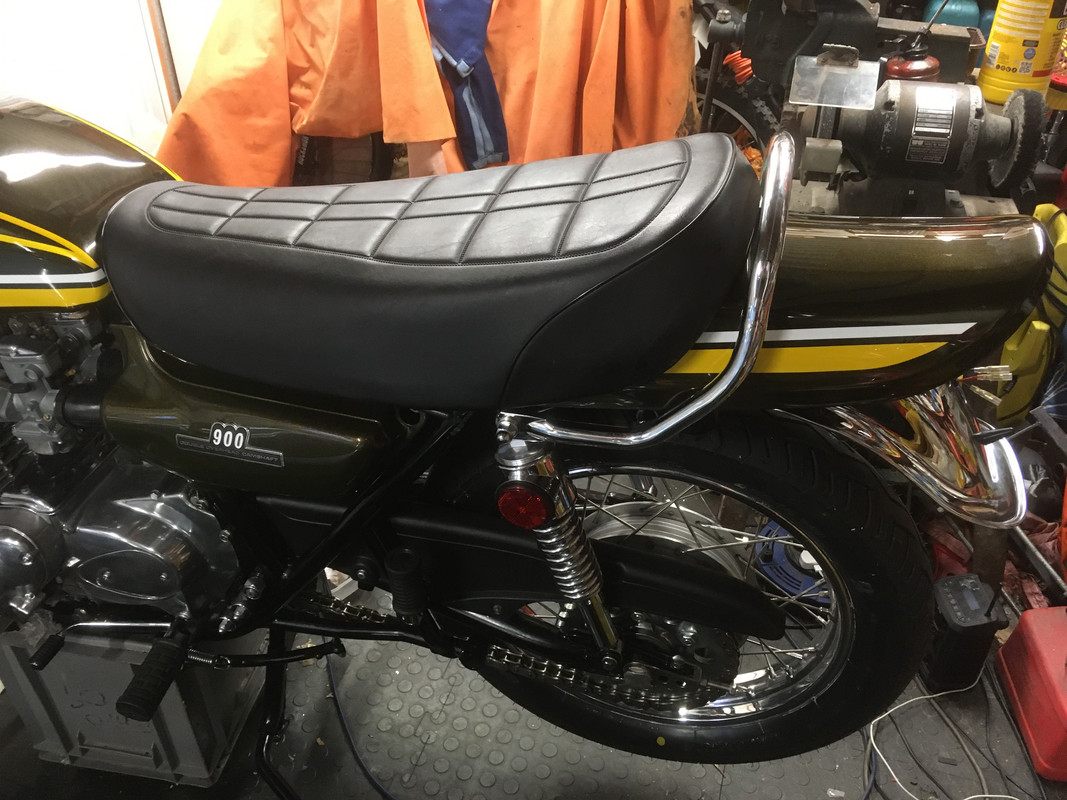
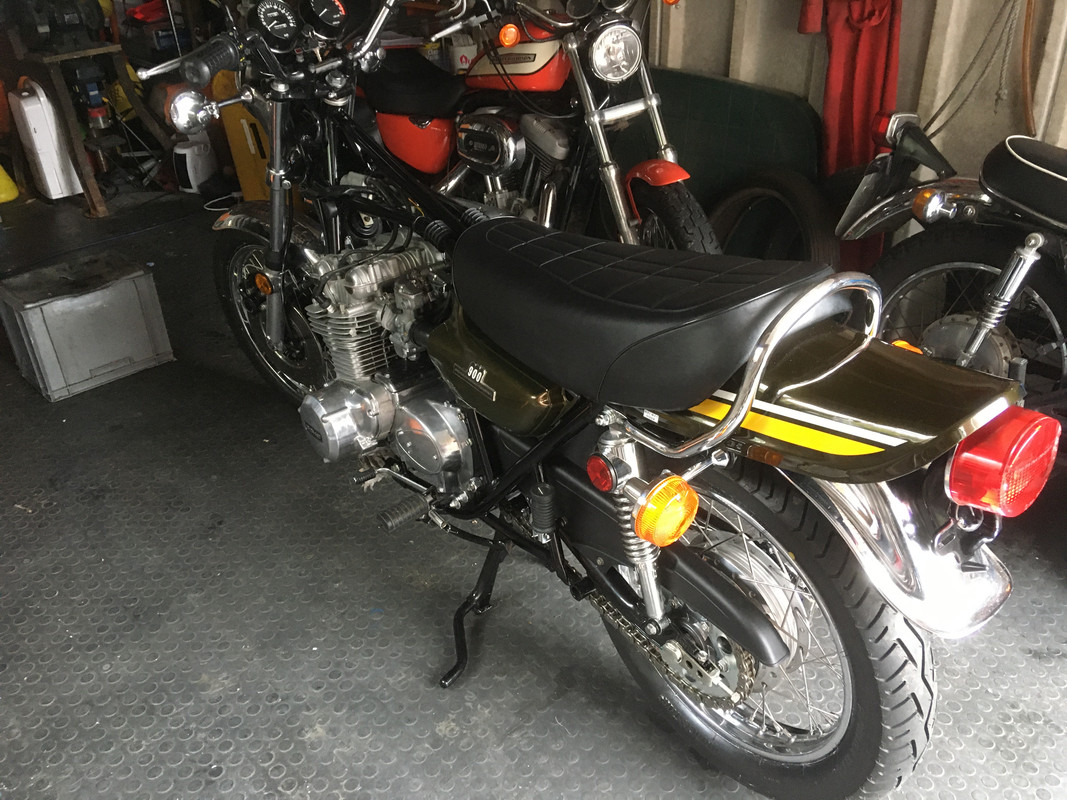
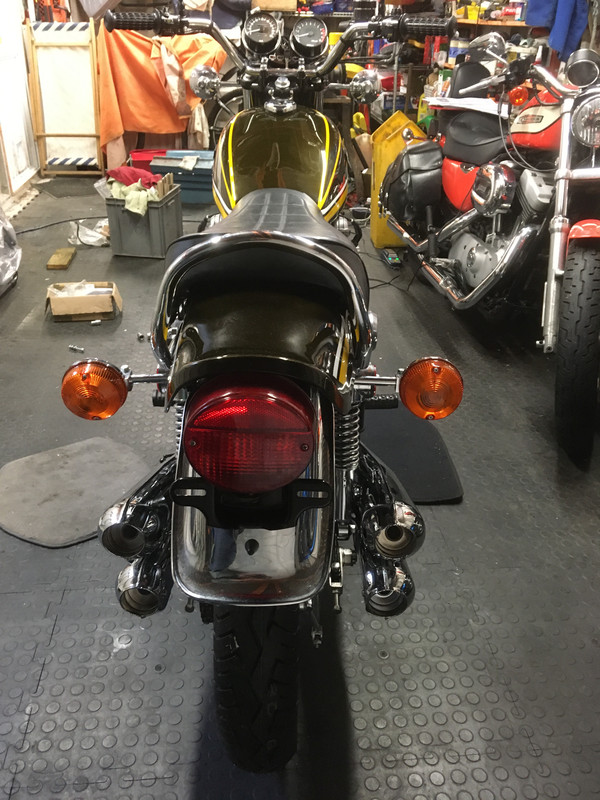
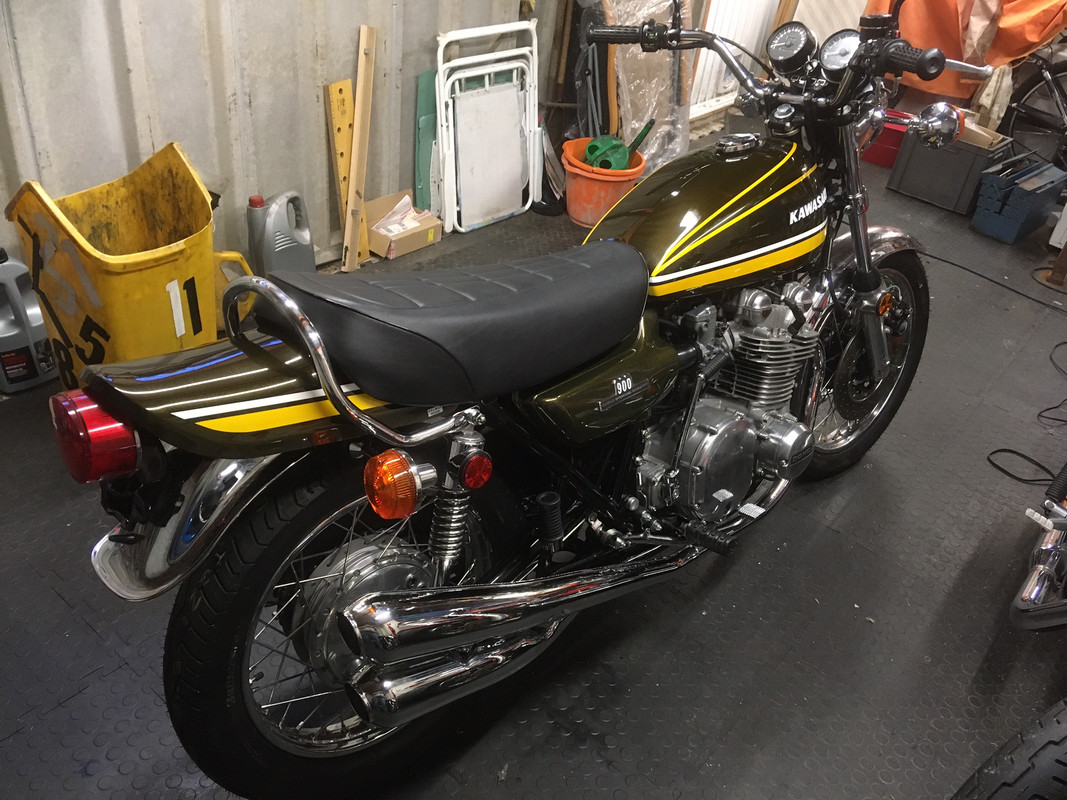
This weekend I have practically finished adding parts, there is mainly setting up and snagging left to do, plus the exhaust and oil once the bike comes off the plastic crate that I've built it on. First I got the rear ducktail finished, stickered up and fitted, complete with tray, rubber and wiring diagram sticker. I also got all the rubbers and washers in the right order to fit the indicators, plus I swapped the pattern lenses for real Stanley ones.

Image

Image

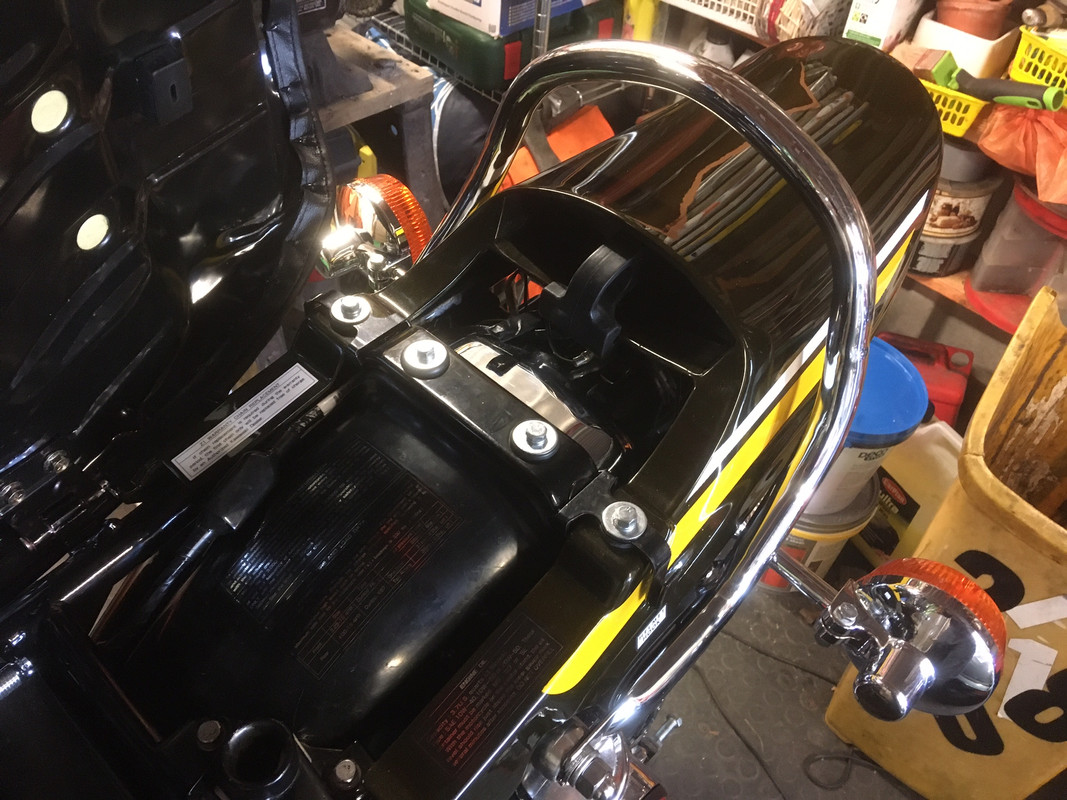
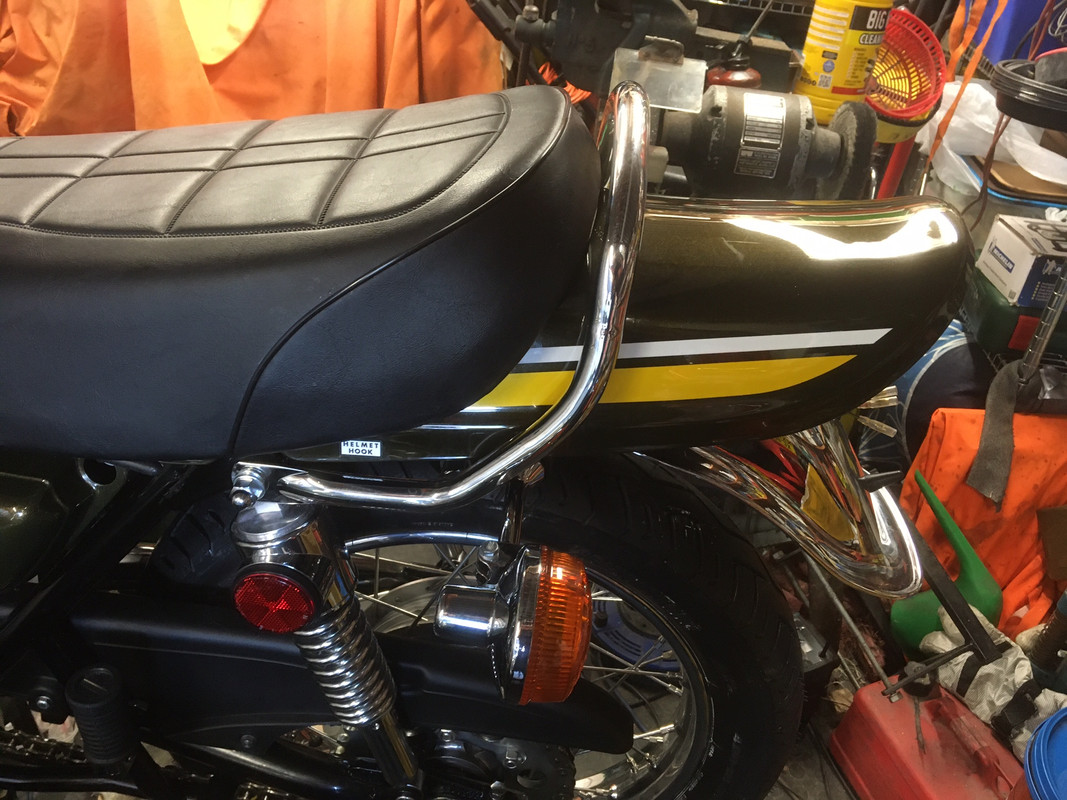
I cleaned up and fitted the rear light, which is the real thing, and date coded March 1974, matching the swinging arm. I fitted a new stop/tail bulb, from a box of new bulbs given to me by a mate who allegedly half inched them from Greater Manchester Police when he worked there! The tanks and r/h side panel were removed for safe keeping while I do the electrics and fuel etc, wrapped and put back in the attic. Now all the electrical components and wiring are in place I fitted the new battery, to see what we've got. It wasn't so good at first. The console indicator light came on, and went out when I put her in first gear, so that's the neutral light in the wrong place. Also I had the oil light lit, the horn parped, and a brief poke of the starter turned the engine, but only for a second as there's no oil in yet.

That however was that, no lights or indicators at all! I was a bit hacked off about this. I never expect everything to work perfectly first time, but as all wiring and switches are brand new and connected up, I expected more, and was unsure what to try next.

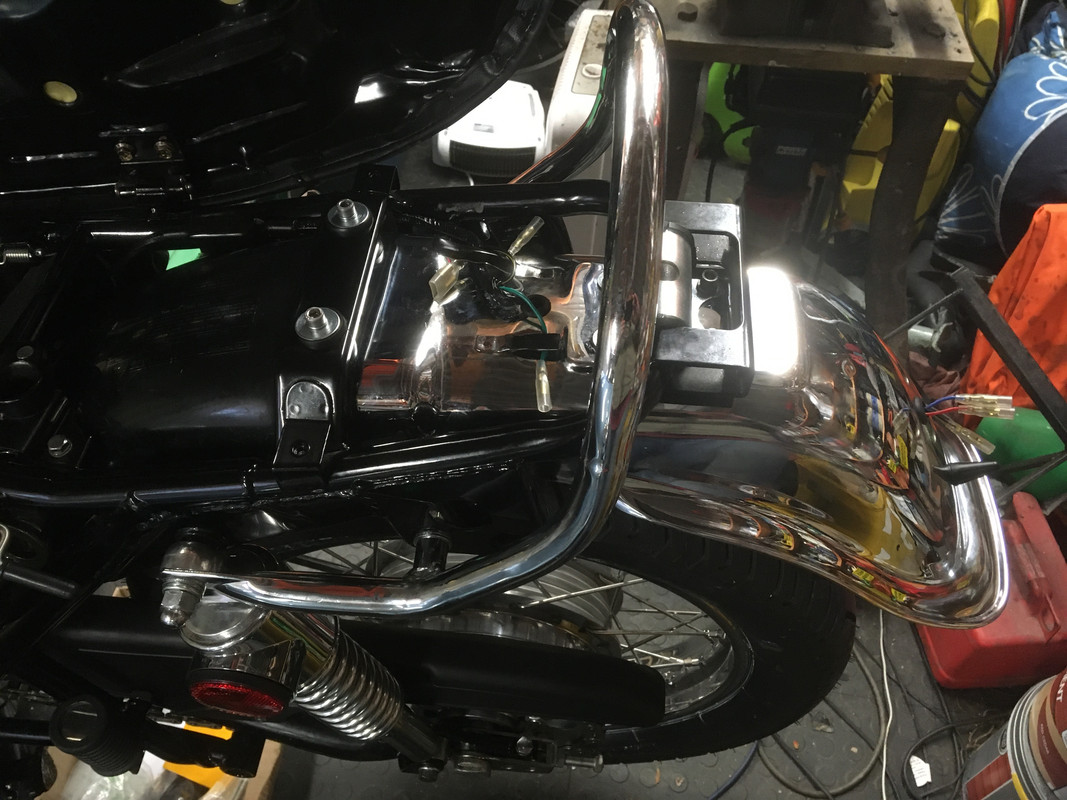
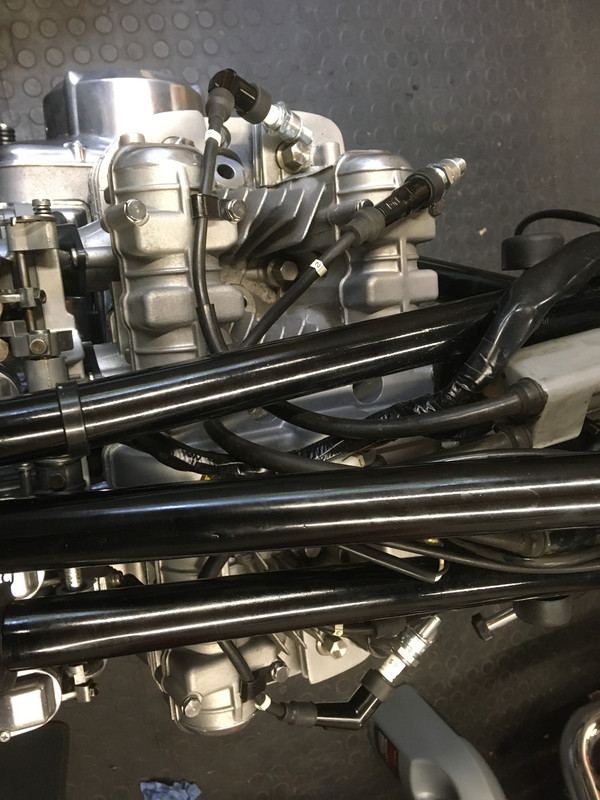
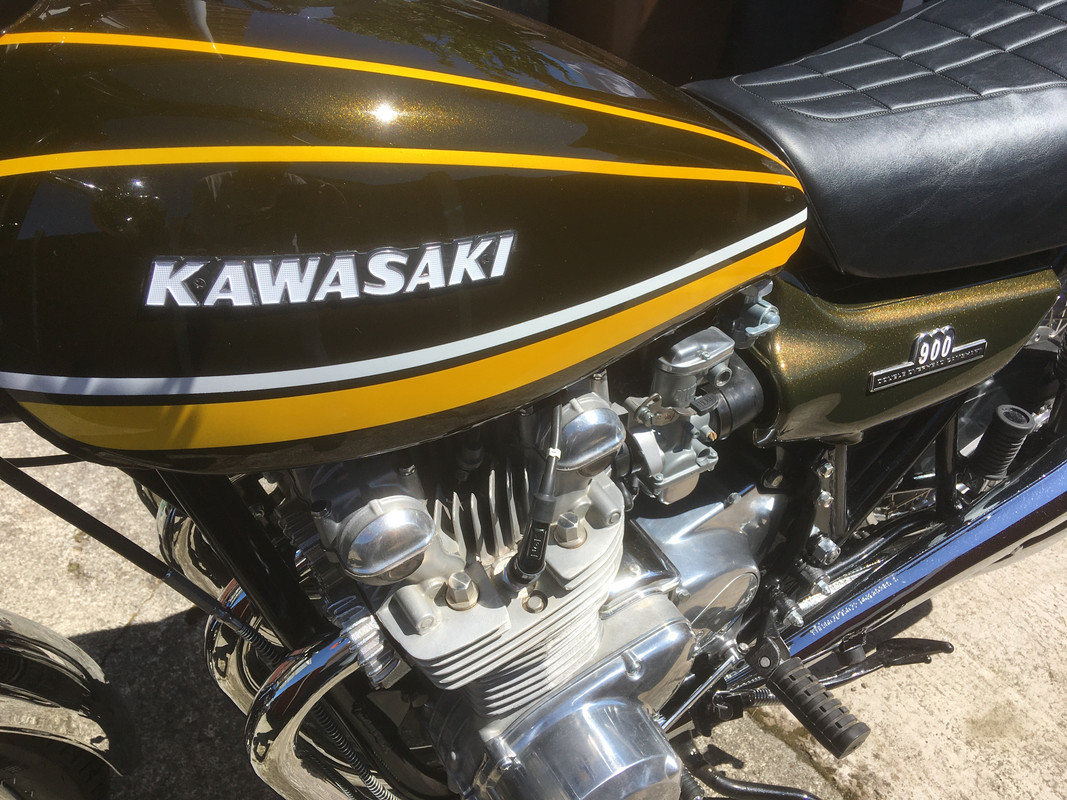
Later I got curious about an unused yellow and black (earth) lead with a female spade connector, that pops out of the loom at the same place as the brake light switch wires. Its in the middle of the photo below, there was nothing at all obvious to connect it to, so I'd just left it.

Image

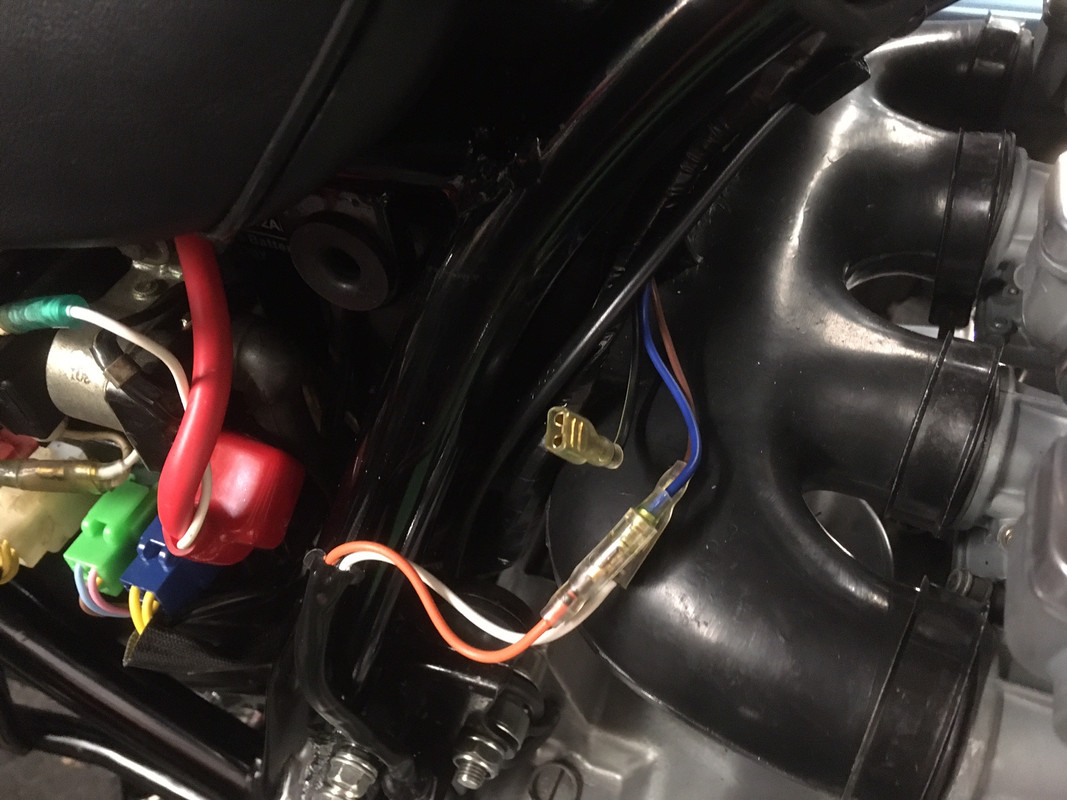
Acting on a hunch I temporarily connected it to the the battery, and everything worked!! :D I made up a lead with a spade at one end and a loop at the other, and connected it to the earth point on the engine. I crimped and soldered the joints, as losing your lights at speed is no fun at all, as I have learned by experience. Anyhow, I now have a full selection of lights, clock lights, indicators, plus brake and idiot lights. also the red brake lamp warning lights up when you apply the brakes. The lights go slightly dimmer when I turn the ignition on at the kill switch. Again, I don't want to check for sparks at the plugs until there is oil circulating.

Image

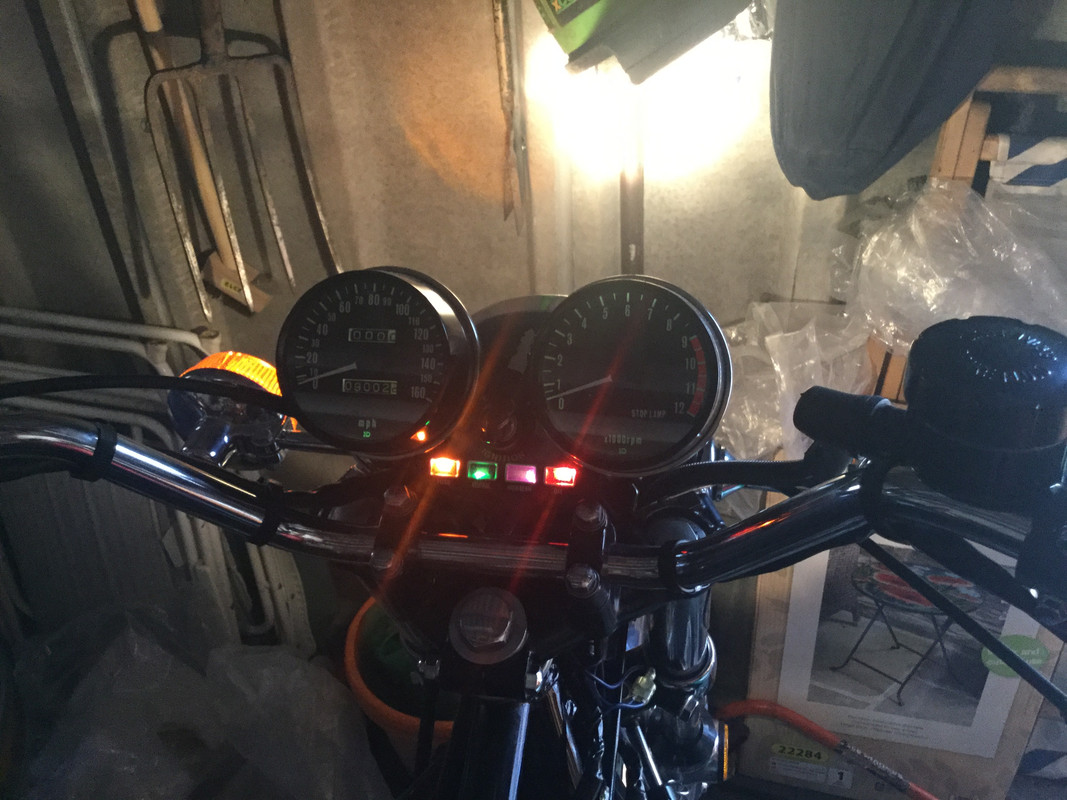
The only issues to be sorted are firstly the neutral and indicator warning lights need swapping around, to do this I have to take the headlamp and clocks off before I can get at the console. Secondly, although I don't have a pilot lamp yet (on order) the headlamp lights up when the bar switch is in the PO position as wellas when it should. There's some funny business with blue wires from the switchgear that plug into each other, in an undocumented way, over and above the wires that use the white block connectors. I'm guessing that's where my problem lies, but I'll wait till I have the pilot lamp fitted before I start to play around.

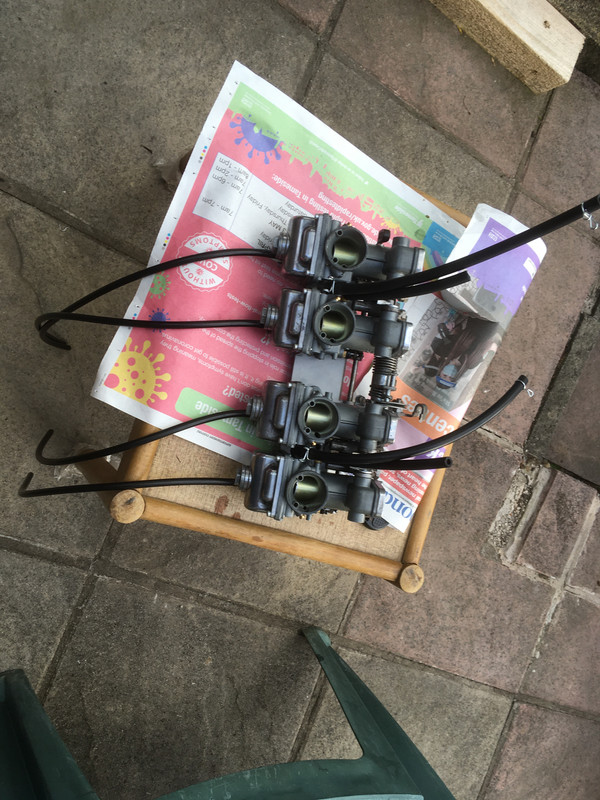
Next I refurbished the (original) fuel tap, cleaning out the ossified seals and fitting new ones, plus giving everything a polish on the wheel. I'm going to check the float fuel levels next, I may try using the unneeded chain oiler tank as a temporary fuel tank and check the carbs a pair at a time, if I can fit the pipe to the carbs without leaks assuming the internal pipe diameter is the same (it might not be).
1974 Z1A
1969 H**** CL450 ‘Scrambler’
2005 H-D XL1200R Sportster
1985 Porsche 911 3.2 Carrera Sport

User avatar
MrDavo
100Club
100Club
Posts: 260
Joined: 20th Jul 2020
Location: Manchestershire

Re: Z1A Restoration

#100 PostAuthor: MrDavo » Fri Apr 23, 2021 9:40 am

The electrics are now finished, a much more straightforward process than I expected.

Yesterday a new headlamp rim arrived from Z Power, the correct US market type with the adjuster screw. After a bit of faffing I swapped my RHD Lucas halogen unit out of the old tatty rim and into the shiny new one. I also bought a genuine pilot light, I had to change one of the bullet connectors to fit it. I seem to be getting better at these, although I seem to get better results with the careful use of long nosed pliers than using either of my crimping tools. I put the rim on the bike and tried the lights - they worked but I still had the headlight main beam coming on when the light switch was in the pilot light position. The fix is boring but I'll leave it here in case anyone else scratching their head finds it in a Google search.

I'd learned from John Brookes' book that the US Z1s didn't have a pilot light fitted. Comparing the US and European wiring diagrams I could see that while all the wires were there on both versions, the brown feed for the pilot on the US bike was disconnected, and instead the PO switch was connected to the headlamp via a blue wire, that was left connected to nothing for Europe. I can see that you really don't want to accidentally get darkness when you switch the lights on! As the replica looms and switches at least seem to come wired for all options, and I'd plugged all the blue wires together, the trick is to find which wire has to be unplugged to disable the feed from PO switch to the headlamp. A bit of trial and error and all was well, and even the pass switch works. Never had one of those before, like cruise control in my car, or the friction screw on the HD twistgrip, I'll probably never think to use it.

That's it for the electrics, although sparks and charging can't be tested until I at least have oil in the motor. Next up is take the clocks off again so I can swap the bulbs in the idiot lights, and some snagging with the back light mounting and rear brake rod. Then I'm going to tackle the next challenge - petrol!
1974 Z1A
1969 H**** CL450 ‘Scrambler’
2005 H-D XL1200R Sportster
1985 Porsche 911 3.2 Carrera Sport

User avatar
MrDavo
100Club
100Club
Posts: 260
Joined: 20th Jul 2020
Location: Manchestershire

Re: Z1A Restoration

#101 PostAuthor: MrDavo » Mon May 24, 2021 1:07 pm

The drama I had with the float levels finally sorted out, and the slides bench synched, here are the carbs, complete with pipework, about to go back on the bike.

Image

I got to the stage where to do the remaining jobs (oil & filter, fit the pipes and sort the front brakes) I needed to finally get the bike off the grey plastic box that I have built it up on. I gave my mates a ring on saturday, and behold! we have a rolling chassis (well, with dragging font discs due to the wrong pads). The box is looking a bit worse for wear but surviving well considering I've built a Harley and a Z1A on it.

Image

I didn't have an oil filter to fit when the fame and engine went on the box, so I've been unable to turn the engine over at all. I fitted the filter, and chucked 4L of 10/40 in, and started to turn the engine. I took the plug out of the oil gallery, and peered in. No sign of oil, worrying, my CB750 had dramas at this stage due to an airlocked pump - I had to prime it with Vaseline before it would work. This time I pressed the starter and suddenly the oil light went out. Looking down there was a welcome pool of oil on the floor, from the oil gallery, so I put the plug back in, and at last could turn the engine over in search of sparks. I also fitted a set of the little plug lead number tags, from PMC.

Image

Happy with that I fitted the plugs, next I got the tank out of the attic again to sort out fuel. A big disappointment here, despite new O rings, my genuine fuel tap does not understand the concept of 'off', fuel still drips through. This seems quite a common problem, some research reveals OEM ones to be unobtainable, and most cheap replicas to be a waste of time. I did read however that PMC have upped their game, and found a better source. We'll see, I've had to order one, not much option other than a real cheapo one that I know will be rubbish.

So no attempt to start her up yet, but I've put the exhaust pipes on. A couple of issues with bolts too short, and nuts that don't match the thread on the long bolts, but here's a sneak preview, better pics when I can drag her out of the garage at last. Note that the plastic box is now in service as a box again, with all the remaining Z1 bits. When I bought the bike it filled five large boxes.

Image

Can someone confirm that the four rubber / steel exhaust bushes all go in the two frame brackets, the parts diagram gives the impression that the bolt goes through the bush, then the pipe (see https://images.cmsnl.com/img/partslists ... 6_8faa.gif ) but I don't think that's correct.
1974 Z1A
1969 H**** CL450 ‘Scrambler’
2005 H-D XL1200R Sportster
1985 Porsche 911 3.2 Carrera Sport

Philippe
Hardcore
Hardcore
Posts: 1999
Joined: 26th Oct 2017
Location: België

Re: Z1A Restoration

#102 PostAuthor: Philippe » Mon May 24, 2021 1:17 pm

Hi MrDavo

the rubbers go in the frame tubes, two left and two right. Don't bother if they don't slide in completely, they'll get in.
The exhaust pipes rest against the rubbers and the two long bolts go through all of the parts (two exhaust pipes, two rubbers).
A self locking nut is attached on the other side. Piece of cake!
She became beautiful ! Congratulations!
GrtZ
Philippe
the differences between a little boy and an adult man is the price and size of their toys!

Bill P
Hardcore
Hardcore
Posts: 1301
Joined: 17th Aug 2015
Location: Derbyshire

Re: Z1A Restoration

#103 PostAuthor: Bill P » Mon May 24, 2021 3:26 pm

Thats a real Bobby Dazzler well done you :up

User avatar
MrDavo
100Club
100Club
Posts: 260
Joined: 20th Jul 2020
Location: Manchestershire

Re: Z1A Restoration

#104 PostAuthor: MrDavo » Tue May 25, 2021 10:37 am

Thanks for the advice about the exhaust bushes, I finally got these sorted properly last night. All I need to do now is to sort the front brakes out, and fit a non leaking petrol tap, then I can see if she fires up! Once ready I'll fit the number plate and get some insurance so I can start to run the engine in. I am watching my emails like a hawk, waiting for notification that the tap is on its way.

Thanks also for the comments, I took these photos yesterday when I was maneuvering the bike to the back of the garage, so I could get my car back in out of the rain.

Image

Image

EDIT: I just got an email to say that my PMC fuel tap has been dispatched. Woohoo! I'd better get myself some insurance sorted out!
1974 Z1A
1969 H**** CL450 ‘Scrambler’
2005 H-D XL1200R Sportster
1985 Porsche 911 3.2 Carrera Sport

User avatar
MrDavo
100Club
100Club
Posts: 260
Joined: 20th Jul 2020
Location: Manchestershire

Re: Z1A Restoration

#105 PostAuthor: MrDavo » Tue Jun 01, 2021 1:28 pm

Fuel tap fitted Friday, I tried to start her on Friday evening. Much to my surprise, she started straight away, and was soon warm and running off the choke.
Saturday she was dragged into the sunlight for the first time, for the first test.

Image

Image

I also got the see the metal flake in the paint 'popping' in the sunlight.

Image

A couple of trips around the block, to check it all works, and then off for the first ride. Here we are by the Holmfirth road at the site of the 'Isle of Skye' moorland pub. The bike ran smoothly, with a familiar whistle from the airbox, similar to my Triumph Daytona 1000 four.

Image

Number 4 header was a little straw coloured when I got back. scared of irreversibly blue pipes I whipped the carbs off, and applied a smear of silicon under #4 carb manifold, and tightened the clamp screws tight. No more yellowing, and I polished out most of what there was. I'm running her in by the book, and changing up at 4,000 rpm for the first 500 miles. We are now at 160 miles, she runs a little rough below 3k, not sure if that's because we are on the verge of stalling or if the setup isn't quite there yet, also if you set the tickover at a particular temperature, if it gets hotter/colder it won't tick over that well without using the throttle a little bit. I'm hoping to get the timing strobed and the carbs vacuum balanced ASAP, we'll see how we are then. The wife isn't coming pillion while running in, she wants me to get on with it, so we can 'go for a blast' on her first ride out.

thanks for everyone's help, particularly Spitfire, for the kind donation of a genuine KHI Shop Manual languishing in his attic.
1974 Z1A
1969 H**** CL450 ‘Scrambler’
2005 H-D XL1200R Sportster
1985 Porsche 911 3.2 Carrera Sport


Return to “Projects”

Who is online

Users browsing this forum: No registered users and 78 guests