Hello Guest User,
Please feel free to have a look around the forum but be aware that as an unregistered guest you can't see all of it and you can't post.
To access these 'Registered Users Only' areas simply register and login.
Please feel free to have a look around the forum but be aware that as an unregistered guest you can't see all of it and you can't post.
To access these 'Registered Users Only' areas simply register and login.
Z1A Restoration
Moderators: chrisu, paul doran, Taffus, KeithZ1R


Re: Z1A Restoration
Hub sent on holiday to bonny Scotland for Timesert fitting in the disc bolt holes, meanwhile small boxes have started to arrive, including taper rollers for the headstock, front wheel bearings and spokes, oil filter & spring etc, and all the nuts and bolts etc to fit the engine into the frame. I'm going to whip off the sump plate, clutch and cam covers just to check all is present and correct, and put some assembly lube on the cams. I already discovered no points plate or alternator stator (but they came in the boxes) under their covers or an oil filter. I can't just assume things like the oil pump and screen are there and never look, only to find out the hard way that they aren't, I already could easily have done that with the oil filter.
I've told the postie that I'm building a bike by post, he thinks I'll have it done in no time at this rate.
If anyone has one, I'm desperately seeking the lower triangular engine mounting plate, it seems to be AWOL, and the nearest available one, other than buying a complete set from Z-Power, is in Ohio.
1974 Z1A
1969 H**** CL450 ‘Scrambler’
2005 H-D XL1200R Sportster
1985 Porsche 911 3.2 Carrera Sport
1969 H**** CL450 ‘Scrambler’
2005 H-D XL1200R Sportster
1985 Porsche 911 3.2 Carrera Sport
Re: Z1A Restoration
The Hub came back from Inverness, the Timeserts were done the same day, and the box Fedexed back to me. Today I put new bearings in, and now it is off to Hagon's back in Essex where I bought the bike, for building into a new rim, with the spoke set I bought from France, so the front wheel is getting some serious mileage in even if I'm not.

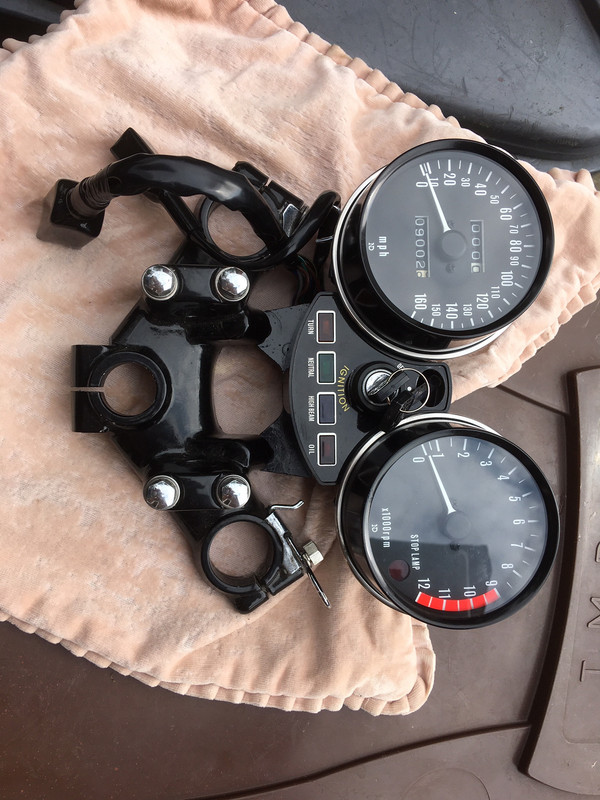
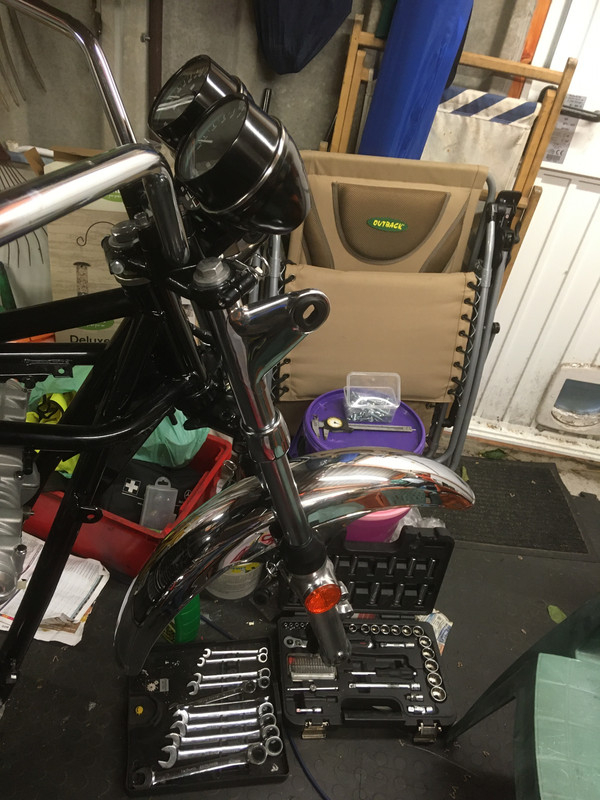
It was too hot to work in the garage, so ever with an eye for a classy location, I set up in the sun next to the wheelie bins to refurb the clocks. they live in the cushion cover shown, for protection.
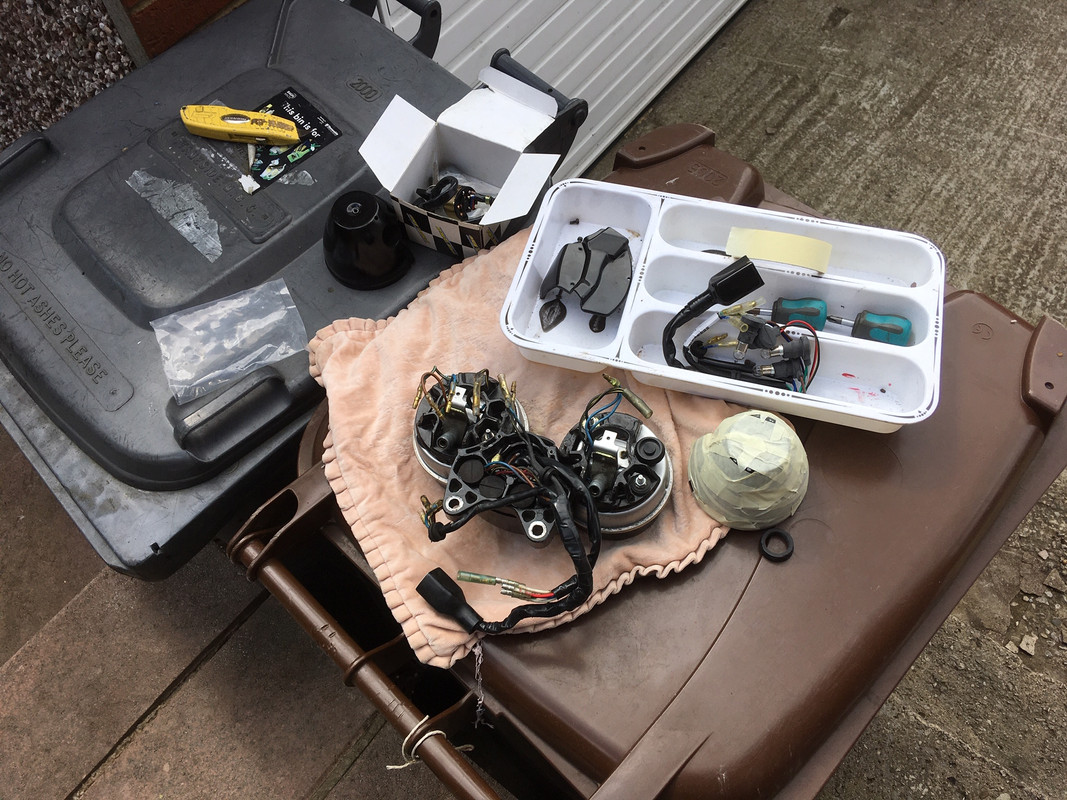
I fitted a new sub loom and idiot lights, and changed the ignition switch, so I have a key that works. I also touched up a couple of minor scrapes.
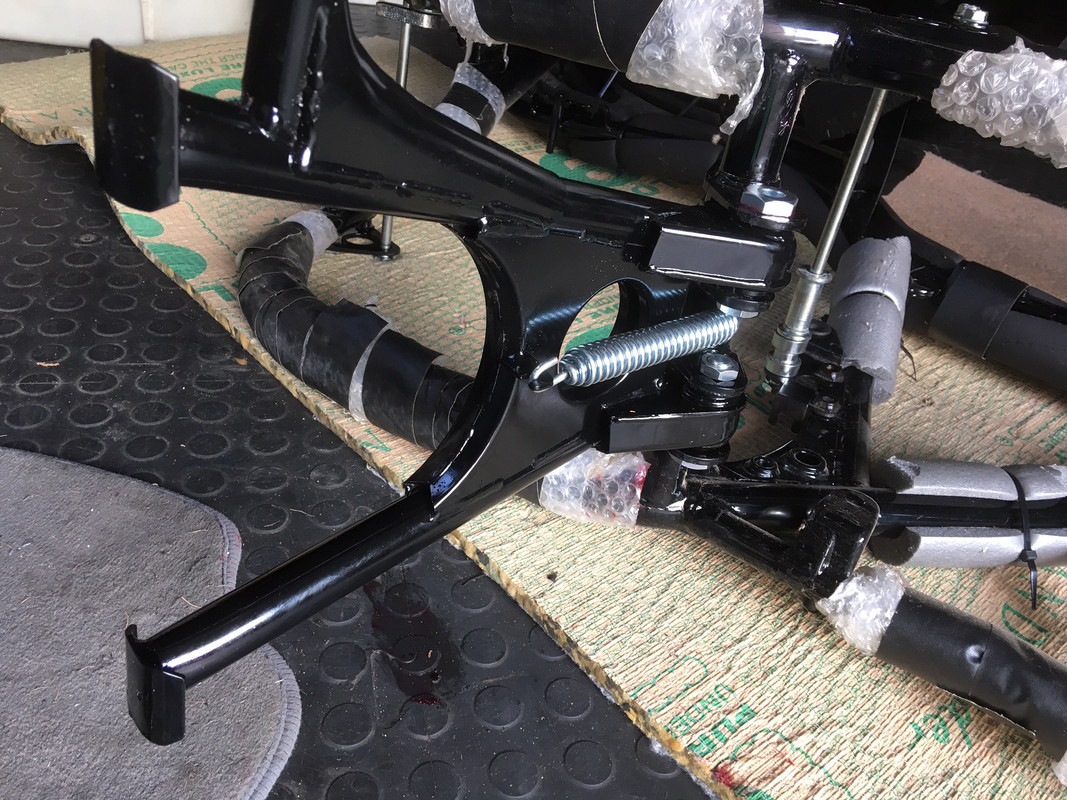
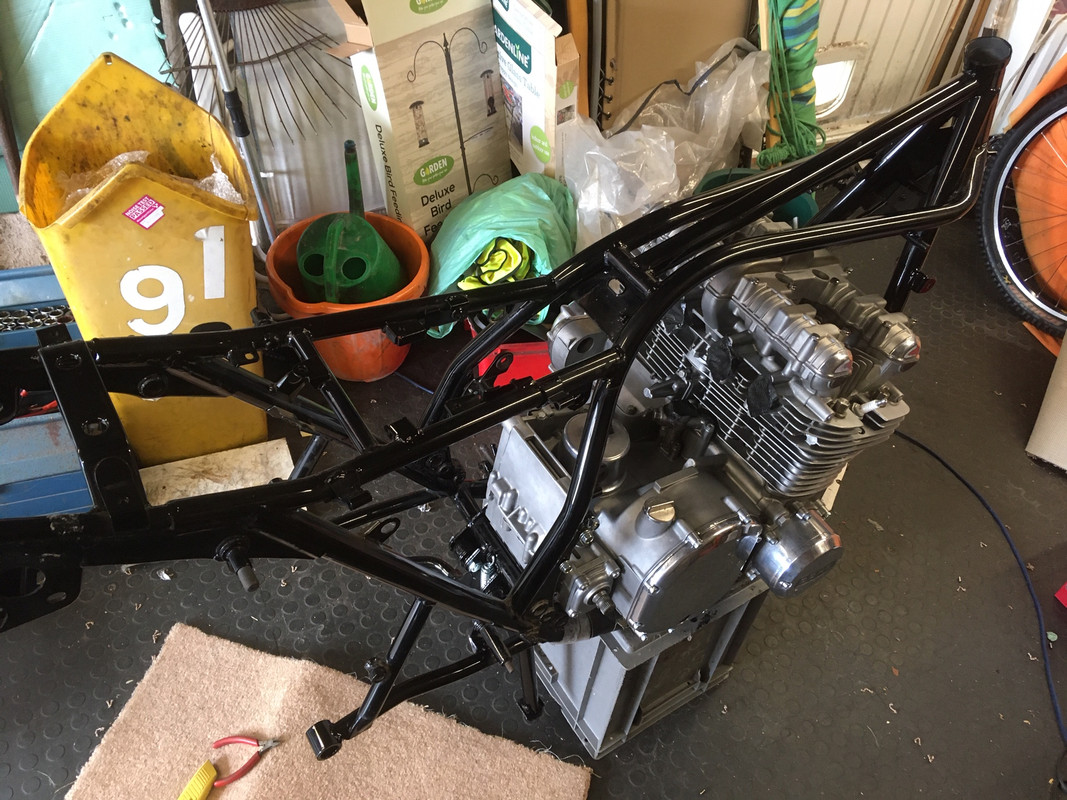
Sunday I got the frame out in the sun, and loose fitted all the hardware necessary to get the engine in, less the missing lower mount. I still haven't sourced one in the UK, so the one for sale in Ohio will probably be ordered this week. There was a choice of a chrome spacer bobbin or a nickel plated one, so I went for the stock look over bling. The clipboard has a copy of the relevant parts book page as a checklist.
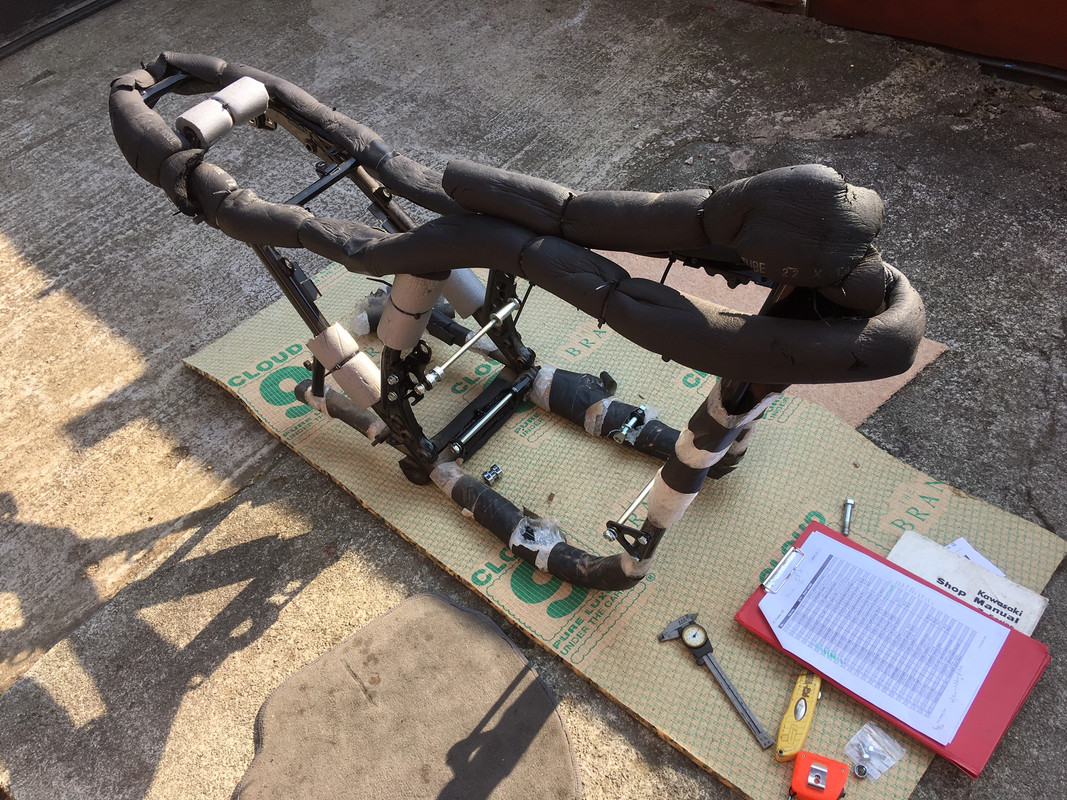
There was no centre stand with the kit of parts I bought, after looking on eBay I realised there wasn't a lot of difference in price between a tatty old one and a brand new DoReMi stand, if you could find one. I tracked one down on German eBay, a quality bit of kit, it went straight on, no hassle.
This morning my glamorous assistants showed up to help me get the motor in. Brains on the left (engineer), brawn on the right (6'7"). We tried the conventional way lifting it in, but after getting it well and truly stuck, the engineer suggested we should be lifting the lightest part, so we lowered the frame over the engine. A bit of a faff, but it worked.
WARNING: You know the two 12mm engine mounting bolts that go into the tear shaped special nuts underneath? The parts book has them transposed - if we hadn't stopped to check after trying to fit a long bolt into a short hole, we could have punched through the crankcase!

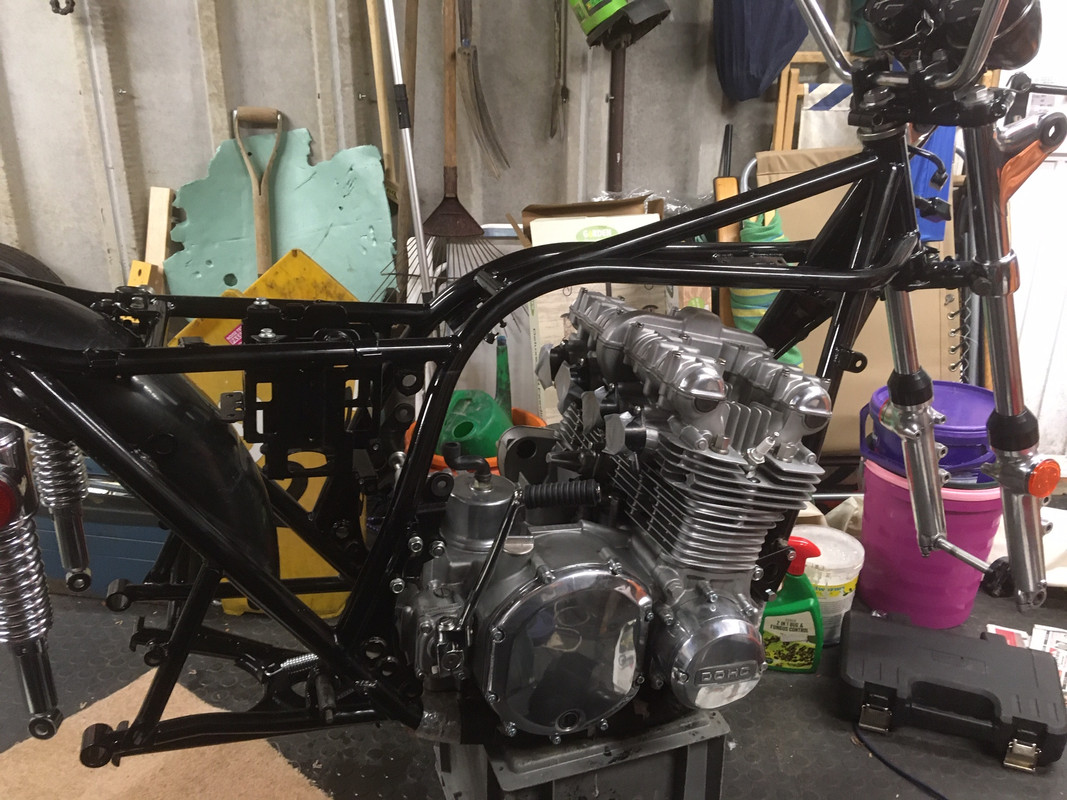
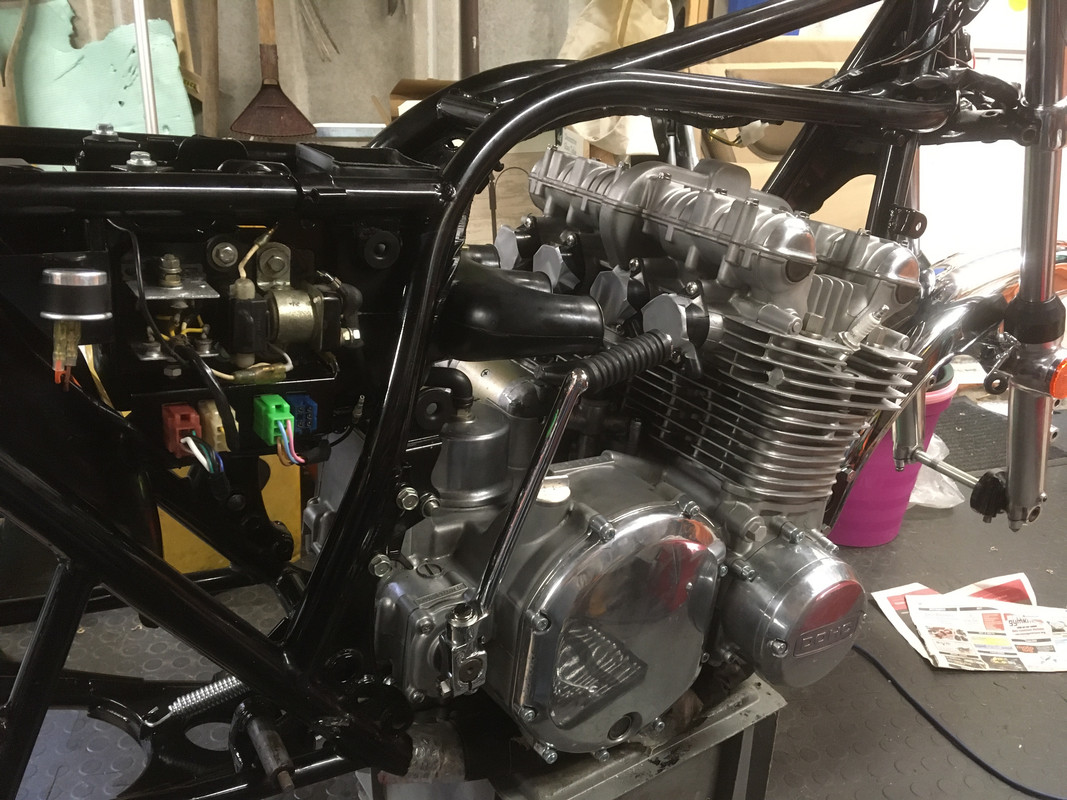
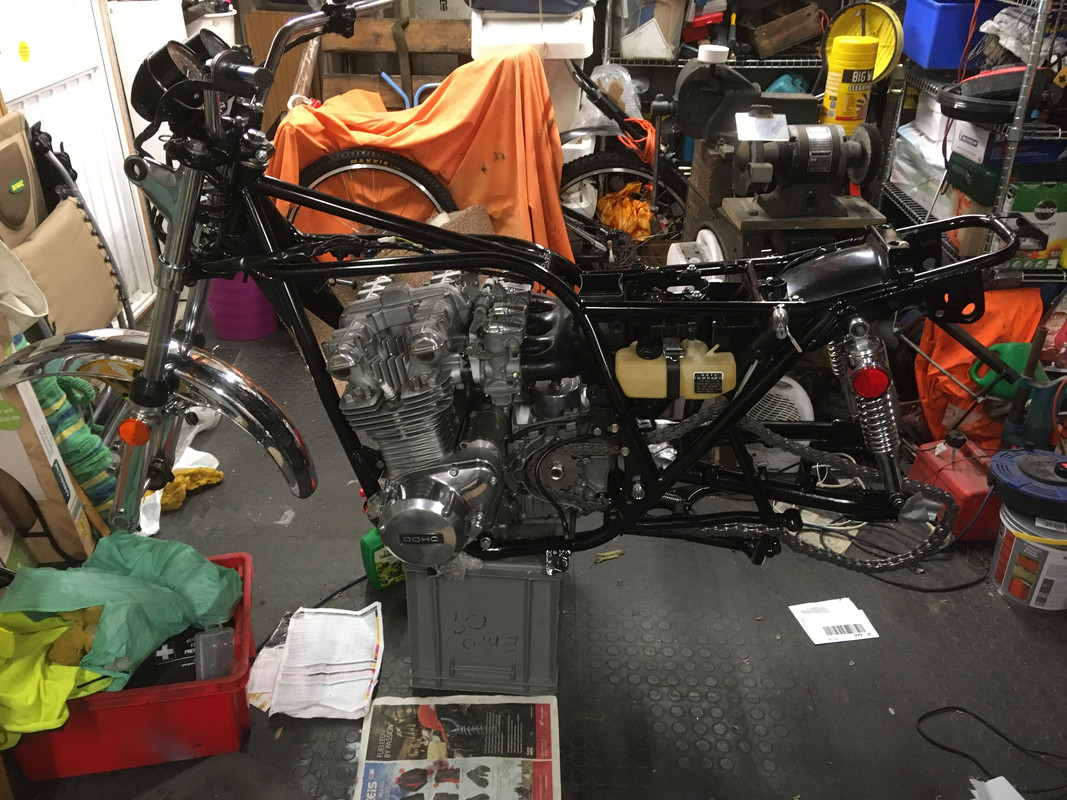
Finally, with the engine in I get to tear off all the bubble wrap and tape, and see the freshly painted frame in all its glory. If you worry about the plastic crate being up to the job of supporting the weight, I rebuilt my Harley motor with the bike sat on that box!

It was too hot to work in the garage, so ever with an eye for a classy location, I set up in the sun next to the wheelie bins to refurb the clocks. they live in the cushion cover shown, for protection.
I fitted a new sub loom and idiot lights, and changed the ignition switch, so I have a key that works. I also touched up a couple of minor scrapes.
Sunday I got the frame out in the sun, and loose fitted all the hardware necessary to get the engine in, less the missing lower mount. I still haven't sourced one in the UK, so the one for sale in Ohio will probably be ordered this week. There was a choice of a chrome spacer bobbin or a nickel plated one, so I went for the stock look over bling. The clipboard has a copy of the relevant parts book page as a checklist.
There was no centre stand with the kit of parts I bought, after looking on eBay I realised there wasn't a lot of difference in price between a tatty old one and a brand new DoReMi stand, if you could find one. I tracked one down on German eBay, a quality bit of kit, it went straight on, no hassle.
This morning my glamorous assistants showed up to help me get the motor in. Brains on the left (engineer), brawn on the right (6'7"). We tried the conventional way lifting it in, but after getting it well and truly stuck, the engineer suggested we should be lifting the lightest part, so we lowered the frame over the engine. A bit of a faff, but it worked.
WARNING: You know the two 12mm engine mounting bolts that go into the tear shaped special nuts underneath? The parts book has them transposed - if we hadn't stopped to check after trying to fit a long bolt into a short hole, we could have punched through the crankcase!
Finally, with the engine in I get to tear off all the bubble wrap and tape, and see the freshly painted frame in all its glory. If you worry about the plastic crate being up to the job of supporting the weight, I rebuilt my Harley motor with the bike sat on that box!
1974 Z1A
1969 H**** CL450 ‘Scrambler’
2005 H-D XL1200R Sportster
1985 Porsche 911 3.2 Carrera Sport
1969 H**** CL450 ‘Scrambler’
2005 H-D XL1200R Sportster
1985 Porsche 911 3.2 Carrera Sport

Re: Z1A Restoration
Hi MrDavo
I see you're making good progress! Keep on going that way!
GrtZ
Philippe
I see you're making good progress! Keep on going that way!
GrtZ
Philippe
the differences between a little boy and an adult man is the price and size of their toys!
Re: Z1A Restoration
Back at it over the weekend, I'm trying to make what progress I can before the car comes back from its body rebuild (which makes fixing bikes look very cheap) and uses up nearly all the space in the garage.
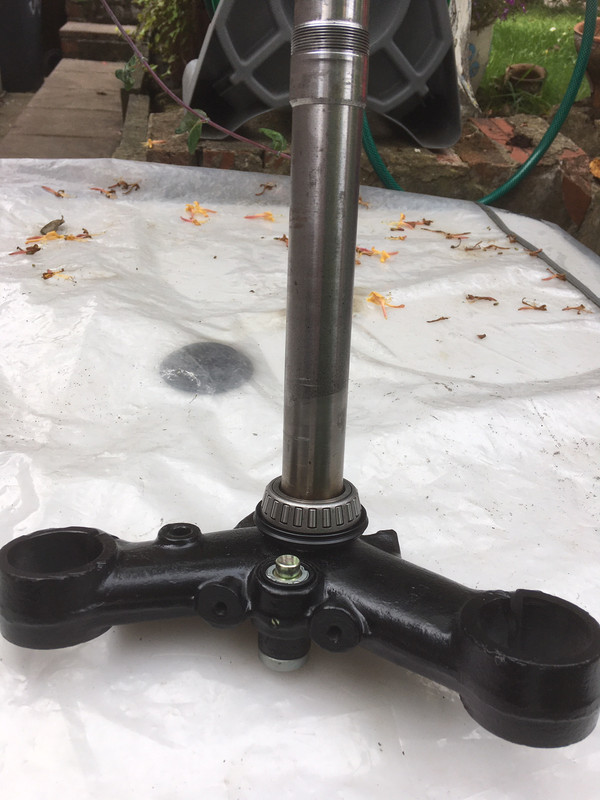
First job was the bottom yoke, on the first day I'd made a bit of a Horlicks of the unrestored one that came with the bike, failing to get the steering lock out, butchering the retaining screw with a drill, then cutting into the stem while removing the original headrace bearing, so not a good start. I decided to make an offer on another at D&K, which already had the steering lock removed, plus a hole for the steering damper, which I've got. The stem bolts are horrible, but going to the chromers, with some other parts, once I've dremmeled the manufacturer's marks off them. Here it is, freshly painted, with new lock and taper roller bearing.
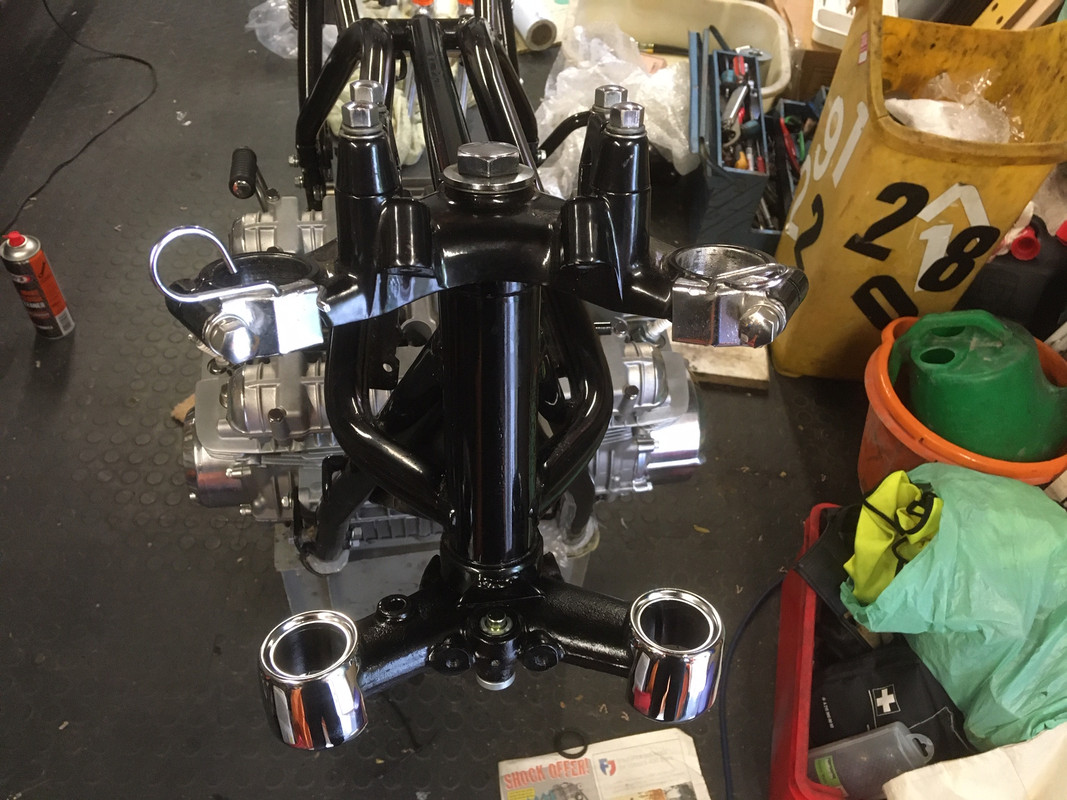
Next, fitted on the bike with the top yoke and blingy mounting hardware.
I then decided I was going to fit the forks and headlamp brackets. I know from experience that all the time goes into the fiddly bits, but this looks like real progress. Unfortunately the forks didn't want to fit, I put the yoke over the centre stem, I could then fit one leg or the other but not both at the same time!
Starting to wonder if something was bent, or not actually off a Z1 after all - then I remembered an old IT saying - 'If all else fails, read the instructions'. Luckily I had these, Dennis from the SOHC H**** forum was kind enough to give me a genuine Z1 workshop manual that was hiding away in his attic.
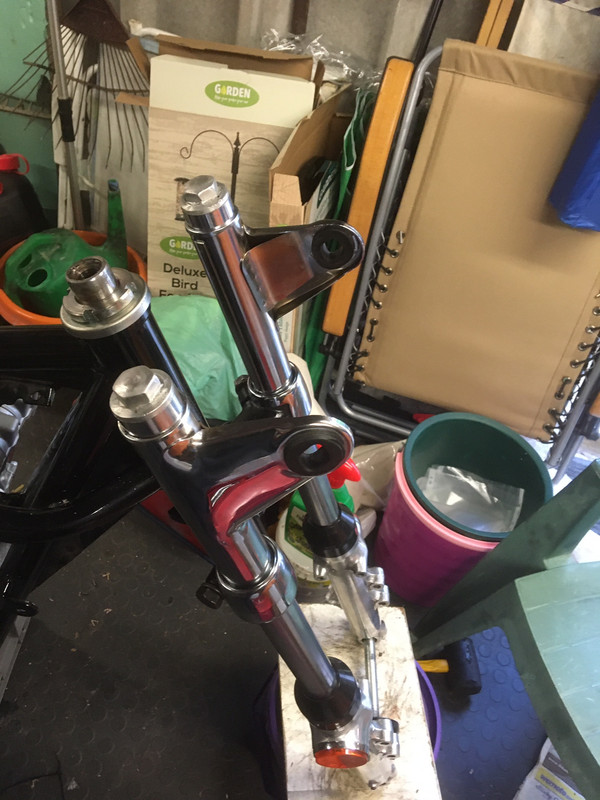
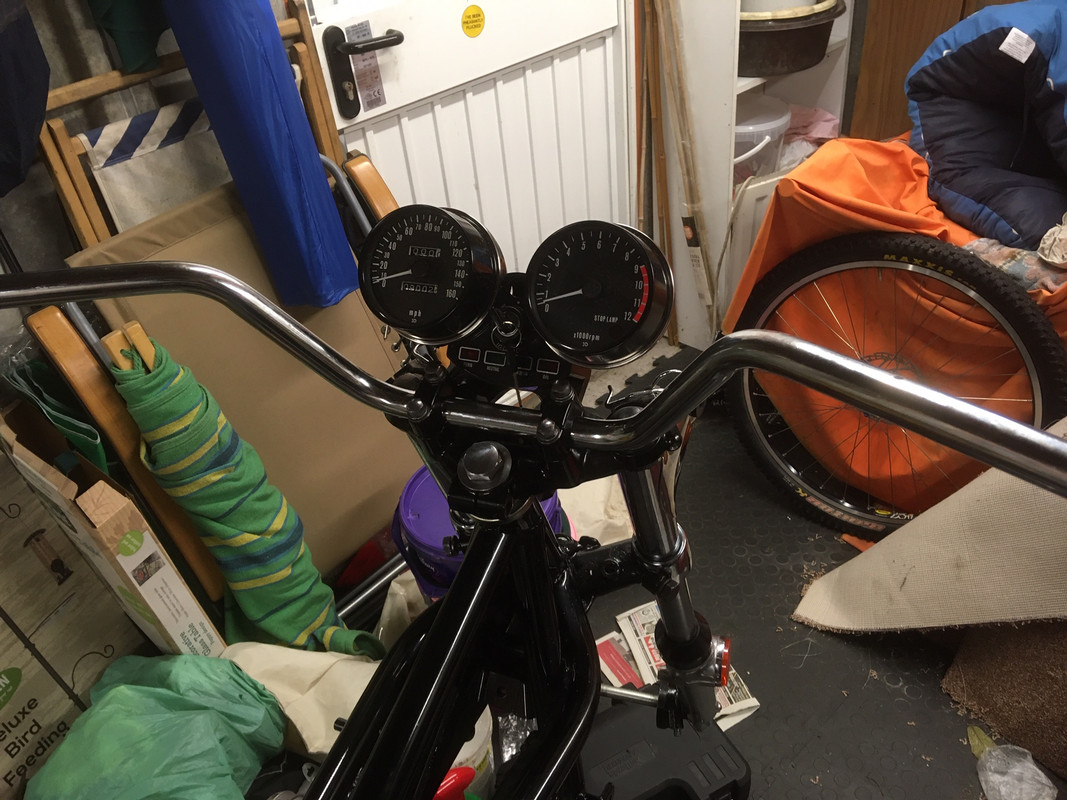
The manual said to get the fork tubes so they were sticking out above the headlamp brackets by 30mm, lower the top yoke over them, then persuade the yoke over the steering stem. It wasn't easy but did work. Putting the bars on gave me leverage to wiggle, and looks good. Then I went to whole hog and fitted the clocks.
I'd have put the mudguard on too if I had the fastners, but I didn't. I did find a fitting kit for the battery box and seat latch, so I fitted them instead. Also I fitted a new set of inlet stubs, with new stainless screws, and the kickstart, which is pattern. I had an original one, which I was going to get rechromed, but on closer inspection, the splines were banjaxed.
I played with some electrics for a while, took photos so I could ask for help on the forum, and went inside to watch the F1 and order some fastners.
First job was the bottom yoke, on the first day I'd made a bit of a Horlicks of the unrestored one that came with the bike, failing to get the steering lock out, butchering the retaining screw with a drill, then cutting into the stem while removing the original headrace bearing, so not a good start. I decided to make an offer on another at D&K, which already had the steering lock removed, plus a hole for the steering damper, which I've got. The stem bolts are horrible, but going to the chromers, with some other parts, once I've dremmeled the manufacturer's marks off them. Here it is, freshly painted, with new lock and taper roller bearing.
Next, fitted on the bike with the top yoke and blingy mounting hardware.
I then decided I was going to fit the forks and headlamp brackets. I know from experience that all the time goes into the fiddly bits, but this looks like real progress. Unfortunately the forks didn't want to fit, I put the yoke over the centre stem, I could then fit one leg or the other but not both at the same time!
Starting to wonder if something was bent, or not actually off a Z1 after all - then I remembered an old IT saying - 'If all else fails, read the instructions'. Luckily I had these, Dennis from the SOHC H**** forum was kind enough to give me a genuine Z1 workshop manual that was hiding away in his attic.
The manual said to get the fork tubes so they were sticking out above the headlamp brackets by 30mm, lower the top yoke over them, then persuade the yoke over the steering stem. It wasn't easy but did work. Putting the bars on gave me leverage to wiggle, and looks good. Then I went to whole hog and fitted the clocks.
I'd have put the mudguard on too if I had the fastners, but I didn't. I did find a fitting kit for the battery box and seat latch, so I fitted them instead. Also I fitted a new set of inlet stubs, with new stainless screws, and the kickstart, which is pattern. I had an original one, which I was going to get rechromed, but on closer inspection, the splines were banjaxed.
I played with some electrics for a while, took photos so I could ask for help on the forum, and went inside to watch the F1 and order some fastners.
1974 Z1A
1969 H**** CL450 ‘Scrambler’
2005 H-D XL1200R Sportster
1985 Porsche 911 3.2 Carrera Sport
1969 H**** CL450 ‘Scrambler’
2005 H-D XL1200R Sportster
1985 Porsche 911 3.2 Carrera Sport
Re: Z1A Restoration
Coming along at a fast pace.... certainly compared to my projects 
-
thebuelligan

- 100Club

- Posts: 138
- Joined: 20th Feb 2020
- Location: Herefordshire
Re: Z1A Restoration
chrisNI wrote:Coming along at a fast pace.... certainly compared to my projects
Zame here lol


Re: Z1A Restoration
Hi Dave,
I haven't been in for a while and have just caught up on the Z1A's progress - looking great and as Chris says it coming on at pace. Note to self - 'keep up Andrew'!
if only my K1 could progress as quickly...........
I haven't been in for a while and have just caught up on the Z1A's progress - looking great and as Chris says it coming on at pace. Note to self - 'keep up Andrew'!
if only my K1 could progress as quickly...........
Current Bikes:
Phil Churchett's 1976 Z900 A4: PRE 2R https://www.flickr.com/photos/115740825@N05/albums/72157680116996884
1973 XL250 K0 Motosport: UKX 73L
2023 R1250 GSA
Previous Zeds: Z750B1 Twin, Z650B1, Z750E
Phil Churchett's 1976 Z900 A4: PRE 2R https://www.flickr.com/photos/115740825@N05/albums/72157680116996884
1973 XL250 K0 Motosport: UKX 73L
2023 R1250 GSA
Previous Zeds: Z750B1 Twin, Z650B1, Z750E
Re: Z1A Restoration
Well another weekend, another installment. I am going to have to slow down a bit I think, because (a) at this rate I soon won't have a project to play with in the garage, just another bike to worry about, and (b) the weekly spend on this project far outweighs the rate at which I can actually earn the money to pay for it. Still, I knew what I was getting into, and there's still the cost of an exhaust set to think about, as well as the small matter of the last installment to pay of my 911's long running body restoration.
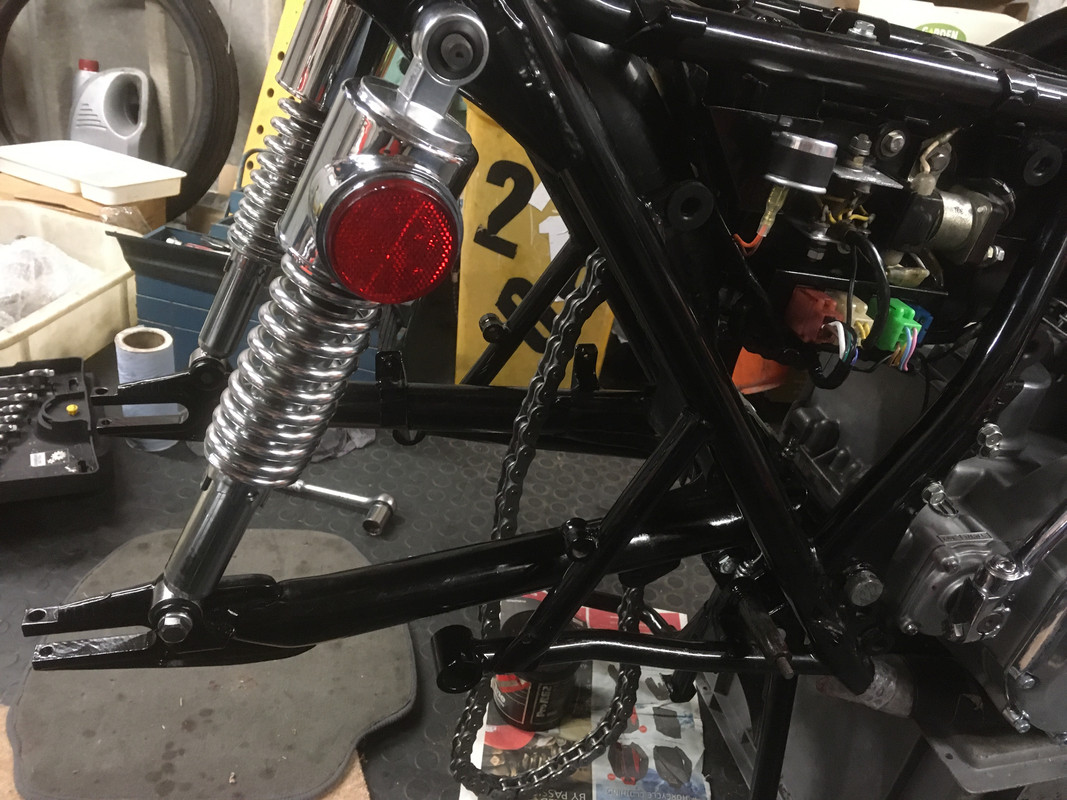
I now had all the hardware necessary to fit the swinging arm, apart from the endless O Ring chain which I ordered from Germany. That arrived this morning, so maybe next weekend. Not having the special tool to hold the sprocket still, I have no idea of how I'm going to hold the sprocket still while I tighten the nut. I can use the back brake, but that involves having a back wheel, brake and torque arm, which is off to the chromers. What did you use?
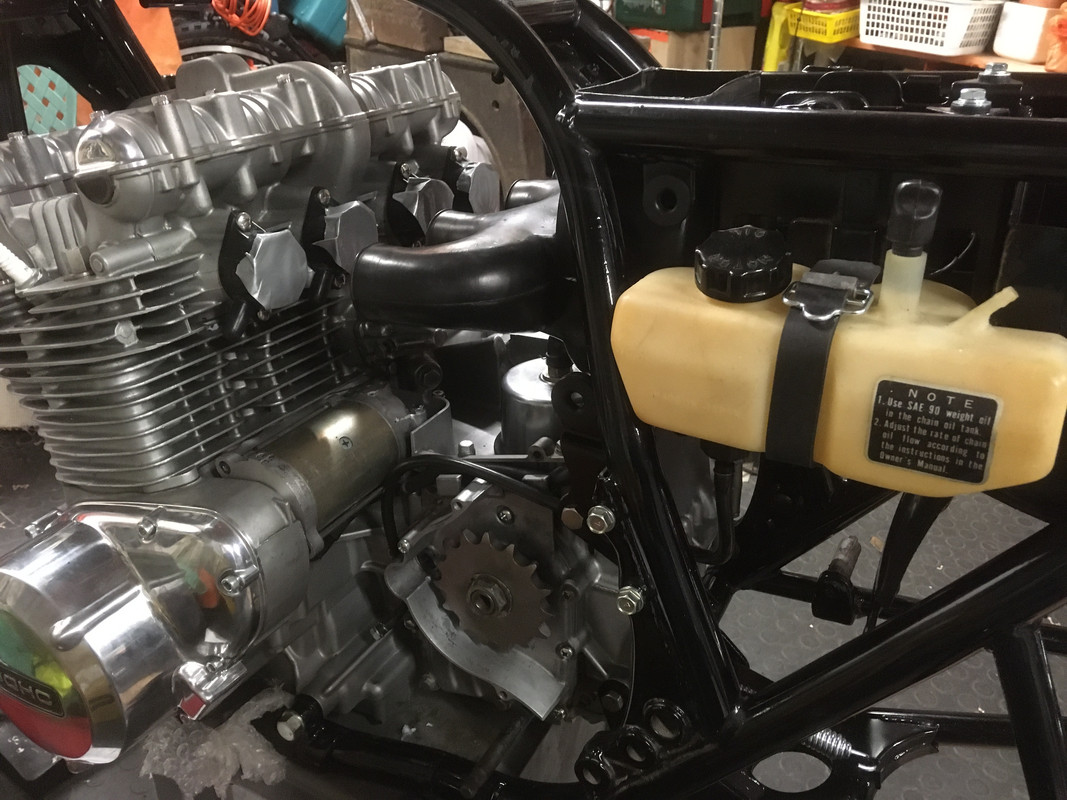
Also newly fitted is the airbox, oil tank and starter motor. Someone suggested that if I am to run the chain oiler 'dry' I need to remove the driving pin from the gearbox output shaft - well although I got the tank and pump with the bike, as far as I can see there is no pin there, so maybe it's just as well I chose to run an O ring chain.
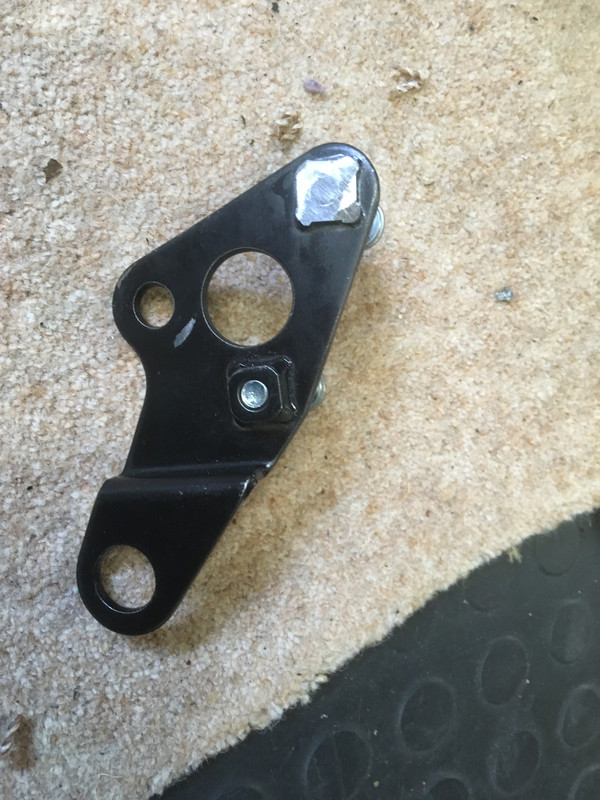
I followed the measurements on the service bulletin on fitting an O ring chain, so I got a Z1B sprocket, the spacer for the rear sprocket, and ground 4mm off the lower bracket mount and bolt:
That refitted I am ready for the swinging arm. However without the chain my attention wandered to the front end, and I fitted the front mudguard.
Then the wring loom went on, I think I have the routing right to the right hand side of the headstock, please tell me if you know otherwise. That got plugged into the orange socket, and the turn signal flasher, at the front I attached it to the clocks and ignition switch plugs.
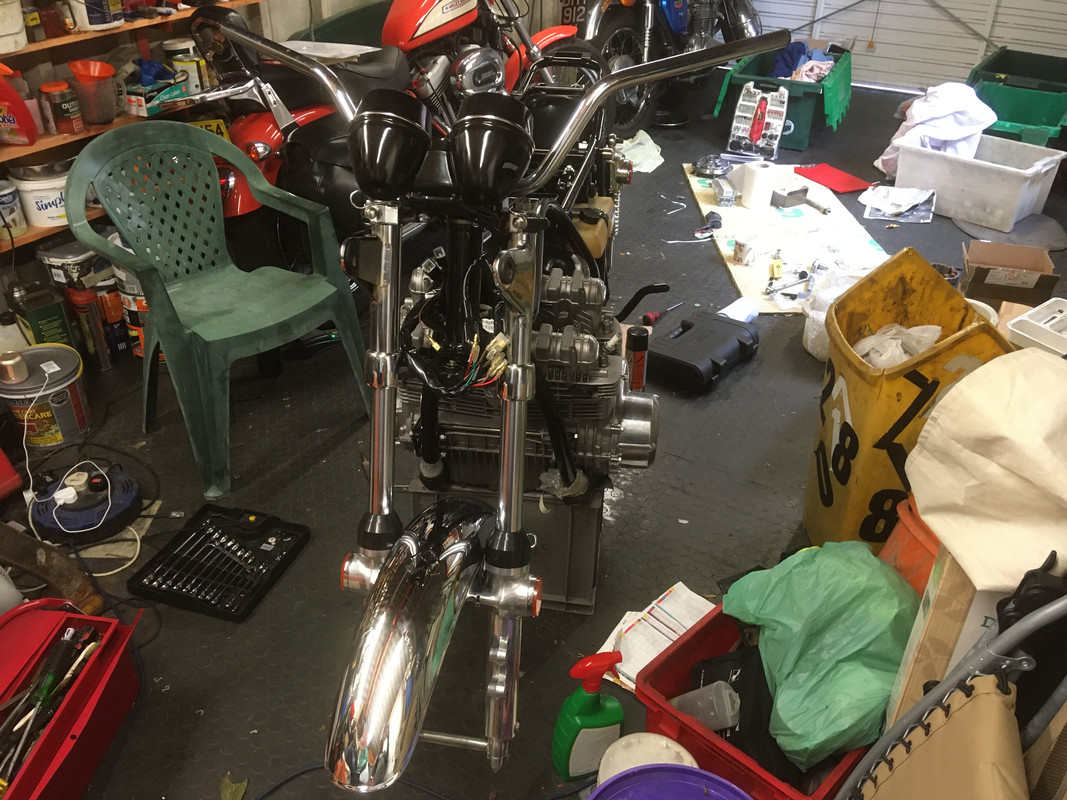
It all looks very Z1 from the front, I'd know those skinny forks and streamlined clocks anywhere.
Finally I got curious about what would be left over for the lights and flasher once the switches got plugged in, so I fitted those. They are replicas, I think, but brand new. I think there must be a sub harness for the headlamp I haven't got.

I'm going to order the correct cable ties for the bars, as they do make a difference in my eyes. I'm just glad I don't have to start threading wires through the handlebars like you do on a H****a, although the result is so much neater.
Next I will be doing that swinging arm, also I may fit the new points plate and see if I can time the ignition. One quick question - which way does the lead from the points go to get to the coils? Photos I've looked at don't seem to show the lead going the obvious route, up the offside down tube, unless people are good at hiding it, does it go all the way around the rear of the engine and next to the main loom, or what?
I now had all the hardware necessary to fit the swinging arm, apart from the endless O Ring chain which I ordered from Germany. That arrived this morning, so maybe next weekend. Not having the special tool to hold the sprocket still, I have no idea of how I'm going to hold the sprocket still while I tighten the nut. I can use the back brake, but that involves having a back wheel, brake and torque arm, which is off to the chromers. What did you use?
Also newly fitted is the airbox, oil tank and starter motor. Someone suggested that if I am to run the chain oiler 'dry' I need to remove the driving pin from the gearbox output shaft - well although I got the tank and pump with the bike, as far as I can see there is no pin there, so maybe it's just as well I chose to run an O ring chain.
I followed the measurements on the service bulletin on fitting an O ring chain, so I got a Z1B sprocket, the spacer for the rear sprocket, and ground 4mm off the lower bracket mount and bolt:
That refitted I am ready for the swinging arm. However without the chain my attention wandered to the front end, and I fitted the front mudguard.
Then the wring loom went on, I think I have the routing right to the right hand side of the headstock, please tell me if you know otherwise. That got plugged into the orange socket, and the turn signal flasher, at the front I attached it to the clocks and ignition switch plugs.
It all looks very Z1 from the front, I'd know those skinny forks and streamlined clocks anywhere.
Finally I got curious about what would be left over for the lights and flasher once the switches got plugged in, so I fitted those. They are replicas, I think, but brand new. I think there must be a sub harness for the headlamp I haven't got.
I'm going to order the correct cable ties for the bars, as they do make a difference in my eyes. I'm just glad I don't have to start threading wires through the handlebars like you do on a H****a, although the result is so much neater.
Next I will be doing that swinging arm, also I may fit the new points plate and see if I can time the ignition. One quick question - which way does the lead from the points go to get to the coils? Photos I've looked at don't seem to show the lead going the obvious route, up the offside down tube, unless people are good at hiding it, does it go all the way around the rear of the engine and next to the main loom, or what?
1974 Z1A
1969 H**** CL450 ‘Scrambler’
2005 H-D XL1200R Sportster
1985 Porsche 911 3.2 Carrera Sport
1969 H**** CL450 ‘Scrambler’
2005 H-D XL1200R Sportster
1985 Porsche 911 3.2 Carrera Sport
Re: Z1A Restoration
Hi MrDavo
you're doing a real nice job! Congratulations.
I must say that the main loom goes on the left hand side of the headstock, not on the right. The switchlooms however run both on the right hand side of the headstock.
The wires of the points run from the points, under the engine ( there are two metal strips attached to two engine bolts) behind the right hand frame pipe and then under the central upper frame pipe to the coils.
Good luck with it!
GrtZ
Philippe
the differences between a little boy and an adult man is the price and size of their toys!
Re: Z1A Restoration
Thanks Philippe, I realise now that the parts book was trying to tell me the correct route for the loom. It will actually be easiest to unplug it at the orange plug and pull it out through the forks rather than undo the plugs to the gauges and ignition switch.
Someone’s going to have to draw me a picture or something for the points lead, I’m still as clear as mud about where it goes. However if it involves going under the engine then it will have to wait until I have wheels attached and the bike is no longer sat on a plastic crate. I think the two clips are in the parts box, however the parts list has 8 of them, so I’m going to have to find out where they all go (HT leads?)
Someone’s going to have to draw me a picture or something for the points lead, I’m still as clear as mud about where it goes. However if it involves going under the engine then it will have to wait until I have wheels attached and the bike is no longer sat on a plastic crate. I think the two clips are in the parts box, however the parts list has 8 of them, so I’m going to have to find out where they all go (HT leads?)
Last edited by MrDavo on Tue Aug 25, 2020 9:28 am, edited 1 time in total.
1974 Z1A
1969 H**** CL450 ‘Scrambler’
2005 H-D XL1200R Sportster
1985 Porsche 911 3.2 Carrera Sport
1969 H**** CL450 ‘Scrambler’
2005 H-D XL1200R Sportster
1985 Porsche 911 3.2 Carrera Sport
Re: Z1A Restoration
Points wire goes up the rear of the right frame tube which your rear brake light switch is in front of ,hope this makes sense
nice job by the way
nice job by the way
Re: Z1A Restoration
Thanks for that. The wire is very much going the scenic route, it explains why I can't see it on photos. on the other hand you really don't want an unclipped points wire melting onto an exhaust and causing a very sudden stop.
Last night I put the swinging arm in, as the endless chain had arrived from Germany. I held the chain out of the way with a cable tie, my main problem was I needed 3 arms, or an assistant to put the spindle in while holding the swinging arm in the right place. getting frustrated I thought 'Ganesh (the Hindu elephant God with 4 arms) would be good at this'. Finally all in place I realised that the swinging arm was wider than the gap between the two exhaust hangers, and I had the swinging arm below it, out of reach of the shocks. Bad words were said, and out it came again. Finally.....
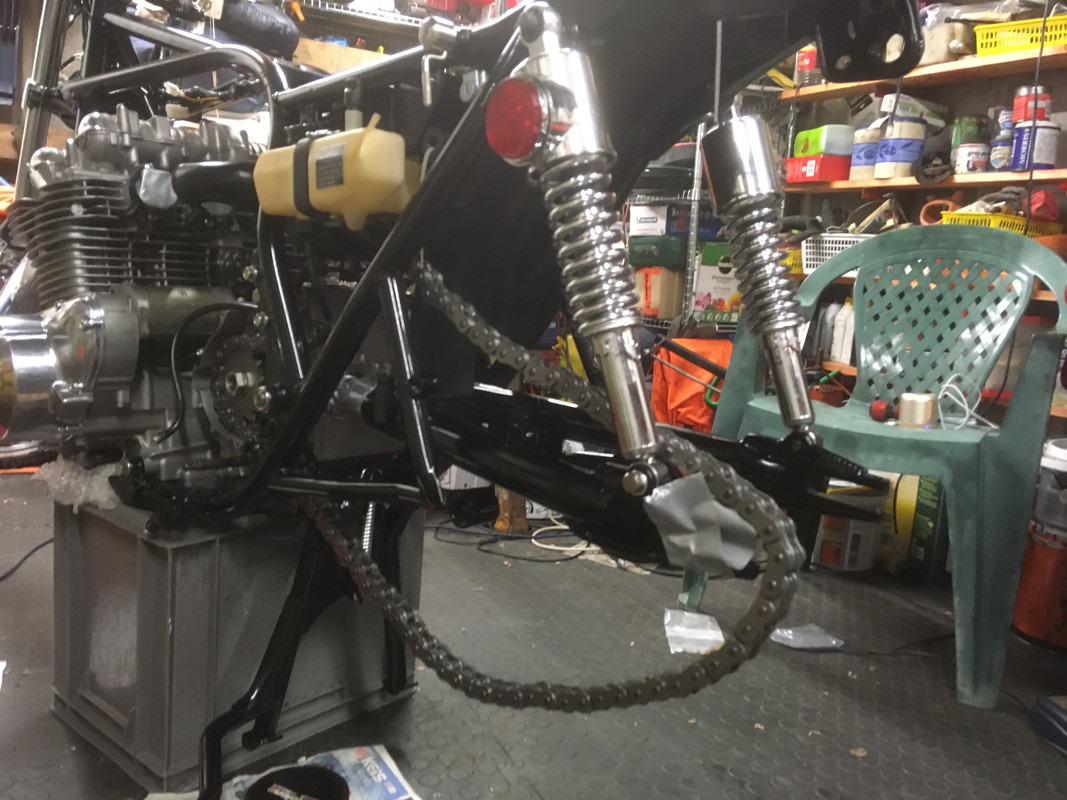
Last night I put the swinging arm in, as the endless chain had arrived from Germany. I held the chain out of the way with a cable tie, my main problem was I needed 3 arms, or an assistant to put the spindle in while holding the swinging arm in the right place. getting frustrated I thought 'Ganesh (the Hindu elephant God with 4 arms) would be good at this'. Finally all in place I realised that the swinging arm was wider than the gap between the two exhaust hangers, and I had the swinging arm below it, out of reach of the shocks. Bad words were said, and out it came again. Finally.....
1974 Z1A
1969 H**** CL450 ‘Scrambler’
2005 H-D XL1200R Sportster
1985 Porsche 911 3.2 Carrera Sport
1969 H**** CL450 ‘Scrambler’
2005 H-D XL1200R Sportster
1985 Porsche 911 3.2 Carrera Sport
Re: Z1A Restoration
As my car came back from its major rustaration on Saturday, I had a to do a lot of reorganising in the garage. Fortunately, because I've been getting on with things, the Z1A takes up a lot less room than when it arrived in many boxes.
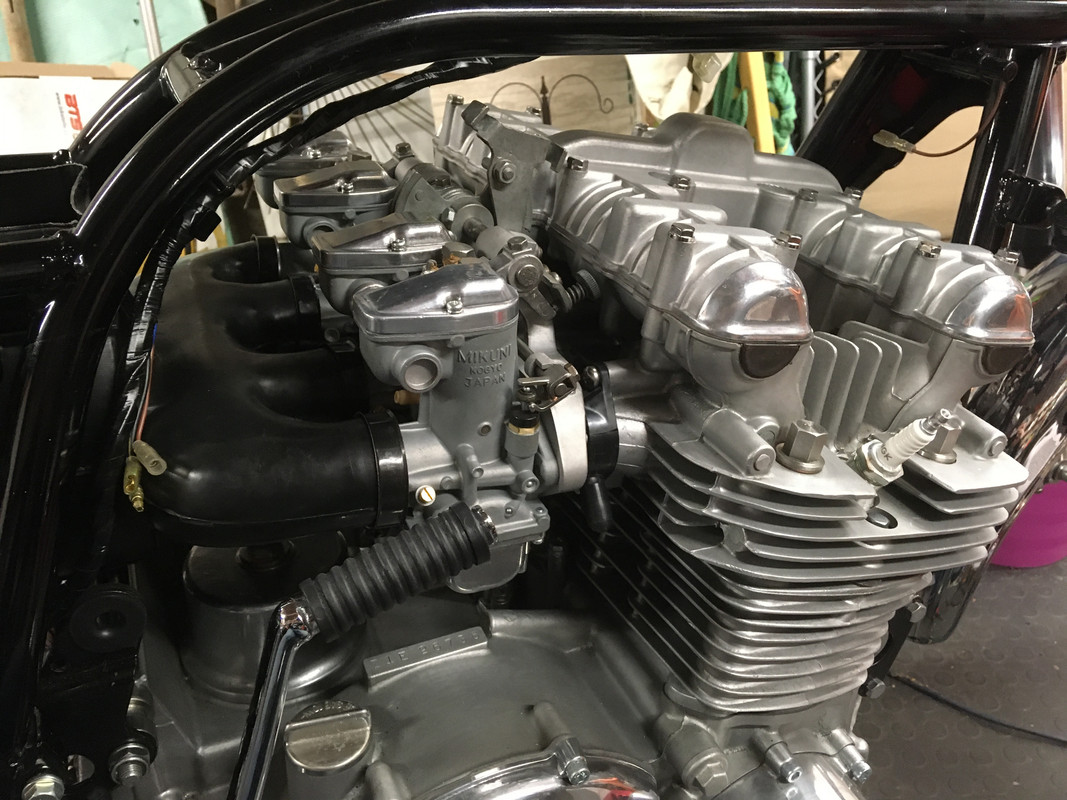
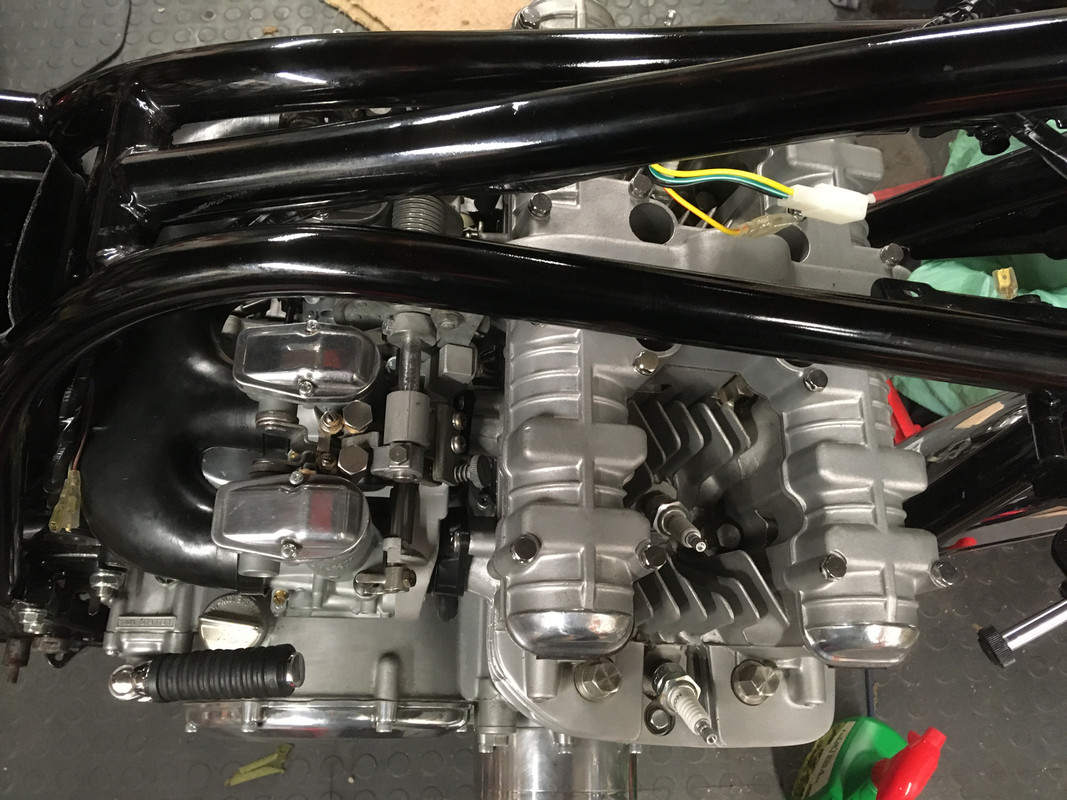
I was concerned about the carbs getting damaged, despite being wrapped in a towel, and decided that the safest place for them was on the bike, now I had all the manifolds and clips to mount them. Someone did a lovely job with them, they have been vapour blasted (or similar) and rebuilt with all new fastners and fittings. The slides look like new, or maybe they've just never been scratched by dust and dirt. I won't know until I have a running bike how well they have been set up, but Roger at Road and Race in Hyde has agreed to synch the carbs and strobe the timing on his diagnostic rig when it's all finished.
I had problems pushing them into the new carb rubbers, I knew I could see too much of the manifold for things to be right, and nothing says 'air leak' like permanently bluing a very expensive set of new exhausts. I took them off again, smeared some liquid soap inside the rubbers and had another go, they suddenly went on properly with a 'pop'. Although I was very pleased to get a genuine original airbox with the bike, I also remembered why in the restorations I have done in the past, every single piece of plastic or rubber tends to get replaced, because it has turned to stone over the decades. One of the inlets from the airbox is only just over the lip of the carb intake, but I think when the wife goes back to work after furlough, her professional grade hair dryer may get borrowed for a while...
I can't find a plastic 'CHOKE' lever anywhere in the world, as they apparently don't exist, so I followed advice from the forum and got a Yamaha one that looks better than nothing.
This morning a pair of new BT46's arrived after I saw a very good deal on a pair the right size on eBay. Hagon have finished the front wheel so the tyre will go on when it gets back to me. I have ordered disc bolts and tabs, the twin discs will go on after I've mounted the tyre.
1974 Z1A
1969 H**** CL450 ‘Scrambler’
2005 H-D XL1200R Sportster
1985 Porsche 911 3.2 Carrera Sport
1969 H**** CL450 ‘Scrambler’
2005 H-D XL1200R Sportster
1985 Porsche 911 3.2 Carrera Sport
Re: Z1A Restoration
Making progress at speed.... 
Who is online
Users browsing this forum: No registered users and 74 guests