Hello Guest User,
Please feel free to have a look around the forum but be aware that as an unregistered guest you can't see all of it and you can't post.
To access these 'Registered Users Only' areas simply register and login.
Please feel free to have a look around the forum but be aware that as an unregistered guest you can't see all of it and you can't post.
To access these 'Registered Users Only' areas simply register and login.
Z1A Restoration
Moderators: chrisu, paul doran, Taffus, KeithZ1R


Re: Z1A Restoration
MrDavo...my wiring is all mainly pattern so ignore the colour coding. I would 'umbly suggest that your shell is not a Z1 shell! Reference to John Brookes 6th Edition of the parts book shows only one shell, the 23005-037-21 (although Kawasaki used the 7" shell in slightly different variations for other models) and it didn't have a "lozenge" aperture (neither did the other 7" model variations) .
Z1-B, 400bhp ZX1000NGF
90% of questions that begin "Why..." can be answered with "Because people are stupid."
90% of questions that begin "Why..." can be answered with "Because people are stupid."


Re: Z1A Restoration
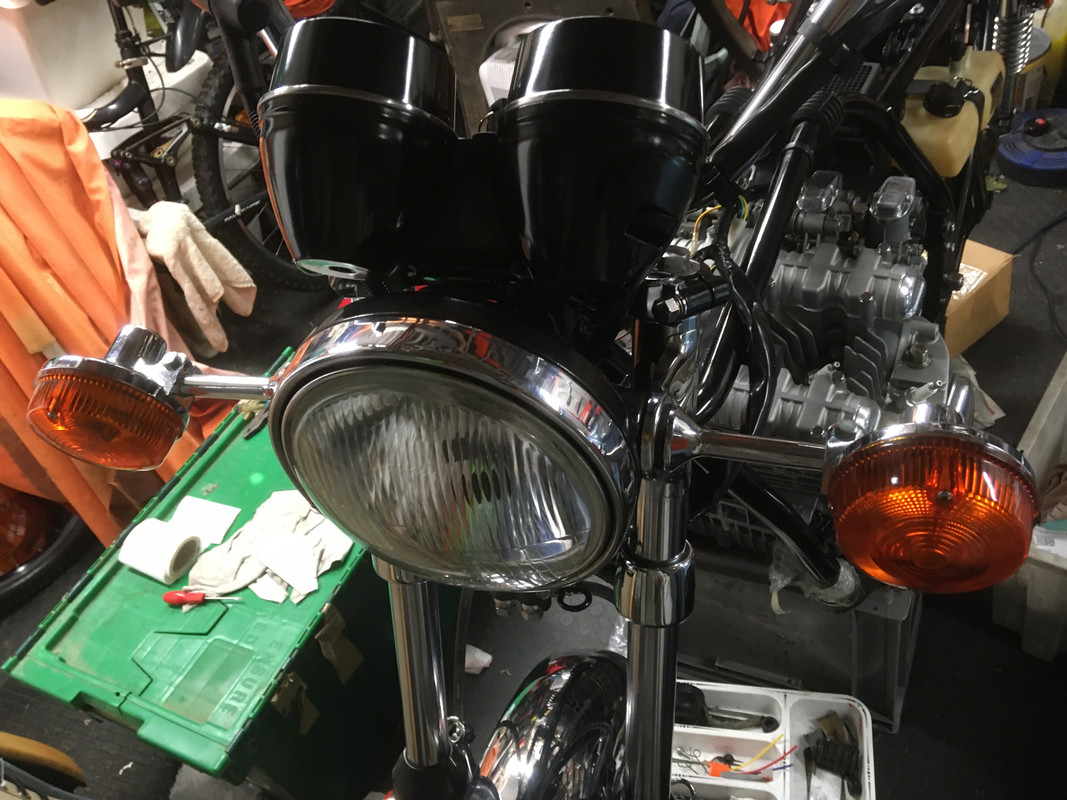
I wonder if the extra hole was cut into it, for some forgotten reason along the way. I say that as the headlamp hole rubbers, indicators and earth plates fit perfectly, also it must be Z1 as it has both the threaded hole for the support bolt, plus the one on top for the Japanese market red light.
Anyway it fits, as does the rim and glass. Today the Lucas 7” halogen lamp turned up, I’ll have a go at fitting it later in the week. Hopefully my pattern loom has the right colours to agree with my wiring diagram so I can wire up the lights and indicators using first principles.
Anyway it fits, as does the rim and glass. Today the Lucas 7” halogen lamp turned up, I’ll have a go at fitting it later in the week. Hopefully my pattern loom has the right colours to agree with my wiring diagram so I can wire up the lights and indicators using first principles.
1974 Z1A
1969 H**** CL450 ‘Scrambler’
2005 H-D XL1200R Sportster
1985 Porsche 911 3.2 Carrera Sport
1969 H**** CL450 ‘Scrambler’
2005 H-D XL1200R Sportster
1985 Porsche 911 3.2 Carrera Sport
Re: Z1A Restoration
I think you're probably correct about it being a Z1 shell with an extra cut-out (maybe to feed additional cabling or such at some in the past by a PO?). You can easily check whether it's the original shell as they were marked "STANLEY 001-0799 JAPAN" (the word Japan was in a slightly smaller font). Anyways, the most important thing is that it will end up back on the road at some point, which is what Ben intended.
Z1-B, 400bhp ZX1000NGF
90% of questions that begin "Why..." can be answered with "Because people are stupid."
90% of questions that begin "Why..." can be answered with "Because people are stupid."
Re: Z1A Restoration
Thanks Steve. I just went into the garage, and although it took a bit of finding now the headlamp is in place, I found the number all present and correct, at the bottom.
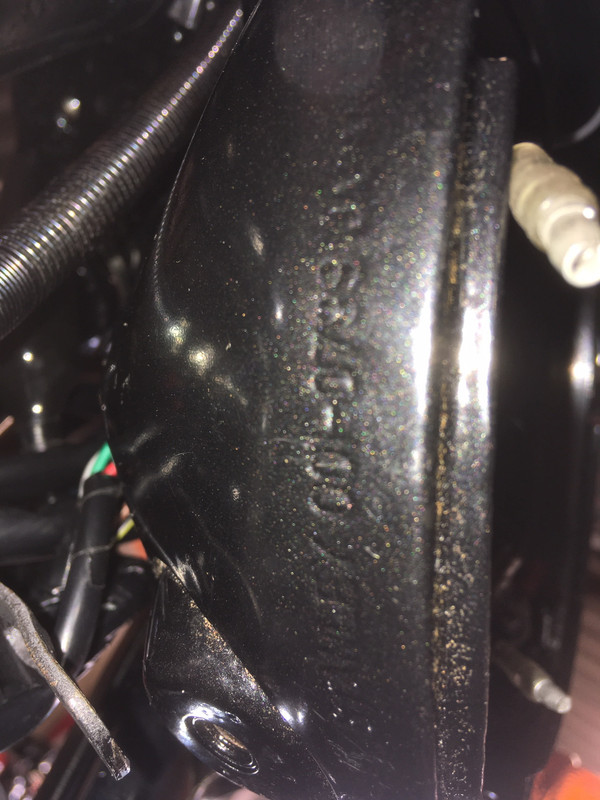
So it is the real thing, the extra slot (its at the back) has been properly cut rather than a bodge, but it will be handy for putting some of the wiring through. I had to google Ben (Gyoichi ‘Ben’ Inamura), I learn something every day.
So it is the real thing, the extra slot (its at the back) has been properly cut rather than a bodge, but it will be handy for putting some of the wiring through. I had to google Ben (Gyoichi ‘Ben’ Inamura), I learn something every day.
1974 Z1A
1969 H**** CL450 ‘Scrambler’
2005 H-D XL1200R Sportster
1985 Porsche 911 3.2 Carrera Sport
1969 H**** CL450 ‘Scrambler’
2005 H-D XL1200R Sportster
1985 Porsche 911 3.2 Carrera Sport
Re: Z1A Restoration
The first thing I did this weekend was make sure that my new 7" Lucas H4 RHD headlamp fitted in the old Stanley rim / adjuster ring arrangement, which it did perfectly, once I had cut a seized up retaining screw, the head of which was completely chewed up. I struggled to find a replacement screw until I remembered that I had a new and unused CB750 rim and retaining ring that I'd bought from Germany and found it wouldn't fit, I was able to borrow a screw from that. The screw holes were spaced differently on the CB750, or I might have used the whole set, my Z1A rim has a little patina, but many think that's no bad thing if its original.
I was going to try wiring up the lights and indicators, even considering pinching the battery from my CL450 so I could actually have power in the electrics for the first time. Than I learned why buying the cheapest headlamp connector block on eBay isn't necessarily a wise move, as the ceramic block fell to bits when I pulled it of the old headlamp bulb after I'd tried it. I've ordered a plastic one now, it should be more durable, and at least i didn't have it fail out on the road somewhere.
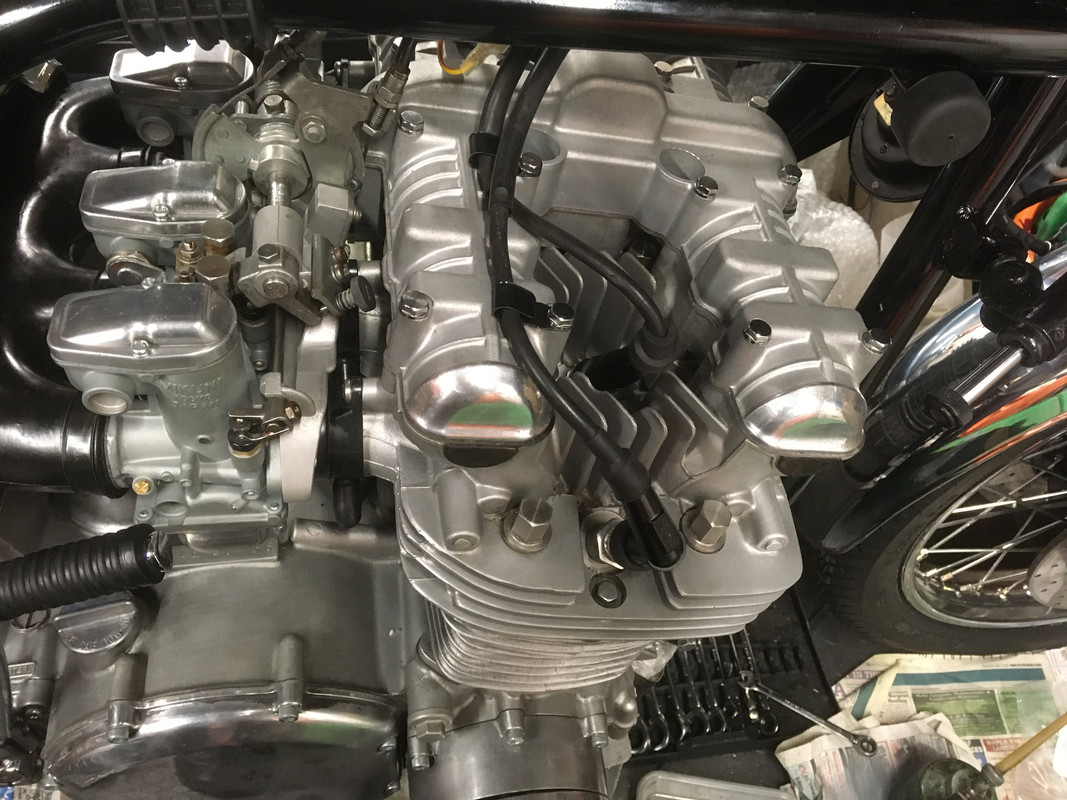
Anyway, next up I'm considering fitting the coils, horn, throttle cables etc, which will restrict the room around the cam cover. However when I come to ignition timing. starter motor testing etc, the engine is going to be turned over, and having been rebuilt an unknown time ago, it was concerning me that everything might well be bone dry in there. I'd already squirted some oil into the bores (pistons and valves are all new, looking in the plug hole with a torch), but I was concerned about the cams. deciding it was now or never, I whipped the cam cover off. As expected all was dry in there, but no rust, and the cam lobes are all in good shape.
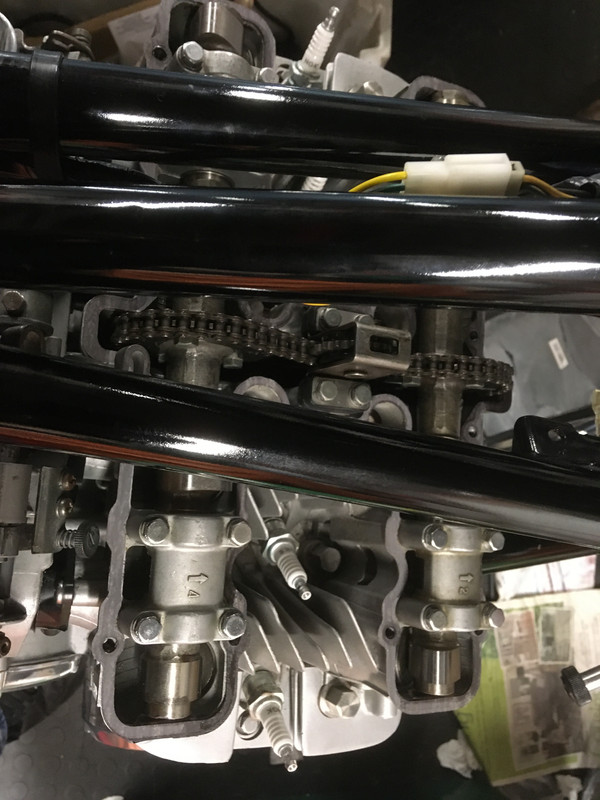
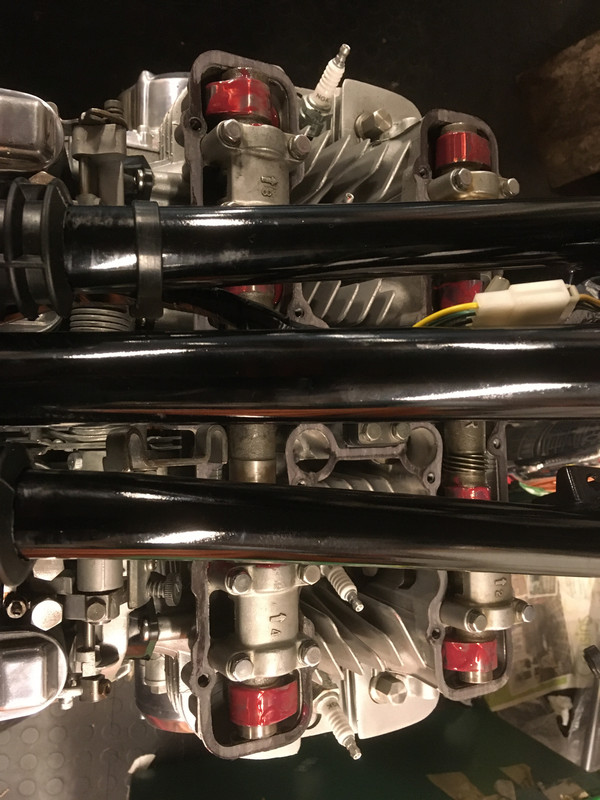
I put a smear of Redline Assembly Lube on the cam lobes, and squirted some oil around the cam bearings, although how much ever gets in the bearing is doubtful until I have oil pressure one day. At least now I'll worry less when I turn her over, I did use the kickstart to get lube all round the cams, everything moved freely, and there was compression with the plugs in.
I was going to try wiring up the lights and indicators, even considering pinching the battery from my CL450 so I could actually have power in the electrics for the first time. Than I learned why buying the cheapest headlamp connector block on eBay isn't necessarily a wise move, as the ceramic block fell to bits when I pulled it of the old headlamp bulb after I'd tried it. I've ordered a plastic one now, it should be more durable, and at least i didn't have it fail out on the road somewhere.
Anyway, next up I'm considering fitting the coils, horn, throttle cables etc, which will restrict the room around the cam cover. However when I come to ignition timing. starter motor testing etc, the engine is going to be turned over, and having been rebuilt an unknown time ago, it was concerning me that everything might well be bone dry in there. I'd already squirted some oil into the bores (pistons and valves are all new, looking in the plug hole with a torch), but I was concerned about the cams. deciding it was now or never, I whipped the cam cover off. As expected all was dry in there, but no rust, and the cam lobes are all in good shape.
I put a smear of Redline Assembly Lube on the cam lobes, and squirted some oil around the cam bearings, although how much ever gets in the bearing is doubtful until I have oil pressure one day. At least now I'll worry less when I turn her over, I did use the kickstart to get lube all round the cams, everything moved freely, and there was compression with the plugs in.
1974 Z1A
1969 H**** CL450 ‘Scrambler’
2005 H-D XL1200R Sportster
1985 Porsche 911 3.2 Carrera Sport
1969 H**** CL450 ‘Scrambler’
2005 H-D XL1200R Sportster
1985 Porsche 911 3.2 Carrera Sport
Re: Z1A Restoration
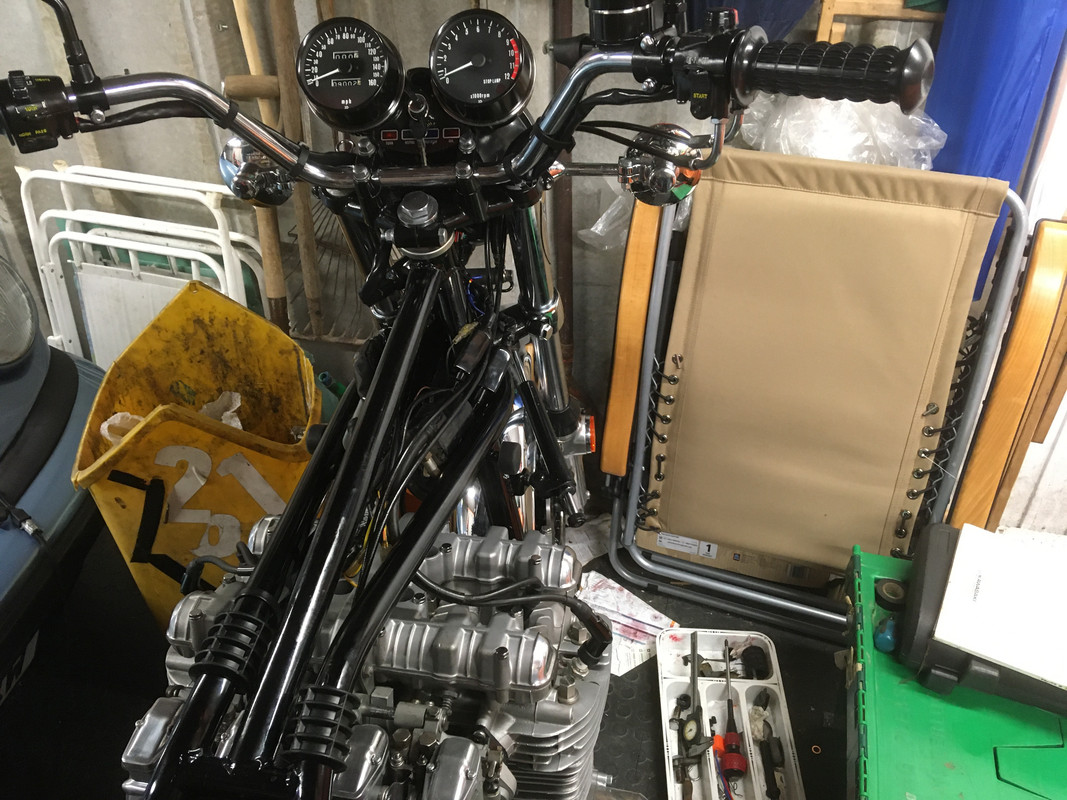
This weekend I didn't get a lot of time in the garage, but I wired up the lights, horn, coils,and HT leads with new plug caps also I fitted the throttle and speedo cables.
Now I can open the throttle i have a slight problem with #1 carb. As it comes off its stop there is a noticeable 'click'. Removing the polished top and looking down at the slide I can't see anything fouling, but its not right.Something is catching, either the opening mechanism, the slide or possibly a bent or displaced needle.I am loathe to take the carbs off again to dismantle the carb body, but I may have to if I cant fix it as it is. I may be able to ignore it, but if its not right, now is the time to sort the problem out. Any suggestions?
Now I can open the throttle i have a slight problem with #1 carb. As it comes off its stop there is a noticeable 'click'. Removing the polished top and looking down at the slide I can't see anything fouling, but its not right.Something is catching, either the opening mechanism, the slide or possibly a bent or displaced needle.I am loathe to take the carbs off again to dismantle the carb body, but I may have to if I cant fix it as it is. I may be able to ignore it, but if its not right, now is the time to sort the problem out. Any suggestions?
1974 Z1A
1969 H**** CL450 ‘Scrambler’
2005 H-D XL1200R Sportster
1985 Porsche 911 3.2 Carrera Sport
1969 H**** CL450 ‘Scrambler’
2005 H-D XL1200R Sportster
1985 Porsche 911 3.2 Carrera Sport
Re: Z1A Restoration
I got to the bottom of #1 carb sticking, see the 'Help' thread. I'm still waiting for a new emulsion tube and needle to show up from CMS, the original tube was slightly bent.
Yesterday I fitted some new odds and ends that arrived from Z Power, like the seat latch and the bracket for the brake light failure switch. I then started on the alternator, the loom is being replaced. Looking at the connections sealed in epoxy I thought this was factory...
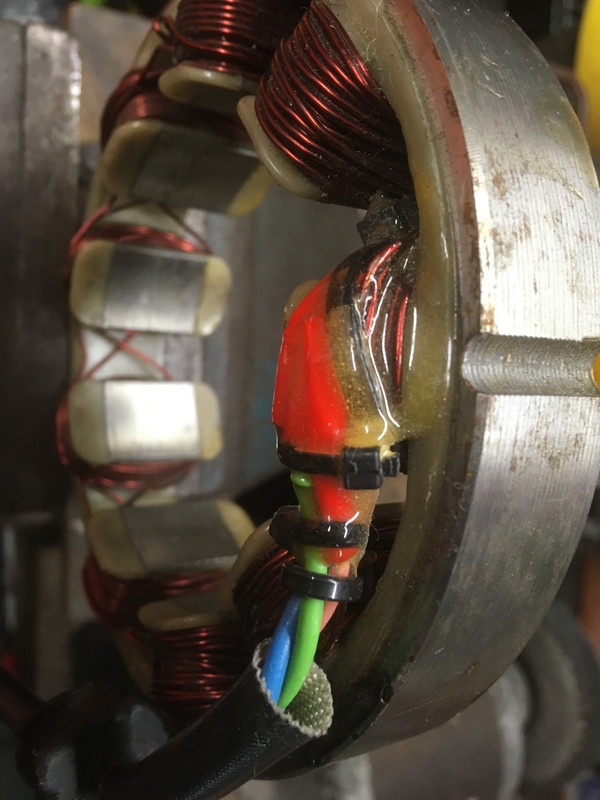
But when I had dremelled away the epoxy I don't think so!
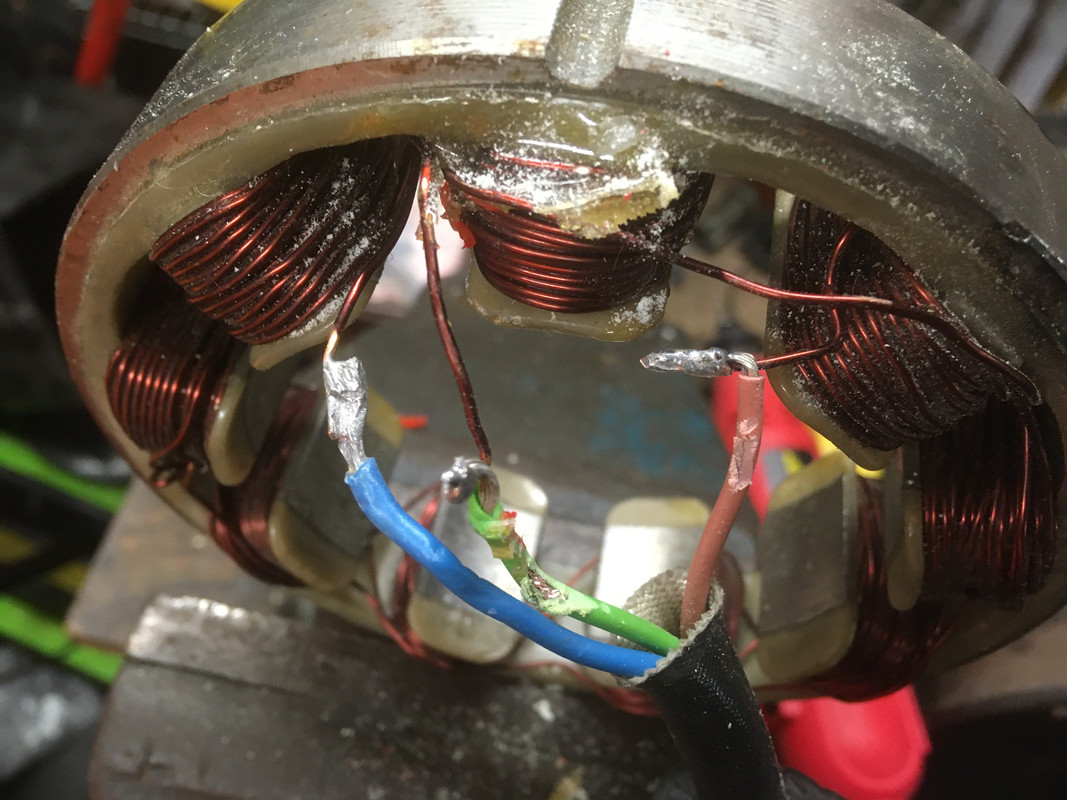
My replacement loom has three yellow wires, but from what I can glean from the web it doesn't matter which coils go to which coloured wire. Unfortunately I discovered at this point that my cheap eBay soldering iron has packed up, so I have ordered another one. Each wire comes with a metal sleeve and some heatshrink, I assume I solder both ends of each wire into the sleeve.
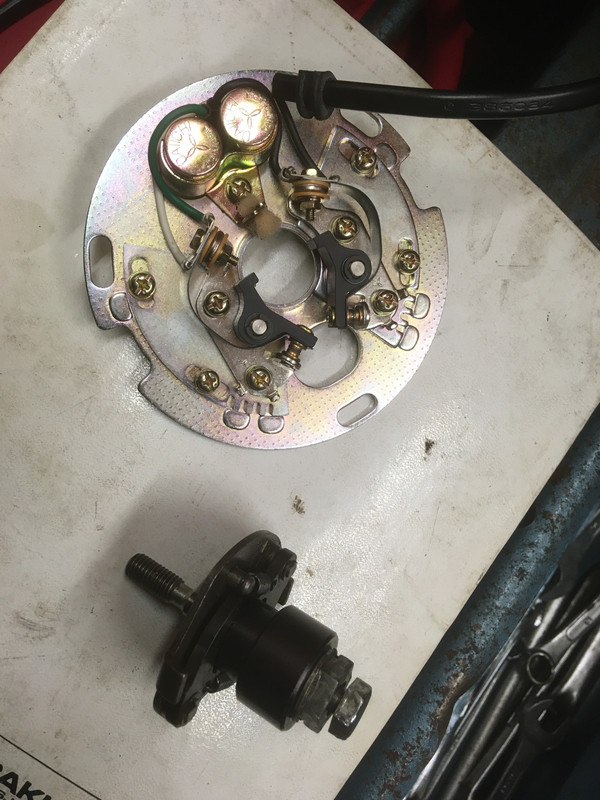
I then had a go at installing the NOS points plate, however I found that it doesn't fit over the cam on the advance retard! Closer inspection and a check on the net reveals that it is in fact the trigger rotor for an electronic ignition which I haven't got. I need a points cam, unfortunately the advance retard and its cam is all one part, so I need to either find a points cam or complete A/R unit. Pm me if you have one!
Yesterday I fitted some new odds and ends that arrived from Z Power, like the seat latch and the bracket for the brake light failure switch. I then started on the alternator, the loom is being replaced. Looking at the connections sealed in epoxy I thought this was factory...
But when I had dremelled away the epoxy I don't think so!
My replacement loom has three yellow wires, but from what I can glean from the web it doesn't matter which coils go to which coloured wire. Unfortunately I discovered at this point that my cheap eBay soldering iron has packed up, so I have ordered another one. Each wire comes with a metal sleeve and some heatshrink, I assume I solder both ends of each wire into the sleeve.
I then had a go at installing the NOS points plate, however I found that it doesn't fit over the cam on the advance retard! Closer inspection and a check on the net reveals that it is in fact the trigger rotor for an electronic ignition which I haven't got. I need a points cam, unfortunately the advance retard and its cam is all one part, so I need to either find a points cam or complete A/R unit.
1974 Z1A
1969 H**** CL450 ‘Scrambler’
2005 H-D XL1200R Sportster
1985 Porsche 911 3.2 Carrera Sport
1969 H**** CL450 ‘Scrambler’
2005 H-D XL1200R Sportster
1985 Porsche 911 3.2 Carrera Sport

Re: Z1A Restoration
Hi MrDavo
have a look at this
https://z-fever.de/shop/de/product_info ... teil-.html
André, the shop keeper, understands English, go for it.
GrtZ
Philippe
have a look at this
https://z-fever.de/shop/de/product_info ... teil-.html
André, the shop keeper, understands English, go for it.
GrtZ
Philippe
the differences between a little boy and an adult man is the price and size of their toys!
Re: Z1A Restoration
Thanks Phillips I’ve bookmarked the shop for future parts, however I’ve just found and bought an A/R unit on eBay UK.
1974 Z1A
1969 H**** CL450 ‘Scrambler’
2005 H-D XL1200R Sportster
1985 Porsche 911 3.2 Carrera Sport
1969 H**** CL450 ‘Scrambler’
2005 H-D XL1200R Sportster
1985 Porsche 911 3.2 Carrera Sport
Re: Z1A Restoration
A courier turned up this morning - only a week after I sent it to them, my chroming is back from Agbrigg in Leeds! Excellent service and excellent finish - shiny shiny things! The original chrome on the parts was still there when I first got them, but had been polished away over the years to reveal the nickel beneath. Now they look as good as new.
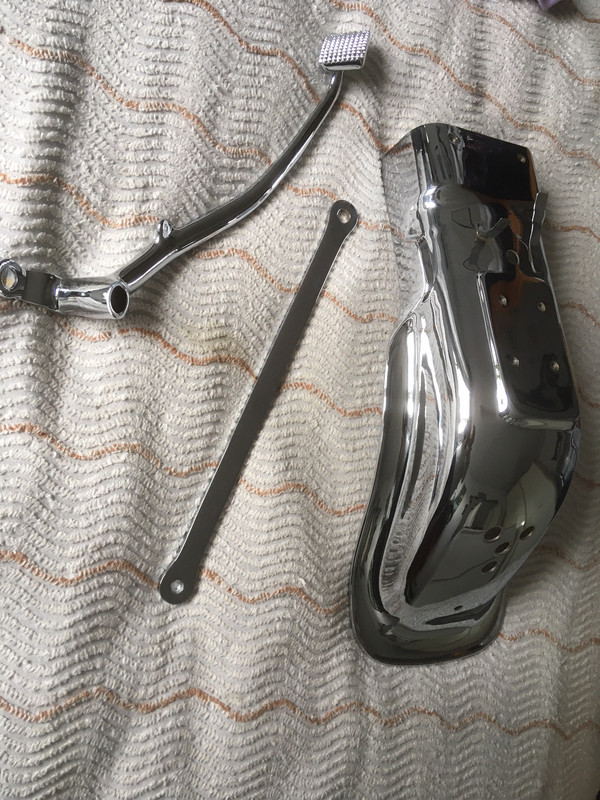
As I'm working from the front of the bike to the back (mainly because I won't be able to get past in the garage once the back wheel is in), these parts have been rewrapped and stashed in the attic, with the paint set and rear wheel. One day i hope to have an exhaust system to squirrel away up there too! No sign yet though.
I was confused to get a Paypal email to say I'd paid Dave Marsden, mainly as I already received the chainguard etc that I ordered from Z Power last week. eventually I realised that my used advance retard unit is on its way, and that the eBay seller was in fact Dave. I didn't miss out on the member's discount, though, as he sent me a reduced 'buy it now' offer, completely unprompted - good man!
1974 Z1A
1969 H**** CL450 ‘Scrambler’
2005 H-D XL1200R Sportster
1985 Porsche 911 3.2 Carrera Sport
1969 H**** CL450 ‘Scrambler’
2005 H-D XL1200R Sportster
1985 Porsche 911 3.2 Carrera Sport
Re: Z1A Restoration
My first job this weekend was replacing the lead for the alternator coils. I failed miserably attempting to solder the little metal sleeves that came with the kit. Basically not enough room for the wire and solder inside the sleeve, and no way to get the tip of the soldering iron in there  . I have soldered the copper stator wire to the harness wire, but I'm not happy with the result, especially considering the current that will go through these joints when charging. I'm considering unsoldering, and trying a crimp on the sleeves, as the wires only just fit, the connection should be tight, and better than my soldered effort. Which crimp toll and how tight (to grip the wire firmly but not distort the sleeve too much) will be trial and error. Any of you used a crimp?
I'd bought a cheap rev counter cable from eBay, its going back because it wont thread onto the tacho drive on the engine. Not sure if its faulty or just wrong, it seems a tad too small, anyway I can't start the thread. A real one isn't cheap but sometimes pattern parts can be dirt cheap for a good reason. Hopefully the vendors won't be dicks about returns, if not I can name and shame them.
Finally, how to fit a fuel cap. I've recorded the stages for posterity, in case anyone else finds it trickier than it looks. I dug the tank out from its box in the attic, Its not been tried on the bike before, and its as stable a place as any while I fitted the new cap. Firstly I put masking tape all round the filler, using craft knives and drill bits very close to my fresh paint, what could possible go wrong ? Next I cut some paint from around the hinge mounts so the cap and latch fitted over the hinge pins, I then measured the diameter of the roll pins, and used a drill bit that size to ream the paint out of the holes they go in.
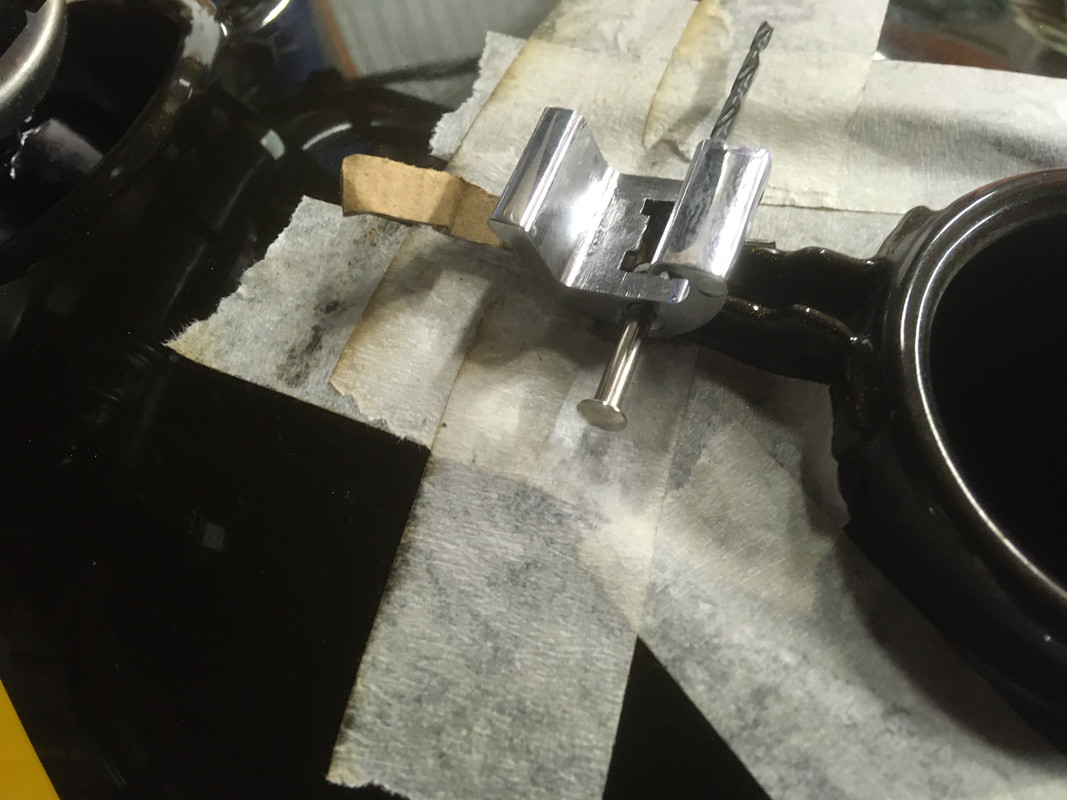
There were no instructions with the cap, so I had to work out for myself how the latch works and what goes where. Here's the parts for the latch, I found the tip for using a strip of cardboard to keep the spring in the right place on a US KZ forum, you pull it out when you've finished.

Then I assembled the latch using a smaller drill bit - before I tried that there was near disaster when the spring flew away into the crowded garage, after a long hunt I luckily found it, in completely the opposite direction from where I thought I'd heard it land. Once I had the parts in place the drill bit was drifted out with the pin....
Once the latch was in place and working properly, it was pretty much the same process with the cap hinge...
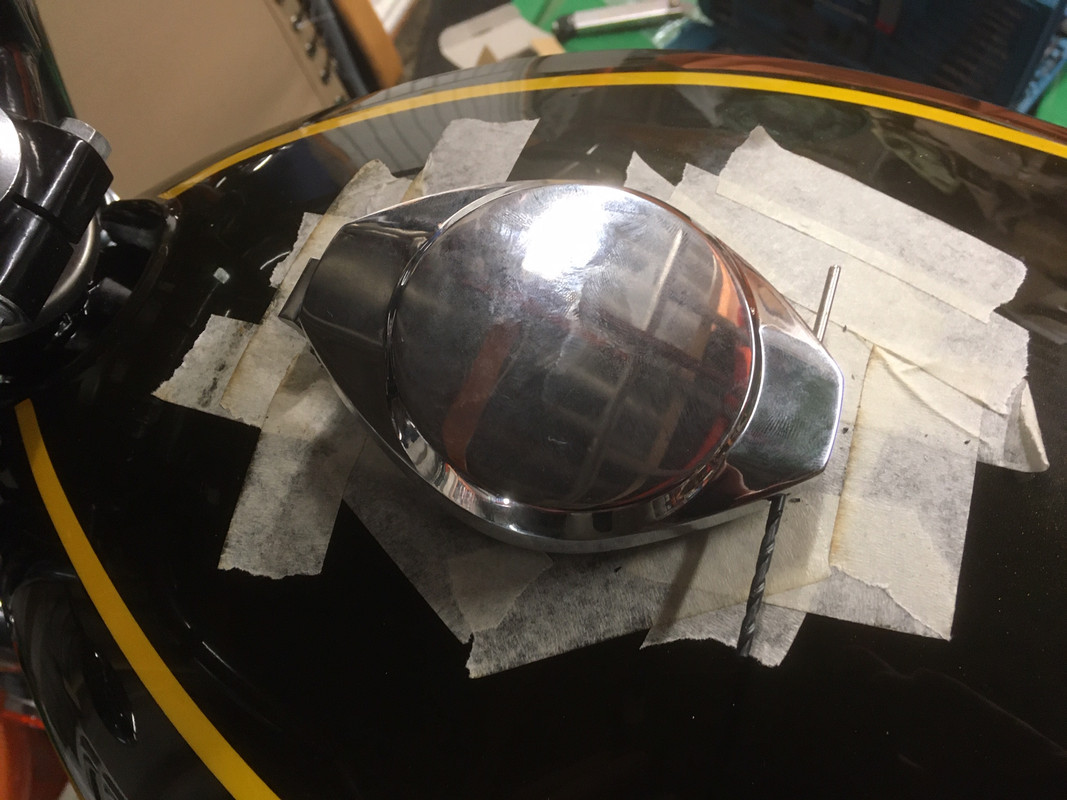
The finished result:

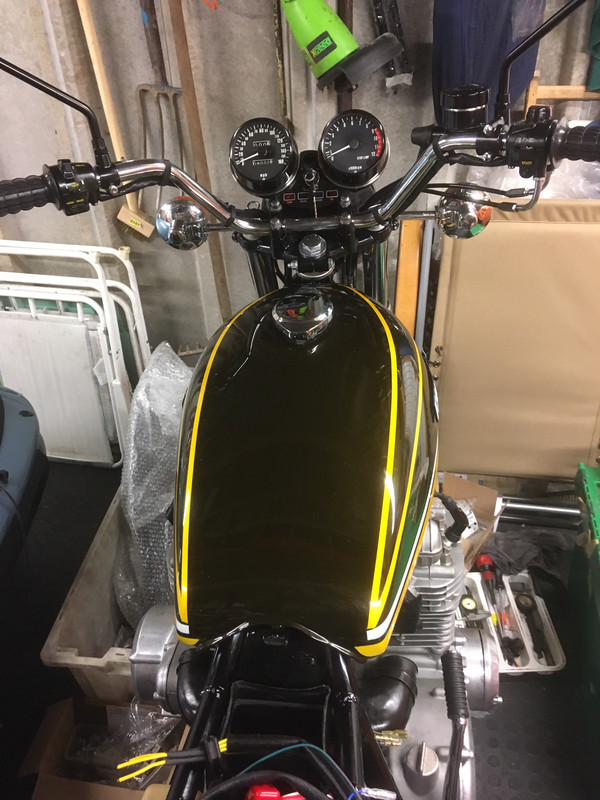
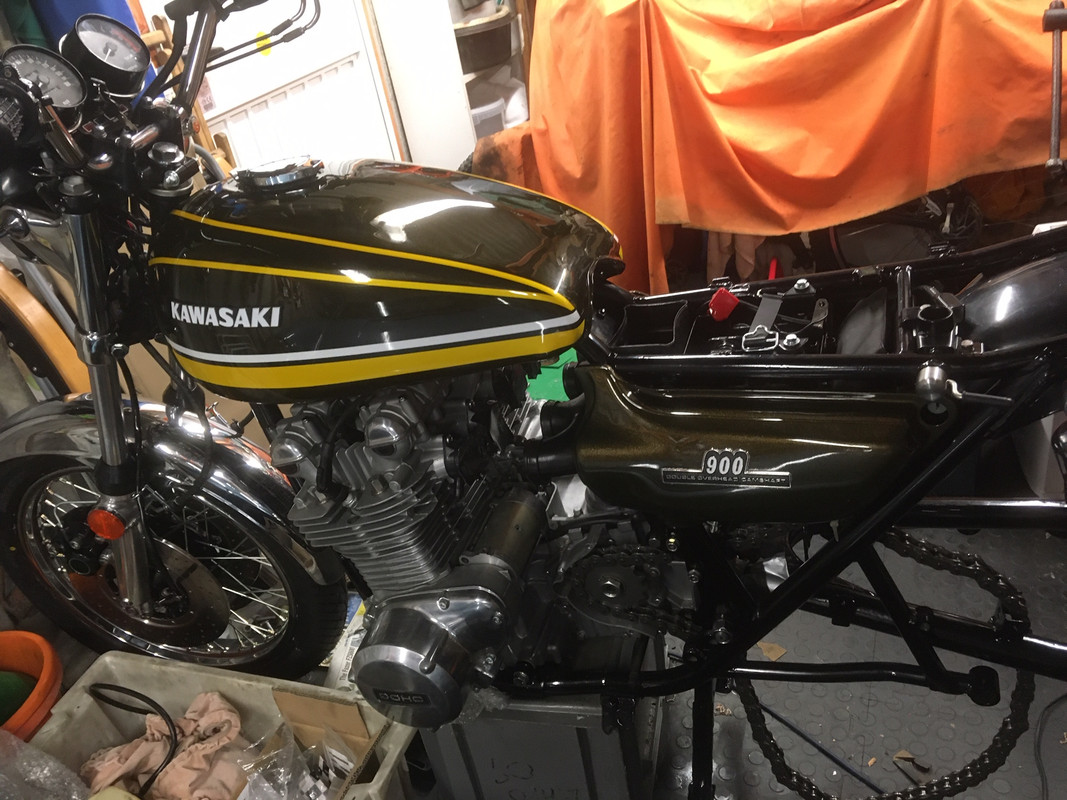
I couldn't resist putting on the side panels, just to see what it looked like. One of the badges has two pins broken, so I have ordered a replacement. Also, although seemingly OEM, the left hand panel may be from a Z1B, as there is no hole for the chain oiler dipstick. I'm not using that system anyway, but its a shame the tank had to go. Now I have a complete system (with pump) to either hoard or see what I can get for it.
I'd bought a cheap rev counter cable from eBay, its going back because it wont thread onto the tacho drive on the engine. Not sure if its faulty or just wrong, it seems a tad too small, anyway I can't start the thread. A real one isn't cheap but sometimes pattern parts can be dirt cheap for a good reason. Hopefully the vendors won't be dicks about returns, if not I can name and shame them.
Finally, how to fit a fuel cap. I've recorded the stages for posterity, in case anyone else finds it trickier than it looks. I dug the tank out from its box in the attic, Its not been tried on the bike before, and its as stable a place as any while I fitted the new cap. Firstly I put masking tape all round the filler, using craft knives and drill bits very close to my fresh paint, what could possible go wrong
There were no instructions with the cap, so I had to work out for myself how the latch works and what goes where. Here's the parts for the latch, I found the tip for using a strip of cardboard to keep the spring in the right place on a US KZ forum, you pull it out when you've finished.
Then I assembled the latch using a smaller drill bit - before I tried that there was near disaster when the spring flew away into the crowded garage, after a long hunt I luckily found it, in completely the opposite direction from where I thought I'd heard it land. Once I had the parts in place the drill bit was drifted out with the pin....
Once the latch was in place and working properly, it was pretty much the same process with the cap hinge...
The finished result:
I couldn't resist putting on the side panels, just to see what it looked like. One of the badges has two pins broken, so I have ordered a replacement. Also, although seemingly OEM, the left hand panel may be from a Z1B, as there is no hole for the chain oiler dipstick. I'm not using that system anyway, but its a shame the tank had to go. Now I have a complete system (with pump) to either hoard or see what I can get for it.
1974 Z1A
1969 H**** CL450 ‘Scrambler’
2005 H-D XL1200R Sportster
1985 Porsche 911 3.2 Carrera Sport
1969 H**** CL450 ‘Scrambler’
2005 H-D XL1200R Sportster
1985 Porsche 911 3.2 Carrera Sport

Re: Z1A Restoration
Just a quick update. I rebuilt #1 carb, using a new (and rare) emulsion tube and needle. That cured the 'hanging' problem. It also gave me an opportunity to bench synch the carbs as best I could. I couldn't find a 0.7mm drill or wire, so I have all 4 carbs just releasing (from the tiny cutout at the front of the slide) a 1mm drill at the same time. Once the bike is on the road one of its first trips will be for a professional carb synch and strobe. I also took the opportunity to paint the red infill 'ON' and arrow on the choke release lever. The carbs are now back on the bike, it was much easier to fit them second time round, as I now have a tube of red rubber grease which I bought to assemble the brake calipers.
I've taken the alternator cover off, and fitted a starter drive gear and spindle which I got from DK, the original was inexplicably AWOL. I'm not happy with my soldered joints between the alternator coils and the replacement cable to the regulator. Ashley from the H***a forum is sorting me out with some spring sleeves and lead based solder to do a better job, as its a high current join I want to do it as best as I can.

I've bought a repro owners manual which one day will go on the tray in in the tail piece. As was pointed out the other day, back in the 70s the owners manual told you how to set the valves, these days it tells you not to drink the contents of the battery. There is, however a list of 21 things to check for tightness daily, without fail, before riding, including the centre stand nuts! In the real world that would get you sacked from work for being late every day, I reckon that even in those days they were getting cagey about legal liability - if you hurt yourself because something important fell off, they would have the defence of 'well, we did tell you to check it was tight!'
I've taken the alternator cover off, and fitted a starter drive gear and spindle which I got from DK, the original was inexplicably AWOL. I'm not happy with my soldered joints between the alternator coils and the replacement cable to the regulator. Ashley from the H***a forum is sorting me out with some spring sleeves and lead based solder to do a better job, as its a high current join I want to do it as best as I can.
I've bought a repro owners manual which one day will go on the tray in in the tail piece. As was pointed out the other day, back in the 70s the owners manual told you how to set the valves, these days it tells you not to drink the contents of the battery.
1974 Z1A
1969 H**** CL450 ‘Scrambler’
2005 H-D XL1200R Sportster
1985 Porsche 911 3.2 Carrera Sport
1969 H**** CL450 ‘Scrambler’
2005 H-D XL1200R Sportster
1985 Porsche 911 3.2 Carrera Sport
Re: Z1A Restoration
I still think the best part of the owners manual was the "How to ride..." section. Considering that when launched, the Z1 was one of the most powerful and fastest production bikes in the world, they also considered those who had never ridden before jumping straight onto one and popping down the shops 
- Attachments
-
-
Z1-B, 400bhp ZX1000NGF
90% of questions that begin "Why..." can be answered with "Because people are stupid."
90% of questions that begin "Why..." can be answered with "Because people are stupid."
Re: Z1A Restoration
The 'break in' data will actually be useful eventually, as I have new bores, pistons and valves, but really, if you need to be told how to slow down and stop a motorcycle, perhaps the Z1 isn't yet the bike for you!
I didn't spend a whole lot of time in the garage this weekend, as my fan heater was dead to the world, although the fuse was OK, I've ordered another one from Amazon. I did think of taking the heater apart to see if I could work out what had gone wrong, but decided that if I ever had to submit a £50K+ claim for a disastrous garage fire, the insurance company would just laugh at me if they'd found a home repaired fan heater in the smouldering wreckage...
I did refit the throttle cables, all now works as it should, and also a set of genuine HT cable clips, which tidied things up no end. Also it stops sparks and shocks from the HT leads, I once had a Triumph T110 that was a beggar for electrocuting my knees in the wet!
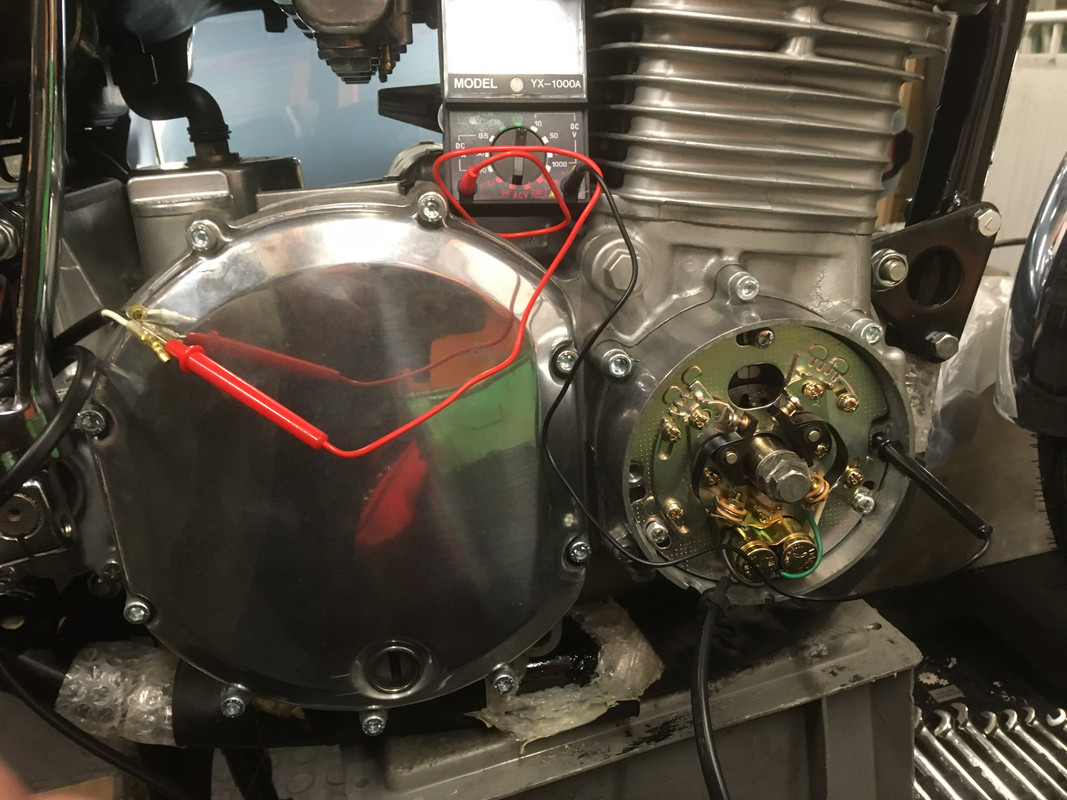
Also I fitted the replacement advance retard unit I got from Dave Marsden, then finally bit the bullet and set the ignition timing. It was a pleasure to time a bike using brand new kit, usually there is at least one screw seized in place, often with a totally chewed up head, made from silver chocolate. Here I am using my multimeter, set to resistance, one probe to the points lead, the other to earth, looking for that moment where the points are just opening. You can see the timing mark on the A/R unit lined up with the pointer on the engine.
I didn't spend a whole lot of time in the garage this weekend, as my fan heater was dead to the world, although the fuse was OK, I've ordered another one from Amazon. I did think of taking the heater apart to see if I could work out what had gone wrong, but decided that if I ever had to submit a £50K+ claim for a disastrous garage fire, the insurance company would just laugh at me if they'd found a home repaired fan heater in the smouldering wreckage...
I did refit the throttle cables, all now works as it should, and also a set of genuine HT cable clips, which tidied things up no end. Also it stops sparks and shocks from the HT leads, I once had a Triumph T110 that was a beggar for electrocuting my knees in the wet!
Also I fitted the replacement advance retard unit I got from Dave Marsden, then finally bit the bullet and set the ignition timing. It was a pleasure to time a bike using brand new kit, usually there is at least one screw seized in place, often with a totally chewed up head, made from silver chocolate. Here I am using my multimeter, set to resistance, one probe to the points lead, the other to earth, looking for that moment where the points are just opening. You can see the timing mark on the A/R unit lined up with the pointer on the engine.
1974 Z1A
1969 H**** CL450 ‘Scrambler’
2005 H-D XL1200R Sportster
1985 Porsche 911 3.2 Carrera Sport
1969 H**** CL450 ‘Scrambler’
2005 H-D XL1200R Sportster
1985 Porsche 911 3.2 Carrera Sport
Who is online
Users browsing this forum: No registered users and 17 guests