Hello Guest User,

Please feel free to have a look around the forum but be aware that as an unregistered guest you can't see all of it and you can't post.

To access these 'Registered Users Only' areas simply register and login.

Restoration of a Gpz 750 R1 (1982)

Work in Progress

Moderators: paul doran, Taffus, KeithZ1R, chrisu

Message
Author
Philippe
Hardcore
Hardcore
Posts: 2004
Joined: 26th Oct 2017
Location: België

Re: Restoration of a Gpz 750 R1 (1982)

#16 PostAuthor: Philippe » Sun Jul 31, 2022 12:34 pm

Hi Garry
Thanks for the compliment!
To be honest, I don't know for sure. In some leaflets to promote the Gpz750 R1, it's mentioned that it has the special crinckle finish on the camshaft cover, in others it's not mentioned at all. I'm going to give it a smooth black finish and a clear varnish on top to give it a glossy appearance like the rest of the engine covers.
I'm going to do this because I don't have the special crinckle paint and I don't intend to buy it just for one camshaft cover. :blush
GrtZ
Philippe
the differences between a little boy and an adult man is the price and size of their toys!

User avatar
Garry.L
Hardcore
Hardcore
Posts: 3084
Joined: 11th Jun 2011
Location: Cheapest Cheshire

Re: Restoration of a Gpz 750 R1 (1982)

#17 PostAuthor: Garry.L » Sun Jul 31, 2022 1:24 pm

Philippe wrote:Hi Garry
Thanks for the compliment!
To be honest, I don't know for sure. In some leaflets to promote the Gpz750 R1, it's mentioned that it has the special crinckle finish on the camshaft cover, in others it's not mentioned at all. I'm going to give it a smooth black finish and a clear varnish on top to give it a glossy appearance like the rest of the engine covers.
I'm going to do this because I don't have the special crinckle paint and I don't intend to buy it just for one camshaft cover. :blush
GrtZ
Philippe


I managed to get a textured type paint for my turbo but to be honest it's no where near as pronounced as the original crinkle finish.... thankfully most of it's hidden :roll:

DSC02333 (2).JPG
ʎɐqǝ uo pɹɐoqʎǝʞ ɐ ʎnq ı ǝɯıʇ ʇsɐן ǝɥʇ sı sıɥʇ

Philippe
Hardcore
Hardcore
Posts: 2004
Joined: 26th Oct 2017
Location: België

Re: Restoration of a Gpz 750 R1 (1982)

#18 PostAuthor: Philippe » Sun Jul 31, 2022 3:52 pm

Hi Garry

wow that's a nice, clean bike!
Yes, the crinckle paint is hardly visible so I'll just give it a coat of "normal" heat resistant paint and varnish.
GrtZ
Philippe
the differences between a little boy and an adult man is the price and size of their toys!

Philippe
Hardcore
Hardcore
Posts: 2004
Joined: 26th Oct 2017
Location: België

Re: Restoration of a Gpz 750 R1 (1982)

#19 PostAuthor: Philippe » Thu Aug 11, 2022 3:34 pm

Hello guys

a little update
the last week I've spent a lot of time on preparing parts for painting.
The frame is painted!
DSCN1192.JPG
the freshly painted frame

The majority of the frame parts is painted too.
DSCN1193.JPG

The engine cases are painted and received a layer of gloss varnish.
DSCN1190.JPG
the engine cases

The front tyre is mounted and the main loom of the electricity is repaired.
New piston rings and a drive chain and sprockets are ordered.
All the bolts, screws and nuts went to the galvaniser to become black and grey again.
The fork stanchions and the brake caliper pistons went away to be hard chromed again.
In addition to the main loom, I started to clean the fuel level sender...
DSCN1194.JPG

This is how it looks on the inside. Rust, rust, rust...let's hope I can repair it.
That looks promising for the inside of the fuel tank...wait and see what that'll be.
GrtZ
Philippe
the differences between a little boy and an adult man is the price and size of their toys!

DavidZ1R
Hardcore
Hardcore
Posts: 1482
Joined: 12th Jun 2011
Location: Bolton Lancs

Re: Restoration of a Gpz 750 R1 (1982)

#20 PostAuthor: DavidZ1R » Thu Aug 11, 2022 6:21 pm

Very nice work as ever Phillipe, I had some zinc work done last week for my z400 twin project ( I know) for rusty 40 year old stuff, came back well.
CB125 GT380 CB750F1 Z1R GPZ 750 Turbo Z1R

DavidZ1R
Hardcore
Hardcore
Posts: 1482
Joined: 12th Jun 2011
Location: Bolton Lancs

Re: Restoration of a Gpz 750 R1 (1982)

#21 PostAuthor: DavidZ1R » Thu Aug 11, 2022 6:22 pm

DavidZ1R wrote:Very nice work as ever Phillipe, I had some zinc work done last week for my z400 twin project ( I know) for rusty 40 year old stuff, came back well.
Attachments
20220802_124905.jpg
CB125 GT380 CB750F1 Z1R GPZ 750 Turbo Z1R

Philippe
Hardcore
Hardcore
Posts: 2004
Joined: 26th Oct 2017
Location: België

Re: Restoration of a Gpz 750 R1 (1982)

#22 PostAuthor: Philippe » Thu Aug 18, 2022 5:34 am

Hi men

I have some progress: see for yourselves.
The fuel level gauge is cleaned and repaired and it's working!
DSCN1218.JPG

DSCN1219.JPG


The beginning of the assembly of the frame parts has started.
New conical bearings are installed in the headstock and the lower triple tree is in place.
DSCN1220.JPG


I couldn't resist to mount a few interior frame parts and started with the battery box and a few electrical components.
DSCN1223.JPG


The rear part of the frame, where the taillight is attached, was also mounted.
DSCN1221.JPG


I couldn't continue because I had to wait for a lot of bolts, nuts and frame parts to be rezingued black and gray.
On tuesday I received a phone call to get the good news: the parts would be ready on wednesday and as promised, they were ready!
This is the result of the good work!
DSCN1235.JPG

DSCN1236.JPG

As you can see there are a lot of parts I don't need for the bike, those will be used for a next project ( a Z1000A2 during the autumn)

Today, the assembly of the engine can start!
Perhaps more news this evening...
GrtZ
Philippe
the differences between a little boy and an adult man is the price and size of their toys!

r3sc
Custard Cream
Custard Cream
Posts: 640
Joined: 24th Nov 2019
Location: Sheffield

Re: Restoration of a Gpz 750 R1 (1982)

#23 PostAuthor: r3sc » Thu Aug 18, 2022 6:31 am

Hi Philippe,

Great work as usual!

Have all the black plated items been zinc plated and then passivated black or is it a different finish altogether?

Bill P
Hardcore
Hardcore
Posts: 1305
Joined: 17th Aug 2015
Location: Derbyshire

Re: Restoration of a Gpz 750 R1 (1982)

#24 PostAuthor: Bill P » Thu Aug 18, 2022 10:37 am

Enjoying this Philippe Top Job :)

Philippe
Hardcore
Hardcore
Posts: 2004
Joined: 26th Oct 2017
Location: België

Re: Restoration of a Gpz 750 R1 (1982)

#25 PostAuthor: Philippe » Thu Aug 18, 2022 4:05 pm

Hi guys

I'm back!
Thanks for the replies.
@r3sc: I don't know how the guy does it but it's a shiny black finish and it protects against rust.
@Bill P: thanks, I hope I don't disappoint you with the work of today...

So, this morning I started the assembly of the engine.
A few weeks ago I ordered a new camshaft chain and a new primary chain. New oil seals were ordered too.
DSCN1239.JPG
the new chains

I started by putting the new chains and new oil seals on the cranckshaft.
The assembly was placed in the upper part of the cranckcase.
DSCN1241.JPG
the first step

The gear box was also placed in the upper cranckcase
DSCN1242.JPG
the gear box

The gear selector with the three forks was secured in the lower cranckcase.
DSCN1243.JPG
the gear selector

After that it was time to join the two halves together.
DSCN1244.JPG
the joined cranckcase halves

Then I had to put the primairy axle in the cranckcase.
In that axle is the starter clutch embedded so I replaced the starter clutch to make sure it worked as it is supposed to. The eight rubber dampers of the primairy axle were replaced too.
Guys, putting the primairy axle in place is a pain in the ... for me. I'm not used to it but after some trial and error I succeeded and the oil pump could be mounted too. After that it was time to mount the oil pan and the new oil filter.
DSCN1245.JPG

The clutch basket was installed, the engine was put upright...
and this was the result of a morning of assembling engine parts
DSCN1247.JPG

After a bit of eating and resting the fun continued.
It was now time to mount new piston rings on the pistons.
DSCN1248.JPG
new piston rings

The pistons were attached to the cranckshaft with new piston pen clips (remember what I found a few weeks ago when I opened the engine).
It became time to mount the cylinders over the pistons...but before that I had to install new camchain guides
DSCN1250.JPG
the new camchain guides

Since the Kawasaki piston ring compressor is only suited for the Z900 and the Z1000, I mounted the cylinders by hand...first pistons 2 and 3 and then pistons 1 and 4...it took me a few hours of work and it costs me a few broken fingernails but the pistons are in!
At 4 P.M. I mounted the engine in the frame and the hardest job was done.
DSCN1252.JPG

So far, so good.
Perhaps more news within a few days.
GrtZ
Philippe
the differences between a little boy and an adult man is the price and size of their toys!

Philippe
Hardcore
Hardcore
Posts: 2004
Joined: 26th Oct 2017
Location: België

Re: Restoration of a Gpz 750 R1 (1982)

#26 PostAuthor: Philippe » Fri Aug 19, 2022 1:23 pm

Hello men

some more news!
This morning I decided to do some work on the frame. The engine can wait...
I started with mounting the swingarm in the frame. Before I could do that I had to connect the drive chain because I always use "endless" drive chains.
The drive chain was placed over the swingarm and then both were mounted.
DSCN1254.JPG

Now I had to assemble the rear shocks. they were taken apart, painted and some parts were zingued black. They consist of quite a lot of parts, see for yourselves.
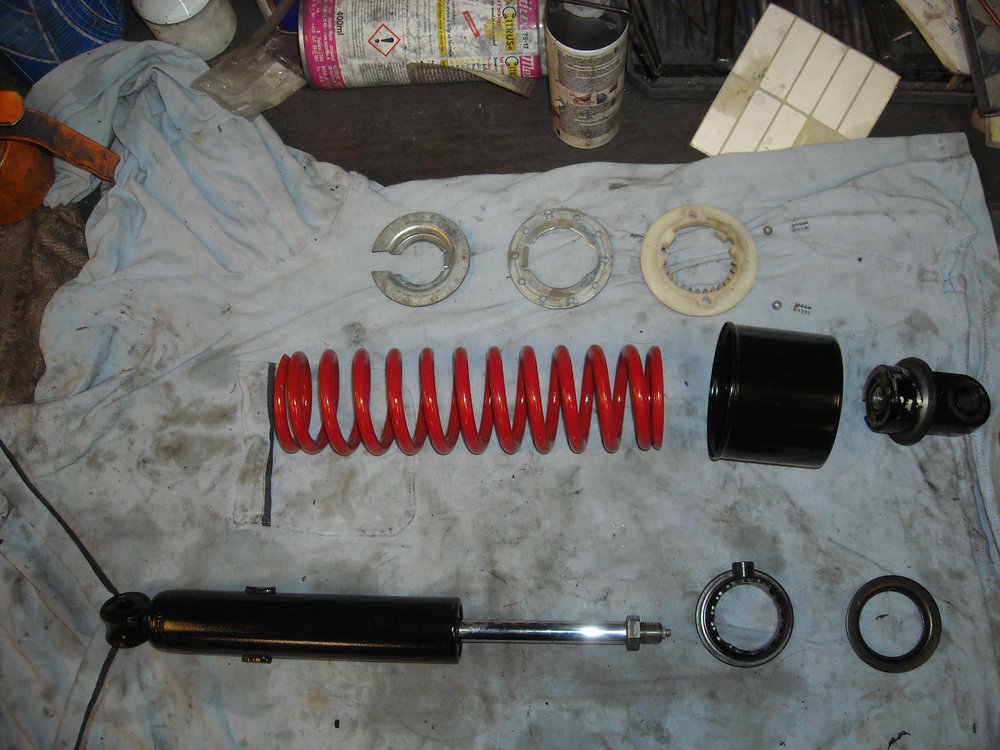
DSCN1255.JPG
the parts of the rear shock

I managed to assemble them by pressing the springs together and then mount the rest of the parts. If you do this yourself and it's the first time ever, take care! NEVER put your fingers between the upper parts of the shocks and the spring, always use a tool! If, for one reason or another, the tool you use to compress the spring would fail, you can only loose a tool, not a finger...
Anyway, this is the result.
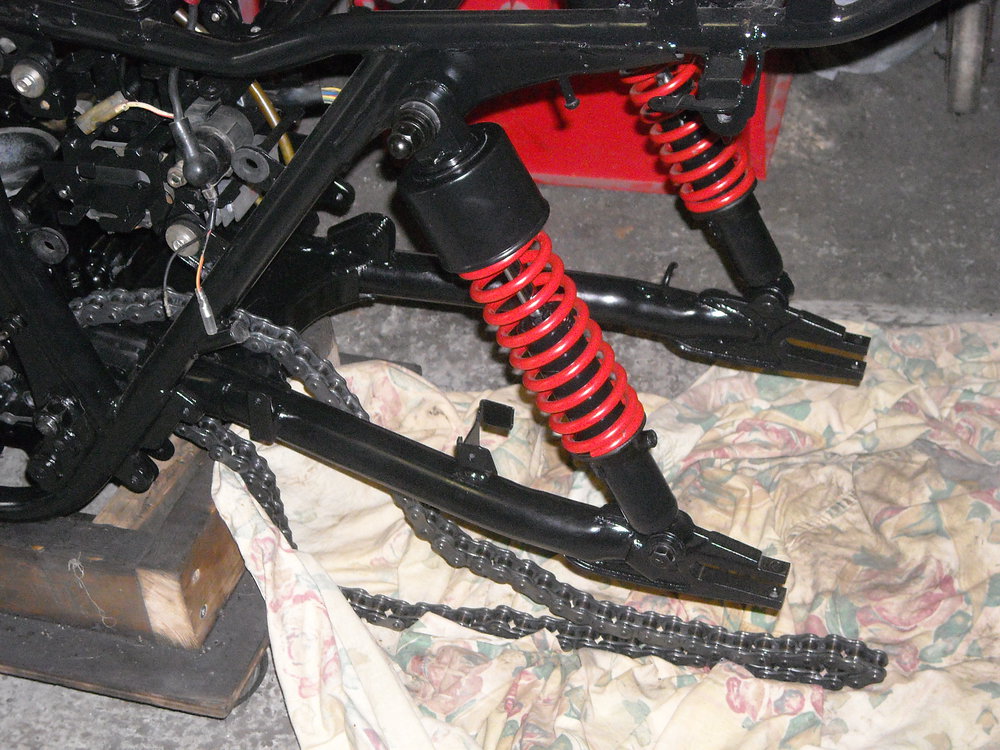
DSCN1257.JPG
the mounted rear shocks

And then it was time to mount the grab handle. Now it would become clear if the measurements I took when welding the frame were correct. And yes, they were correct, the grab handle mounted without any problem!
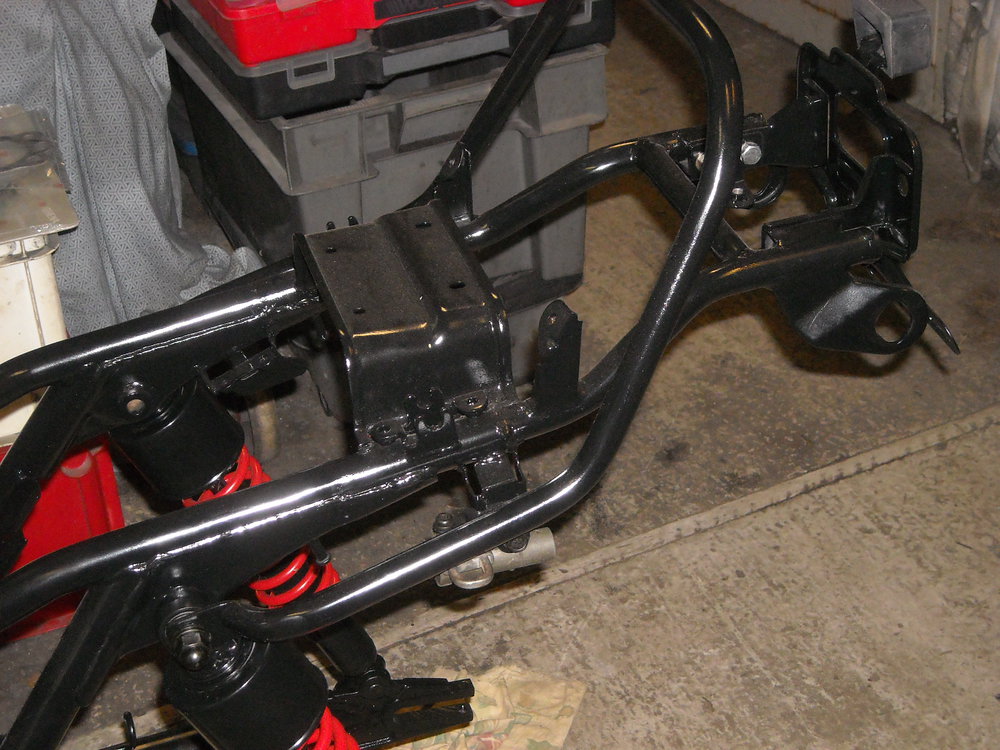
DSCN1258.JPG
the mounted grab handle

I decided to mount the rear wheel too. Before that I had to put a tyre on it. It went smooth and after 15 minutes the tubeless tyre was mounted.
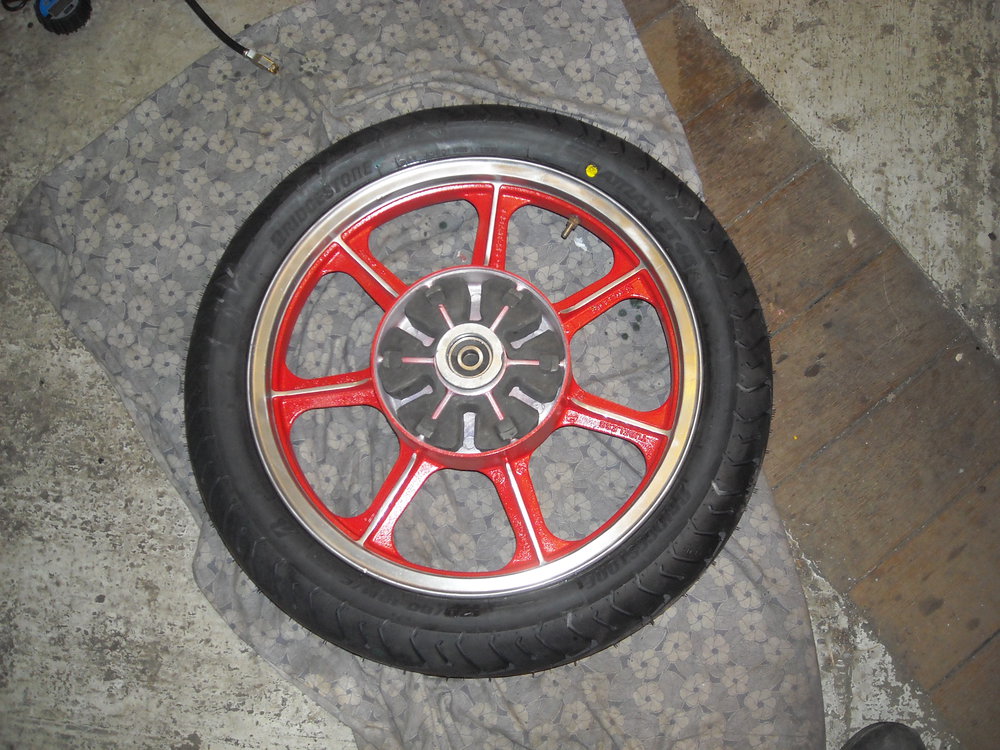
DSCN1259.JPG
the rear wheel with a new BT46 tyre

The rear disc brake rotor was mounted afterwards. If you do it before you put a tyre on the wheel, there's a chance that you cause damage to the brake rotor.
DSCN1260.JPG

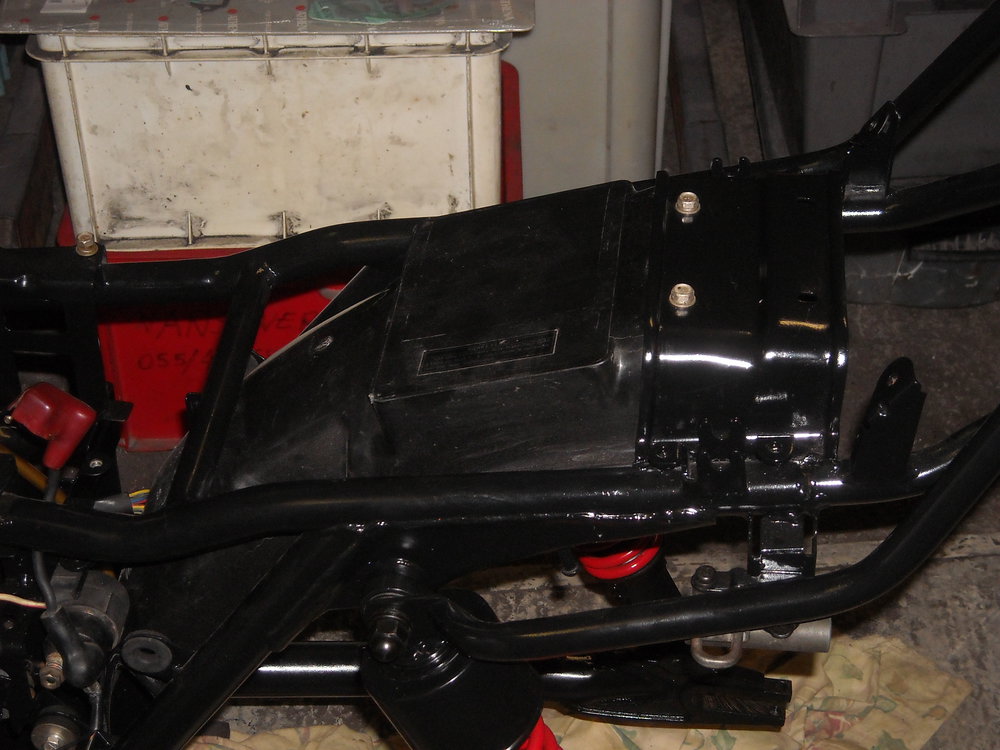
Before mounting the rear wheel, I mounted the inner rear mudguard, it's easier to do it before the wheel is in place.
DSCN1261.JPG
the inner rear mudguard

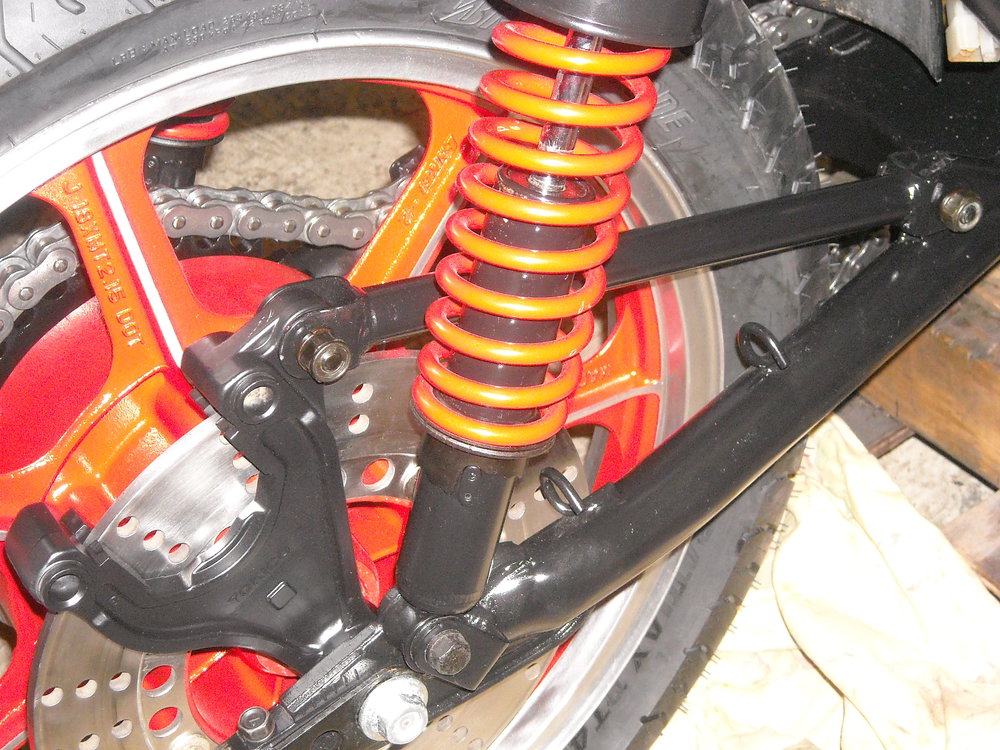
A new sprocket was mounted on the sprocket carrier and then the rear wheel spindle was mounted with all the nescessary parts (drive chain adjusters, rear brake caliper holder and spacers).
DSCN1264.JPG
the rear caliper holder

The drive chain was placed over the sprocket and the whole assembly was put in place.
The two small stoppers were placed at the end of the swing arm and secured with a bolt.
DSCN1262.JPG

Then I decided to mount the rear outer mudguard. If you do this before you mount the rear wheel, it's in the way and you have to maneuvre the rear wheel around it.
DSCN1263.JPG

And when all these things were done I had to get back to the engine.
The front sprocket had to be mounted...
That's for the next episode.
Perhaps within a few days.
GrtZ
Philippe
the differences between a little boy and an adult man is the price and size of their toys!

moizeau
Custard Cream
Custard Cream
Posts: 665
Joined: 3rd May 2019
Location: France

Re: Restoration of a Gpz 750 R1 (1982)

#27 PostAuthor: moizeau » Fri Aug 19, 2022 2:48 pm

Looking lovely Philippe. Have you got a tyre machine or do you use levers to fit the tyres?
Pete

Philippe
Hardcore
Hardcore
Posts: 2004
Joined: 26th Oct 2017
Location: België

Re: Restoration of a Gpz 750 R1 (1982)

#28 PostAuthor: Philippe » Wed Aug 24, 2022 4:04 pm

Hello men

the next episode:
@ moizeau: Pete, I don't have a machine, it's all by hand and I use 3 of these levers to fit the tyres
DSCN1444.JPG


So, the last few days I've been making the attachments for the fairing...they are OK but need some refinement, more about them the next time.
Today a parcell arrived and in it were shims to adjust the valve clearance.
When looking at the camshafts I discovered that a previous owner switched the camshafts :shock:
The exhaust camshaft was used for the intake and vice versa. They even changed the sprockets :eek
So I had to change the sprockets and remeasure the valve clearance. It turned out that two valves had no clearance at all.
I didn't have the correct shims so I had to wait.
In the mean time I mounted the cylinderhead, the starter engine and some more items of the frame.
DSCN1266.JPG


DSCN1270.JPG


The tail light and the rear indicators are mounted
DSCN1268.JPG


The air filter box,with new intake rubbers
DSCN1272.JPG


The front sprocket cover
DSCN1445.JPG

And yes I mounted a special washer behind the front sprocket nut before installing the cover!

The camshaft cover was mounted after setting the valve timing.
A new upper camchain guide was mounted too.
DSCN1447.JPG


This is the result of todays work
DSCN1446.JPG


Perhaps some more news about the fairing tomorrow
DSCN1448.JPG

As you can see it's mounted temporarely.
I'm waiting for the fork stanchions to be hardchromed and I used some old stanchions with the same diameter in order to mount the headlight brackets and the headlight.

That's all for today folks!
GrtZ
Philippe
the differences between a little boy and an adult man is the price and size of their toys!

User avatar
chrisNI
Site Admin
Posts: 3709
Joined: 22nd Dec 2001
Location: NI

Re: Restoration of a Gpz 750 R1 (1982)

#29 PostAuthor: chrisNI » Wed Aug 24, 2022 7:30 pm

Good work Philippe :D

CLASSICAL
new poster
Posts: 8
Joined: 3rd Jul 2021
Location: West Yorkshire

Re: Restoration of a Gpz 750 R1 (1982)

#30 PostAuthor: CLASSICAL » Wed Aug 24, 2022 7:37 pm

What an absolute star you are Philippe!
Great work again :wow


Return to “Projects”

Who is online

Users browsing this forum: No registered users and 111 guests