Hello Guest User,
Please feel free to have a look around the forum but be aware that as an unregistered guest you can't see all of it and you can't post.
To access these 'Registered Users Only' areas simply register and login.
Please feel free to have a look around the forum but be aware that as an unregistered guest you can't see all of it and you can't post.
To access these 'Registered Users Only' areas simply register and login.
My Ultimate Zed
Moderators: chrisu, paul doran, Taffus, KeithZ1R

Re: My Ultimate Zed
Nice design work and I like the 3D printer for prototyping; I really must find an excuse to get one 

Re: My Ultimate Zed
Just read this thread from start to finish. What a great read, stunning attention to detail & looking forward to seeing the finished bike. A credit to you sir 
-
Zomerset Zed

- 100Club

- Posts: 239
- Joined: 30th May 2014
- Location: Somerset
Re: Final engine build
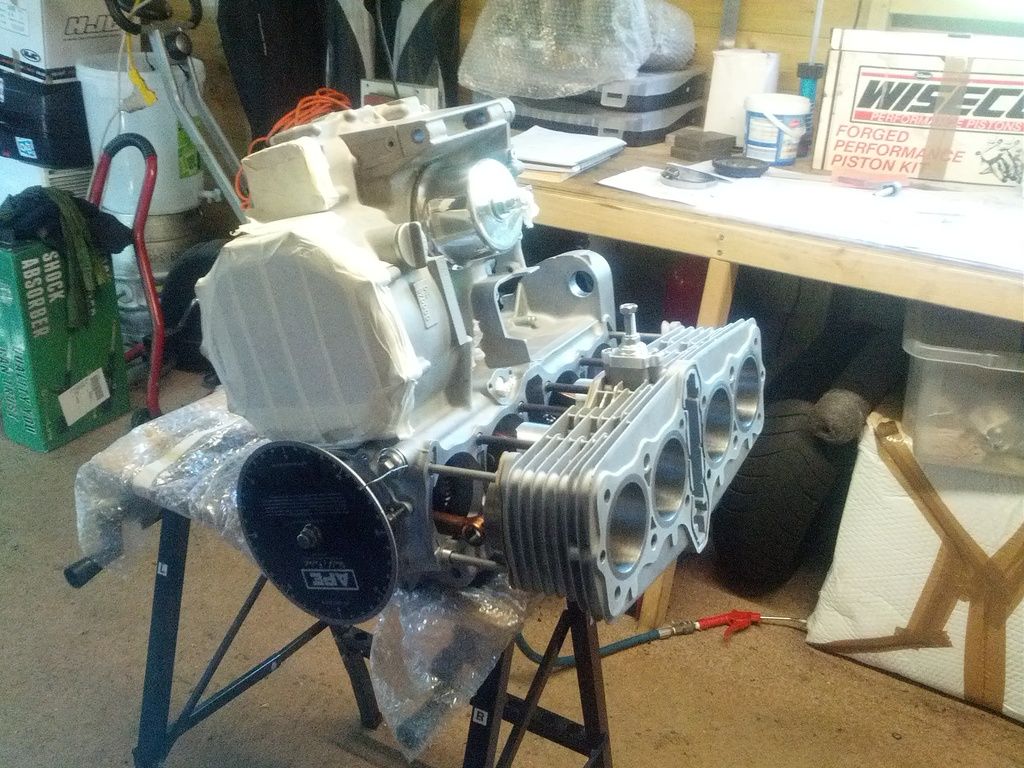
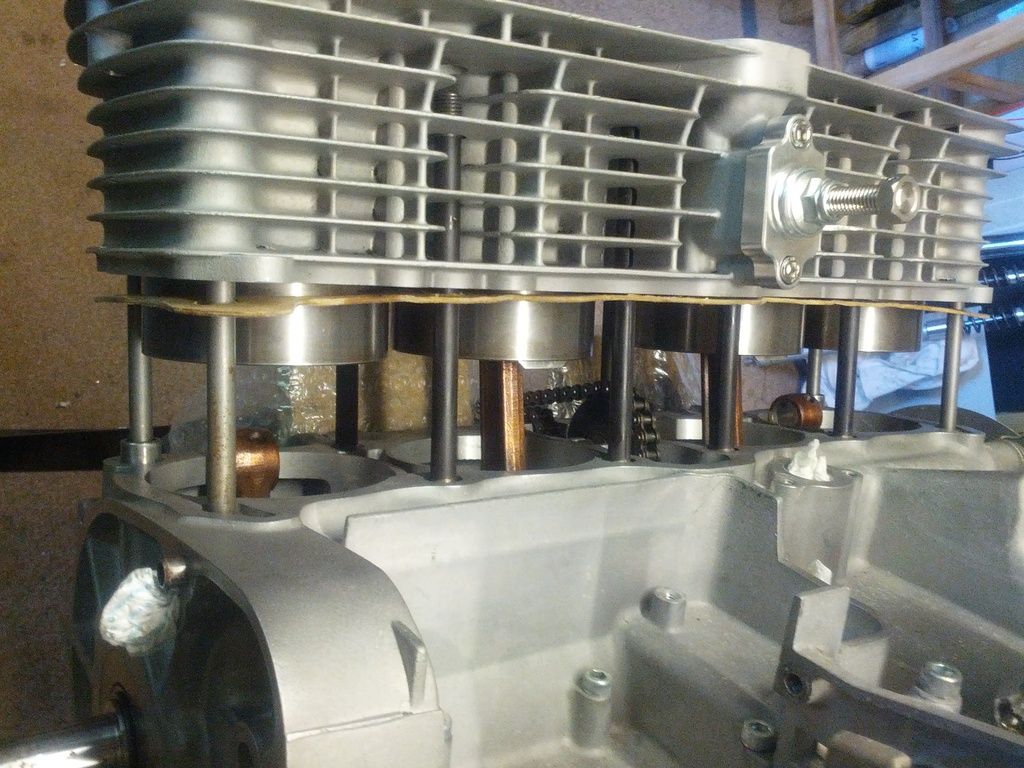
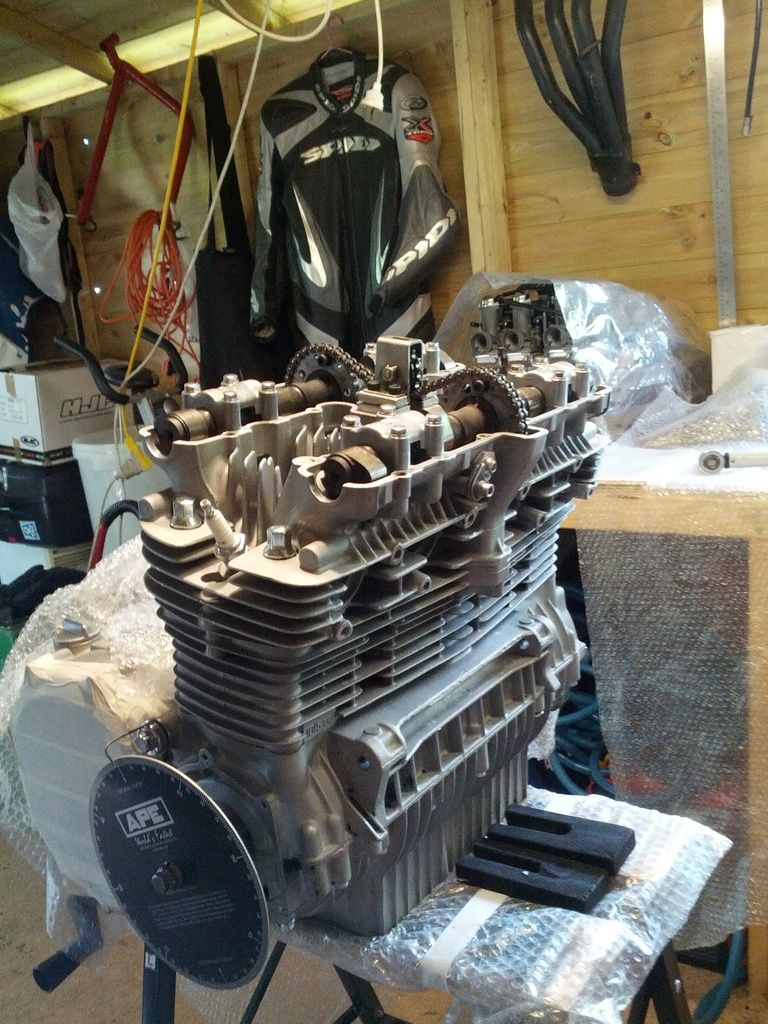
Time to build up top end:
I used a variety of techniques to measure squish and compression ratio:
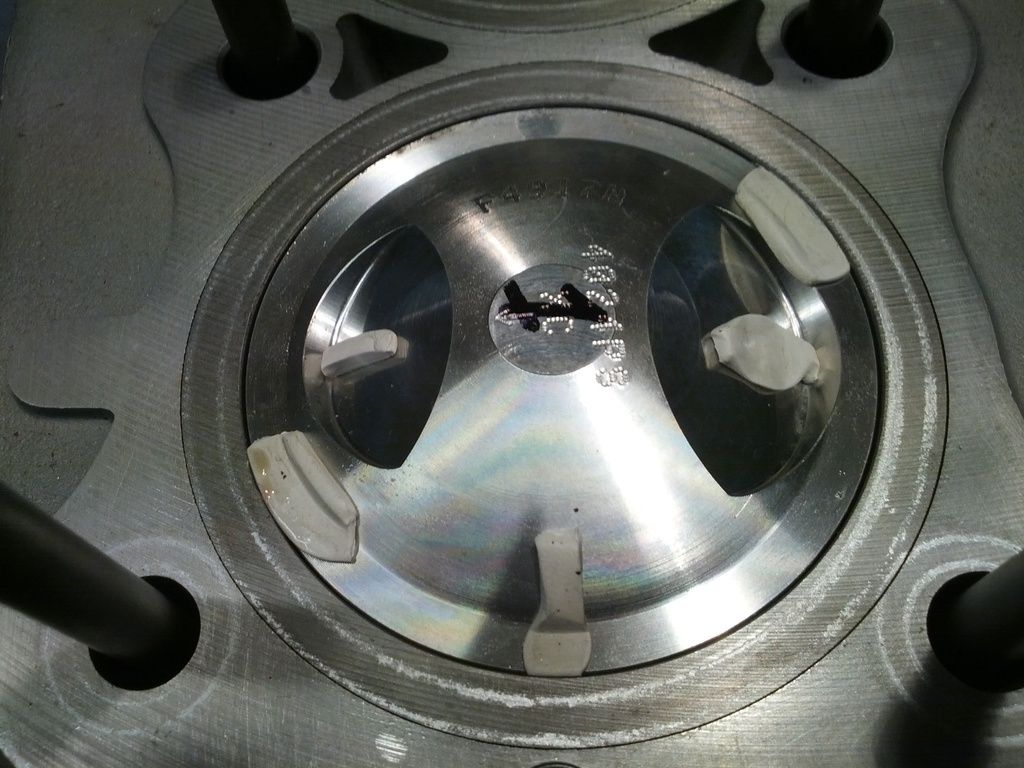
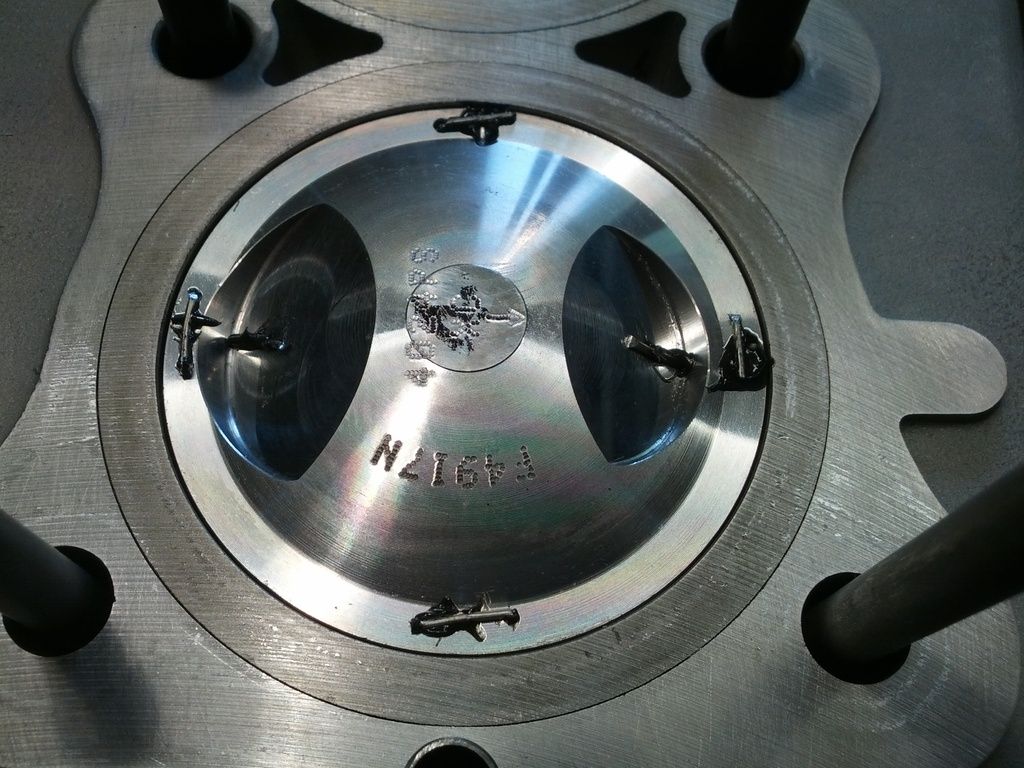
I measure as low as 0.66 mm squish, and a compression ratio of 11.2:1 static. Squish is too low for a road bike really, and compression ratio i would like to see about 10:25 as per Wiseco piston design.
So i calculated i required an additional 0.7mm of clearance between the piston and the head, so i ordered some 1.5mm gasket paper to get the additional height from the original Cometic 0.7mm base gasket.
I then refitted the barrels and head onto the un-ringed pistons and re-did all my measurements with cams timed in properly. CR came out at 10.3:1 and squish at 1.40mm. Result!
Strip down again!
I then re-checked the piston rings for gap and fit and increased the gap on a few and sanded a radius onto both the edges of the ID of all the 2nd rings as it was a bit sharp. After ringing all the pistons and fitting 1 circlip and the gudgeon pin to each piston (1 and 2 on the rhs, 3 and 4 on the lhs) i fitted them to their respective homes:


And the reason for doing this

When i went to get my ring compressors out, there are only 3 to be found! The hazzards of moving house, grrrrr...
So the theory is:
Fit pistons into barrels individually easing each ring in at a time (there is a generous taper at the base of the Wiseco liners).
Fit my home made base gasket to bottom of barrels.
slide out gudgeon pins on 2 and 3 so the oil ring is just in the liner and the pin is out enough to clear the rod and can rest on the bottom of the liner.
Tip engine so it is resting on its front (so you dont have to fight gravity pulling the barrels down when you dont want them to go down)
Slide barrels on.
Rotate crank so rods 2 and 3 are at TDC.
Slide barrels down until they meet little end bore.
Slide Guineon pins into rods (can use a bar resting on top of the front head studs to support the conrods so they dont flop down and a phillips screw driver to locate the little end).
Fit the circlips in the pistons (can be a little fiddly as they are bastard tight anyway).
Slide pistons up bore by pushing down on barrels and rotating the crank.
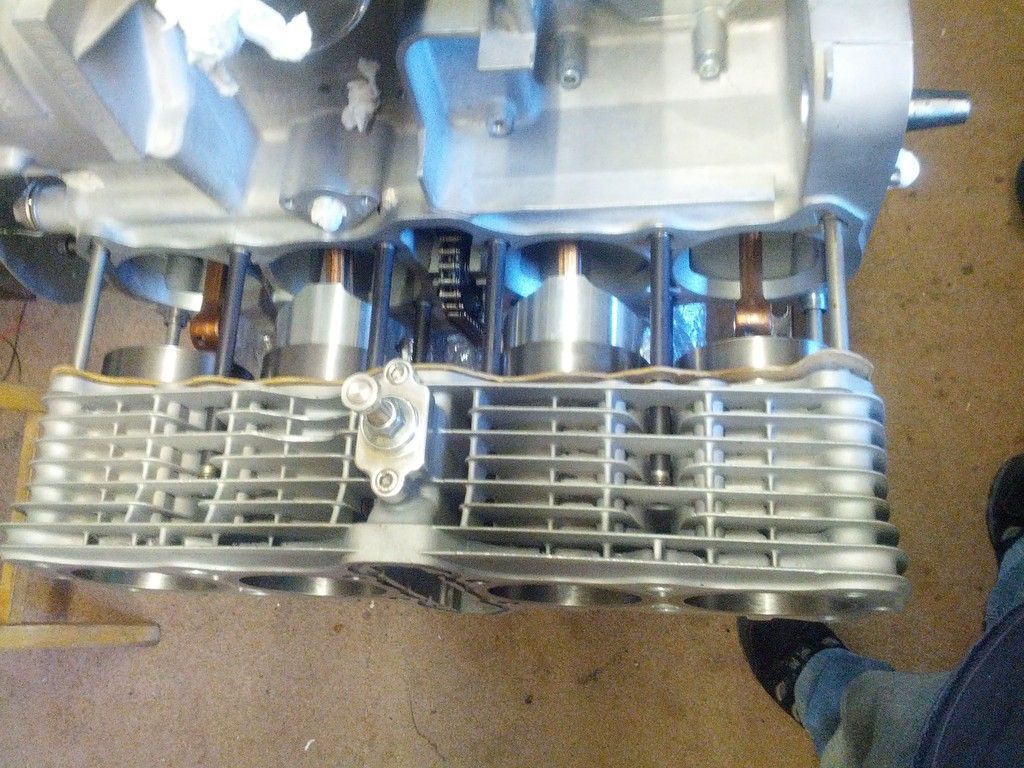
Now push pistons 1 and 4 down so they meet the rods and repeat which is easier on the outer 2.
Applied RTV to base gasket in appropriate places, on barrels first, then block and pushed barrels down, head on quickly and torque down.
Next day, head off, head gaskets in and blue Hylomar applied around oil ways on both faces.
New Genuine cam chain tunnel seal and all new rubber blocks on the sprocket shafts.
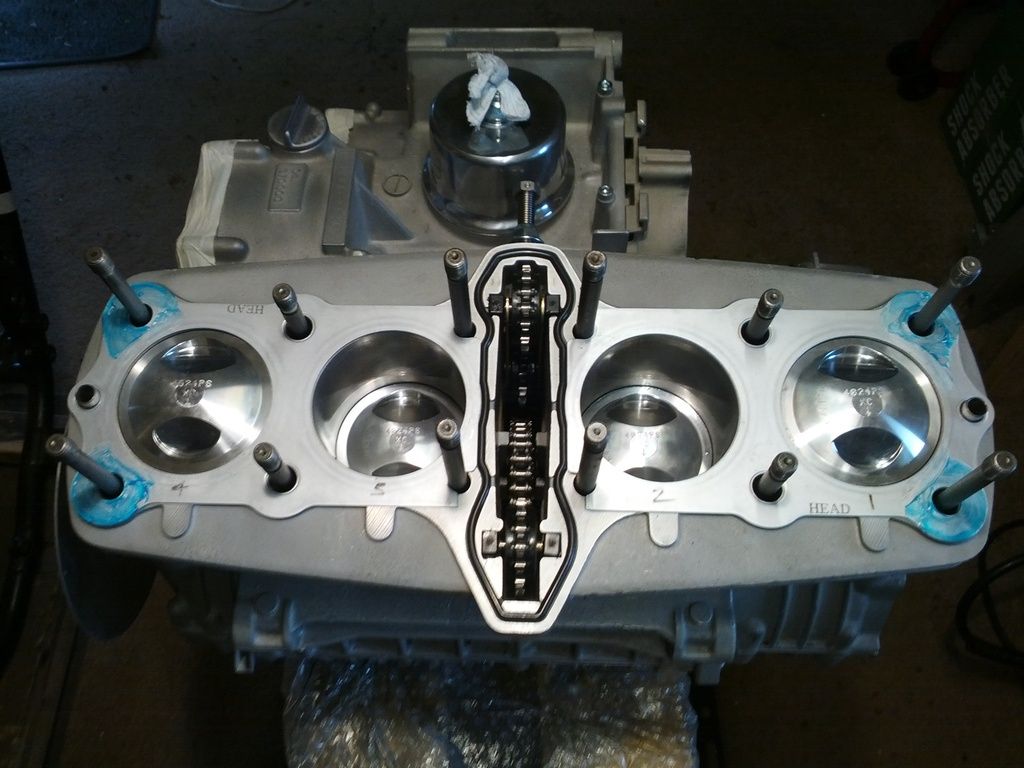
Head on and torqued down for the last time.
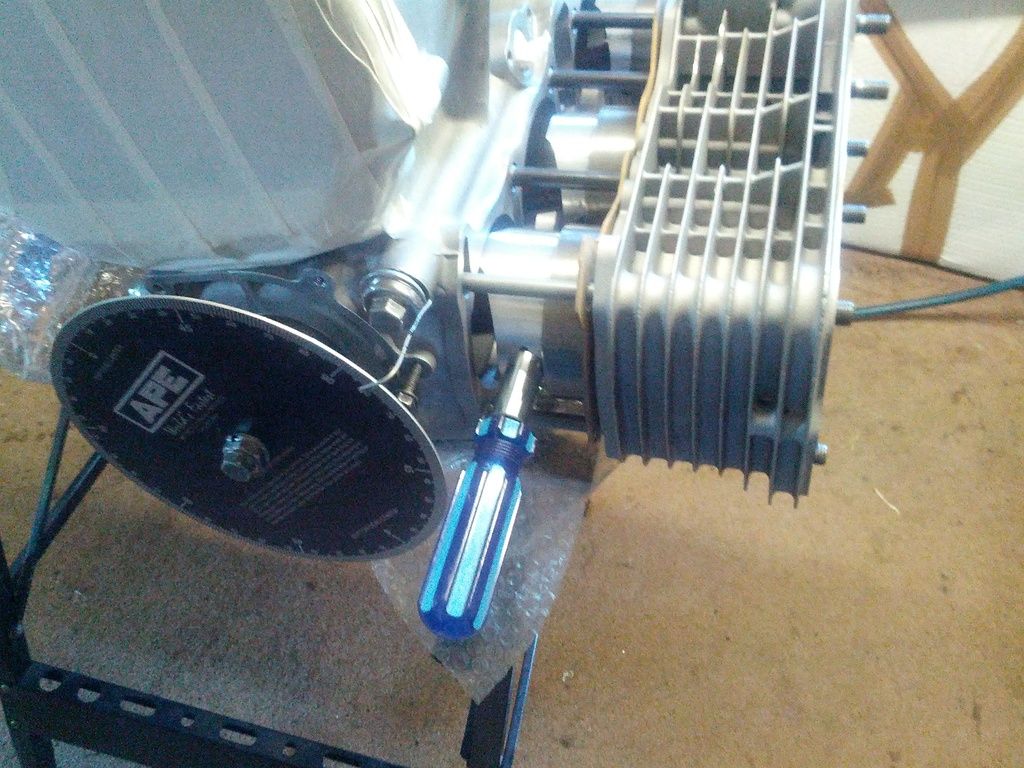
I then re-checked the cam timing and adjusted slightly to get the 107/106 i wanted.
Wanted to get this all down so i have a record of what i have done and may be of interest to some??
Tried to re-use original cam end caps, half-moons or whatever
Either got pressed in or out on 2 of them, so ordered some TK Max ones off Ebay (seem good quality) and fitted them with no issues.
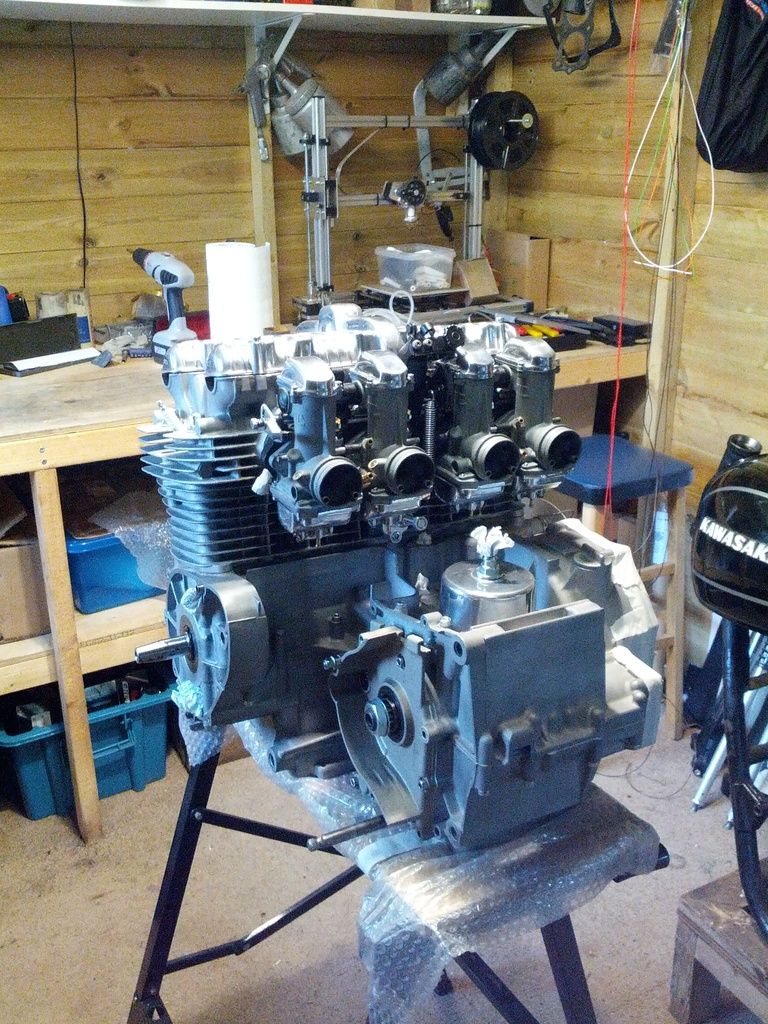
Slung the carbs on to get a feel for what its going to be like
Replaced comedy Athena tensioner gasket (thin and wrong shape) with home made one:
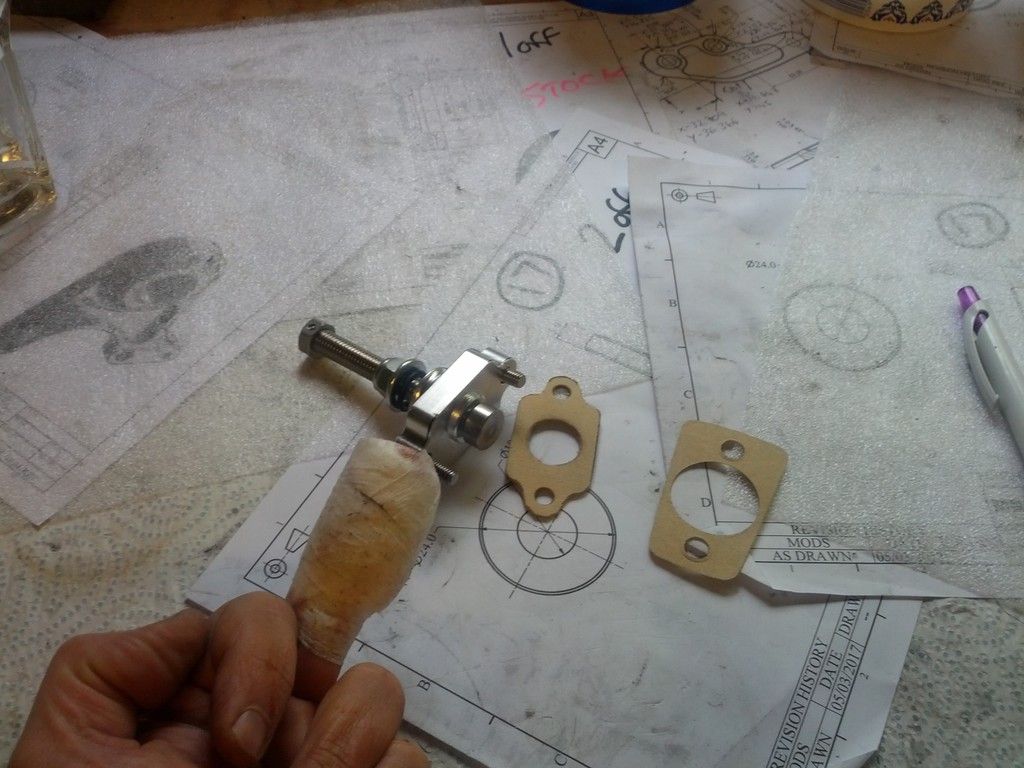
Gasket:1, Finger: Nil

I used a variety of techniques to measure squish and compression ratio:


I measure as low as 0.66 mm squish, and a compression ratio of 11.2:1 static. Squish is too low for a road bike really, and compression ratio i would like to see about 10:25 as per Wiseco piston design.
So i calculated i required an additional 0.7mm of clearance between the piston and the head, so i ordered some 1.5mm gasket paper to get the additional height from the original Cometic 0.7mm base gasket.
I then refitted the barrels and head onto the un-ringed pistons and re-did all my measurements with cams timed in properly. CR came out at 10.3:1 and squish at 1.40mm. Result!
Strip down again!
I then re-checked the piston rings for gap and fit and increased the gap on a few and sanded a radius onto both the edges of the ID of all the 2nd rings as it was a bit sharp. After ringing all the pistons and fitting 1 circlip and the gudgeon pin to each piston (1 and 2 on the rhs, 3 and 4 on the lhs) i fitted them to their respective homes:


And the reason for doing this
When i went to get my ring compressors out, there are only 3 to be found! The hazzards of moving house, grrrrr...
So the theory is:
Fit pistons into barrels individually easing each ring in at a time (there is a generous taper at the base of the Wiseco liners).
Fit my home made base gasket to bottom of barrels.
slide out gudgeon pins on 2 and 3 so the oil ring is just in the liner and the pin is out enough to clear the rod and can rest on the bottom of the liner.
Tip engine so it is resting on its front (so you dont have to fight gravity pulling the barrels down when you dont want them to go down)
Slide barrels on.

Rotate crank so rods 2 and 3 are at TDC.
Slide barrels down until they meet little end bore.
Slide Guineon pins into rods (can use a bar resting on top of the front head studs to support the conrods so they dont flop down and a phillips screw driver to locate the little end).
Fit the circlips in the pistons (can be a little fiddly as they are bastard tight anyway).
Slide pistons up bore by pushing down on barrels and rotating the crank.


Now push pistons 1 and 4 down so they meet the rods and repeat which is easier on the outer 2.

Applied RTV to base gasket in appropriate places, on barrels first, then block and pushed barrels down, head on quickly and torque down.
Next day, head off, head gaskets in and blue Hylomar applied around oil ways on both faces.
New Genuine cam chain tunnel seal and all new rubber blocks on the sprocket shafts.

Head on and torqued down for the last time.
I then re-checked the cam timing and adjusted slightly to get the 107/106 i wanted.


Wanted to get this all down so i have a record of what i have done and may be of interest to some??
Tried to re-use original cam end caps, half-moons or whatever
Either got pressed in or out on 2 of them, so ordered some TK Max ones off Ebay (seem good quality) and fitted them with no issues.
Slung the carbs on to get a feel for what its going to be like

Replaced comedy Athena tensioner gasket (thin and wrong shape) with home made one:

Gasket:1, Finger: Nil
Re: My Ultimate Zed
Good build good read
-
Zomerset Zed
- 100Club
- Posts: 239
- Joined: 30th May 2014
- Location: Somerset
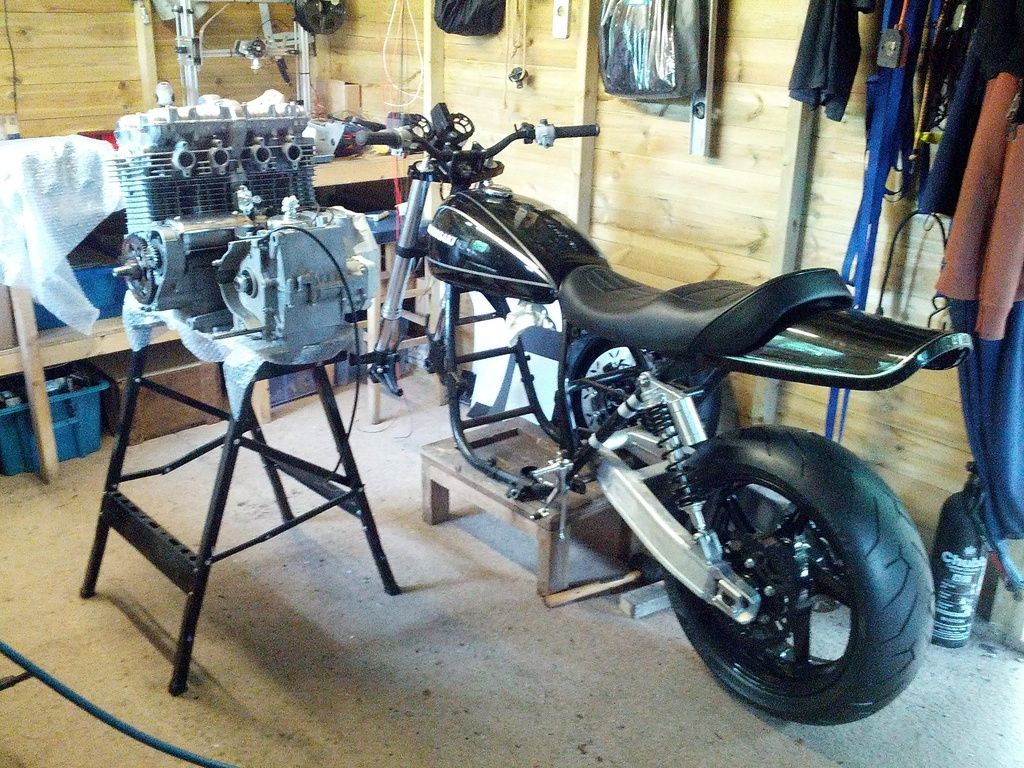
Getting close!!
Got some parts back from Mikey, polished and anodized gloss black:
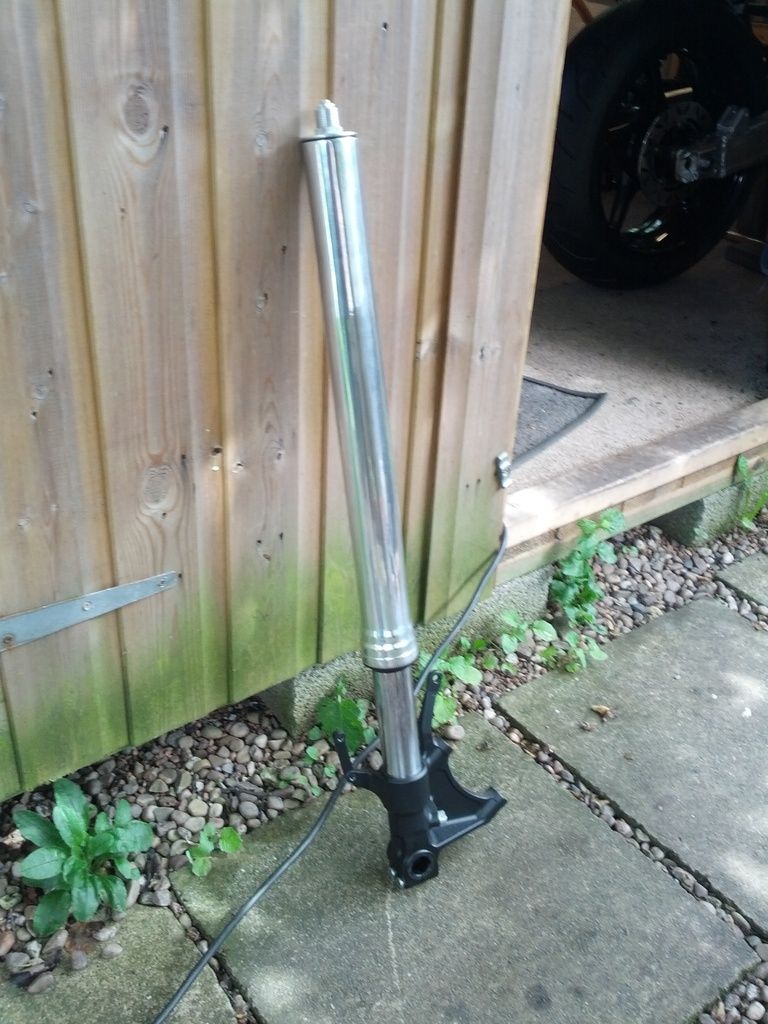

The forks i have got Mikey to polish at the moment. I have real doubts about the forks as i may have to lengthen them to get more ground clearance at the front. If i think i may have to do this i will have to make some tube extensions to screw in the top of the forks and lengthen the cartridge by the same amount. The end goal is to get the forks anodised black, but i have decided to wait until i have the whole bike built up and at least do some riding on it to decide how much the front end may need to be raised, then get the extensions machined and then send the whole lot off for anodising, so everything matches colour wise. I only want to do this once as the internal PTFE coated bushes will need to come out of the forks for anodisng and this looks like a prick of a job, and im sure the bushes wont be cheap either
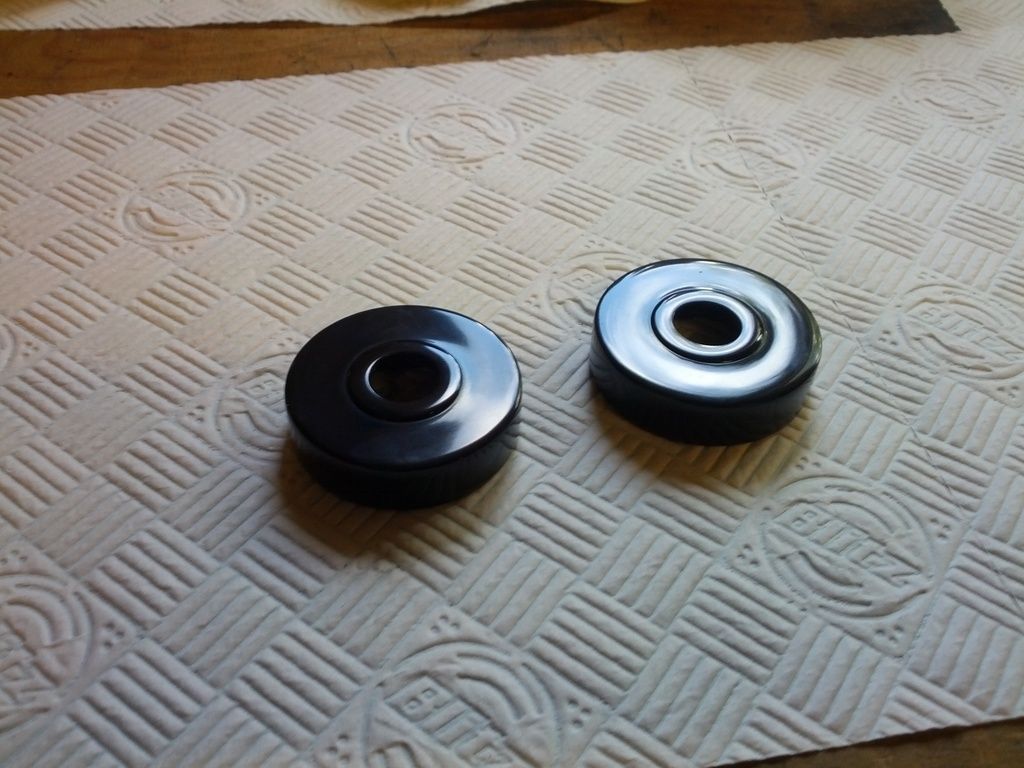
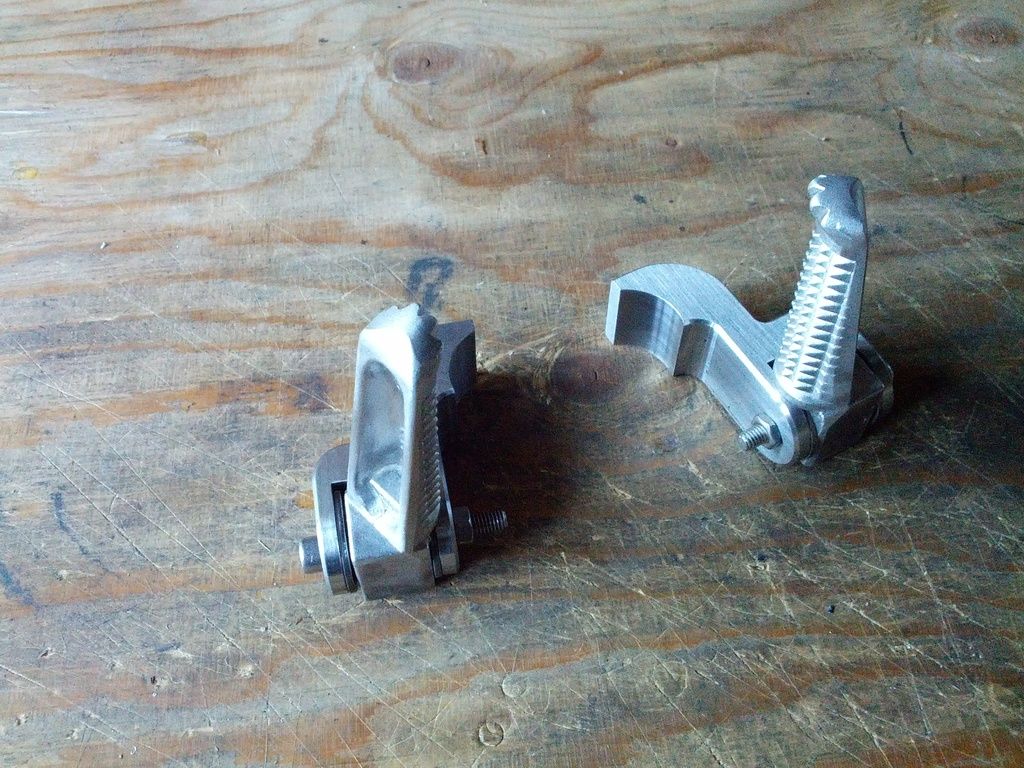
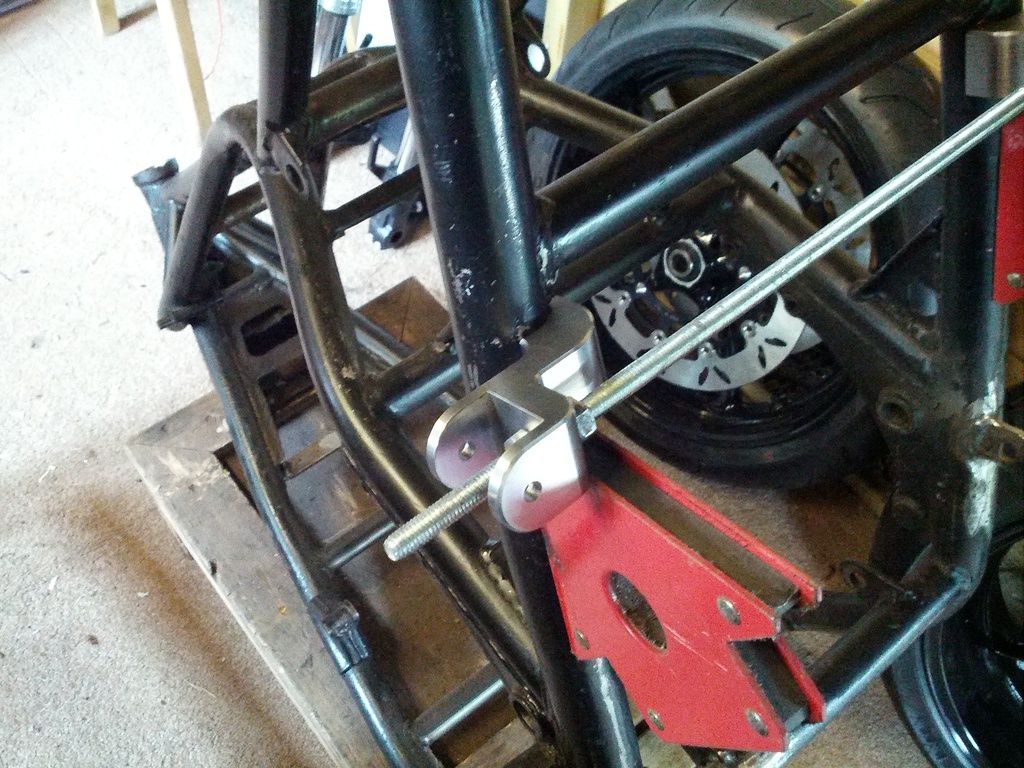
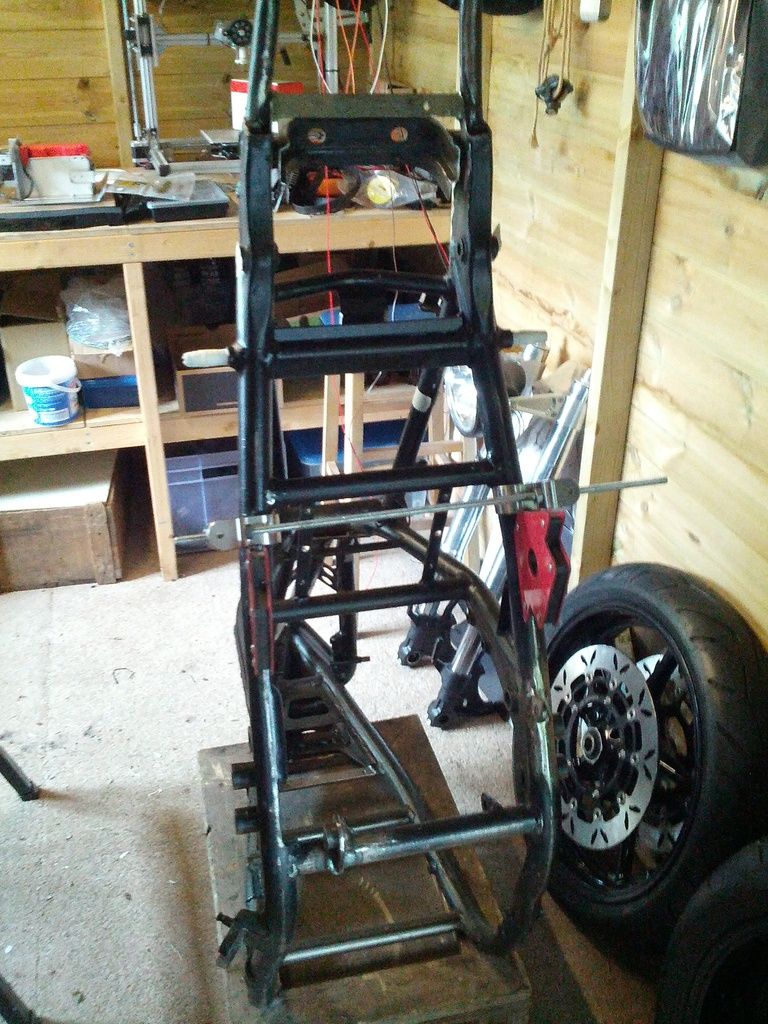
Swingarm spindle end caps:
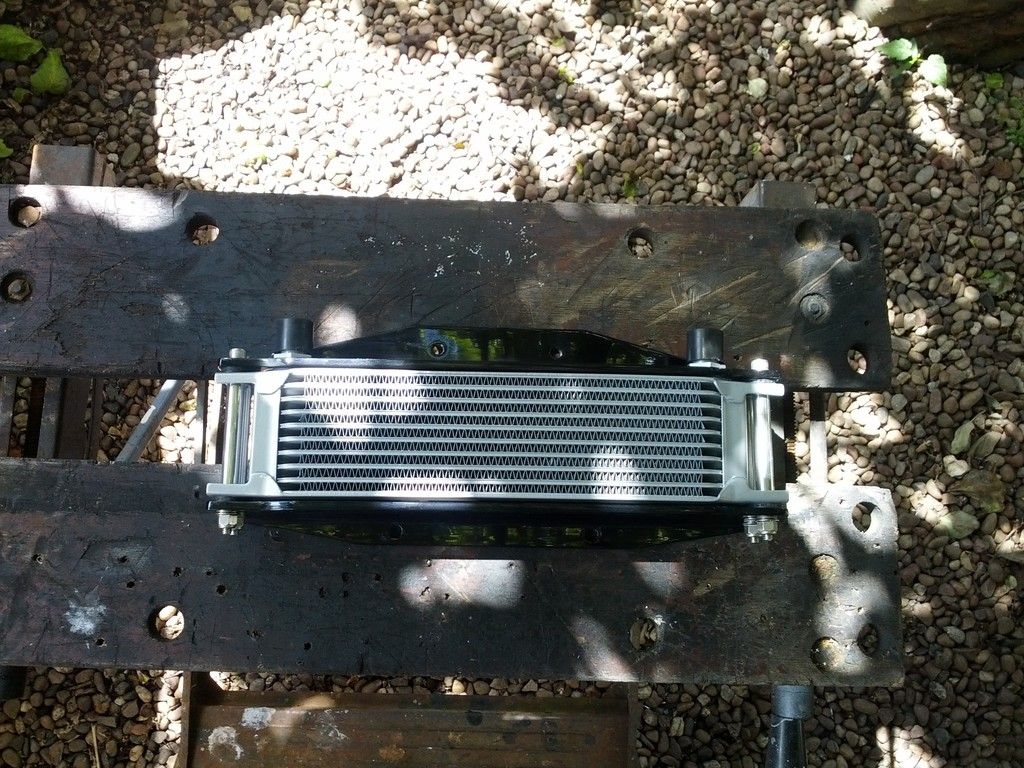
Oil cooler brackets:
Other jobs:
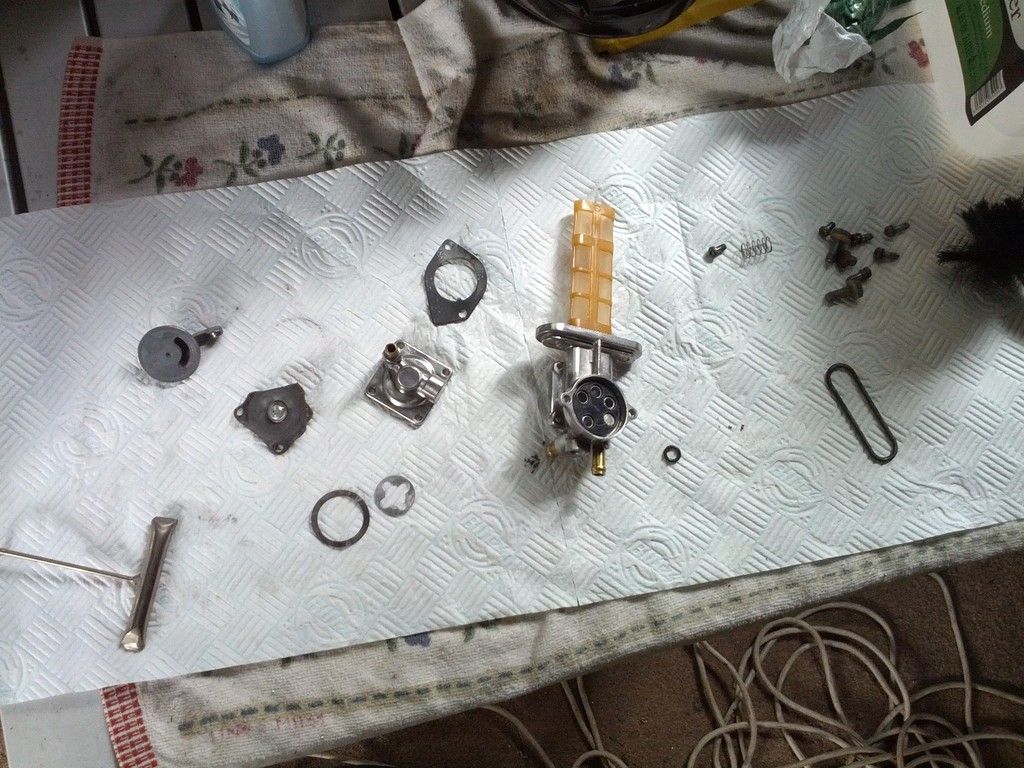
Cleaned up the fuel tap with brass wire brushes and a few goes in the ultrasonic bath.
I took the plunge and opened up the original clocks with the angle grinder:
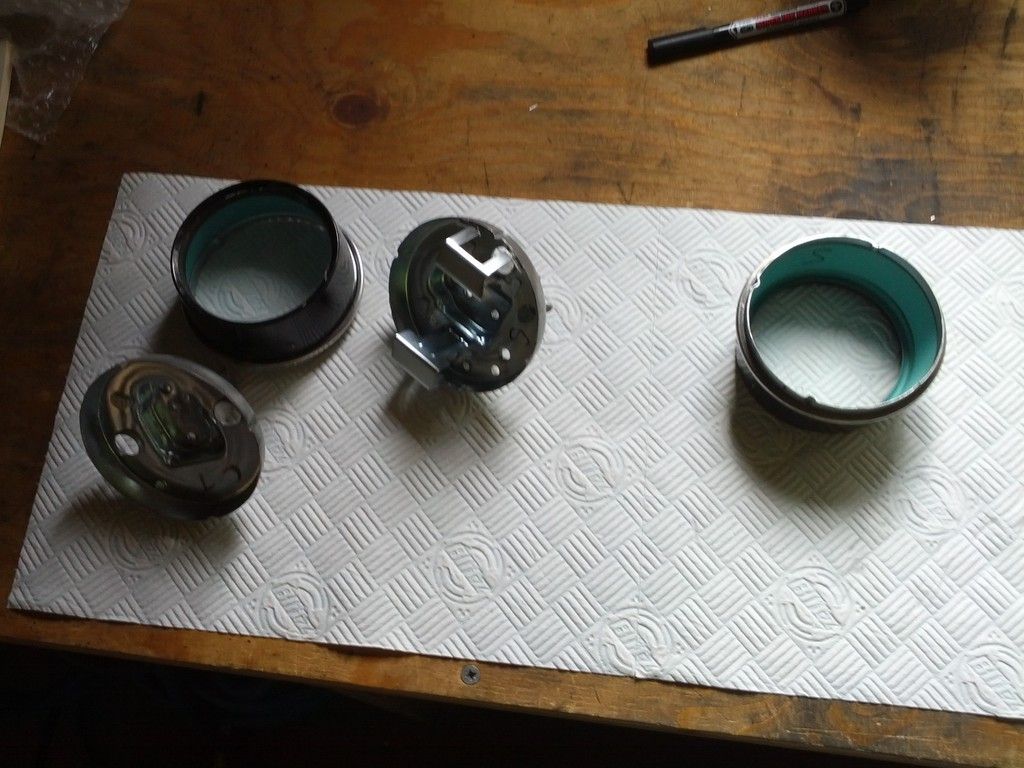
The idea is i am trying to fit the Koso LED Tacho and speedo into the original instrument binnacles
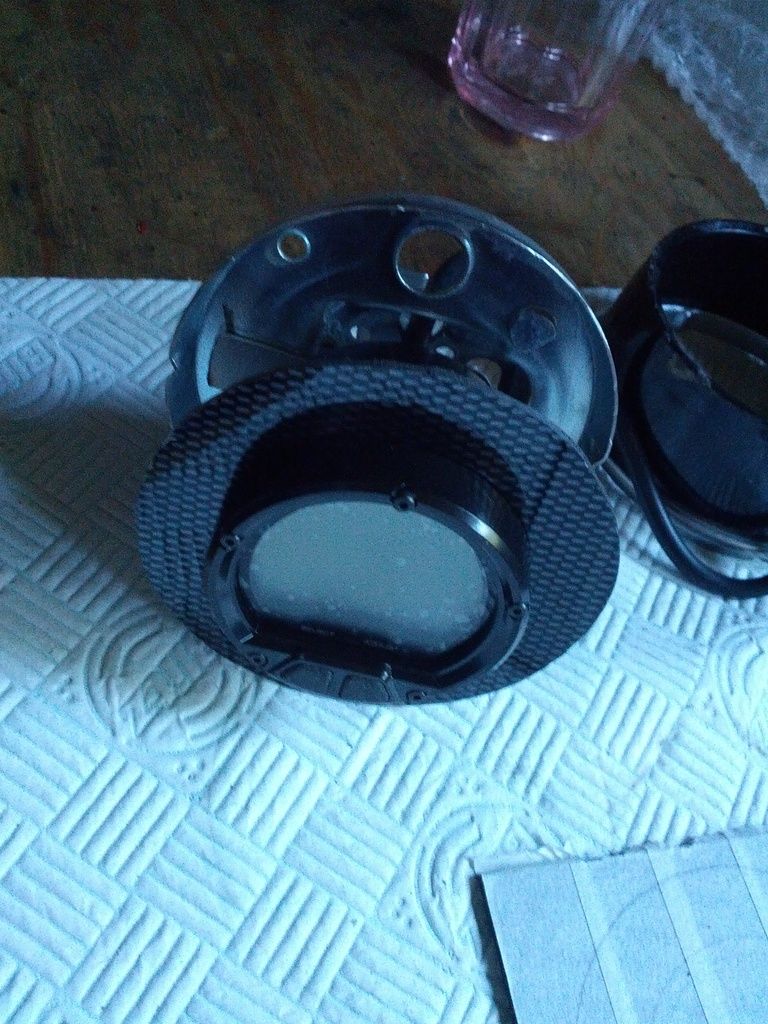
I wont go into detail here but its proving to be a fiddly swine of a job
But i am determined to make it work and look decent.
Built up the warning lights and tested:
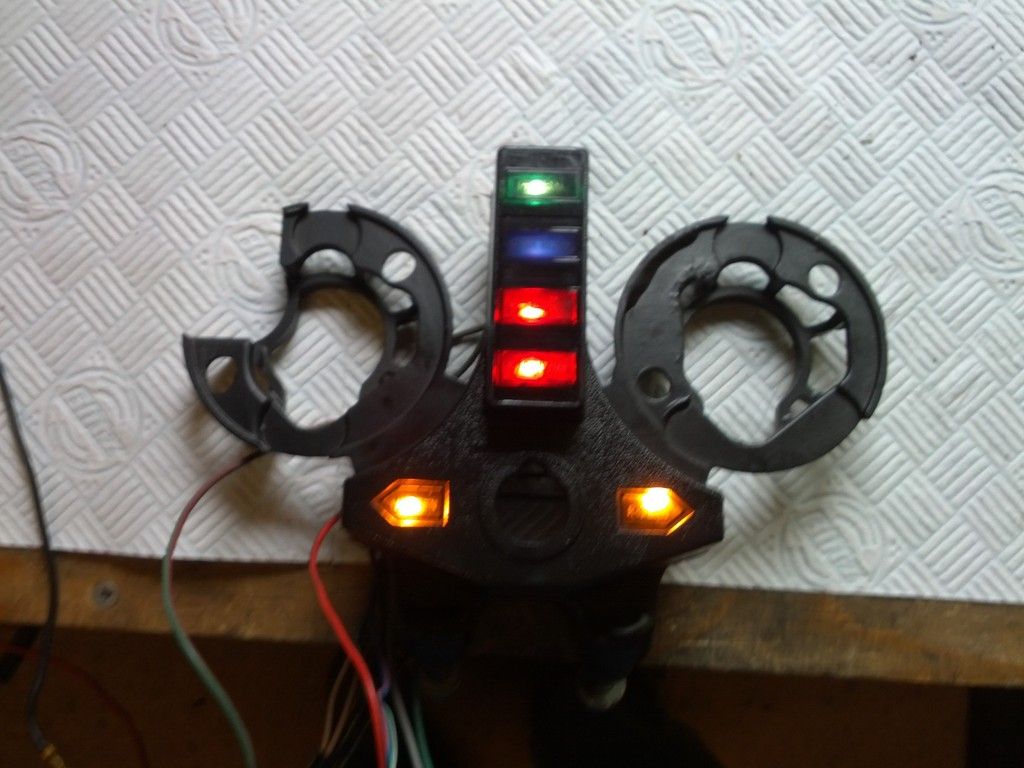
May give LED bulbs a try??
Bought a PMC seat and fitted it with a few minor adjustments to the frame and removed the seat prop brackets etc.
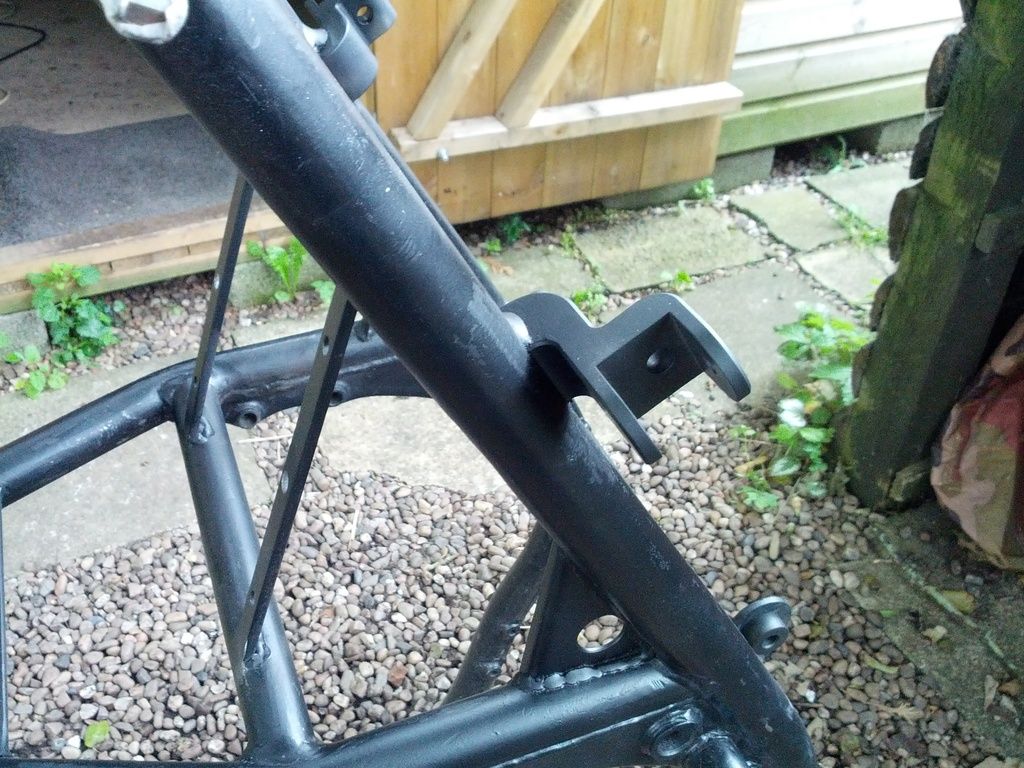
After much prevaricating i designed and had machined some pillion footrest brackets in steel so i can weld to the rear tube in the desired position (where it will fit folded up basically)
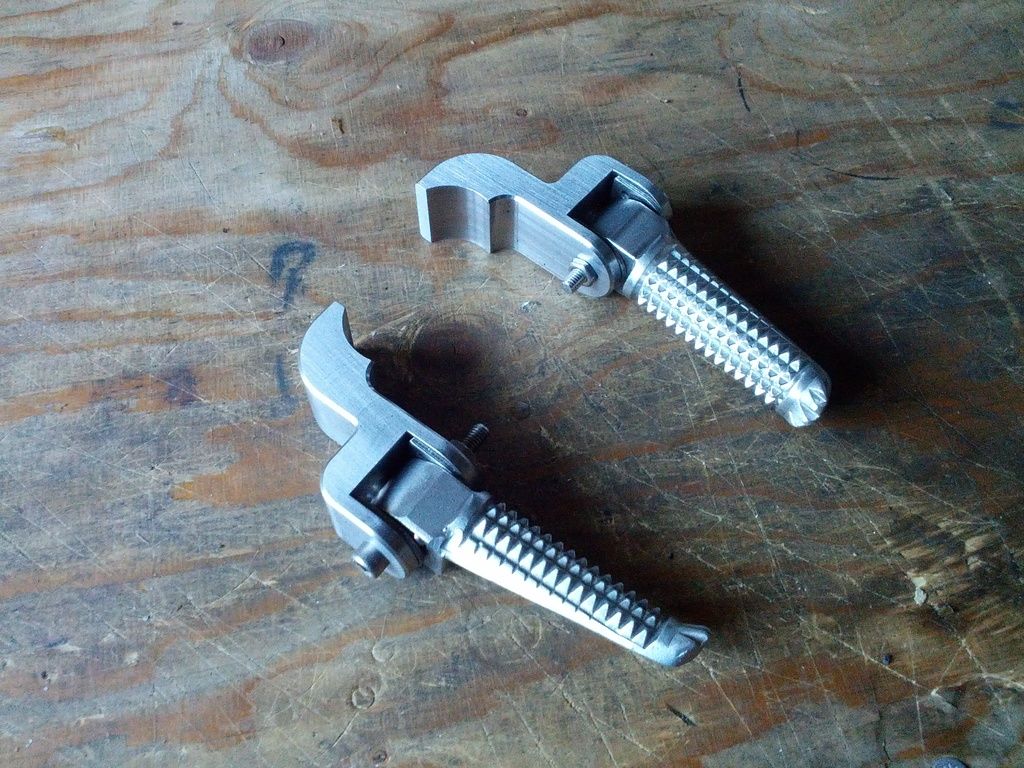
I got some cheap Yamaha pegs complete for a tenner off ebay. Came up well after a bit of wire brushing etc:
Locating them on the frame for welding:
Welded on to the frame:


The forks i have got Mikey to polish at the moment. I have real doubts about the forks as i may have to lengthen them to get more ground clearance at the front. If i think i may have to do this i will have to make some tube extensions to screw in the top of the forks and lengthen the cartridge by the same amount. The end goal is to get the forks anodised black, but i have decided to wait until i have the whole bike built up and at least do some riding on it to decide how much the front end may need to be raised, then get the extensions machined and then send the whole lot off for anodising, so everything matches colour wise. I only want to do this once as the internal PTFE coated bushes will need to come out of the forks for anodisng and this looks like a prick of a job, and im sure the bushes wont be cheap either
Swingarm spindle end caps:

Oil cooler brackets:

Other jobs:

Cleaned up the fuel tap with brass wire brushes and a few goes in the ultrasonic bath.
I took the plunge and opened up the original clocks with the angle grinder:

The idea is i am trying to fit the Koso LED Tacho and speedo into the original instrument binnacles

I wont go into detail here but its proving to be a fiddly swine of a job
But i am determined to make it work and look decent.
Built up the warning lights and tested:

May give LED bulbs a try??
Bought a PMC seat and fitted it with a few minor adjustments to the frame and removed the seat prop brackets etc.

After much prevaricating i designed and had machined some pillion footrest brackets in steel so i can weld to the rear tube in the desired position (where it will fit folded up basically)

I got some cheap Yamaha pegs complete for a tenner off ebay. Came up well after a bit of wire brushing etc:

Locating them on the frame for welding:


Welded on to the frame:


-
Zomerset Zed
- 100Club
- Posts: 239
- Joined: 30th May 2014
- Location: Somerset
Never too late
Its about time i updated this thread as i do want to complete it over the winter.
Getting everything ready for blast and powdercoat:
I re-made the electrical box side plates so they would fit the frame better towards the rear and you cant see through into the box behind the side panels.
While waiting for the frame to get done i got on with a few other jobs: Adapting the standard clock housings to accept the Koso digital gauges i bought for the bike:
Cutting out the original steel green stuff coated liner was a bitch
Once i had worked out how to get the new gauges into the housings i could weld (tack) the housing halves back together. It needed 2 of us the hold in the correct orientation whilst tacking.
Housings were filled, sanded and painted with gloss black aerosol and clear lacquered. I had just picked up some more parts from the CNC shop including the headlight/front inicator brackets, so i made up a complete front end and mounted the clocks:
Not perfect but it'll do for now until i come up with a better way of doing it
Last edited by Zomerset Zed on Wed Nov 15, 2017 10:50 pm, edited 2 times in total.

Re: My Ultimate Zed
Will keep an eye out photos I like photos
-
Zomerset Zed
- 100Club
- Posts: 239
- Joined: 30th May 2014
- Location: Somerset
Re: My Ultimate Zed
Great to hear from you - been too long
Thanks, had a shitty year with some major bad things happening, so got a bit behind on the thread

-
Zomerset Zed
- 100Club
- Posts: 239
- Joined: 30th May 2014
- Location: Somerset
Re: My Ultimate Zed
Will keep an eye out photos I like photos
Hope you can see them?
Re: My Ultimate Zed
Zomerset Zed wrote:Will keep an eye out photos I like photos
Hope you can see them?
Yes mate all the new ones are visable
-
Zomerset Zed
- 100Club
- Posts: 239
- Joined: 30th May 2014
- Location: Somerset
Re: My Ultimate Zed
If you want to see the old ones, you have to install the google chrome photo-bucket fix. Link is on the discussion board page i think 
-
Zomerset Zed
- 100Club
- Posts: 239
- Joined: 30th May 2014
- Location: Somerset
Re: My Ultimate Zed
Fast forward 6 weeks (not the agreed 4) and i have some powder-coated parts back:
-
Ginger Bear

- Hardcore

- Posts: 5512
- Joined: 16th Dec 2008
- Location: In the Dark.
- Contact:
Re: My Ultimate Zed
Powdercoating by Nick @ Griffs?
It may have overrun a little (something that niggles me too) but the quality will be second to none.
Good to see this project getting back on track. We'll save you some space on the club stand for when it's finished.
It may have overrun a little (something that niggles me too) but the quality will be second to none.
Good to see this project getting back on track. We'll save you some space on the club stand for when it's finished.

# 104
Phil Churchett Award Winner 2011 & 2016
Buzzworkz Best Modified Zed 2016
-
Zomerset Zed
- 100Club
- Posts: 239
- Joined: 30th May 2014
- Location: Somerset
Re: My Ultimate Zed
Powdercoating by Nick @ Griffs?
It may have overrun a little (something that niggles me too) but the quality will be second to none.
Hi GB, yes. Although the overall quality was good there were other issues that had me really not happy at the time. But time is always an excellent cure for most things.....
Don't want to go slagging off people on forums, but their "mistakes" have cost me time and money. This is to be expected on any project of an engineering nature and my own mistakes have cost me on this project too!
The bike is actually complete and running, but still sorting through the small issues as all specials have when you first ride it. I am playing catch up on the thread
Would love to put it on the stand next time, i think people would like the details
Who is online
Users browsing this forum: No registered users and 62 guests