Anything larger requires the crankcases mouths opening out and new liners.
Hello Guest User,
Please feel free to have a look around the forum but be aware that as an unregistered guest you can't see all of it and you can't post.
To access these 'Registered Users Only' areas simply register and login.
Please feel free to have a look around the forum but be aware that as an unregistered guest you can't see all of it and you can't post.
To access these 'Registered Users Only' areas simply register and login.
Pigfords OLD effort......now JULES NEW PROJECT!!!!!
Moderators: chrisu, paul doran, Taffus, KeithZ1R
-
london calling

- Hardcore

- Posts: 2255
- Joined: 16th Apr 2004
- Location: Loughborough, East Midlands

-
HOPPA
Been cleaning a few bits & bobs in me spare time 
Used paint stripper on the cam cover & head...... A quick 'wire brushing' and the a splash of Gunk de-greaser followed by lashings of "Muc-off".
Dried overnight on the heater.....
The dudiscious application of PJ1 - Satin....
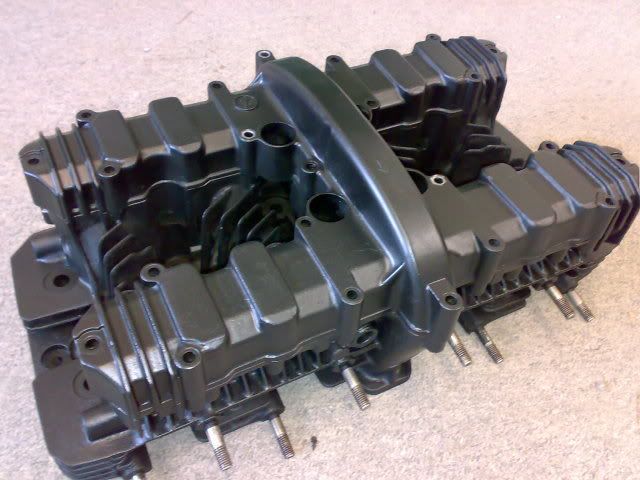
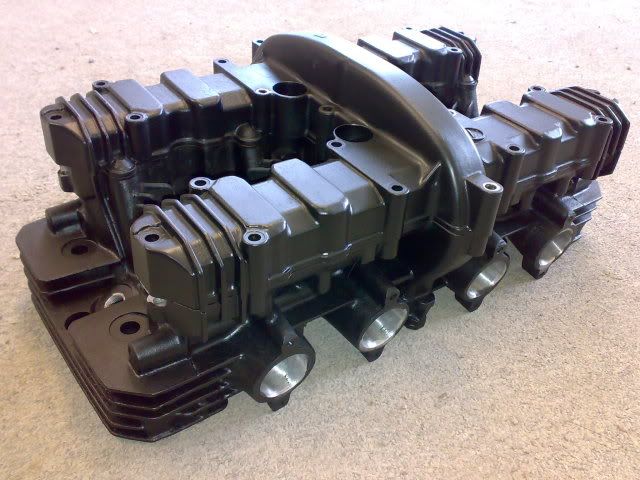
Not turned out too bad..... just the cost of the can of Fast Black
Used paint stripper on the cam cover & head...... A quick 'wire brushing' and the a splash of Gunk de-greaser followed by lashings of "Muc-off".
Dried overnight on the heater.....
The dudiscious application of PJ1 - Satin....
Not turned out too bad..... just the cost of the can of Fast Black
And on the 7th day... Zeds were created!

Must be Xmas.... 
Mrs P was feeling very generous today & let me assemble the head in the warmth of the kitchen.....
So.... got the new APE h/duty springs, extra shims & new stem seals ready.
All valves have been cleaned & lapped in a few weeks back......
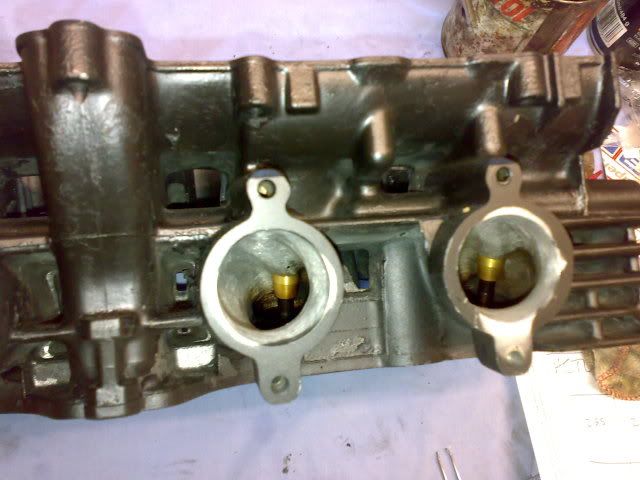
Prised the old stem seal off (brittle & sh*te) and greased the valve stems...
Fit new seals with a touch of grease.... still a bit fiddly
Valve tool at the ready, all valves clearly marked for re-insertion....
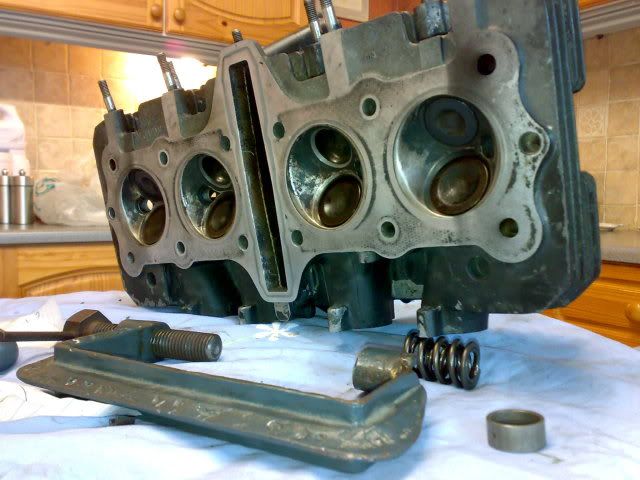
A spring seat is sat under the spring set and the top retainer popped onto the springs then put in place over the valve. Only compress springs JUST enuff to get the collets fitted, so as not too over squash them.
All nicely fitted...........and time to fit the buckets & shims.....
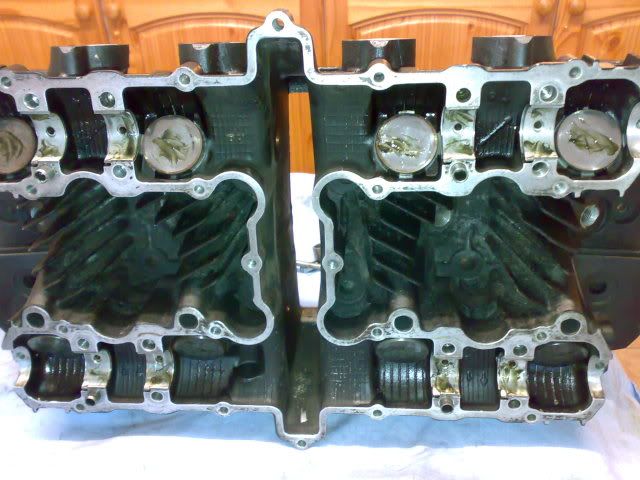
I had measured gaps before stripping it down, so new what sizes were needed. Only had to buy 2 x shims coz I swapped some about to get required clearance (0.010 +/- 0.005mm).
The head is gas flowed & all looks OK...
Awaiting the blasting of the barrel & casings then I can start to get the engine back together & in the frame.....
Mrs P was feeling very generous today & let me assemble the head in the warmth of the kitchen.....
So.... got the new APE h/duty springs, extra shims & new stem seals ready.
All valves have been cleaned & lapped in a few weeks back......
Prised the old stem seal off (brittle & sh*te) and greased the valve stems...
Fit new seals with a touch of grease.... still a bit fiddly
Valve tool at the ready, all valves clearly marked for re-insertion....
A spring seat is sat under the spring set and the top retainer popped onto the springs then put in place over the valve. Only compress springs JUST enuff to get the collets fitted, so as not too over squash them.
All nicely fitted...........and time to fit the buckets & shims.....
I had measured gaps before stripping it down, so new what sizes were needed. Only had to buy 2 x shims coz I swapped some about to get required clearance (0.010 +/- 0.005mm).
The head is gas flowed & all looks OK...
Awaiting the blasting of the barrel & casings then I can start to get the engine back together & in the frame.....
And on the 7th day... Zeds were created!
-
phil churchett
- Hardcore
- Posts: 1630
- Joined: 28th Mar 2003
- Location: Warwickshire
-
Davy Doherty
-
Dark Skies

- 100Club

- Posts: 263
- Joined: 10th Feb 2008
tailiftchris wrote:I`ve got an electric impact gun from Snap On. Superb !
The problem can be torquing up when you`re all done though ?
I did have a hub tool for my LC, same as a TZ, was brill`.
I wonder if anyone has one for our Zeds ?
I have one (genuine Kawasaki) I bought for working on my Z1000-H.
It resembles mole grips with two offset wedges that locate in two opposing clutch hub splines. Last time I used it the engine was on the floor on a thick blanket. I located the tool with the handle lodged against the floor, sat on the engine and heaved on the clutch nut with a long breaker bar. Pretty easy.
KZ1000-M1 CSR
"I have only five words for you: From my cold, dead hands."
"I have only five words for you: From my cold, dead hands."
-
RALPHARAMA

- Area Rep.

- Posts: 2752
- Joined: 19th May 2007
- Location: Pensford, Somerset
- Contact:
Looking good Piglet ... now you got this far see if she'll let you put some parts in the dishwasher 
.... Rebuilding engines in front of the sitting room fire is quite romantic
CB's gradually coming over to the dark side trouble is she keeps nicking me CMM
.... Rebuilding engines in front of the sitting room fire is quite romantic
CB's gradually coming over to the dark side
Ralph Ferrand
Z1000A1 (1977), Godier Genoud Z1300A5 (1983), Z900A4 Stock (1976), Z900A4 Special (project), GPZ1100 Unitrak (1983), ZRX1200R (2004) DT175MX (1981).
http://www.bikerstoolbox.co.uk
Don't be caught out http://www.dhlparcels.info/
Z1000A1 (1977), Godier Genoud Z1300A5 (1983), Z900A4 Stock (1976), Z900A4 Special (project), GPZ1100 Unitrak (1983), ZRX1200R (2004) DT175MX (1981).
http://www.bikerstoolbox.co.uk
Don't be caught out http://www.dhlparcels.info/
-
paul doran

- Area Rep.
- Posts: 9241
- Joined: 24th Sep 2004
- Location: near Dublin Ireland
Who is online
Users browsing this forum: No registered users and 29 guests